How to achieve information content when creating a stand?
It is better to make do-it-yourself stands for a kindergarten according to a strictly defined plan:
- At the top is a heading, written or printed large, in a straight line or with a curved base;
- Below the title are images. They should be placed across the entire width of the poster or a space should be made for words (depending on the volume of text);
- Below the pictures are direct congratulations and wishes, in prose or poetic form;
- Below is the signature (“kindergarten administration”, “Your teachers”, “Your parents”, etc.).
What to tell children about summer
The main “summer” topics that can be used for conversations with children are:
- vegetables fruits;
- berries, mushrooms;
- insects, birds, animals;
- people's activities in the garden, in the forest;
- types of outdoor recreation (travel to the sea, summer sports);
- safety of children in summer.
The first of these sections are suitable for toddlers, and the rest for older preschoolers. They allow you to select pictures about summer for both very young children and future first-graders. You can use both subject images (berries, flowers, sandbox toys) and subject compositions:
- “The first day of summer has arrived!”;
- “What do children play outdoors in the summer?”;
- “What are the rules of behavior on the water and why are they needed?”
Properly selected illustrations help increase the effectiveness of speech development exercises and make them more interesting. Various pictures about summer are excellent visual material that makes it possible to conduct useful activities, as well as exciting games with preschoolers of different ages.
Work in the garden
Fauna Russia Day
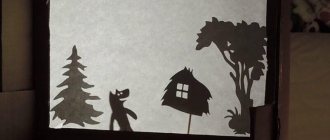
Outdoor games Walk in the forest
Children care about nature
Visibility and its implementation
For a stand to be perceived as an interior decoration, it must be in harmony with it. You should not focus only on the informative part. Pictures, images, photographs are required next to the inscriptions on the stand.
If the stand is dedicated to the New Year celebration, it must have a decorated Christmas tree. If March 8 - mimosa or a bouquet of other flowers. If it's Mother's Day - an image of a woman's face with a smile.
A bright background created by completely covering the surface with colored paper or painting it with paints will help provide clarity.
Names of the months in children's pictures
All children love games. It will be more interesting and easier for your child to learn the names of the months if he is shown story-based illustrations or presentations. If parents independently make a presentation about the seasons for their child, it will be even better. An excellent option is to create it together with your child. This way he will remember the names faster.
By finding illustrations about each month and showing them to the child, the parent will be able to fix their names in his memory. To do this, you need to select pictures that demonstrate the life of animals in each season, the type of clothing for each season, etc.
To interest your son (daughter), the presentation must be colorful. You can also display the features of each month. For example, September - leaves fall, the school year begins, and children go to school. In presentations, you can focus on holidays. For example, December - New Year, decorating the Christmas tree and home. Be sure to include the child’s birthday in them - he will definitely know and remember this day.
Winter months
The child needs to be explained that there are 3 winter months - December (ends the year and begins winter), January (begins the year) and February (the harshest month, with blizzards and snowfalls). It is important to choose thematic pictures for the story.
Spring months
The first month of spring is March. This is the period when primroses - snowdrops - appear. The second month is called April. This is a period of changeable weather: sometimes the sun shines, sometimes it rains. The third month – May – is the time when nature begins to clothe the forest. Plot illustrations are also appropriate for the explanation.
Summer months
June is the first month of summer. In ancient times it was called “worm”. This month has the longest day and shortest night of the year - June 22. June is followed by July, the month when linden blossoms intensively. Summer ends - August - time for harvest. In addition to pictures, you can choose riddles that describe each month.
Autumn months
There are also 3 autumn months: September (early autumn), October (golden autumn) and November (late autumn). To describe the season, you can select signs for each month.
Clarity and its personification
Do not forget that the stand is made, first of all, for the audience. Both adults and small children can act as them. They understand vivid images - Father Frost, Snow Maiden, a fireman in uniform, etc., numbers that carry meaning (31, 23, 8). Symbols and branding are best left for other purposes.
The title should be as accurate and succinct as possible. There is no need to make it poetic or burden it with epithets: it is more important for children what kind of holiday they are preparing to celebrate.
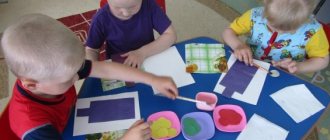
The principle of accessibility: “let me touch it!”
If the stand is placed in a kindergarten or school classroom, children will inevitably become overly curious. Some people will want to take a closer look, and some will want to touch it. So that the result of creativity does not go to waste in the very first minutes of public viewing, you need to make it tangible.
For example:
- Attach felt leaves in yellow and orange tones to the stand for Autumn Day,
- For a stand in honor of Easter, attach a wicker surface that imitates a basket, or an eggshell, painted in different shades,
- Decorate the stand dedicated to May 9 with real St. George ribbons and carnations cut out of red corrugated paper.
A DIY children's educational stand is a prime example of accessibility. Its design depends on the age of the children for whom it is intended.
Such a busy board will help develop curiosity and promote exploration of the world around us.
For children 2-3 years old, felt flowers and trees of different shades and shapes will do.
The middle group can enjoy the following attached to the stand:
- Cubes,
- Pyramids,
- For an hour.
For members of the preparatory group - letters and road signs, tiny tools or any other gizmos from everyday life:
- Landline phone dial,
- Mixer valve,
- Door knob,
- Espagnolette,
- Chain,
- Old calculator,
- Wheel,
- Compass,
- Klaxon, etc.
Unusual solutions for ordinary stands
A collage is the best option if you have to prepare a stand with your child as an assignment for a group celebration or to participate in a competition.
Unlimited creative freedom:
- You can include any newspaper cutouts in your collage,
- Magazines,
- Advertising pictures,
- Suitable for the topic.
The following can be glued to the stand sheet:
- Natural materials (dried leaves, small pebbles),
- Applications made of paper (snowflakes or flowers) or fabric (felt, knitted fabric),
- Handicraft small items (bugle beads, beads, beads, threads of yarn, pompoms);
You can also make stands for children's crafts with your own hands. It can be called “Our Vernissage” or “Exhibition of Crafts”.
- To attach drawings to the stand, you can use pins or magnets. To demonstrate three-dimensional crafts (made of plasticine, cardboard, corrugation, etc.) - paper or knitted “pockets”;
- temporary stand, or stand-template. This will be convenient when you need to impromptu prepare for a celebration or when there is absolutely no time to decorate the group.
- For it you will need: self-adhesive letters (the entire alphabet) and numbers, button magnets, double-sided tape, a sponge (to give volume to the inscriptions), universal pictures (flowers, leaves, candles, stars, etc.);
- DIY information stands for kindergarten differ from all others by the presence of plastic frames or “pockets” for placing official information concerning parents.
- In all other respects, they should serve as decoration for a children's group: have a bright design with expressive characters - Leopold the cat, Carlson, a train, a hedgehog, a daisy, etc.
Such boards can be made in an unusual shape - in the form of a cloud or a light, a star or a sun - this way they will quickly attract the attention of parents.
How to make a wall newspaper for Teacher's Day, photo with explanation
The wall newspaper for Teacher's Day is congratulatory in nature and is designed on a large format of whatman paper A1 or A0. The design style is most often classic with a heading in a straight, straight font. Although, the direction in the publication can be absolutely free. Newspaper headlines could be: Happy Teacher's Day!; Happy Teachers' Day!; Happy day, teacher!; Happy Teacher's Day, Marya Konstantinovna!
The purpose of the newspaper is to congratulate the class teacher or teaching staff. The basis should be a plot-based congratulation: drawings, poems, prose, signatures of class students. It is allowed to use colorful drawings and cut-out explanations in the newspaper, since the text alone will look very modest. The selected newspaper format must be harmoniously distributed between the material. Decorate the edge of the newspaper with margins 1.5-3 cm wide. Colored lines drawn with pencils, felt-tip pens, and wax crayons can be used as markings.
Place a poem or handwritten greeting in the center. You can use several options as a drawing, the most win-win are flowers and teacher attributes: a globe, a pointer, books, bells, a teacher’s board. Decorations made of colored paper, felt, and corrugated paper are acceptable as decorations.