Types of applications
Before you start learning how to make beautiful appliqués with your own hands, you should understand what types of this technique exist.
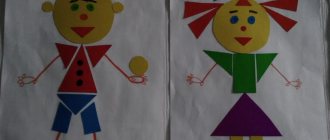
- Mosaic applique - first the contours of the image are drawn, then parts of geometric shapes and different sizes are glued inside it.
- If you twist colored paper into a spiral, the technique is called quilling.
- For symmetrical applique, before cutting out the part, the paper blank is folded in half.
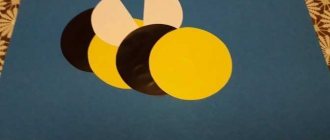
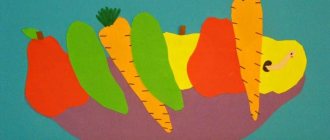
- A multi-layer applique is one that is created from parts of different sizes, small ones are glued onto large ones.
- If you trace the palm and use this figure as a base, you will get a palm applique.
Owl creation technique
- Take cardboard - it will be the base.
- Glue a twig cut from colored paper.
- Now paint the background with paints, you can paint with your fingers.
- Glue clouds, moon and other background elements as you wish.
- Using the templates, trace the outline of the owl on the branch with a pencil.
- Tear off pieces of paper and glue them inside the outline.
- Make a second layer on top of the first.
- You can draw the eyes and beak with felt-tip pens or make them out of colored paper and glue them on.
Firebird
The process of creating such a craft perfectly develops the imagination, because the character is magical and very bright.
- To make the head and body, cut out a ten-centimeter square piece from colored paper.
- Form a square into a triangle and bend along the larger side.
- Now expand the square - it is divided into four sectors.
- To get the body of the bird, glue both edges overlapping.
- The belly is the larger side, and the smaller side is the back.
- To create a chic ponytail, cut nine nine-centimeter strips - curl them or leave them straight.
- Glue three stripes to the back, six will serve as material for making wings also on the back.
- You can also make both the tail and wings using the palm technique.
- You can cut out eyes and other small details from colored paper or draw them.
- Attach the bird to the background on a branch of colored paper, decorate the background by painting it and gluing parts from colored paper.
Second way
A simplified way to create chickens or geese will be possible even for the smallest.
Sequencing:
- Draw or print a picture of a bird.
- Paint the comb, paws, eyes, etc.
- Take regular cotton wool and tear it into small pieces.
- Using craft glue, attach the white lumps in the places where the feathers should be.
Crafts made from dry leaves
To create a firebird from dry leaves, prepare dry leaves, a glue gun, paint, and a sheet of cardboard.
- For the background, paint cardboard or use colored cardboard.
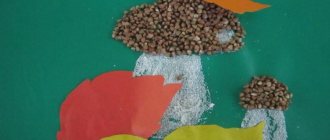
- Spread the paper and carefully arrange the leaves, and then color them.
- Now dry the leaves. Apply hot glue to the cardboard and glue colorful leaves.
- To do this, there must be an adhesive layer on the cardboard sheet, as well as spot-applied glue on the leaves.
- First, form the shape of a tail, then a larger leaf that stands out in shade - this will be the body of the firebird.
- Paws and eyes can be made from colored paper or cardboard.
- The magic bird is ready!
Detachable composition “Dove”
- Draw the silhouette of a bird on cardboard:
- Tear a white A4 sheet into pieces:
- Apply glue to the design.
- Place tear-off pieces on top.
- Glue a paper beak and eye to the dove.
Migratory birds
Materials you will need:
- Sheet of cardboard,
- colored paper,
- And also scissors
- Paints and glue.
Operating procedure:
- A piece of cardboard is the sky.
- Color it or get a colored one.
- Cut out clouds from white cardboard and glue them to form a background.
- Draw and cut out the birds and then glue them to the cardboard.
- Draw the details - eyes, feathers, beak, and also add trees and other elements as desired.
The second method is mosaic
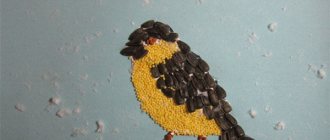
- Choose different colors, but similar tones. For example, different shades of red or orange.
- Cut into pieces close to square, rectangular, triangular shapes, but of different sizes.
- Glue them onto plain cardboard to create the desired image.
This is what a craft made using this method looks like.
Wild birds
This is a method of embodying the lifestyle of untamed winged creatures, as children see them. Most often, such compositions depict keys flying to the south, as well as caring mothers in a nest with babies or in search of food among the foliage of a tree.
A three-dimensional image will be able to convey all the beauty as much as possible.
Sequencing:
- The base must be solid. You can simply take a plain sheet of cardboard or paint it, adding elements that correspond to the character of the product (leaves, flowers, clouds, etc.)
- Fold white A4 in half and along the fold draw the shape of a bird from the side - head, elongated neck, raised wing, tail.
- Cut along the outline and glue on one side only.
- Create several of these birds, preferably of different sizes, so that they are not identical.
- After the glue has dried, “straighten the feathers” of the jamb - slightly twist the part of the wing that is not glued to the outside so that it puffs up. A few cuts symbolizing plumage will also not hurt.
In winter, it will be relevant to implement the idea of winged animals that do not fly to warmer climes. The birds at the feeder will remind you of caring for our little brothers. Bullfinches and tits can be easily recognized by the bright colors of their plumage, and your plans can be realized with the help of decorated cotton pads.
Chickens
In order to make a craft with the image of funny chickens or other poultry, take a sheet of colored cardboard, cotton pads, a brush with paints, as well as glue and plasticine.
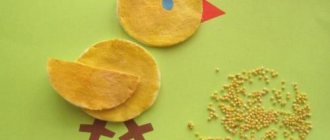
- The entire cotton pad will play the role of the head, as well as the body of the bird; if you separate half of the disc, you will get wings or a tail. Pre-paint them with paints and then glue them to the cardboard.
- All other elements (paws, eyes, beak) can be made from plasticine.
- To create a goose or chicken, you need to make a printout with a picture of a bird, and also stock up on a piece of cotton wool and PVA glue.
- Roll cotton balls to fill the image.
- You can also add colors to your work - paint some elements if necessary, add details.
- This way you will get a bird with plumage, the effect of which is created by cotton wool.
First option
You will need:
- base sheet
- brushes and watercolor
- cotton pads
- glue
- plasticine
Sequencing:
- Prepare the main working material. Paint with gouache and mark the barnyard where the chicks supposedly walk. You can just take colored cardboard.
- Dye cotton pads yellow. Cut them in half or trim rounds to give the body the desired shape.
- Glue the blanks on the base plane.
- Complete your creation with plasticine parts. You can create a beak, eyes and paws from this material or complement the composition of the work with plant details.
We provide several variations of the design of compositions on this theme.
Cockerel and hen
- Take a white sheet of paper, a brush with paints, images with a pre-printed chicken and cockerel, colored paper, napkins of different colors, and you can’t do without a hole punch, glue and scissors.
- Prepare your future background: for this you need to paint a white sheet of paper and draw on it the background elements that you come up with.
- Illustrate the earth as well as the sky in your work.
- You can use colored paper to create images of a house, fence and other details.
Now cut out the birds.
- You can move on to decorating the characters of the craft - cut out feathers from colored paper, twist lumps from a napkin, a hole punch will be useful for making confetti.
- Glue the resulting plumage, now you can glue the birds to the background.
- If you wish, you can create a large work in a group, which will include an entire poultry yard.
There are many techniques for creating applications with images of birds. Using those presented in this article, you will create unique paintings that will decorate your child’s room, and the process of creating this masterpiece will give him a lot of positive emotions.
Also, all these techniques can be safely used for classes in kindergarten, all of them will develop the imagination of children and teach them to be neat, and will give them experience in running their own small project.
