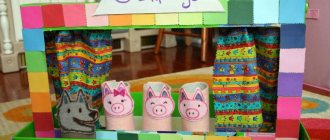
Cardboard theater
You can make a theater-themed craft from cardboard with your own hands. The fastest way to make a puppet theater is from an ordinary shoe box. We need bright fabric for the curtain. And on the back you can stick a beautiful picture that will become the background.
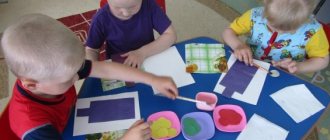
Scenery
The scenery for the theater is made independently by the child. The necessary decorations are drawn on a piece of paper and cut out.
The scenery for the puppet theater is:
- Chair
- Table
- House
- Moon
- Trees
- Sun
- Flowers
Characters
Characters for the puppet theater are cut out of thick paper. You can draw them yourself or cut them out from children's magazines or unnecessary books.
DIY glove puppet
In reality, there are a lot of puppet theaters that can be built. Even at almost no cost. You just need to use your wits and do it! You can sew it, for example.
Or you can learn to knit and knit these cute little characters:
Honestly, I used to knit well, but now I don’t have enough time for it all. But I never liked sewing. But, as an option, you can also create a theater for those who love this business.
Although here is the simplest master for you - a class on sewing a puppet theater from fabric using gloves. Anyone can do it, even those who do not know the art of sewing.
We will need:
- household gloves, knitted - 2 pcs., buttons for the eyes - 2 pcs., thread, scissors, braid, stationery knife
Stages of work:
1. Take the first glove and steam the seam thread on the cuff, it is usually red or yellow. Tuck the little finger, thumb and index finger in so that they do not come out, sew them up. You should end up with a head with ears and a hare neck. Sew the bases of the ears to prevent your fingers from getting in there.
2. Now take the next glove and hide your ring finger in it, sew up the hole. Place your middle and index fingers together and now place the hare's head on them.
3. Sew the head to the neck. To hide the seam on your neck, tie it with a bow or tie in the shape of a butterfly. Sew button eyes and embroider a muzzle, or you can draw it with a marker. You can decorate a bunny using fluff or knitted threads by gluing a cute forelock to his head.
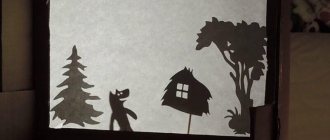
Shadow play
Setting the stage
List of required items:
- Scissors
- Small ruler
- Simple pencil
- Stapler
- Glue stick
- Cardboard box. Preferably with a width of 15 cm.
The long side of the box must be separated. The process produces a rectangle with one flat plane. It is necessary to measure five centimeters from the edge. Then the screen frame is drawn and cut out. Using a stapler, the coals are fastened in such a way that a structure in the shape of the letter “L” is obtained. Everything unnecessary is cut off.
Then you need to measure, with an allowance for gluing, the paper that will cover the screen. The sides are glued. And the top of the screen can be secured with a stapler.
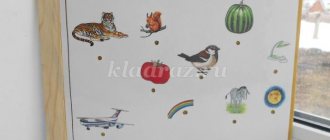
Characters
Tools for making characters:
- Pencils
- Cardboard
- Scissors
- Stapler
- Drink straw
In addition to characters, you can also make scenery for the theater. Characters are drawn on cardboard. Then they are cut out. Afterwards, the characters must be secured to the straw using a stapler.
Framed theater
This is a very simple way to make theater-themed crafts.
It is made from handmade materials. The most important thing is to find corrugated cardboard. It can be cut from any box in the house.
Necessary materials:
- Cardboard.
- Scissors
- Curtain fabric
- Satin ribbon
- Glue
- Foam tape
- Black marker or felt-tip pen
- Watercolor paint or gouache.
Manufacturing process:
- A frame in the shape of a rectangle is cut out of cardboard.
- Another rectangle is cut inside for the frame.
- Now the frame should be painted red with gouache or watercolors.
- Cut out two theatrical masks from cardboard. Then these masks need to be painted. One mask should depict sadness, and the second one should represent fun. A variety of emotions can be drawn using a black marker.
- Now you need to make a curtain. It is best if the fabric is red. But any other will do. Preferably bright.
- Then all the parts are glued onto the rectangle base. It is best to stick it using foam tape. The masks are glued in the center of the base. They need to be placed next to each other. The curtain is glued on top using glue. Make a drapery, then tie it with a ribbon and secure the lower part with glue.
- The previously prepared frame is glued on top.
This is how quickly and easily you can make theater-themed crafts for kindergarten.
The first do-it-yourself puppet theater - printable templates
Traditional fabric dolls are more difficult to care for and are not suitable for all children. But any child can handle paper products. Place a cone with a picture on the finger, suitable for each child.
It is advisable to introduce the little ones to simpler fairy tales:
- Teremok.
- Kolobok.
- Chicken Ryaba.
- Turnip.
We will need:
- scissors;
- Printer;
- PVA glue.
All templates must be printed, cut out and connected together. Fairy tale “Teremok”.
An audio tale will make the task of voicing paper characters easier. You will only need to carry out what you hear.
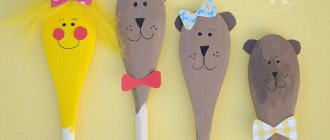
Making hand puppets
You can make dolls for your home theater yourself. You can sew them from felt or fabric. Dolls made from ordinary socks turn out to be unusual.
Felt doll
To make such a doll, you will need a sketch of the doll, pieces of multi-colored felt, thread and needle, glue, and thin cardboard.
Doll making process:
- Creating a pattern. The sketch of the doll is redrawn on cardboard and then cut out. In this way you can make the main and small parts of the doll.
- The doll's details are transferred to pieces of felt. The color of the felt is chosen independently. For example, a hare can be gray or white. The clothes of the main characters can be varied. Everything is done according to your taste or the taste of the child.
- The parts of the puppet theater are cut out.
- The dolls are assembled. Take the main part for the doll made of felt. Then you need to sew other parts to it using a buttonhole stitch. Parts that cannot be sewn are glued with glue.
- The parts are sewn on the edge using a buttonhole stitch.
Sock doll
Materials required for manufacturing:
- Unnecessary sock
- Cardboard
- Thick threads or yarn
- Small piece of fabric
- Threads
- Buttons
- Needle
- Glue
The sock can be of completely different colors. Choose at your own discretion. You can ask to choose a sock for making a child’s doll.
Manufacturing process:
- Making a mouth for a toy. A rectangle 5 cm wide and 18 cm long is cut out of cardboard. Then this rectangle is folded in half. The corners are rounded along the width. Using this fabric blank, the inside of the doll's mouth is cut out.
- The toe of the sock is cut off. The edges are cut along the contour of the workpiece.
- The cardboard blank is glued to the inside of the sock using glue.
- A piece of fabric cut out for the mouth is glued to the top of the cardboard.
- Now you need to make a hairstyle for the doll. Take yarn or thick threads and wrap it around your hand 3-4 times. Then you need to tie it in the middle and cut the ends of the yarn. Then this hairstyle is sewn onto the doll.
- To make eyes for a doll, take 2 buttons and sew them onto the sock. The eyes can be made from cardboard, painted and glued on. You can even buy ready-made eyes in the store and glue them on with glue.
On the topic of theater, you can make a lot of different fakes yourself together with your child. The manufacturing process will captivate both parents and children. These fakes can be made from available materials. It is not necessary to buy the necessary items in the store. The main thing is to turn on your imagination and start creating.