Let's sculpt a cat
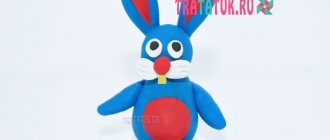
A cat can be molded in two main ways - from a single piece of plasticine or from separate parts. The figurine can be in different positions (sitting, lying, standing) - it all depends on the imagination of the creator. The simplest cat figurine is made from three pieces of plasticine (torso, tail and head).
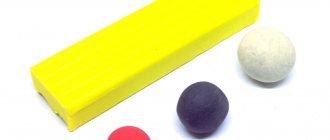
To create such a craft, you need to prepare plasticine (black, orange, white, brown or another color), stacks and a modeling board.
First you need to divide the block of plasticine into three different parts: the largest part (about 2/3 of the block) will go to the body, a small piece to the tail, and the rest to the head.
You can see step by step how to mold a cat using the photo instructions below:
Using the same principle, a figurine of a stretching cat is made. To do this you need to do the following:
- Roll a small thick sausage from plasticine of the selected color;
- Make cuts on both sides with a stack;
- Bend the workpiece as shown in the photo:
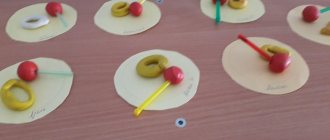
- Roll a large ball for the head and two small ones for the cheeks;
- Assemble the face by gluing the cheeks and nose;
- Make eyes from white and green plasticine, form triangular ears from two small pieces, roll black plasticine into a sausage for the mustache;
- Add eyes, ears and mustache to the head;
- Attach with a match or glue the head to the body;
- Roll the sausage, bend it and attach it to the back of the figure in the form of a tail.
Article on the topic: Continuous crochet motifs with detailed descriptions and diagrams
The cat is ready!
A simple but beautiful cat can be sculpted in a sitting position. For this you will need:
- plasticine in brown, white, red, green and blue colors;
- wire;
- matches;
- stacks;
- scissors.
Progress:
- Make a ball from a small piece of brown plasticine;
- To create eyes, roll paired balls of different sizes from white, green and black plasticine;
- Make eyes and glue them to the ball;
- For the cheeks, nose and mouth, make red and white balls;
- Completely assemble the muzzle;
- Make triangular ears from small pieces of plasticine and attach them to the head;
- Cut the insulated wire into six pieces to create a mustache (if you use bare wire, you need to wrap each piece with a small amount of plasticine);
- Stick a mustache into the muzzle (three on each side);
- Roll a cone out of most of the brown plasticine and press down on top and bottom;
- Roll up blanks for paws: balls and droplets;
- Glue the legs to the body: balls in front, droplets on the sides;
- Treat the paws with a stack to make fingers;
- Roll a small sausage from a piece of brown plasticine, bend it and attach it to the body;
- Using a match, connect the head and body;
- Make a white shirtfront: roll a piece of plasticine into a droplet and flatten it;
- Glue the shirtfront to the chest, and also decorate the tip of the tail with white plasticine;
- Make multi-colored balls for the cat: roll a small ball and a long rope, wrap the rope around the ball;
- Set up a composition of a cat and glomeruli.
You can assemble a cat figurine from several parts using matches or toothpicks. To do this, you need to perform the following steps step by step:
- Divide the plasticine block into three equal parts;
- Roll one part into a ball;
- Separate a small piece from the other part (it is needed for the tail), make a sausage, and roll the remaining part into a ball (head);
- Divide the last part into six equal pieces and roll them into balls;
Article on the topic: MK Embroidery with Ears Ribbons
- Make a thick sausage (body) from a large ball;
- Roll four identical sausages (legs) from small balls, divide the remaining balls and make ears, cheeks and nose out of them;
- Attach the tail to the body (cover);
- Glue the cheeks, ears and nose to the head;
- Attach the paws and head to the body using matches (toothpicks);
- Make eyes from white and black plasticine cakes.
The cat is ready!
The paws do not need to be pierced with matches, but simply glued to the body. Then you can bend your front paw as if a cat is washing itself.
From a single piece of plasticine you can make a cat in a small hat. To do this, you need to make blanks: mold a cat’s body from a cylindrical piece of plasticine, roll up a tail, make eyes, cheeks, a nose, paws, a hat and a mustache. Then put everything together.
Fans of the popular doll will need instructions on how to make a cat from Monster High.
You can also make a dog - Watzita.
Summary of a modeling lesson for the middle group “Bear”
Summary of a modeling lesson for the middle group “Bear”
Educational field - art
Goal: To form aesthetic tastes, develop creativity and thinking.
Objectives: Learn to sculpt an object consisting of several parts, conveying characteristic features (ears, muzzle)
.
Reinforce familiar sculpting
: rolling, unrolling, connecting parts using smearing techniques.
Develop independence, cultivate interest in modeling
.
Integration of educational areas: cognition, physical education, reading fiction, artistic creativity, music.
Material: plasticine; modeling boards
;
bear
images ;
toy bear "
. _
Preliminary work:
reading fiction "Teremok"
,
"Three Bears "
;
“Mashenka and the Bear ”
, talk about the wintering
of the bear
, its food products, its living conditions, looking at illustrations depicting
a bear
, guessing riddles, watching the presentation
“Wild Animals”
.
Progress of the lesson:
Educator: Guys, a guest will come to us today, but before he appears, we must guess who it is. I'll tell you a riddle, and you tell me the correct answer.
Clubfoot and big,
He sleeps in a den in winter.
Loves pine cones, loves honey,
Well, who will name it?
Children: Bear
.
Educator: Correct! Listen to a short excerpt about a bear
“Which of us doesn’t know
a bear
?
Big, clumsy, club-footed. This is exactly the opinion we hold about this beast. But in reality the bear is not like that
.
He is very mobile and maneuverable. The bear
is a formidable forest dweller who will not let anyone down if he is not in the mood.
Belongs to the bear
.
The bear
is a predatory mammal that swims well and climbs trees.
One blow and the bear can kill another animal. 's legs are thick
, its head is massive with small ears and eyes, and the color of its fur is changeable.
Although the bear
is a typical predator, he also likes to enjoy plant desserts: berries, fruits, grains, grass, plant roots,” but don’t be afraid, our guest is very kind, he came to us from a fairyland.
(there is a knock on the door. The teacher brings in a toy)
. Guys, we forgot to say hello to our guests, how can we greet beautifully?
Children: Hello, we are very glad to see you!
Educator: Bear told me that he is bored alone in the den in winter, how can we help him?
Children: Let's make little bear cubs
.
Educator: But first we’ll play a game with you. The game is called "Teddy bear"
, you must perform movements in accordance with the text. So, let's go to our clearing and stand in a circle.
A clubfooted bear is walking through the forest,
He collects the cones and puts them in his pocket,
Suddenly a cone fell, right on the bear’s forehead,
The bear got angry and stomped his foot.
“I won’t collect pine cones anymore,
I’ll get in the car and go to bed!”
Educator: It’s too early for Mishka to go to bed, it’s better let’s go to the table and see how our guys will sculpt bear cubs
.
Children: go to the tables and sit down in their places.
Educator: Guys, what parts does the bear consist of?
Children: torso, head, paws and tail.
Educator: How are we going to sculpt the body, what does it look like?
Children: oval body.
Educator: And the head?
Children: Round.
Educator: Please note that the bear has an elongated muzzle
, and there are ears on the head!
How many ears does a bear
? Let's count?
Children: 1 – 2. 2 ears
Educator: Yesterday I made a bear, would you like me to show it to you?
Children: Yes.
Educator: I stretched out the muzzle with my fingers, and made the ears by pinching plasticine. Which part of the body do you think we'll start working on? Explain why you think so?
Children: From the body, because we will attach all parts of the body to it.
Educator: What are we going to sculpt after the body is done?
Children: Let's sculpt the head.
Educator: We will have a torso and a head, do we need them?
Children: Connect.
Educator: In order for our head to hold firmly, we must use the technique of smearing. What remains for us to make so that the bear is ready?
Children: Paws and tail.
Educator: How many paws does a bear
, let's do the math.
Children: 1, 2, 3, 4 -4 paws.
Educator: We will make them from balls, but we will need 5 balls, what is the fifth one for?
Children: For the ponytail.
Educator: Guys, when you start working, I will play some music for you, it will help you unleash your creative abilities. There is plasticine on our tables, we need to divide it into 3 parts, one part should be a little larger, the other two parts should be the same. From the larger part we mold the body, from the other part - the head, and we need to divide the last part into 5 more equal parts, these will be the paws and tail. Let's get to work. (music is turned on, preferably sounds of nature)
During work, the teacher gives children advice and, if necessary, provides assistance.
Analysis:
Look, guys, what cute little bears you have made!
.
(Ask the children whose work they liked and why, tactfully draw attention to the shortcomings in some works, offer to try to avoid them next time).
Guys, let's invite our guest to choose new friends. ( Teddy Bear
happily selects all the children's works and thanks the children for the gifts). The children invite him to come visit again.
Teddy Bear
treats the children with cookies and says goodbye.
How to make a cat from plasticine
For beginners, the modeling process should be divided into stages, then making the craft will not seem complicated. For children 4-5 years old, we suggest making a simple figurine without small parts, step by step.
Modeling a cat with stripes
For sculpting you will need:
- Colored plasticine.
- Stack for modeling.
- Mustache line.
Plasticine cat step by step:
Roll a sausage and a ball from a piece of plasticine.- Cut the sausage lengthwise into two parts on both sides; these will be the paws.
- Bend the sausage into a horseshoe shape.
- Make triangular ears of the main color, a white muzzle and an orange nose, black eyes - beads. Stick all this onto the head - a ball.
- Cut fishing line or threads (the threads can be coated with glue so that they do not sag, but stick up) and insert the mustache.
- Roll up the tail, bend it and attach it.
- Make thin stripes of white plasticine for the back and tail.
- Use a stack to outline the mouth. Carefully smooth out the figurine, place it in a beautiful pose, make sure that the legs are even and the craft does not fall.
You can offer to make a mouse for the cat. Roll a gray sausage that looks like a carrot. Raise the sharp end, attach a black nose, round eyes, attach rounded ears on the sides, and a thin curly tail.
It's easy to make a ball of thread. The kids roll out threads from plasticine with their palms, the adult connects them into one rope and winds them into a ball.
Craft kitten from plasticine
This craft is not very simple, there are small parts, it is recommended for children over five years old.