Introductory part
Goal: developing children's ideas about body proportions.
Tasks:
Educational:
Teach children to see the proportions of the human body and compare body parts.
Educational:
- Develop skills in sculpting sequence, sculpting techniques: rolling, pinching;
- compare the proportions of body parts; develop communication skills.
Educational:
Develop initiative, cooperation skills, continue to learn how to decorate your crafts.
Integration of educational areas:
Social and communicative development, speech development, cognitive development, artistic and aesthetic development.
Equipment:
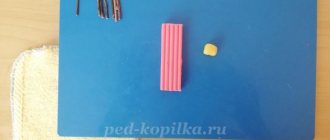
A box with different human body parts with different proportions and colors, a box of plasticine for each child, a plasticine board, stacks, room layouts for little people.
Tank
For the upcoming Victory Day, you can invite your child to make a tank out of plasticine. For this work, in addition to the usual materials, you will need a matchbox and a match.
— First you need to make the wheels of the tank. To do this, you need to roll the balls and flatten them into a puck shape. Glue these wheels to the sides of the box.
- Make a cube, make hatches from plasticine of a different color (one color with wheels).
- Coat the matchbox with a thin layer of plasticine. Glue the cabin.
— Glue a small piece of plasticine onto one end of the match so that there is a sight and a barrel. Insert the other end of the match into the cabin.
Very young children can make this plasticine tank. Older guys may well improve the design, making the tank more realistic.
GCD move
| Educational areas | Tasks | Sequence of activities | Expected responses and actions of children |
| Social and communicative development | Create a positive emotional mood, take advantage of a surprise moment | The teacher enters the group with a beautiful box. - Guys, look what our schoolchildren gave me! Let's see what is there? The teacher's box accidentally falls to the floor. - Guys, I think I broke something. The teacher opens the box and shows it to the children. - What is this interesting? | Children approach the teacher and look at the box. Children put forward their versions. |
| Speech development | Activate children's vocabulary, continue to teach how to conduct a dialogue and answer questions, suggesting your own versions. | — Hands of different colors and sizes; - the legs are also not all the same; “I’ll try to collect them now.” The teacher places the large torso of the man to the small head and asks: Did you connect the parts correctly? What's wrong? Is there a head, is there a torso, are the arms and legs attached? | Children watch the teacher’s actions and answer questions. |
| Cognitive development | Teach children to see the proportions of the human body and compare body parts. | So he sorts through the parts of the man from the box until the children agree that the man is assembled correctly and his body proportions match. The teacher invites the children to try to make a similar person. Choose a piece of plasticine for yourself, take a stack, divide the piece of plasticine in half, and then in one half separate 2 equal parts for the body and head, and the other half for the legs and arms of the person. | Children agree or disagree with the teacher. |
| Artistic and aesthetic development | Develop skills in sculpting sequence and sculpting techniques: rolling, pinching. | The teacher helps children in sculpting and decorating little people. Offers a choice of room layouts for little people, prepared in advance by children and their parents. | Children sculpt their little people and decorate |
| Social and communicative development | Develop communication skills. | Game activity of a teacher with children. | Independent play activities of children. |
Author: Sycheva Oksana Yakovlevna Position: teacher of the 1st qualification category Place of work: MAOU "Komsomolskaya Secondary School" (Komsomolsk kindergarten) Location: Komsomolsky village, Perm region
Date modified: January 23, 2022 Date published: June 23, 2018
Preparatory stage
Children have grown up, and new techniques for working with plasticine are available to them. From sculpting on a plane, which involves creating a kind of painting, plasticine bas-reliefs on a sheet of cardboard or paper, and from simple forms (balls, lumps, figures without complex details), the children move on to three-dimensional standing and walking figures that require taking into account proportions and the laws of balance.
Playing with plasticine is an important part of preparing for school.
What methods of modeling from plasticine can be used
Children aged 6–7 years are already familiar with constructive (the composition is created from individual parts, like a construction set), sculptural (all parts of the figure are made from one piece) and combined methods (combination of constructive and combined). To sculpt a figure in motion, it is more convenient to use a constructive method - this way it is easier to convey small details, such as, for example, palms, facial relief, etc.
Modeling techniques
In this group, children consolidate previously mastered modeling methods, including:
- rolling out elements (creating a “ball”);
- rolling (rolling “sausages”);
- indentation, that is, creating depressions on the form with your fingers;
- flattening (making “pancakes” from balls);
- pinching (pinching a piece and flattening it with two fingers);
- pulling (pulling an element out of a piece);
- accession;
- smearing (building up elements onto the base and smearing the boundaries of the connection);
- pinching (clamping the part, but without flattening);
- stretching (stretching elements while maintaining the overall shape);
- smoothing (smooth transition of craft elements into each other).
Almost all of these methods are useful when working with the human figure.
Composition options on the theme “Man in Motion”
Modeling of a non-static figure can be presented in the following variants of themes for composition, which can be dedicated to a specific educational block:
- “Girl Plays Ball” (when studying topics related to summer fun);
- “Skier” (in the process of studying materials related to winter sports);
- “A girl and a boy are dancing” (for example, on the eve of the New Year);
- “Soldier” (this composition can be dedicated to February 23 or May 9), etc.
As can be seen from these examples, most of the options for such modeling in calendar and thematic planning correlate with the winter theme. This is explained simply: by the 2nd semester, the children repeat and consolidate all the basic techniques and methods of sculpting, which allows them to create complex designs, which include the human figure.
Preliminary work with the group
Although the technique of sculpting a human figure is relatively simple, the teacher, during classes on speech development and physical education warm-ups, first examines with children the features of a person’s posture, drawing their attention to such nuances as:
- body angle;
- turning the head;
- bend of arms and legs, etc.
In addition, even before starting to work with plastic material, the adult individualizes the process as much as possible. That is
- divides the responsibilities for preparing the workplace and the necessary tools between the guys;
- allows you to choose the color range of plasticine for crafts;
- helps determine the position of the limbs (if children are performing a composition where the pose of the figure may vary), etc.
It is advisable that the choice of color scheme for the little man’s costume remains with the child.
Motivation
Already at the stage of individualization (that is, preparation for the lesson), the motivation of the little ones begins. However, the first part of the lesson should be planned so that the kids become interested in both the result of the work and, what is very important, the sculpting process itself. To do this, the teacher can use a number of techniques.
This is interesting. The famous Italian teacher, philosopher and humanist of the late 19th and early 20th centuries, Maria Montessori, said: “Do not limit yourself to just one teaching aid, for example, cards. Cover one topic in different ways: in games, posters, books, cartoons.”
One of the options for motivation could be a preliminary drawing of a sample of a man in motion
Conversation and visibility
If we rank the most effective ways to get children to work, then, of course, conversation will take first place. The main thing is to build it correctly. Usually these are questions from an adult, which the kids answer one at a time or in chorus. For example, before creating a figure of dancing children, questions might be:
- When do people dance?
- Do you like to dance?
- How are the legs and arms of the dancers positioned when moving?
- What should a person doing dancing wear?
However, these questions cannot be speculative. Children perceive the world figuratively, so they cannot do without clarity. These could be pictures of athletes, frames from famous cartoons (for example, “Well, just wait!”), or photographs of the children themselves. If the kids are sculpting the composition “Girl Plays with a Ball,” then for motivation you can invite all the kids to repeat 2-3 exercises with the ball, and then discuss which movements were the same, which were different, and also what poses the body took.
A game
The story-based game gives the lesson a particularly interesting working atmosphere. If we talk about working on plasticine figures, then such a character, including children in work-play, can be a cartoon or book hero. For example, during a lesson on the subject of a skier’s figure, the symbol of the Sochi Olympics, Cheburashka, may come and invite the kids to create their own ski team.
Children work in class with special pleasure if their favorite character “comes to visit” them
Poems
The rhythm and dynamics of rhymed lines also organizes the children well and puts them in a working mood.
- One day nature and people started a dispute about primacy. Storms and blizzards rushed in and covered everything up to the roofs with snow. "Hooray! - Nature rejoiced, “They can’t get through the snow, they won’t survive!..” It’s not in vain that the people have ingenuity... And people came up with SKIS!
- If you can’t sleep in the morning, the dream has run away somewhere, and you’re tempted to start dancing - So the day for dancing has come!
- I'm a military captain! I'm not afraid of a hurricane! The whole team is recruiting, We are leading the ship into the storm. It’s not in vain that we stand at our post! We will protect you, country!
Let's sculpt a girl
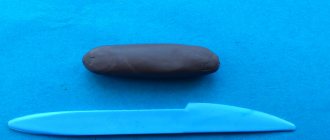
The first master class will be devoted to the process of sculpting a girl figurine. In order to mold a girl from plasticine, you will need plasticine of several colors, namely: red, pink, yellow, beige, white, brown and matches.
You need to start the modeling process by modeling a dress; to do this, you need to form a cone-shaped part from a piece of red plasticine, then stretch the plasticine in a circle so that you get a skirt. Then, using a different color, you can apply a pattern to the skirt, for example, you can make a polka dot skirt using yellow plasticine. Next, you should make a cake from the yellow color, then you need to make cuts on it and attach it to the top of the cone-shaped part. Then you need to make sleeves from red and attach them to the dress.
In order to make a head, you need to form a ball from beige plasticine, then you need to attach eyebrows, eyes, nose, lips and cheeks to the front part. In order to make hair, it is enough to form thin sausages out of brown hair, collect several sausages to form ponytails, and attach them to the head. You can also make hairpins from red. After this, the two resulting parts must be connected using a match. Next, you need to stick two matches with yellow plasticine, make shoes, attach the parts to the main parts, and the craft can be considered ready.
Composition options based on theme
According to the fine arts program, the modeling lesson “Girl Plays with a Ball” is offered to children in October. The program involves a variable task - simply creating an image of a person in motion (how he runs, dances, works, etc.).
In addition, within the framework of this topic (creating an image of a person in dynamics), the following topics can be offered to preschoolers:
- "Athletes in winter." The task is to convey in sculpting the characteristic movements of a person involved in different types of winter sports (skating, skiing, sledding, playing hockey), as well as sculpting attributes for each sport.
- “Soldier with a machine gun” (the lesson can be timed to coincide with February 23).
- “How we do physical education.” This can be framed as a collective composition.
- “Cheerful Dancers” (or “How We Dance in a Music Class”).
The same figures can again be arranged in completely different ways - "Ballerina".
An interesting theme for sculpting is a dancing person, for example, a ballerina
Types of materials for modeling
Plasticine will differ in composition. For sculpting figurines and dolls, it is better to choose wax compounds. They hold their shape, but are firm and resilient, which does not require much time and effort to create a masterpiece.
For paintings, more viscous varieties are chosen. The more colors, the more interesting it is for the child to work; you can combine them.
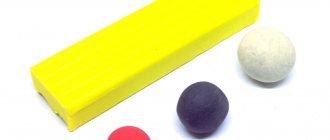
Types of plasticine:
- Classic ordinary - multi-colored material, quite plastic. It allows you to mix colors and remake figures. In most cases it is sold in the form of rectangular bars.
- Wax - a type of classic. It is easier to work with, as it molds better and is softer than its predecessor.
- Ball plasticine is a special material that consists of very small foam balls. Working with him is very pleasant and completely safe for children. During sculpting, the balls massage the palms. The fakes hold their shape well. The balls do not wrinkle, as they are connected by the finest adhesive threads.
- Hardening plasticine. The mass has bright colors and dries within 24 hours. A doll made from such plasticine will be a good toy and decoration for a child’s room for a long time. Many create entire collections.
- Sculptural is a professional material for sculpting. It is used by sculptors and art school students. The mass is made on a wax basis and holds its shape.
- Ar-plastic is suitable for school-age children. The soft type is used for appliqués, while the hard type is used to create three-dimensional figures.
- Salt dough is a special mass for the little ones. Its disadvantage is that it dries quickly in the open air.
- Floating plasticine - a doll made from this plasticine will not sink in water. The mass does not dry out and can be used repeatedly.
- The modeling paste is pleasant to the touch, and the finished doll can be decorated with paints.
- Bouncing plasticine - molded balls jump well.
Modeling from plasticine “Girl with a ball”
Alena Babeshko
Modeling from plasticine “Girl with a ball”
Modeling from plasticine
«Girl with a ball»
Step-by-step instructions (man)
: Take red plasticine , roll it into a ball, then form a cylinder. Pinch the “skirt”
.
Roll 2 small balls of the same color and fix them in the form of shoulders. “sausages” from beige plasticine
— the girl’s , we make finger cuts in a stack. We attach our hands to the hangers. We make 2 more sausages - legs, attach them from below under the dress. We make two ovals from pieces of yellow , press in the indentation, and insert the legs.
Let's get to the head. from light plasticine . We put 2 pieces on it for the ears and 1 for the nose. We place these parts on the head.
On both sides of the upper part of the nose we place a piece of white plasticine , put a white circle on it, and a black circle on the white one. This is how we made our girl's eyes .
From a pink material, apply a piece of blush to the cheeks, as well as a piece for the lips, which we divide in half in a stack. From beige plasticine we make a thin short sausage - a neck - and attach it to the head. black plasticine to the head and show the curls of the bangs in stacks. We divide another piece of black in half - these are the tails.
We make a bow out of yellow. To do this, slightly flatten the sausage, make a constriction and apply folds in a stack. We put a bow on the head and also attach the tails. We apply the neck to the body. from red plasticine and form a fringe with a stack.
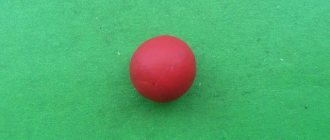
Step by step instructions (ball)
: Roll into a blue ball. We form 2 yellow sausages and 2 red sausages. We flatten each sausage and stretch it into an oval shape.
Place it on the ball and spread it a little. From 2 pieces of white plasticine we make pancakes , with which we hide the places where the colored stripes meet.
Abstract of GCD on artistic creativity. Modeling from plasticine and natural material “Spiky hedgehogs” Tasks. Arouse interest in modeling from plasticine and natural materials to convey the characteristics of the animal’s body covering. Improve.