What are the benefits of using non-traditional techniques?
This is interesting. From an early age, children try to reflect their impressions of the world around them in visual activities through the visualization of sensations. Hence the desire to draw with fingers on foggy glass, with a stick on the sand and with chalk on the asphalt.
So, existing non-traditional drawing techniques have the main advantage - they allow you to quickly see the results of your work. And, really, putting a blot on paper with your own finger and seeing a funny design in it is fast and fun. In addition, unusual techniques allow
- develop creative abilities;
- form a non-trivial view of the world around you;
- help develop imagination and creativity;
- develop fine motor skills;
- cultivate independence.
Scheme for drawing up lesson notes
This work must begin with the formulation of goals and objectives through visual activity. As for the goals, to those that were identified in the context of non-traditional drawing techniques in general, we can add some specific ones:
- practice the ability to recognize and name colors;
- introduce children to different types of drawing materials (gouache, watercolor, etc.);
- cultivate accuracy and goodwill in group and individual work.
During drawing classes using non-traditional techniques, the following educational tasks are solved:
- children learn to work with signets, soap bubbles, cotton swabs, and also learn to draw with their fingers or palms;
- an idea of paint concentration and basic skills in creating shades are formed;
- expressive images are created, while maintaining the liveliness and spontaneity of the child’s worldview;
- the joy of receiving a product of one’s own creativity is fostered.
The success of the lesson also depends on how carefully the teacher distributes time between all stages of work. As you know, a lesson in kindergarten lasts 30 minutes, during which you need to go through 3 stages of work:
- introduction (about 5 minutes) – implementation of motivational techniques (conversation on a topic, playing with visuals, role-playing, reading poems, listening to songs, etc.);
- the main part (about 20 minutes) is to complete the drawing;
- conclusion (about 5 minutes) - summing up, praise of the teacher, reflection of the kids (in the form of answers to questions - “Did you like drawing in such an unusual way?”, “Do you think you succeeded?”, “Whose work do you think is the most beautiful ? etc.).
Whatever technique you choose, children must be helped to realize their intended image.
Please note that some techniques (such as signet painting) do not require much time to complete. In this case, you can increase the timing of the introductory part using dramatization, role-playing, that is, techniques that require a lot of time.
Non-traditional drawing techniques with children of primary preschool age article (younger group)
Non-traditional drawing techniques with children of primary preschool age.
Artistic art is the first opportunity for a child to develop on the creative side. Any artistic process is closely related to thinking and logic. The kid thinks through every little action to make his creation perfect. And also, this process perfectly develops creative thinking, fine motor skills of the fingers, perseverance, attentiveness and concentration on one action.
Non-standard drawing techniques for children will help make artistic activities fun and interesting. Such methods will make joint creativity fun and will evoke extremely positive emotions in children and adults. In the future, the child himself will show interest in children's painting. The drawings can be anything - careless, dirty and even multi-colored. The main thing is full involvement and keen interest in the process of joint activity.
Drawing with non-traditional techniques opens up wide scope for children's imagination, gives the child the opportunity to get carried away by creativity, develop imagination, show independence and initiative, and express his individuality.
Unconventional painting techniques are a wonderful way to create small masterpieces. It turns out that you can create a soap picture, and your palm can turn into a blue elephant. You can not only knit with woolen threads, but carrots and potatoes can surprise you with unusual patterns.
For example, with children of primary preschool age you can use the following non-traditional drawing techniques:
- Drawing with fingers and palms.
- "Stamps" made of threads.
- Stamp made from potatoes or carrots.
- Leaf prints
- Drawing with cotton swabs.
- Drawing with lumps of crumpled paper.
- Sponge painting.
- Plastelinography.
- Passepartout.
10.Frottage.
11. Soap painting.
1.Drawing with palms and fingers
A very interesting and exciting way to draw with colored fingers or palms, which kids will definitely love. It requires:
- Paper;
- Container for mixing paints;
- Gouache;
- Water;
- Brushes.
An adult applies paint with a brush to the child’s fingers or palm. Then the child needs to make an imprint on paper, maybe even several times. You can add eyes, hands, or patterns to your prints to give the finished drawing a finished look. You can practice this technique from the age of 1.5 years or even earlier if the child begins to show an active interest in artistic activities.
2. “Stamps” made of threads.
The magic thread technique fully corresponds to its name. A couple of simple manipulations and you get an interesting abstraction on paper without using a brush. The essence of the technique is the use of thread for creativity. The thread is dipped in paint, but is not imprinted on the sheet, but is compressed by a press. To create “striped stamps” you can use threads tightly wound around an object. Using a thick layer of paint, the threads are painted in the required color. Then, using imagination, the “striped pattern” is applied to the surface to be decorated.
The result will be more original if you fold the thread in a zigzag shape in advance. Next, the paper is pressed down with a press, and the woolen thread is taken out. The thread leaves a bizarre pattern that, together with the child, can be interpreted in any way.
Materials : Wool thread, base, paint, brush, paper, water jar.
3. Prints with potatoes, carrots, apples.
Delicious vegetables and fruits can also be drawn. You just need to give them the desired shape, choose the appropriate paint color, paint them with a brush and make a beautiful imprint on the surface to be decorated.
Materials : Vegetable/fruit, paint, brush, paper, water jar.
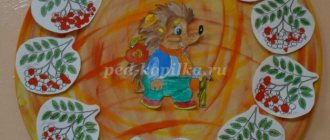
4. Leaf prints.
This technique is familiar to many. To print a sheet, you can use any ink. Paint should be applied to the side with veins. Then the painted side of the sheet is applied to the paper and ironed. After a few seconds, you need to carefully lift the sheet. An imprint of the leaf will remain on the sheet of paper. For sheet technology you will need any leaves of bush and deciduous trees, brushes, as well as a piece of paper and paint. You can practice this technique even from the age of two. From leaves you can create any picturesque composition - trees, flowers, sun and even a forest!
Materials : Leaf, paint, brush, paper, water jar.
5.Drawing with cotton swabs.
In the fine arts, there is a stylistic movement in painting called “Pointillism” (from the French point - point). It is based on the manner of writing with separate strokes of a dotted or rectangular shape.
The principle of this technique is very simple: the child paints the picture with dots. To do this, you need to dip a cotton swab in the paint and apply dots to the drawing or outline that the adult has already drawn.
When painting with cotton swabs, it is very important that there is enough material for creativity. You shouldn’t skimp on cotton swabs and it’s better to use your imagination to the maximum. It is recommended to follow several rules:
- There is no need to wet the sticks before painting;
- The color should be rich and thick;
- The stick should be lightly pressed into the paper, perpendicular to it;
- It is better to use one stick once so that the colors do not turn out dirty and blurry.
Using cotton swabs you can make a variety of images - nature, animals and birds, the water world, people.
Materials : Cotton swabs, paint, paper, water jar.
6.Drawing with lumps of crumpled paper.
Another non-standard way of drawing. It starts with the process of making paper balls. After 10-15 lumps are ready, you can start creating. Lumps of crumpled paper are generously dipped in watercolors, after which they are used to create a drawing. The movements of the pieces can be anything - pokes make sharp single elements, and if you move the lump along the sheet, a clearly drawn background is created.
There are two ways to draw with crumpled paper.
Method number 2 . Liquid paint is applied to a sheet of paper. After a short period of time (while the sheet is still wet), a crumpled napkin is applied to the sheet. By absorbing moisture, the napkin leaves its characteristic mark on the surface of the paper.
Method number 1 . A layer of paint is applied to the crumpled paper ball. The painted side can then be used to make prints.
Texture sheets can then be successfully used when creating collages.
Materials : Napkin/paper, paint, brush, water jar.
7. Sponge painting
A simple and interesting sponge painting technique for children. Parts of the sponge are dipped in paint and transferred with stamps onto paper. Everything comes from a sponge. Any drawings, backgrounds, decorations and even small details. The child learns to draw details and apply layers thanks to this technique. In addition, it is very exciting and interesting. If you don’t want to get your hands dirty with paint, you can wrap a piece of sponge with thread or put it on a pencil. Before manipulation, you should definitely ask the child how he wants to draw.
Materials : Paint plate or palette, foam sponge, paper, thick gouache.
8.Plastelinography
A technique that uses plasticine to create paintings of semi-volume objects on a horizontal surface. Thick paper, cardboard, and wood are used for the base. To decorate the image, you can use beads, beads, natural materials, etc.
Materials: Plasticine, base, beads/beads.
9.Passepartout
Another interesting and simple drawing technique. In this technique, the child's scribbled "doodles" are inserted into a sheet with a cut-out shape of an animal, tree, flower, etc. An adult cuts out a template, for example, in the shape of a daisy and places it on top of the baby’s daub. This way, an unremarkable drawing will become part of an unusual idea.
10.Frottage
To perform this technique, you need to place a sheet of paper on a flat, embossed object and shade its surface with a colored pencil. We will get a beautiful picture-print, with the silhouette of the substrate object!
Children who have tried to draw on a table from relief wood probably know that sometimes this technique is “connected” to the drawing completely by accident.
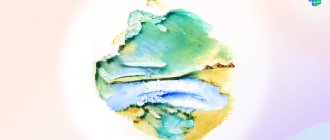
11.Soap painting
Your baby will definitely love this technique. You need to mix the paints with a few drops of regular liquid soap, then apply it to the paper with a brush. We will see that small soap bubbles appear from the paint, which create a beautiful texture of the design. This is very unusual and you should definitely try to draw this way with your children.
Tips for a child working with paint
When drawing in non-standard ways, it is very important to encourage the child’s activity and in no case point out his mistakes. In some situations, when creativity is difficult for a child, he can be directed, but so that he himself is carried away by the process.
It is also important not to give your child the entire palette of colors at once - it is better to give him a choice of two or three colors so that he does not get confused in the creative process.
Don't worry about the mess in your work - art always requires sacrifice, and even if a child gets the table or clothes dirty, you shouldn't scold him.