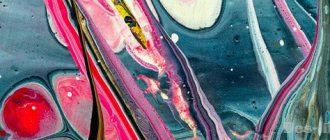
How diverse the world of art is! He has no boundaries and generously accepts any ideas, turning them into a separate direction of creativity. One of them is monotype - a drawing technique that combines printed graphics and painting, but is not an engraving.
The artist applies an image with a brush to a flat metal surface, from which the design is imprinted onto damp paper under the pressure of an etching press. This design is unique because... its replication is impossible: only one high-quality print can be obtained from a flat form.
In this article we will tell you where this type of art comes from, what types of monotype there are, and how to learn this drawing technique yourself. Welcome to the world of monotype!
The history of the appearance of monotype
Monotype, translated from Greek, literally means “one print,” but, judging by historical data, it did not originate in Greece: the first engraving prints without a black outline appeared in the 11th century in China. These were the simplest types of monotype.
For a long time, monotype was an additional technique to the main graphic techniques. The first color print was made by the Dutch artist Hercules Seghers: he painted over metal engravings (etchings) with colored paints. This is how unique prints were obtained, which served as the beginning of the development of this type of art.
This technique of depicting a drawing was adopted and improved by the Italian artist and graphic artist Giovanni Benedetto Castiglione. It is he who is credited with the invention of monotype. Castiglione painted the plate with ink and, after the paint had completely dried, cut out the image with a sharp tool and printed it on paper.
“The Creation of Adam” is one of the most famous monotypes of the Italian painter. The painting depicts God emerging from a cloud with white angular strokes. And in the darkness, Adam is depicted with thin flowing lines. This masterpiece was created using black ink, a plate and a blunt instrument (stick or brush handle) [Art Institute Chicago, 2020]:
More than a hundred years later, the English artist, engraver, poet William Blake contributed to the development of monotype: he varnished the drawing on a copper board. He filled the areas empty of varnish with acid, so that the outline of the design protruded above the smooth background. Next, Blake transferred the drawing with a print to the board. This is how zincography appeared - a convex etching.
Despite all the artistic experiments, monotype began to emerge as a separate direction only in the 19th century thanks to Edgar Degas, a French artist. He created many works using this technique. Degas loved to experiment: he was the first to use a transparent board in a monotype; it made it easier to control the work process.
The artist published manuals on monotype, presented his works at exhibitions, and the circle of those interested in monotype began to gradually expand [N. Kuznetsov, 2010].
In Russia, Elizaveta Kruglikova is considered the founder of monotype. While in Paris for about 25 years, she created about five hundred prints on various subjects. The largest series of works made using the monotype technique is the “Flowers” series; it includes more than a hundred prints [P. Kornilov, 1969].
In the 20th century, color and the material used began to take on special importance in art. Thus, Yuri Velikanov, a student of Elizaveta Kruglikova, created monotypes dedicated to the construction of a power plant on the Svir River.
Monotype gained particular popularity in the 1930s. Using this technique, Anatoly Suvorov created illustrations for Alexei Nikolaevich Tolstoy’s story “Nikita’s Childhood”:
Ada Rybachuk, an artist from Ukraine, came to the North in 1950 and was struck by the beauty of nature, which served as an incentive for inspiration and painting using the monotype technique. She created illustrations for the fairy tale “Little Unyany”:
Artists of the 20th century experimented in their creativity, worked with colored paints and found non-standard methods for performing monotypes. Vadim Frolov, an engraver, used waste from metal production in his works, and Valery Mishin, an artist from St. Petersburg, used real objects to create prints: plants, buttons, needles, snaps, etc. This is how the monoprint appeared.
Mikhail Tarkhanov, a graphic artist and designer, poured oil paints over water and then placed a sheet of paper on top. Using watercolor, ink, and pencil, he completed the missing images on the dried canvas. This is how a new direction of monotype appeared - aquatype.
Another original way of applying a picture was invented by Gennady Troshkov: he applied paints to glass or lithographic stone, and then transferred this paint to paper using a soft roller.
As you can see, since the advent of monotype, this type of creativity has undergone significant changes. Artists used various methods of drawing, which led to the emergence of new directions in the monotype technique. Let's look at each of them in more detail in the next section.
LiveInternetLiveInternet
https://podg-kursy.ru/index.php/2012-06-28-06-00-25
History of the creation of monotype printing technology
Monotype is a unique printing technique that combines the qualities of printmaking and painting. Giovanni Benedetto Castiglione (1609-1664) Giovanni Benedetto Castiglione (Italian: Giovanni Benedetto Castiglione; 1607, Genoa - 1665, Mantua) - Italian artist and engraver, representative of the Genoese school. [edit] Studied with Van Dyck, Rubens, Bernardo Strozzi and Domenico Fetti. For the first time he used the monotype technique. The engraver's skill earned Castiglione the fame of the second Rembrandt. The main themes of the artist’s paintings are biblical scenes.[/td]
Monotype (from mono... and Greek - imprint) is a type of printed graphics, the invention of which is attributed to the Italian artist and engraver Giovanni Castiglione (1607-1665) .
The monotype technique consists of applying paints with a brush onto a perfectly smooth surface of a printing form (glass, plexiglass, plastic, metal plate), followed by printing on a machine or by hand under hand pressure or a roller; The print obtained on paper is always unique, unique and inimitable. Although there are often situations when working on creating a print from a plate, it is possible to achieve an even greater effect of beauty in the drawing than from the first print.
In psychology and pedagogy, the monotype technique is used to develop imagination in children of senior preschool age.
Monotype - Technique of freedom and Divine intervention!
| Monotype: Two words: “mono” and “type”. Monotype (from “mono” - one and Greek - imprint, imprint, touch, image...) - a type of printed graphics. If you just say: one touch, touch, pressure...... you can probably find many more verbal analogues. But, most importantly, this is a work of art completed in one step! The first monotypists were probably the ancient people, who left traces of their handprints on the walls of their caves... The face of Christ on the shroud is also a kind of monotype! You can find many different variants of monotype in nature... Works made using the Monotype technique are characterized by subtlety of color relationships, smoothness and softness of the outlines of forms, which outwardly brings monotype closer to watercolor. The monotype technique has been known since the 17th century, but became widespread only from the end of the 19th century. |
When creating a monotype print (print), paint is applied to the surface. Place a sheet of paper on top and press it to the surface. An impression is formed on the paper with unusual patterns that cannot be repeated by the artist. The image on the print is random and spontaneous. After printing, the artist selects those prints that he liked or that satisfy him in terms of aesthetic appeal and subject matter. Of the many prints, only a very few are selected. Therefore, artists rarely use the monotype technique: it is quite labor-intensive and requires a large amount of materials and patience.
Materials and tools.
Materials: Glass or plastic, rubber roller or rolling pin, newspapers, paper, oil paint, spatula, sketch of a drawing, turpentine (thinner No. 4), clean rag.
Paints . This technique is omnivorous in relation to paints! Watercolor, gouache, tempera, acrylic, oil paints, etching, typographic, for complete tearing you can also use construction types of paints. Paints are used both with thinners and in pure form - depending on the task. The choice of surfaces from which impressions can be made is also wide and varied: paper, various types of cardboard, plastic of different thicknesses, plates of different metals - zinc-copper-steel-brass. Glass, hardboard and plywood! Canvas and wood, stone!!! The main thing is that the surface texture matches your tasks and goals. But the question of an internal feeling of what the surface should be like comes with your personal experience.
Paint is also applied to the surface using various tools: a roller, the artist’s hand and fingers, brushes, palette knives, various spatulas, including curly ones. Rollers with different textures are also used. And finally, whatever comes to your creative mind. 
| Etching press | Lithographic printing press |
Etching machines are used to make prints from sheets of plastic and metal sheets. To make a print from a lithographic stone, a lithographic printing press is used.
To remove paint from the printed surface, they use everything from simple fabric to all sorts of specific materials: matches, steel sponge for cleaning dishes, ear sticks...
And finally, the types of surfaces on which the imprint is made: paper, various types - from plain to etched, colored papers, plastic, plywood, stone, glass, metal, artistic canvas and various fabrics. In general, there is reason for imagination.
Stylistic directions in monotype
(printed graphics)
The first method, one of the simplest, is also called “fractal monotype”
Take the hard surface of your choice, in a creative trance, apply paint with the tool you need, lay paper on top, press it on top with your hands or a rubber roller. Smoothly remove the sheet. Examine the resulting impression. As a rule, this method is quite difficult to manage. Especially if you use water-based paints: watercolor, gouache, acrylic, tempera. Then many artists, peering at the resulting print, try to see some image, landscape, composition and slightly modify the print, trying to enhance and reveal what they saw in the monotype.
There are several other ways or techniques for creating fractal monotypes.
| First stage | Second phase | Third stage | Fourth stage | Fifth stage |
| Sixth stage | Seventh stage | Eighth stage | Color monotype | Black and white monotype |
First stage:
For work we will need the following materials: - white or tinted paper, you can use different types of paper - paints: gouache, watercolor, tempera, acrylic - bath for soap solution - soap solution - watercolor brushes (squirrel brush) or gouache (bristles) ) - a cloth for wiping paint from brushes and from the surface - plexiglass or regular glass - a jar of clean water - a palette for mixing colors
Second stage:
Next, we prepare a linear or tone sketch (drawing) for work. We place the drawing under the plexiglass. And you and I can start working in color.
Third stage:
The work is carried out in the same way as you paint from life or imagine, come up with your own color combinations. Try to take the color clean, bright, saturated. The shades of color are noble and pleasant to the eye. Change the water in your water jar often. The most important thing in your work is not to forget that when you take a mixed color, put it in a jar with a soap solution, since the soap solution does not allow the paint that you applied to the surface of the plexiglass to dry quickly.
It is important to know and take into account their features (properties) when working with paints. If you work with gouache, then try to do the work faster, since the paint dries quickly and it may turn out that you painted with paints, but the work has already dried. If you work with watercolors, then watercolor loves a lot of water, then in our case the watercolor solution should contain rich colors and have a little water in its composition. Excessive amount of water in the color can have a negative effect on the print (it will look like a big puddle when printing).
Fourth stage:
After we have completed the sketch in color, we take a sheet of paper. I would like to draw your attention to the fact that you need to grasp the sheet of paper with both hands by the corners of the sheet. Why do we do this, you ask? To ensure that the sheet does not wrinkle, break, or get dirty with your hands, place it evenly on the surface of the plexiglass, connecting the sheet format with the sketch of the drawing.
Fifth stage:
The next stage is that you need to gently press down the sheet with the palms of your hands, stroking it a little, pressing down where we have drawn the drawing. Try not to press, you need to do this with all your might, easily feeling on your palms that your drawing is gradually being transferred to a sheet of paper.
Sixth stage:
Next, you carefully remove the sheet of paper from the plexiglass (surface). Please note that the drawing must be removed by holding a corner of the sheet and slowly lifting the second corner of the sheet so that the sheet does not move when removed from the surface.
Seventh stage:
Then the resulting print must be hung to dry so that it does not get stained with paint and spoil the work. The dried print can be improved by clarifying the details of the drawing.
Second way.
When paint is applied to plates of metal or plastic, paper is placed on top and an impression is made using an etching or lithographic press. In this technique, as a rule, oil and etching paints are more often used. This method allows you to accurately control the creative process and accurately predict the desired creative result. Here you can create almost picturesque realistic works. To prevent ink oil from sticking to the paper, it is moistened with water before printing!
| First stage: You need to prepare your workplace so that nothing interferes with your work. Using a spatula, we apply black printing ink to the surface of the metal plate (if you don’t have printing ink, you can use ordinary oil paint “gas soot”). Then we apply the paint so as to roll it out with a roller over the entire surface of the plane. | Second stage: Roll out the printing ink with a roller so that the entire surface of the plate is covered with an even layer. Make sure you don't have too much paint on your plate. The paint layer should be thin and even. If you put a lot of paint on the plate, the paint will stick on the drawing and paper, and this is not desirable in our case. | Third stage: After you have covered the plate with an even layer of paint, you need to put clean paper (newspaper) under the plate. Why are we doing this? When we rolled out the paint on the plate, we stained the paper around the work, therefore, so as not to stain our clothes and hands while working on the drawing, we brought the work area clean again. Remember, the quality of work and accuracy of execution depend on how your workplace is organized. | Fourth stage: Printing paper is being prepared. Use thick paper, or use regular Whatman paper, a watercolor sheet or cardboard that is not too thick. We moisten thick paper under water so that it is wet on both sides and place it under a press to dry. Place a sheet of damp paper on both sides, either with the paper you use or in a cardboard folder, and press it down with something heavy. The printing paper should be prepared correctly and be slightly damp. Then such paper will not stick to the paint and shape. | Fifth stage: You need to take a sheet of paper so that it does not break or bend. Take a sheet of paper correctly, carefully by the corners or with special tweezers. Then carefully bring it to the mold and place it so as to fit the size of the plate. Under no circumstances should you adjust a piece of paper if you have not placed it correctly on the form. Better take it off and put it back on. |
| Sixth stage: We pick up a pencil and begin to draw the image we have in mind. Or you can prepare a drawing in advance, draw it on paper and only then apply it to the form. By form I mean the plate on which the paint is applied. You can use various devices when drawing a picture, such as a compass, fingers (applying penumbra), a needle, a nail, a ballpoint pen (helium), a nail and other materials. | Seventh stage: As you work, you can spy and monitor the process. You just need to do this carefully, bending the corner of the sheet so that your drawing does not shift or get dirty. We looked, if something is missing in the drawing, then you can easily correct it, clarify it, set the necessary effects and contrasts. | Eighth stage: Before removing the drawing from the form, look again at the clarifications in the drawing, maybe you forgot to draw something. If you are ready to see what you finally got, then we carefully take the corner of the sheet and slowly remove it from the plate with a hand movement and admire the result. Next, the print obtained during printing must be hung to dry, since printing or oil paint dries within 24 hours. | Ninth stage: Do not rush to part with the form on which you drew. There are two ways to go: the first is when you can re-roll the plate with paint, or maybe you want to change the black color to a colored one, please. Or the second option is to make a negative version with your resulting drawing on a plate, for this we need an etching printing press (I agree that not everyone has one at home - author's note). We take a mold with our pressed pattern, place it on the surface of the machine, cover it with paper, and then with felt and roll it once. Before this, you need to check the pressure in the machine - tighten some nuts. | Tenth stage: The resulting print from the form should be immediately hung up to dry, since the paint has not dried on the paper, you can stain the drawing by showing it, and then your work will be branded. Hang the print so that it does not interfere with anyone during further work. Good luck with your work! |
Third way.
This method requires the artist to draw with firm confidence, since corrections are impossible.
Take plastic or glass. Using a roller, apply an even layer of paint to the desired area or the entire surface of the sheet, having previously removed excess oil from the paint and placed it on newspaper for a while. All this is acquired through experience. If you are unsure that you can immediately draw and arrange your work on a sheet of paper, then before you put it on the paint, with light movements of a simple pencil you can outline the main composition and after that, without pressing, lower the sheet onto the paint-rolled surface . And then, you begin to draw what you have outlined, working with a pencil, a simple pen, a brush handle - it all depends on the thickness of the line you want to get.
It is advisable not to rest your hands on the paper. After completing your exercises on paper, carefully remove the sheet. Like any type of monotype, it can be modified and completed, already seeing what happens to it
Fourth way.
Pour water into the photo tray. Take printing inks, dilute them in different jars until liquid with gasoline or a special solvent. Then you take your brushes and, depending on your inner painterly state, splash paint onto the water, adjusting which color you need more or less of. And then the fun begins: mix the paints with a brush handle and see that unique pattern that you think is necessary. You need to work quickly, but carefully: place a sheet of paper on the water, and then only, as if in an arc, the second edge. And it must be removed in the same way: first one, and then the second one in an arc. Mixing paints in water creates amazing picturesque combinations, like in a kaleidoscope.
| First stage: For work we will need the following material: - white paper (whatman paper or watercolor sheet of paper) tinted paper, you can use different types of paper - printing or oil paints, - water bath — paint solvents: turpentine or gasoline - bristle brush - a cloth for wiping paint from brushes - palette for mixing colors | Second phase: Before starting work, make sure that you have prepared all the material for work. Squeeze the colors onto the palette where you will mix them. Use whatever colors you need to create a colorful effect on the water. It is enough to take a few colors, for example, the main ones. At this stage, you should have paper for impressions prepared. | Third stage: Next we get to work. We mix the desired color on the palette and use turpentine as water (solvents for oil paints), we try to take more solvent onto the brush so that all the paint flows from the brush onto the water and you will see an amazing effect on the water. A drop of paint spread on the surface of the water. We mix more color and lower it into the water and see another blur of color and continue until we achieve the desired effect. | We continue to be amazed by the play of color and watch the changes on the water. You can also use water splashes, but you need to do them carefully so as not to splash the table and clothes. | All work on creating colorful monotype masterpieces must take place in special rooms (workshops). Since solvents are not acceptable at home (smell and no ventilation), you can get poisoned. |
| Fourth stage: I draw your attention to how the colorful effect is created on a sheet of paper. You see in front of you a colorful play of colors on the water, take the paper and smoothly apply it to the surface of the water and make the following movements, starting with one corner clockwise and then counterclockwise and smoothly remove the sheet of paper from the surface and observe and admire the resulting effect. | Amazing images are created, unique, like in a kaleidoscope. | This photo shows the process of applying paper to the surface of the water and you see how the paper is painted into an amazing pattern (sometimes texture). It is noteworthy that this monotype technique allows you to make many prints and all of them will be unique and inimitable. | Fifth stage: Place the resulting print to dry, preferably under a press, so that the paper does not curl. | Sixth stage: When your work has dried, you can leave the resulting effect, or you can draw something additional, combining the resulting texture with your drawing. |
Fifth method Methods for extracting monotypes from space.
You paint a work of art with oil paints on canvas or cardboard. Then you apply paper, fabric or the same canvas - carefully, but maybe not very carefully. It all depends on your temperament. You press the paper, also using various pressing techniques. As experience shows, you can make up to three prints, and none of them will repeat the previous one. The result is very subtle picturesque things. Which can be completed on top of the monotype. But this will be a mixed technique.
| First stage: For work we will need the following material: - white paper (whatman paper or a watercolor sheet of paper) tinted paper, you can use different types of paper - oil paints, gouache or watercolor, - a jar for water - a bristle brush - a rag for wiping paint from brushes - palette for mixing colors | What is the next technique of the monotype technique? When we take a form as a base, for example: cardboard, plate, canvas, corrugated paper and other surfaces from which we can get an amazing effect (surface textures). What is the working principle? We paint a drawing in color onto the surface of rough cardboard or canvas and place a sheet of wet paper on top of the colorful drawing and press it slightly to the surface and get a delicate watercolor print, which can be finished on top with various art materials. | Here is a print made first on cardboard and then printed onto a wet sheet of watercolor sheet. What is the advantage of this monotype technique is that the print obtained in this way turns out to be delicate, watercolor, magical, mysterious and unpredictable, as if nature itself were working with the drawing. | This photo shows the process of applying a colorful design to the surface of cardboard. The material used is gouache paints. You can also use oil paints diluted with linseed oil. | It is important to use pure, open colors in your work. Work quickly and carefully. There should be nothing around you that interferes with your work. Upon completion of work, you need to clean up your work area and dry the resulting print. I wish you creative experiments! |
The sixth method is mixed technique.
When the created monotype is taken as a base and then modified with various other materials: oil pastel, dry pastel, acrylic, oil, tempera, textured pastes and so on……… Methods of extracting a monotype from space.
Well, once again I would like to say that the very beauty of monotype is that there is Divine unpredictability in it, which brings into the monotype this amazing feeling of expectation of a miracle! Albeit a small one, but still a miracle that makes the artist’s heart tremble with joy. The monotype process is probably the most exciting of all the activities!
Monotype will forever enter your creative life and bring many pleasant creative moments!
Good luck and new discoveries!
Mineev Ivan Alexandrovich.
right-brain drawing, intuitive painting, drawing and painting courses for everyone, drawing courses for adults, courses for artists, oil painting training, pastel drawing lessons, basics of drawing clothing models, pencil drawing portraits for beginners
Home
ll About us ll Services and prices ll Educational institutions ll News ll Reviews ll Contacts ll Interesting ll Artist’s advice
_____________________________________________________________________
Preparatory courses in drawing and painting invite everyone who wants to receive an artistic education or simply
learn to draw!
Painting training, painting courses, painting lessons, painting teachers, drawing, art school, artists training, art education, artist courses, drawing courses, drawing courses, drawing training, drawing training, drawing lessons, drawing lessons.
Drawing is your calling too!
Address: Index 192289, St. Petersburg, Nearest metro station “Spasskaya”, “Sennaya Square”, “Sadovaya” Voznesensky Prospekt, 36 (entrance in the arch)
Tel
Types of monotypy
Monotype is a multifaceted art form. The authors use various technical techniques that help to most accurately convey the artist’s idea.
There are several criteria that divide monotypy into types:
- Color solution: monotype can be monochrome or polychrome. Monochrome monotype is most often done with black printing or offset ink.
- Method of applying the design: the design is applied to a clean form or by removing paint residues from the base.
- Type of printing form: the design can be applied to wood, glass, plastic, metal.
- Type of print base: a print of a drawing can be made on canvas, cardboard, or paper.
- Art materials : watercolor, ink, oil, acrylic, etc. are used for drawing. [Very Important Lot, 2020].
Monotype is a great way to develop creativity for both adults and children. Today, several varieties of this image technique have appeared:
- Aquatype: the picture is applied with gouache, and then the areas free from paint are painted over with black ink. Next, the painted sheet must be dried and then placed in a container with water. Mascara does not dissolve in water, but gouache does not dissolve partially. The result is the original blurry image:
- Deotype: a sheet of paper is placed on a form with paint, and thin tracing paper is placed on top. A drawing is applied to the tracing paper using a pencil or any other object. As a result, the paint is imprinted unevenly on the paper and an interesting pattern is obtained:
- Negative monotype: to create it, a form with remnants of paint that was used in deotype is used. Unpainted areas are re-painted and a new print is made on paper:
- Aquagraphy: insoluble paint in liquid form is slowly added to a container of water. Colored pigments will form on the surface, which must be mixed with a brush, creating interesting patterns. Then a sheet of paper is placed in a container of colored water to make an imprint of the pattern, and it is carefully removed. By the way, this method of depicting a picture appeared in the 15th century. In Turkey and Persia, aquagraphy was called ebru (" cloud art "):
- Florotype: paint is applied to the form, and petals, flowers, leaves are laid out on top and covered with paper. an interesting imprint remains on the paper with the silhouettes of the objects used:
- Decalcomania: a colored design is transferred from paper under pressure to a fabric surface, ceramics or other canvas. This technique is most often used to print a decal:
- Blotography: this is one of the easiest techniques to create a monotype image. Anyone can handle it: watercolor or gouache is poured onto the center of a sheet of paper, and then the paper is tilted in different directions so that the paint spreads over the surface, forming colored streaks: [Very Important Lot, 2020].
It is no coincidence that monotype is classified as a non-traditional drawing technique. The methods for creating images are striking in their originality and at the same time simplicity. I just want to try to draw something like this using one of the methods described above. And you?
Monotype techniques
Drawing using the method in question has a long history. During this time, several different working techniques emerged.
Subject monotype
The simplest technique can be used as follows:
- The drawing is done on a sheet of paper.
- It is folded in half, forming a fold line.
- On one of the halves, paint half of a simple object, for example, a cube.
- The paper is then folded, creating a complete picture.
Landscape monotype
Older kids can create landscapes. In this case, they draw part of the image on half of the paper, fold it and get the full picture. Thus, in particular, it is convenient to draw a forest on the shore of a lake and its reflection in the water.
Winter landscape
Other monotype techniques
To perform the next technique, you must already have basic skills. In this case, a plastic sheet is used. Dark paint is applied to it. While it retains its moisture, the child moves a cotton swab over it. Then they apply a sheet of paper and get a picture drawn with light paint on a dark background.
Baby learns a new drawing technique
Another technique can be used when the drawing is made by applying dark paint to a light surface with a brush.
On a note! Another subject technique can be used. In this case, the sheet of paper is crumpled before drawing on it. As a result, new features will be added to the resulting print, allowing you to see the image with more texture.
Planning a walk in a preparatory group in winter
There is a non-standard use of this technique. Here the presentation is created in two stages:
- First, make a background image on a piece of paper.
- After the paint has dried, the child completes the drawing on it.
The work is done this way:
- You need to prepare a bowl of water, linseed oil, oil paint, a solvent for it and a brush that will be used for stirring. You need containers in which to mix the paint.
- For each desired color, this procedure is carried out separately. A little paint is poured into the jar, solvent and linseed oil are added. Then this mixture must be thoroughly stirred.
- The mixture is poured from the jars into a bowl of water. Linseed oil allows paints to float
- Use a brush to gently mix the liquid.
- Then a sheet of paper is placed under water and slowly raised. The paint drips off it, leaving beautiful and unexpected shapes.
- Then you need to wait until the paper dries.
On a note! Multi-colored stains will be visible on the sheet, which form unusual patterns or fantastic figures. The child can modify the drawing at his own discretion.
Monotype in psychology
Monotype is not just a drawing technique, because... today it is a type of art therapy that will be useful to absolutely everyone who needs to stabilize their psycho-emotional state. This method of psychotherapy has long been loved by psychologists, because, if used correctly, it will bring obvious benefits in the form of:
- relieving emotional stress;
- development of individuality;
- strengthening interpersonal connections;
- actualization of feelings;
- development of thinking, creativity;
- spontaneous self-expression [M. Kiseleva, 2007].
The most famous method of studying the psyche of an individual and its disorders using monotype is the psychodiagnostic text of Hermann Rorschach (“Rorschach’s Blots”).
The author of the test drew 10 blots of different colors and saturation, each image serves as a stimulus for free associations. According to Rorschach, what the subject sees in these images indicates his intellectual control and emotional state. For the purity of the study, the test taker must answer the following questions:
- What does he see in the picture?
- Where does he see this?
- Why does the ink blot evoke such associations in him?
Here is an example of one of the test images:
What do you see in the picture? This image evaluates a person's attitude towards other people. Most often, subjects answer that they see a moth, a butterfly, two people, or a person looking in the mirror.
If you see two people talking, then you have an active social life. If you feel like they are washing their hands, then you may not feel safe. And if it seems to you that two people are playing some kind of game, then most likely you are now subject to competition [B. Bely, 2005].
Monotype is especially useful for children. It plays an important role in studying the psychological state of the child and developing his creative skills. Many children love to draw with paints, so the process of creating a drawing using this technique fascinates them very much. Monotype contributes to:
- development of fine motor skills;
- stabilization of the emotional background;
- speech development;
- broadening the horizons of children;
- normalization of the nervous system;
- formation of perseverance, perseverance, attentiveness, etc. [M. Kiseleva, 2006].
To begin with, you can use a simple sheet of paper and paint: let the child draw what he can, and then, while the paint is still wet, cover the painted sheet of paper with a clean sheet. The end result will be a funny picture.
This kind of creative activity can be easily organized at home. In kindergartens, for this purpose, plexiglass or plastic boards are used, on which an image is applied with gouache or oil paints and then printed on paper. The resulting picture is complemented by a drawing with a brush or pencil.
Monotype is included in the curriculum of fine arts lessons. In elementary grades, children draw with their fingers or palms, while older students use other techniques and materials.
An interesting creative exercise “Frosty Patterns” is offered by psychologist Galina Elchaninova. To do this you will need sheets of paper, gouache, gel paints, threads, a plastic bag, and a tube. First, dip the brushes into jars of paint and apply spots on the bag. Next, put paper on it and press tightly. On the resulting print, before the paint has dried, we lay out patterns using thread, tubes, etc. The result is an improvised winter pattern.
This technique can reflect absolutely any theme, be it summer, spring, or just free creativity. The main thing is the absence of restrictions [G. Elchaninova, 2018].
Monotype is an excellent way to develop sensory-perceptual perception. Here is another exercise that psychologists recommend doing with children: you will need liquid gouache, water, paint cups, vegetable oil, flour, PVA glue, salt, cardboard, oilcloth.
To begin with, children make their own paint: mix 100-150 grams of flour, a tablespoon of vegetable oil, a pinch of salt, a tablespoon of glue and add water so that the consistency resembles sour cream. It is important that all components are mixed by hand. Next, the child’s favorite color is added to the resulting mixture.
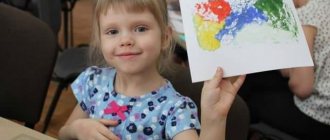
Ask children to comment on how they felt during the process. After this, give the task to paint with your hands on cardboard or a sheet of paper with the resulting paint. This can be individual or collective creativity.
Don’t be afraid to experiment with monotype: the more varied the activities, the more interesting they will be for children. an unusual execution of monotype in her book “Creative Workshop: 55 Master Classes for Little Explorers”: take paints, water, paper, soap and straws. Mix gouache and soap in water in a ratio of 1:2:2.
Invite your child to blow into a tube lowered into a glass of colored soapy water until a cloud of bubbles forms on the surface. Place the paper on the bubbles. It will be more interesting if there are several similar solutions and they are all of different colors [R. Dorley, 2016].
If you have any difficulties in conducting such creative activities, you can always turn to pedagogical materials for help. There are many notes on monotype on the Internet for teaching lessons to children of different ages.
Examples of drawings by preschoolers using the monotype technique with comments on how to complete the work
The butterfly is one of the most popular objects depicted using the monotype technique. Each work is unique. A variegated pattern distinguishes the butterfly in the “Beauty Butterfly” drawing; the outline of the silhouette is outlined with a felt-tip pen, which makes the drawing even brighter. “Moth” has a delicate, mysterious color in yellow and blue tones. The compositions “Sunny Butterfly” and “Blue Butterfly” are decorated with additional details: the sun, grass, flowers. The butterflies themselves here have an interesting wing shape. The butterfly in the drawing “Beautiful Butterfly” looks original and elegant: this effect occurs due to a combination of two unconventional techniques - monotype and leaf printing (the antennae are painted in with watercolors).
Photo gallery “Butterflies using monotype technique”
Watercolor drawing
Drawing with watercolors and felt-tip pen
Watercolor drawing
Watercolor drawing
Watercolor drawing
A combination of two unconventional techniques - monotype and leaf printing
Charming sea inhabitants that look like magical creatures are depicted in the drawing “Fish”. Let us note the very beautiful background of the composition; the seabed with algae is realistically and at the same time magically conveyed. A threatening looking fish is shown in the “Sawfish” picture. The drawing “Fish in an Aquarium” turned out to be unusual. Their color complements each other: red with white spots and vice versa white with red spots.
Photo gallery "Fish"
Watercolor drawing
Gouache drawing
Watercolor drawing
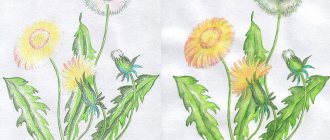
Using the monotype technique, very beautiful flower bouquets are obtained. A bright composition with yellow-red buds is presented in the picture “Bouquet for Mom”, and “Vase with Flowers”, on the contrary, is made in delicate pastel colors. A mysterious and mysterious plant is the work “Magic Flower”.
Photo gallery "Flowers"
Watercolor drawing
Watercolor drawing
Watercolor drawing
Landscape works made using the monotype technique are always fascinating. You can look at them for a very long time. Drawings with horizontal symmetry are, as a rule, trees reflected in a body of water (lake or river). In this regard, the compositions “Beautiful Trees”, “Forest over the River”, “Colors of Autumn” are interesting. Works with vertical symmetry are individual beautiful trees (drawings “Spreading Tree”, “Tree with Pears”. Also, the composition “Apple Orchard” looks charmingly summery - it amazes with its multicolored colors. Interesting variations on the winter theme are “New Year Tree" and " Winter miracle."
Photo gallery “Landscape compositions”
Watercolor drawing Watercolor drawing
Watercolor drawing
Watercolor drawing
Watercolor drawing
Watercolor drawing
Watercolor drawing
Watercolor drawing
Children's works by design are of great interest. A child’s imagination, combined with the monotype technique, sometimes creates the most unexpected and bizarre images. So, the “Pink Bull” looks mysterious, from which it emanates kindness. The drawing “Cheerful Sun” creates an anthropomorphic image of the sun with big eyes and a smile. The “Queen of Light” is charming and mysterious. And the “Running Bunny” differs from an ordinary animal with its vague, unusual figure. Cheerful twin sisters smile at us from the composition of the same name. And for some reason the “Merry Ducklings” turned away from each other.
Photo gallery “Fantasy motives”
Watercolor drawing
Watercolor drawing
Watercolor drawing
Watercolor drawing
Drawing with watercolors and felt-tip pen
Watercolor drawing
In the senior preschool level, children enjoy fantasizing about space themes. With the help of monotype, bizarre fantastic images of aliens are created - the inhabitants of Mars, Jupiter, Saturn. Children even come up with names for them and write them on the drawing. Let us note that all the creatures, each unusual in its own way, have a good-natured appearance, because the majority of children’s works are always positive.
Photo gallery "Space"
Watercolor drawing
Watercolor drawing
Drawing with watercolors and colored pencils
Watercolor drawing
Watercolor drawing
The more diverse and interesting the techniques and techniques of visual activity when working with preschoolers, the more the children’s artistic abilities develop. In this regard, monotype is truly a magical way of drawing. In the perception of children, it is similar to a fairy tale or a magic trick. The original technique allows the creative nature to reveal itself, which leads to the most unexpected results: the child will admire his drawing and want to draw again and again.
Let's start practicing
The advantage of monotype is that absolutely everyone can do it. To learn how to draw in this technique, you do not need to have an artistic education or a rich imagination; you just need to stock up on time and some tools, such as:
- Base: To start, you can use thick paper or cardboard. The main thing is that the surface is not saturated with paints. Glass, metal plates, and plastic surfaces are suitable as a base.
- Paints: It is best to use acrylic paints, because... they are distinguished by bright colors and dense texture, the images are more saturated and interesting, gouache is also suitable.
- Drawing supplies: usually paint is applied with brushes and a roller, and for drawing details, cotton swabs, tubes, toothpicks, pencils, in a word, anything that has a pointed end is suitable.
- Additional materials: to create more original images, you can use fabric as a base, and to add texture to the design - any available materials, twigs, leaves, etc.
One of the main principles of monotype is specularity. The drawing is obtained by imprinting paint from the base onto another surface or, in the simplest way, from one half of the paper to the other. Another important point - do not overdo it with the amount of paint, otherwise the drawing will resemble blots.
Monotype is a technique that allows you to create a unique print. It will not be possible to replicate a drawing: only one print can clearly convey the image. Despite its simplicity in execution, you should start with simple images and drawing techniques. There are several monotype techniques that you can easily handle:
- Subject monotype : using this technique, you can draw any object by symmetrically transferring an image from one half of a sheet of paper to the other. It's very simple: first we bend a sheet of paper in half, unfold it and draw on one side, for example, a tree trunk. Next, fold the paper in half again: the design is imprinted on the blank side of the sheet. This way you can finish drawing the leaves on the tree, the sky, the background, etc.
- Monotype “Butterfly” : on one part of a sheet of paper we draw colored spots, the outline resembling the wings of butterflies. We print the colored part of the sheet on the blank half. The result is a bright outline of the butterfly; the contours of the wings, patterns and antennae can be completed with a pencil.
- Landscape monotype : on one side of a sheet of paper we draw a landscape and print the drawing on the opposite side of the sheet. The resulting picture can be completed and made clearer and more organic. Look how beautiful the monotype on the theme “Spring” looks:
- Monotype “Flowers” : paint over a sheet of paper with white ink, draw stripes of pastel colors on top, and then use a wide brush to shade the colored lines with white paint. Make a vase of flowers the central figure of the image. You can choose shades according to your taste. Once the image is completely applied, wet another sheet of paper and press firmly onto the design. You will get a picture with original streaks [L. Savchuk, 2018].
You can execute this monotype using the previously described methods, by depicting part of the design on one side of the paper and simply printing it on the other.
Even a child can handle such techniques, but despite the simplicity of the process, both adults and children will enjoy creating an image. The main thing is to make prints before the paint dries.
If you are ready to experiment, in addition to the above-mentioned materials, use glass, rollers, and plastic. Apply paint to the glass with a roller or brush. If you want an interesting texture, use hard brushes. You can remove excess paint with a napkin and complete the missing details. Then, while the paint is still wet, cover the glass with a sheet of paper and go over it thoroughly with a roller. A few minutes of creative flight and the picture is ready.
There are many video tutorials and master classes that will help you quickly master this drawing technique. Look at this one for example :
If you have long wanted to learn how to draw, but until now you thought that only the gifted could do this activity, we advise you to take our online course “Drawing”, where you will learn how to create your own works of art and forever cast aside all doubts about your creative abilities. We recommend!
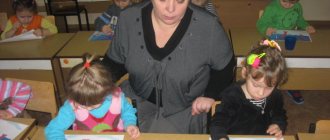
Drawing using the monotype method in kindergarten
Important! When using monotypic drawing, children produce drawings, each of which is unique.
These lessons can be included in the educational plan or organized as a circle.
You can start classes in kindergarten using the monotype drawing technique as early as the second junior group. At this age, children are asked to depict simple and well-known objects. Here are a few such examples:
- air balloons;
- cubes;
- fish;
- checkboxes.
Usually kids are asked to use a sheet of paper folded in half. First, make the design on one side, then fold it in half. The drawn image is printed on the other side.
On a note! Sometimes the design is applied so that it touches the fold line. After folding the page, a symmetrical image is obtained.
If it is difficult for a child to make a drawing, you can prepare a template for this.
Bouquet of flowers
At an older age, children are asked to draw more complex drawings. For creativity, watercolors or gouache are used. The first of them should not be diluted too much. In some preschool educational institutions, drawing classes are conducted using acrylic paints. However, in this case, you need to take into account that they dry quickly and cannot be washed off if you want to correct the drawing.
Mathematical notes of GCD in preparatory groups for Federal State Educational Standards
To conduct classes in kindergarten on creating images, you can use the following materials:
- sheets of thick paper or thick glossy paper;
- when teaching preschool children, you can use film;
- A plastic board is suitable for drawing;
- glass;
- You can use tiles.
Other options for performing the work are also possible.
Summarize
Monotype is one of the oldest forms of art, which has greatly transformed in our time and has found its application not only in creative fields, but also in psychology. This is a unique method of drawing that does not have any restrictions.
You can use all possible materials: paper, plastic, glass, metal and any available means; The main thing to remember is that speed and mood are important in this matter.
Monotype is compared to meditation, and it is not for nothing that this technique is widely used in art therapy. To master this type of creativity, no special preparation is required, and each of you will probably have the materials necessary for drawing at home.
This activity will be exciting for both adults and children, so don’t deny yourself the pleasure of plunging into the world of creativity. And, if you have long wanted to try yourself as an artist, we recommend starting with monotype, because it is fast, simple and very exciting.
We wish you creative inspiration!
We also recommend reading:
- Storytelling
- Lettering: freedom of speech for the artist
- A selection of useful materials about creativity and creativity development
- How to learn to understand works of art
- What is neurography and how is it useful?
- "The hands resist him." History of the pattern causing Stendhal syndrome
- 10 most famous artists
- Euler circles
- Neuroaesthetics: what is it and what does it do?
- Profession artist
- Lettering: art in letters
Keywords:1LLL
Creation technique
Monotype is a unique printing technique that has managed to combine the qualities of painting, printmaking and drawing. Its essence lies in applying paints to a flat surface and then imprinting the design on paper or other flat surface. The paintings always turn out different, in the future you can leave them as they are, or add various fragments to get a finished work.
This type of art can be mastered by children of primary preschool age without much difficulty. Give them the opportunity to draw different butterflies and flowers and have them “print” these images. Kids will be delighted with this creative process, but at the same time they will become familiar with this art and master the technique of working with brushes and paints. The main task is to awaken the imagination of kids. The “landscape monotype” technique is also suitable for this. With the help of prints, unique paintings and landscapes are obtained that help children develop:
- imagination;
- fine motor skills of hands;
- creative thinking;
- creative (artistic) abilities.
Interesting Facts
Artists from overseas have distinguished themselves by their practicality. American masters have turned monotype into a waste-free art. The paint that remains on the glass forms the original picture. It is framed and sold as a work of art. Monotype in its pure form is used quite rarely. It is often used in mixed media: various shapes and textures are combined on a printed picture, artists guess the desired shapes and paint them with a brush.
Today, monotype is not only a type of creativity, but also a special tool that is used in psychology and pedagogy. Such activities have a positive effect on the development of imagination and spatial thinking. This technique can have a beneficial effect on all family members. Children will be interested in working with a variety of colors and guessing the final result, while adults will be able to look deep into their souls and get to know themselves better.