“The use of different types of technology in artistic creativity” (from work experience) article
“The use of different types of technology in artistic creativity”
(from work experience)
The formation of a creative personality is one of the important tasks of pedagogical theory and practice at the present stage.
The use of different types of technology opens up opportunities for the development of children's creative abilities, imagination, and imagination. Only non-standard and unconventional creative techniques allow each child to more fully reveal their feelings and abilities. When using these techniques, the child learns not to be afraid to show his imagination, since they do not turn the child to a standard, do not introduce him into any framework.
Experience has shown that mastering non-traditional image techniques brings true joy to preschoolers if it is built taking into account the specifics of the children’s activity and age. They are happy to draw different patterns without experiencing any difficulties. Children boldly take on art materials; children are not afraid of their diversity and the prospect of independent choice. They take great pleasure in the process of doing it. Children are ready to repeat this or that action many times. And the better the movement turns out, the more pleasure they repeat it, as if demonstrating their success, and rejoice, attracting the attention of an adult to their achievements.
While working, I encountered a problem: children are afraid to draw because, as they think, they
They don’t know how, and they won’t succeed.
Of course, children’s visual arts skills are still poorly developed, formative
the movements are not formed enough. Children lack self-confidence, imagination,
independence.
An incentive to encourage children to be active, to make them believe that they can very easily become little artists and create miracles on paper. And it seems to me that in order to help children, the use of different types of technology in artistic creativity is what is needed.
Unusual materials and original techniques attract children because the word “No” is not present here, you can draw with whatever you want and how you want, and you can even come up with your own unusual technique. Children feel unforgettable, positive emotions, and by emotions one can judge the child’s mood, what makes him happy, what makes him sad.
Therefore, when organizing a subject-development environment, I took into account that the content was developmental in nature and aimed at developing the creativity of each child in accordance with his individual capabilities, accessible and appropriate to the age characteristics of children.
Conducting classes using non-traditional techniques:
- Helps relieve children's fears;
- Develops self-confidence;
- Develops spatial thinking;
- Teaches children to freely express their ideas;
- Encourages children to creative searches and solutions;
- Teaches children to work with a variety of materials;
- Develops a sense of composition, rhythm, color, color perception; a sense of texture and volume;
- Develops fine motor skills of the hands;
- Develops creativity, imagination and flight of fancy.
- While working, children receive aesthetic pleasure.
Visual activities using non-traditional materials and techniques contribute to the child’s development of:
- Fine motor skills and tactile perception;
- Spatial orientation on a sheet of paper, eye and
- perception, emotional responsiveness; visual perception;
- Attention and perseverance;
- Fine skills and abilities, observation, aesthetic perception, emotional responsiveness;
- In addition, in the process of this activity, the preschooler develops control and self-control skills.
The creative process is a real miracle. Watch children discover their unique
abilities and the joy that creation gives them. Here they begin to feel
benefits of creativity and believe that mistakes are just steps towards achieving a goal, and not an obstacle,
both in creativity and in all aspects of their lives. It is better to instill in children: “In creativity there is no
There is no right way, there is no wrong way, there is only your own way."
In many ways, the result of a child’s work depends on his interest, so in class it is important
activate the preschooler’s attention, motivate him to activity with the help of additional
incentives.
Such incentives could be:
- play, which is the main activity of children;
- a surprise moment - a favorite fairy tale or cartoon character comes to visit and invites the child to go on a trip;
- asking for help, because children will never refuse to help the weak, it is important for them to feel significant;
In addition, it is advisable to vividly and emotionally explain to the children the methods of action and show depiction techniques
There are many techniques of unconventional drawing, their unusualness lies in the fact that they
allow children to quickly achieve the desired result. For example, which child will
It’s not interesting to draw with your fingers, to make a drawing with your own palm, to put it on paper
blots and get a funny drawing. The child loves to quickly achieve results in his work.
Types of non-traditional drawing techniques:
Poking with a hard, semi-dry brush.
Materials: hard brush, gouache, paper of any color and format, or an embedded silhouette of a furry or prickly animal.
The child dips the brush into the gouache and hits the paper with it, holding it vertically. When working, the brush does not fall into the water. Thus, the entire sheet, outline or template is filled. The result is an imitation of the texture of a fluffy or prickly surface.
Drawing with cotton swabs.
Materials: Watercolor or gouache, sticks, water, paper, pencil.
Use a pencil to draw a drawing on paper. Take each new paint with a new stick. Fill in
dots first outline the drawing. Then fill the entire drawing with dots. Works performed
with cotton swabs, very similar to drawings made with separate strokes.
Finger painting.
Materials: bowls with gouache, thick paper of any color, small sheets, napkins.
The child dips his finger into the gouache and puts dots and spots on the paper. Each finger is painted with a different color. After work, wipe your fingers with a napkin, then wash off the gouache.
Palm drawings.
Materials: gouache or watercolor, brush, pencil, child’s palm, any paper.
With his fingers spread out, the child places his palm on a sheet of paper and traces it with a simple pencil. Using various lines, the child completes the required drawing. Then he colors the image with paints.
Leaf prints.
Materials: paper, leaves of various trees, gouache, brushes.
The child covers a piece of wood with paints of different colors, then applies the painted side to make a print. Each time a new sheet is taken. The petioles of the leaves can be painted on with a brush.
Printed with potato stamps.
Materials: a bowl or plastic box containing a stamp pad made of thin foam rubber impregnated with gouache, thick paper of any color and size, potato stamps.
The child presses the signet onto a stamp pad with paint and makes an impression on the paper. To obtain a different color, both the bowl and the signet are changed.
Imprint with cork.
Materials: a bowl or plastic box containing a stamp pad of thin foam rubber impregnated with gouache, thick paper of any color and size, cork seals.
The child presses the cork to the stamp pad with paint and makes an impression on the paper. To obtain a different color, both the bowl and the stopper are changed.
Foam imprint.
Materials: a bowl or plastic box containing a stamp pad made of thin foam rubber impregnated with gouache, thick paper of any color and size, pieces of foam rubber.
The child presses the signet onto a stamp pad with paint and makes an impression on the paper. To obtain a different color, both the bowl and the foam are changed.
Wax crayons + watercolor.
Materials: wax crayons, thick white paper, watercolor, brushes
A child draws with wax crayons on white paper. Then he paints the sheet with watercolors in one or more colors. The chalk drawing remains unpainted.
Drawing on crumpled paper.
Materials: crumpled paper, gouache, brush.
The child first crumples a sheet of paper, then smoothes it slightly and applies the image directly along the curves with a brush. The drawing turns out to be somewhat voluminous, as if protruding.
Drawing on wet paper.
Materials: wide bowl with water, paper, watercolor paints, brush.
The child wets the sheet with clean water and then paints the image with a brush. It looks like it's blurry in the rain or fog. If you need to draw details, then you need to wait a little until the drawing dries, or put thick paint on the brush.
Spray
Materials: paper, gouache, hard brush, toothpick.
The child puts paint on the brush and shakes it onto the paper, running a toothpick along the bristles of the brush. Splashes will fly onto the paper. Themes for drawing can be the following: “Napkin for mom”, “Golden autumn is spinning”, “Snowfall”, “Starry sky”. Spraying drops is also possible using a toothbrush and a toothbrush.
Landscape monotype.
Materials: paper, brushes, gouache or watercolor.
The child folds the sheet in half. On one half of the sheet a landscape is drawn, on the other half it is reflected in a lake or river (imprint). The landscape is done quickly so that the paints do not have time to dry. The original drawing, after a print is made from it, is enlivened with paints so that it differs more from the print.
Subject monotype.
Materials: thick paper of any color, brushes, gouache or watercolor.
The child folds a sheet of paper in half and on one half of it draws half of the depicted object (the objects are chosen to be symmetrical). After painting each part of the object while the paint is still wet, the sheet is folded in half again to make a print. The image can then be decorated by folding the sheet in the same way after drawing several decorations.
Blotography is normal.
Materials: paper, ink or thinly diluted gouache in a bowl, plastic spoon.
The child scoops up the gouache with a plastic spoon and pours it onto the paper. The result is spots in a random order. Then the sheet is covered with another sheet and pressed (you can bend the original sheet in half, drip ink onto one half, and cover it with the other). Next, the top sheet is removed, the image is examined, and it is determined what it looks like. The missing details are completed.
Blotography with a tube.
Materials: paper, ink or thinly diluted gouache in a bowl, plastic spoon.
The child scoops up gouache with a plastic spoon and pours it onto the sheet, making a small spot.
(a drop). Then blow on this stain from a tube so that its end does not touch either the stain or the paper.
If necessary, the procedure is repeated. The missing details are completed.
Drawing with soap bubbles.
Materials: shampoo, gouache, sheet of paper, cocktail tube, thin brush (felt pens).
The teacher pours shampoo into a jar of gouache, adds a little water, stirs everything well - the solution is ready. Inserts the straw into the glass. The child begins to blow into the tube until lush foam forms. Then the cup with foam is covered with a sheet of paper - an image is obtained. You can attach the sheet to cups with other gouache colors. When the image dries, the teacher offers to fill in the missing details.
Drawing with sand, cereals, salt, shells.
Materials: cardboard, glue brushes, pencil, PVA glue, clean sand (cereals, salt, shells)
The child prepares cardboard of the desired color, draws the required design with a simple pencil, then coats each item in turn with glue and carefully sprinkles it with a loose substance, pouring the excess onto a tray. If you need to add more volume, then this object is smeared with glue several times on the surface of the sand.
Scratch (translated from French “scrape, scratch”)
Materials: sheet of paper, candle, gouache, liquid soap, black ink, scratching sticks (you can use a knitting needle).
- Cover the entire sheet with any colored gouache (you can use several colors or colored cardboard)
- Rub the entire surface of the sheet with a candle.
- Cover with black mascara so that the mascara does not curl on the paraffin, add liquid soap to it (1 drop of soap per tablespoon of mascara)
Drawing together on a long strip of paper.
By the way, it is useful to change the paper format (i.e., give not only the standard). In this case, a long strip will help two people to draw without interfering with each other. You can draw isolated objects or scenes, i.e. work nearby. And then it is advisable to move on to collective drawing. Children agree on who will draw what to create one plot.
Drawing with a secret in three pairs of hands.
Take a rectangular sheet of paper and 3 pencils. They are distributed: who will draw first, who will draw second, who will draw third. The first one begins to draw, and then closes his drawing, folding the piece of paper at the top and leaving a little bit, some part, for continuation (the neck, for example). The second, seeing nothing but the neck, naturally continues with the torso, leaving only part of the legs visible. The third one finishes. Then the whole sheet of paper is opened - and it almost always turns out funny: from the mismatch of proportions and color schemes.
Non-traditional appliqué techniques
Broken applique
This method is good for conveying the texture of an image (fluffy chicken, curly cloud). In this case, we tear the paper into pieces and make an image from them. Children 5-7 years old can complicate the technique: not just tear pieces of paper as best they can, but pluck or tear off the outline drawing. Cutting appliqué is very useful for developing fine motor skills and creative thinking.
Overlay applique
This technique allows you to obtain a multi-color image. We conceive an image and consistently create it, overlaying and gluing parts in layers so that each subsequent detail is smaller in size than the previous one.
Modular application (mosaic)
With this technique, an image is created by gluing many identical shapes. Cut out circles, squares, triangles, or simply torn pieces of paper can be used as the basis for a modular applique.
Symmetrical applique
For symmetrical images, fold the blank - a square or rectangle of paper of the required size - in half, hold it by the fold, and cut out half of the image.
Ribbon applique
This method allows you to get not one or two, but many identical images, scattered or interconnected. To make a ribbon applique, you need to take a wide sheet of paper, fold it like an accordion and cut out the image. Using ribbon appliqué, we get a real garland from the desired image.
Silhouette applique
This method is accessible to children who are good with scissors. They will be able to cut out complex silhouettes using a drawn or imaginary outline.
“Plasticineography - an unconventional modeling technique for preschoolers”
Plasticineography is an unconventional modeling technique, which is expressed in “drawing” with plasticine more or less convex in volume (bas-relief) images on a horizontal surface.
Material for work: plasticine; colored cardboard; markers; ballpoint pen refills; stack; photo frames
Direct plasticineography
in which the stucco image is built on a flat surface. When making a painting, you must first roll out three-dimensional shapes, for example, koloboks, sausages, then arrange them along the contour and flatten them in accordance with the plan, attaching the parts well.
Children easily master this technique as early as two to three years of age. They are offered a simple drawing without small details, at the initial stage with a ready-made base. Older guys create more complex compositions. They independently prepare the base, make a contour, which is gradually filled with softened plasticine.
Reverse plasticineography (stained glass)
involves drawing from the reverse side of the base. To do this, it must be transparent, for example, plastic or plexiglass. The drawing is drawn up on the base with a marker, and then its elements are filled with plasticine. Pieces of plasticine of the required size and color are selected into the image, softened, and then smeared onto a transparent base. To get a thin, neat layer, you can smear it with your fingers or a stick, carefully pressing the plasticine to the surface.
Modular plasticineography
belongs to a complex technique and requires preschool children to be able to master all modeling techniques. Then you get a stucco picture consisting of various decorative elements: balls, cakes, cylinders, braids and other technical elements.
Mosaic plasticineography –
a technique loved by children, since the image is made only from plasticine balls. A fairly simple technique is available to children of all ages. The main thing is to select the appropriate colors and carefully fill the contour space with elements without going beyond its boundaries. The working method consists of rolling small balls, placing them on a base and pressing them against it.
Contour plasticineography –
involves sculpting an object along its contour. The step-by-step steps of the action will be as follows: first, a drawing is applied to the base with a marker, then an outline is laid out using thin rolled flagella, the image is filled with flagella of the corresponding color. Teachers advise using a large syringe without a needle, into which plasticine is placed, then the syringe is placed in hot water to soften. In this way, you can get beautiful, even flagella.
Multilayer plasticineography –
represents layers of plasticine sequentially applied to the base. A similar technique is necessary for landscapes: images of forests, water, fields, when you need to select not only the main colors, but also their shades. This kind of work is quite difficult for small preschool children, and it is appropriate to do it only with older children. The working method is as follows: different colors of plasticine are selected, from which thin cakes are made. Then the blanks are placed on top of each other in the form of a multi-layer cake in accordance with the pattern.
Textured plasticineography –
the most complex technique, as it involves the production of a three-dimensional image. In it one can distinguish bas-relief (French bas-relief - low relief, the volume of the picture is less than half), high relief (protruding more than half) and counter-relief (Latin contra - against and relief, in-depth picture). To get such paintings, you can use a special roller with an image printed on it. In stores you can purchase ready-made templates for this technique.
Each of these techniques is a little game. Their use allows children to feel bolder, more spontaneous, develops imagination, and gives complete freedom for self-expression. There lives an artist and poet in each of us, but we don’t even know about it, or rather, we have forgotten. Remember the parable of the “buried talents”. But indeed, many “bury” their talent in the ground, unable to reveal themselves. This is how “undiscovered talents” walk the streets and live everyday lives. You need to remember a simple rule - there are no untalented children, there are undiscovered children. And we, adults, must help reveal these talents!
As V.A. said Sukhomlinsky: “The origins of children’s abilities and talents are at their fingertips. From the fingers, figuratively speaking, come the finest threads-rivulets, which are fed by the source of creative thought. In other words, the more skill in a child’s hand, the smarter the child.”
Consultation “Non-traditional drawing methods”
Nakhusheva Maryana Arsenovna
Consultation “Non-traditional drawing methods”
Appendix No. 9
Municipal government educational institution “Secondary school of the village. Zolskoe village
Consultation
«Unconventional drawing methods»
/at the workshop/
Developed by the teacher:
Nakhusheva M. A.
Non-traditional drawing techniques in the development of preschool children
Preschool age is a sensitive period for the development of productive activities in children: drawing , modeling, applique and design . In them, the baby can express his attitude to the world around him, develop creative abilities, as well as oral speech and logical thinking.
Children's fine art is a world of bright, amazing images. It often amazes adults with its spontaneity, originality, and wild imagination. Preschoolers draw a lot and with great desire. Children are very inquisitive, their interests go beyond the family and kindergarten, the world around them attracts them. Through productive activities, children develop a stable interest in visual arts and develop their abilities.
In our time, the comprehensive education of a new person and the further increase in his creative activity are of paramount importance. Therefore, it is necessary to develop a sense of beauty, to form high aesthetic tastes, the ability to understand and appreciate works of art, the beauty and richness of our native nature.
We successfully used the method of introducing children to the visual activities of T. S. Komarova, but during the classes we were always struck by the monotony of the techniques proposed for depicting an image, so children happily draw with their fingers, plasticine, etc.
Having studied the works of various authors, such as G. B. Kibisheva, the “Inspiration”
, I. A. Lykova - “
Methodological manual for specialists of preschool educational institutions”, T. N. Doronova - “Nature, art and visual activities of children”
R. G. Kazakova
“Art activities in kindergarten”
we found a lot of interesting ideas and set themselves the following tasks:
drawing skills in children .
-Introduce children to various non-traditional drawing techniques .
-Teach you how to create your own unique image using various drawing .
In the artistic and aesthetic development of children, what is important is the ability to perceive a work of art and independently create an expressive image that is distinguished by originality and independence.
Children develop correct technical skills and abilities gradually, from lesson to lesson. As a result of a thoughtful process of learning to draw , children master the correct methods not through dry exercises, but by solving a variety of visual problems that are interesting to them.
The technical side of visual activity is subordinated to the task of creating an expressive image in a drawing. It is this goal that determines the choice of this or that material for drawing . When thinking through the lesson, I select the material in which the image of the object can be particularly expressive, interesting, beautiful, and will give children aesthetic pleasure. But this will be possible only if they well master the visual and expressive capabilities of each material.
For drawing in kindergarten, you can imagine various materials: simple and colored pencils; watercolor and gouache paints; wax crayons; markers; watercolor crayons; pastel; coal; sanguine; plasticine and ink. In the practice of teaching children visual arts, we widely use a variety of materials, and we are convinced that children like novelty. They draw with great interest even with a simple graphite pencil, using different pressures to convey the shadows of the subject.
Gradually, as children master the skills of working with various materials, we try to lead them to a conscious choice of material to create their image. A very important point here is that the child shows independence and gets the opportunity to draw with the material that he likes best. When at the end of the lesson the child sees his drawing among other works, he will notice the variety of technical solutions to the images. Then in the next lesson his choice may be different. The child must feel the possibility of choice. This contributes to the development of his creativity. It is very important that mastery of technical skills and abilities allows children to depict the world in all its diversity.
In my work for several years I have been widely using various types of non-traditional drawing techniques .
"Palette fingers"
–
finger painting .
Don't have a brush at hand? No problem! Let's dip one finger in red paint, another in blue, a third in yellow... What a palette.
This is not a complicated, but very interesting technique that children of all ages will really enjoy. They draw with great pleasure.
^ Learning to finger draw takes place in several stages.
First, children draw with one finger, then with several. At this stage, acquaintance with color, shape, rhythm and position in space occurs. We decorate butterflies, fish and a clearing with elements such as dots, strokes, and spirals.
At the second stage, children learn to mix paints. Each finger is dipped in different paints and colors are applied on color. By mixing colors, children achieve the desired shade. For example, with the children of the middle group we drew a “fluffy bear”
.
By the preparatory group, children are already fluent in the “finger technique”
and they themselves come up with themes for
drawing , using in the plot such techniques as poking, smearing, mixing paints. the “finger
method, ” children
drew scenes for Aksakov’s fairy tale “The Scarlet Flower
. The work turned out to be very successful.
^ The next technique is palm drawing .
This method very well develops the creativity of children of primary preschool age. They not only see the paint, but also feel it.
The next non-traditional form of learning that I use in my work is line drawing .
With the help of a stroke, you can tell about the nature of the object, the properties of the material, convey not only lightness, softness, smoothness, but also heaviness, gloominess, sharpness, aggressiveness and, most importantly, reveal the image of the hero, his attitude to the environment. Also, drawing with a line very well prepares the hand for writing. From the middle group, children draw on the topic: “Chicken”
and
"Cockerel with his family"
.
This is not a complicated and quite expressive method of drawing , in particular animals, allowing you to convey their characteristic features using various types of shading.
From the analysis of children's works, we can conclude that not all children are able to control the amplitude of vibrations of their hand. The strokes are of different sizes, sometimes with little pressure on the pencil. Therefore, we recommend that teachers with children exercise their hand more often in their free time to strengthen their shading skills.
Another very interesting technique is drawing on damp paper . This technique is used in working with children of older preschool age.
Painting with watercolors is more difficult than with gouache, but it is very interesting. draw with it on white paper, diluting the paint with water. The more water, the more transparent the color of the paints. The works turn out to be very delicate and elegant. Children especially like “Sea” using this technique.
, both in calm and quiet weather, and in a storm.
^ Drawing with wax crayons , candles and watercolors.
This method has long been used by folk craftswomen when painting Easter eggs. Using this technique we painted on the theme “Vologda lace”
.
We also use such a new drawing as scratching.
Interesting classes were held using this technique on the topic: “Winter Forest”
,
“A Walk in the Park”
,
“Night Tales”
.
^ Brushstroke painting.
Children really like to paint The work turns out rich and interesting. Not all children get the right smear. For some it is very long, for others it just looks like a dip. to draw more in your free time on the following topics: “Weed”
,
“Herringbone”
, etc.
Very interesting are such drawing as monotype and diotype (signet technique)
.
This method helps develop fantasy, imagination, sense of color and shape. With the children we drew “City in Rainy Weather”
,
"Trees reflected in the river"
.
The children drew with pleasure ; they were interested in how one half of the drawing turns into a whole drawing, and even a painting.
The children also liked such techniques as batik - painting on fabric, stylization - obeying certain rules. This is a very difficult, but interesting job that contributes to the development of creativity in children. The children and I painted “Willow in a Vase”
. The children performed well; each of their works was unique. They showed the boundlessness of children's creativity.
Another unconventional technique is spraying . This is not a very simple technique. Its essence is to splash drops of paint. To implement it, we use a toothbrush and a toothbrush. Drawings on the topic: “Snowfall”
,
"Leaf Fall"
. This is a complex technique, and children do not master it right away, but despite this, the work brings satisfaction.
^ Drawing with plasticine . This technique requires perseverance, patience and the desire to complete the job. With the children of the older group we drew “Swan Lake”
,
“Parrot”
, and with the children of the preparatory group they held a creative lesson on the topic
“Fairy Tales of A.S. Pushkin”
.
We also use other non-traditional drawing techniques :
— chalk drawing;
— drawing with charcoal and sanguine;
— drawing using natural materials;
- African painting;
- drawing with a poke (hard brush)
;
— drawing with semolina;
— drawing with threads.
We can confidently say that a variety of techniques contributes to the expressiveness of images in children's works.
Experience has shown that mastering image techniques brings true joy to children if it is built taking into account the specifics of the activity and age of the children. They happily cover one sheet of paper after another with spots, strokes, and strokes, depicting either autumn leaves swirling in the air or snowflakes smoothly falling to the ground. Children boldly take on art materials; children are not afraid of their diversity and the prospect of independent choice. They take great pleasure in the process of doing it. Children are ready to repeat this or that action many times. And the better the movement turns out, the more pleasure they repeat it, as if demonstrating their success, and rejoice, attracting the attention of an adult to their achievements.
Literature
Greek V.A. I draw with strokes. – Mn.: Skaryna, 1992.
Zelenina E. L. Play, crawl, draw: Book. For teachers and parents. – M.: Education, 1996.
Komarova T. S. Visual activities: Teaching children technical skills and abilities. //Preschool education, 1991, No. 2.
Komarova T.S. As much variety as possible. //Preschool education, 1991, No. 9.
Kosminskaya V. B., Khalezova N. B. Fundamentals of fine arts and methods of guiding children’s visual activities: Lab. workshop Textbook A manual for pedagogical students. Institute for specialties No. 2110 “Pedagogy and psychology (preschool)
" – 2nd ed., revised. – M.: Education, 1987.
Lykova I. A. Visual activities in kindergarten: planning, lesson notes , methodological recommendations . – M.: “KARAPUZ-DIDACTICS”
, 2007.
Mosin I.G. Drawing : Textbook. a manual for teachers, educators and parents. –Ekaterinburg: U-Factoria, 1996.
Theory and methodology of visual activity in kindergarten: Textbook. manual for pedagogical students. Institute for specialties No. 2110 “Pedagogy and psychology (preschool)
" /IN. B. Kosminskaya, E. I. Vasilyeva, R. G. Kazakova and others - 2nd ed., revised. and additional – M.: Education, 1985.
Trofimova M.V., Tarabarina T.I. Both study and play: Fine arts. A popular guide for parents and teachers. – Yaroslavl: Academy of Development, 1997.
Artistic creativity in kindergarten: A manual for teachers and music directors. Ed. N. A. Vetlugina. – M.: Education, 1974.
Classics in an unconventional interpretation
Let's put away the stamps and salt, wipe off our paint-stained pens, and get out the watercolors and brushes. Boring? It’s not boring at all, but very interesting, because with the help of classic watercolor paints we will create miracles!
You need to take thick paper (the best option is special watercolor paper) and wet it until it is sufficiently wet. Put a little paint on the brush and lightly touch the brush to the wet paper. The movements should be light and smooth, the beauty of the result depends on this. Before your eyes, a drop of paint spreads in different directions, turning into something amazing! It's a good time to tell your child about the rules for getting new colors and shades. Now this practice is most obvious. The resulting unimaginable divorces will serve as an interesting backdrop for future creative works.
The next unconventional drawing technique that we will consider, also from the category of “miracles nearby”, is called “Aquatype”.
This is a technique of painting with paints and water, also known as water printing. Just as in the previous method, we will need thick paper, we will choose no less traditional paints - gouache, we also need black or any dark ink. Think with your child, what would he like to portray? This method produces unusually beautiful flowers. After the paints have dried, paint over the entire sheet of paper with ink, then immerse your work in a bowl of water and enjoy the wonderful transformations! The gouache will all dissolve, leaving only your drawing on a dark background. Why isn't it magic?
The series of incredible transformations is not over! Let's take the same thick paper and use wax crayons (if you don't have them at hand, you can use an ordinary candle) apply a drawing or pattern. Next, apply watercolor paint to the entire sheet (the areas treated with wax will not be painted). A drawing will appear on a colored watercolor background, which will be a surprise for the baby, because when you draw with colorless chalk on a white sheet, it is quite difficult to imagine the end result. The process of magic can also ultimately bring quite a practical result.
Making “marble paper” is an extremely exciting activity that kids really like: it’s fun to play with things that are not allowed to be taken at all. For example, dad's shaving foam. To work you will need:
- shaving foam;
- watercolor paints;
- flat plate;
- sheet of thick paper.
First you need to get a saturated solution: mix the paint with water. Then apply a thick layer of shaving foam to the plate, and add a few bright drops of paint in a chaotic manner. Using a brush, we paint drops of paint on the foam, creating intricate zigzags and patterns. Here it is - a magical mystery that will completely absorb an enthusiastic child. And here is the promised practical effect. We apply the sheet to the rainbow foam, and then turn it over so that the foam is on top of the sheet. We remove the remaining foam on the paper with a scraper. And - lo and behold! Unimaginable stains appear from under the foam, similar to a marble pattern. The paper has absorbed the paint. After drying, “marble paper” can be used in making crafts or as an addition to decoration.
From a very early age, children try to reflect their impressions of the world around them in their visual arts. Drawing in unconventional ways is a fun, mesmerizing activity that surprises and delights children. Unconventional drawing is used at an early age so that the child draws quickly, because it is still difficult for him to show perseverance. And for older children, unconventional drawing is a way to express creativity. Since for an older child the result is already important, so that the drawing is bright, beautiful and reflects all the events. This is a huge opportunity for children to think, try, search, experiment, and most importantly, express themselves. Conducting classes using non-traditional techniques
- Helps relieve children's fears;
- Develops self-confidence;
- Develops spatial thinking;
- Teaches children to freely express their ideas;
- Encourages children to creative searches and solutions;
- Teaches children to work with a variety of materials;
- Develops a sense of composition, rhythm, color, color perception; a sense of texture and volume;
- Develops fine motor skills of the hands;
- Develops creativity, imagination and flight of fancy.
- While working, children receive aesthetic pleasure.
There are many non-traditional drawing techniques; their unusualness lies in the fact that they allow children to quickly achieve the desired result. For example, what child would not be interested in drawing with his fingers, making a drawing with his own palm, putting blots on paper and getting a funny drawing. The child loves to quickly achieve results in his work.
With children of primary preschool age it is recommended to use:
- finger painting;
- stamped with potato stamps;
- palm painting;
- tamping.
Children of middle preschool age can be introduced to more complex techniques:
- poke with a hard semi-dry brush.
- foam printing;
- cork printing;
- wax crayons + watercolor;
- candle + watercolor;
- leaf prints;
- palm drawings;
- drawing with cotton swabs;
- magic ropes.
And in older preschool age, children can master even more difficult methods and techniques:
- sand painting;
- drawing with soap bubbles;
- drawing with crumpled paper;
- blotography with a tube;
- landscape monotype;
- stencil printing;
- subject monotype;
- ordinary blotography;
- plasticineography.
Each of these techniques is a little game. Their use allows children to feel more relaxed, bolder, more spontaneous, develops imagination, and gives complete freedom for self-expression.
Finger painting – happening.
It is better to introduce children to non-traditional drawing techniques with finger painting - this is the easiest way to obtain an image. At an early age, many children are just learning to use artistic instruments, and therefore it is easier for children to control the movements of their own fingers than a pencil or brush. Each finger-brush has its own paint. You can draw with dots, spots, streaks - and it will snow on the street, and smoke will come out of the chimneys, and what a bunch of grapes, just a sight for sore eyes.
Children really enjoy drawing with their hands. We dip the child’s palm in paint, and the child makes an imprint on the paper with it, then we complement the drawing with fingerprints, and we get a giraffe; we press our palm to the post and draw dots with our fingers - we get an autumn forest. And if you decorate your palm in different colors, you can get funny octopuses, or a cheerful sun and a beautiful butterfly.
Printed with potato stamps.
This technique allows you to repeatedly depict the same object, making a wide variety of compositions from its prints. The child presses the signet onto a pad of paint and makes an impression on a sheet of paper. You can use half an apple.
“Tamping” technique
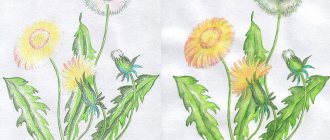
We use this technique from an early age. We give a foam rubber swab and, dipping it in paint, the children create images. The results are light, airy clouds, fluffy dandelions.
Stenciling with a tampon.
The child applies the stencil to the paper, dips the foam rubber in the paint and dab the foam rubber over the stencil, then carefully removes the stencil, if necessary, repeating the procedure after the paint has dried.
Foam drawings.
For some reason, we all tend to think that if we paint with paints, then we must also use a brush. Not always, foam rubber can come to the rescue. We advise you to make a variety of small geometric figures out of it, and then attach them with thin wire to a stick or pencil (not sharpened). The tool is already ready. Now you can dip it in paint and use stamps to draw red triangles, yellow circles, green squares (all foam rubber, unlike cotton wool, washes well). At first, children will draw geometric shapes chaotically. And then offer to make simple ornaments out of them - first from one type of figure, then from two, three.
Poking with a hard, semi-dry brush.
Means of expression: texture of color, color. Materials: hard brush, gouache, paper of any color and format, or a cut out silhouette of a furry or prickly animal. Method of obtaining an image: the child dips a brush into the gouache and hits the paper with it, holding it vertically. When working, the brush does not fall into the water. In this way, the entire sheet, outline or template is filled. The result is an imitation of the texture of a fluffy or prickly surface.
Wax crayons + watercolor.
Means of expression: color, line, spot, texture. Materials: wax crayons, thick white paper, watercolor, brushes. Method of obtaining an image: the child draws with wax crayons on white paper. Then he paints the sheet with watercolors in one or more colors. The chalk drawing remains unpainted.
Drawing with a candle.
Children really like to draw with a candle. By drawing invisible strokes or putting dots, and then applying paint to the sheet, you can see rain or waves on the sheet, patterns on the window.
“Monodrinking” technique
This technique is the most common. Having folded a sheet of paper in half, apply a few drops of liquid paint to one part of the sheet, cover with the other half of the sheet, unfold it, you will see unusual patterns. You can see flowers, clouds, and a fox in them. If you draw a butterfly with folded wings on one side and cover the image with the other half, you can see that the butterfly spread its wings and flew. Using these techniques, it is easy to explain the law of symmetry to children.
Diapitiya technique
Using a swab or paint, apply a light coat of paint to the smooth surface of the cardboard. Place a sheet of paper on top and invite the child to draw something with a pencil, trying not to press too hard on the paper. On the side that was pressed to the cardboard, a print is obtained - a mirror image of the design with an interesting texture and colored background.
Technique of drawing on a wet sheet
How to properly wet a drawing sheet
This is the most important thing in the technique of drawing on a wet sheet. You need to find a middle ground: a sheet that is too dry will not allow the paint to flow beautifully. If there is too much water, the paint will spread all over the sheet and the drawing will not work out.
Paint on a wet sheet with light touches with the tip of a brush. When you touch a wet sheet with a paint brush, the paint should spread approximately 1-2 centimeters in diameter around the brush.
If the paint doesn't flow, it means you haven't wetted the sheet enough. If the paint spreads very shapelessly, it means there is too much water. Excess water can be removed with a dry brush or sponge.
Drawings whose theme is somehow related to water are very plausible: fish in a pond or aquarium, the sea, clouds with rain. The flowers look very alive.
You can only draw a background for a future drawing on a wet sheet. Or you can use a stencil to draw a figure (for example, an animal) and make the background wet only around this figure.
Learning to make a background. Usually children draw on white paper. This way you can see it more clearly. It's faster that way. But some subjects require a background. And, I must say, all children’s works look better against a background made in advance. Many children make the background with a brush, and an ordinary, small one. Although there is a simple and reliable way: to make a background with cotton wool or a piece of foam rubber dipped in water and paint. You can make a background at the end of the work with wax crayons.
“Blotography” technique
Games with blots (blotography) develop the imagination well. The child scoops up the gouache with a plastic spoon and pours it onto the paper. The result is spots in a random order. The sheet is then covered with another sheet and pressed. Children look at the image and determine: “What does this look like? "
Technique "Thread writing"
This technique causes great delight in children. You will need cotton threads, a set of diluted gouache or watercolor paints that need to be stirred from time to time, and paper. Cut the threads so that it is convenient for children to work with them, 10-15 cm, dip the thread in the paint so that it is saturated. Holding it by the tip, carefully place it on a sheet of paper and cover it with another sheet so that the tip of the thread protrudes. Hold the top sheet and pull the thread. It turned out to be a very beautiful image.
Nitography method.
This method exists mainly for girls. But this does not mean that it is not suitable for children of a different gender. And it consists in the following. First, a screen measuring 25x25 cm is made from cardboard. Either velvet paper or plain flannel is glued onto the cardboard. It would be nice to prepare a cute bag with a set of woolen or half-woolen threads of various colors for the screen. This method is based on the following feature: threads with a certain percentage of wool are attracted to flannel or velvet paper. You just need to attach them with light movements of your index finger. From such threads you can prepare interesting stories. Imagination and sense of taste develop. Girls especially learn to skillfully select colors. Some thread colors suit light flannel, and completely different ones suit dark flannel. Thus begins the gradual path to women’s craft, a very necessary handicraft for them.
Drawing with postcards.
In fact, almost every home has a ton of old postcards. Go through old postcards with your children, teach them to cut out the necessary images and paste them into place, into the plot. A bright factory image of objects and phenomena will give even the simplest unpretentious drawing a completely artistic design. Can a three-, four-, or even five-year-old child draw a dog and a beetle? No. But he will add sun and rain to the dog and the bug and will be very happy. Or if, together with the children, you cut out a fairy-tale house with a grandmother in the window from a postcard and paste it on, then the preschooler, relying on his imagination, knowledge of fairy tales and visual skills, will undoubtedly add something to it
Technique for drawing with semolina.
A drawing is drawn on a sheet of paper with a pencil (or ready-made coloring pages are taken). Then, one by one, the elements of the pattern are coated with glue and covered with semolina. Let it dry, shake off excess grains. When the drawing is dry, paint it with gouache.
Spray technique -
The “spray” technique is the spraying of drops, which in kindergarten can be done with a toothbrush, a ruler, and a comb. Use a toothbrush to pick up paint and draw a ruler along the surface of the brush towards you. Themes for drawing can be absolutely anything. For example, on a sheet of paper we place a composition of dry plants. We attach a vase stencil and a butterfly stencil. Turn the toothbrush away from you (bristles up) and start “combing” it with a ruler, moving from bottom to top. Don’t be afraid to get splashed; if you perform all the steps correctly, splashes of paint and water will fly onto your work. Splash the created composition along the contour, choose darker and more saturated colors for this (burgundy, red, dark green).
You can draw snow like this.
Finger painting using sand.
Very interesting work that children do with pleasure! The lesson takes place in two stages: - at the first stage, we prepare a sheet of paper (preferably large format) for further drawing - apply glue to the entire surface and sprinkle evenly with sand (prepared and well sifted) After this, let the glue dry! After the glue has dried, you need to remove excess sand - just carefully blow it off). After completing the first stage, we proceed to the second - directly to drawing! Invite the children to use their fingers to draw an autumn tree using a variety of colors on the sandy surface of a leaf.
Sawdust painting technique.
This method is simple and accessible to almost every child. . A drawing is applied to the surface of the product with a pencil (or ready-made coloring books are taken).
Then, one by one, the elements of the design are coated with glue and covered with colored sawdust. The best wood is birch and aspen, the sawdust should be white. If it is not possible to prepare birch or aspen sawdust, then softwood sawdust will do. The harvested sawdust is dried and sifted through a fine sieve. Raw sawdust sifts very poorly. After this, the prepared material is painted over. We use gouache paints. The paints are diluted with water in the required concentration. The amount of water is determined experimentally. The more water, the paler the coloring material will be, therefore, the color saturation of the sawdust itself will change. The prepared sawdust is poured into gauze, tied (not tightly) and filled with coloring solutions (stir thoroughly). For better impregnation, leave the sawdust in the solution for a day (stirring occasionally, then untie the gauze, put it on film and dry it near the radiator. Store the painted and dried sawdust in plastic containers.
Frottage technique
Another interesting technique for creating small masterpieces. The word "frottage" comes from the French frotter - "to rub, rub". As children, we all transferred coins onto paper, placing it under a piece of notebook paper and coloring it on top with a pencil! This, it turns out, is frotage.
The frotage technique consists of placing some kind of relief object under a piece of paper and painting it over with pastels, a couple of minutes - and the DIY craft is ready! The main task is to find a relief that will look interesting on paper. And choose the colors, of course.
Drawing technique - drawing with a rope
For the second year now, I have been using an unconventional technique in my work—drawing with a rope. Children learn to draw not only with pencils and paints, but also with colored strings. First, simple patterns and loops are laid out with rope, and then they move on to more complex objects. Each lesson is accompanied by a fairy tale corresponding to the topic. These classes use: poems, riddles, finger gymnastics, physical education minutes. Children really enjoy these activities, they feel joy and are proud of their work. They develop fine motor skills, prepare their hands for writing, develop their imagination, and strengthen their drawing skills.
Drawing with an eraser
Use a simple pencil to shade the entire sheet. Then we take an eraser, mark the center of the flower and erase the petals with the eraser and so we draw the whole bouquet. When you have finished “drawing” with the eraser, you can paint the yellow center and green leaves of the chamomile with paints.
“We draw with little balls.”
To work, you need to prepare album sheets, HONEY watercolor paints, brush No. 5-6, water and cellophane bags, previously cut lengthwise and crosswise.
The only thing you must never tire of asking your children to do is to work quickly with the brush and not let the paints dry on the paper. If, nevertheless, the paints applied first have had time to dry, help moisten them with water.
Quickly apply watercolor to the sheet. Apply cellophane to the center of the design, moisten your fingertips with water and GENTLE rotating movements create bag wrinkles on the paper. We direct the rotation of the fingers in any direction. The bag sticks to the paper with paint, and water and watercolor collect in the wrinkles. The paper will lighten in these places. Let the paper dry, do not rush to remove the bag. after a while we remove the bag and see what happens. You have a set of sheets with fancy patterns. This is an excellent background for drawings, an exclusive material for applique, for snowflakes, autumn leaves, letters, etc.
Imprint technique
Imprint with leaf prints.
It is very interesting to paint with leaf prints. We cover the leaves with gouache, then place the painted side on a sheet of paper, press and remove, resulting in a neat colored imprint of the plant.
“Scratching” technique
The “scratch” technique is also called “tsap-scratch”!
The drawing is highlighted by scratching with a pen or sharp instrument on paper or cardboard filled with ink (to prevent it from spreading, you need to add a little detergent or shampoo, just a few drops). The word comes from the French gratter - to scrape, scratch, so another name for the technique is scratching technique . We usually take thick paper and shade it with a thick layer of colored wax crayons. You can take colorful cardboard with a ready-made variegated pattern, then you can limit yourself to an ordinary wax candle (not colored). Then, using a wide brush or sponge, apply a layer of mascara to the surface. You can, of course, use gouache, but it gets dirty after drying. You can also use black acrylic paints. When it dries, use a sharp object - a scraper, a knife, a knitting needle, a plastic fork, a toothpick - to scratch the design. A pattern of thin white or colored strokes is formed on a black background.
Children usually really like this kind of drawing. Scratching is an entertaining and unusual technique; a child is captivated by the process of “developing” an engraving on cardboard. Drawings at the beginning of learning can be quite simple: outlines of objects, a cobweb, a balloon, etc. Gradually the tasks can be made more difficult.
The scope for imagination here is simply enormous: for example, you can draw an engraving on cardboard with a plastic fork: whole - waves on the sea, breaking off the "extra" teeth - road, rails, etc. You can think of a use for a fork handle, a disposable plastic knife, and even a spoon!
Option 1.
1) Thick cardboard, sketch with colored wax crayons - you can use one color, you can use multi-colored spots and stripes (in a thick layer). Leaving no white spots.
2) On top, using a wide brush or even a small sponge, cover with a layer of thick (the consistency of sour cream) black gouache (or black mascara + a drop of shampoo - it does not stain your hands when working, or acrylic paint), let it dry.
3) Take a non-writing ballpoint pen (or a sharpened wooden sushi stick, or a toothpick, or even a plastic fork, or another convenient pointed object, or all objects at once) - and when you scratch, clear contrasting multi-colored lines appear. You can draw with lines, strokes - anything: the underwater world, a bright autumn forest, space...
Helpful Tips:
If gouache (ink) rolls off a layer treated with wax pencils (crayons) , then you can degrease the base with talcum powder (sprinkle on top and rub with cotton wool). To prevent gouache from staining your hands when scratching the drawing , you need to add a little PVA glue to it before applying it and stir well. Or, when drawing, place a piece of clean paper under your hand, which rests on the sheet.
Option 2.
1) For the base, you can take colored or white cardboard, or cardboard with a ready-made bright pattern (even the same cardboard cover from colored cardboard will do). Rub the base with a simple wax candle.
2) Second and third steps – see option 1.
Option 3.
1) For the base, you can take white cardboard and paint the background with any colors, and in any way you like. Dry. Next are the second and third steps of option 1.
Drawing with a piece of textile
We take a piece of fabric measuring 10 x 5 cm, crumple it, and make something like a tampon. Dip a fabric swab into gouache paint. You can paint with black gouache on white cardboard. You can also paint on a colored background, for example blue, with white paint, then we will get a “Winter Landscape”.
Painting small stones . Of course, most often the child draws large stone tiles on a plane, on paper, or less often on asphalt. A flat image of a house, trees, cars, animals on paper is not as attractive as creating three-dimensional creations of your own. In this regard, sea pebbles are ideally used. They are smooth, small and have different shapes. The very shape of the pebble will sometimes tell the child what image to create in this case (and sometimes adults will help the kids). It’s better to paint one pebble as a frog, another as a bug, and the third will make a wonderful fungus. Bright, thick paint is applied to the pebble - and the image is ready. It’s better to finish it like this: after the pebble has dried, cover it with colorless varnish. In this case, a voluminous beetle or frog made by children’s hands shines and shimmers brightly. This toy will take part in independent children's games more than once and bring considerable benefit to its owner.
Let's draw with plasticine!
Plasticine painting on glass.
From plasticine you can sculpt not only three-dimensional figures, but also create beautiful creations on a plane. This technique has its own name - drawing with plasticine. This is a very entertaining activity for both toddlers and older children.
So, what did we need to create a plasticine drawing?
1. High-quality plasticine that kneads well and mixes together. The less it sticks to your hands, the better.
2. The basis of the picture: glass, cardboard, wooden frame. (Frame)
3. A board for modeling, a glass of water, napkins for hands, stacks, various improvised devices for creating the desired texture.
We use glass as a base to create a picture using the reverse appliqué technique and be sure to protect the edge of the glass with electrical tape so that children do not get hurt. But it should be noted that this work is done under the close supervision of adults.
Features of the technology:
Drawing (you can put the coloring book in a photo frame instead of a photograph. And let’s start creating) Before you start sculpting, you need to think about the color combination and select the right shades by mixing. We begin to apply the selected color to the desired details of the drawing from the side that the drawing from the frame is looking at). Spread the plasticine evenly with your finger, without going beyond the lines of the sketch. The layer thickness is no more than 2-3 mm.
At the end of the work, carefully wipe the glass from greasy fingerprints and remove the second protective film. Select a suitable sheet of cardboard for the background. We insert the drawing with the reverse side back into the frame.
Drawing technique "Pointillism"
The name of the movement in painting, pointillism, comes from the French word pointiller, which means “to write with dots.” Pointillism is drawing using dots of different colors (dot strokes). And, therefore, this technique is quite within the capabilities of preschool children.
We draw using the pointillism technique, using different visual materials: just our fingers, swabs, cotton swabs, brushes, felt-tip pens, markers.
Painting with salt.
First we draw with a simple pencil. Paint a small area of the drawing with watercolors. Sprinkle with salt. The salt absorbs excess water and sticks to the leaf. Shake off excess salt. We continue to work in the same spirit until the end. The use of salt gives an unusual effect. Try it and you'll see.
Drawing with colored salt.
Salt can be dyed in different colors.
Salt color:
First, dilute the gouache in a container with a small amount of water (the more water, the lighter the color. The less water, the more intense the color). Then pour salt into a plate and pour out the colored water. Gently mix the salt with a fork so that all the salt is colored. You can dry it in the oven, heat the oven to a temperature of 100 degrees and put our molds with salt there for an hour. You can use a microwave oven, place the molds there for 5-10 minutes at maximum temperature. After you take out the salt, you will see that you get dry lumps. Take a plastic bag and pour salt into it. Then roll out the salt on a cutting board until it becomes crumbly. For each color we take a separate jar.
Draw a picture with a simple pencil, then with PVA glue, sprinkle salt on the glue.
Drawing with a toothbrush.
Let me make a reservation right away that not everyone likes this technique. But when drawing some objects, it is simply not replaceable. Therefore, we will also talk about her. When painting with a toothbrush, dipping it, like a brush, into paint, you get a really fluffy Christmas tree, waves on the sea, a shaggy animal. It will be very difficult to achieve such an effect with a brush.
Technique of drawing with oil pastels on velvet paper.
The pencil moves easily on the paper and is shaded with your finger, creating softer shades, and children are simply delighted with this technique! The drawings are bright and cheerful.
Collage.
The concept itself explains the meaning of this method: it combines several of those described above. In general, we ideally think the following is important: it is good when a preschooler is not only familiar with various image techniques, but also does not forget about them, but uses them appropriately, fulfilling a given goal. For example, one of the 5-6 year old children decided to draw summer, and for this he uses a dotted pattern (flowers), and the child will draw the sun with his finger, he will cut out fruits and vegetables from postcards, he will depict the sky and clouds with fabrics, etc. There is no limit to improvement and creativity in visual arts. English teacher-researcher Anna Rogovin recommends using everything that is at hand for drawing exercises: drawing with a rag, a paper napkin (folded many times); draw with dirty water, old tea leaves, coffee grounds, berry juice. It is also useful to color cans and bottles, spools and boxes, etc.
Imprint with crumpled paper. Means of expression: stain, texture, color. Materials: saucer or plastic box containing a stamp pad made of thin foam rubber impregnated with gouache, thick paper of any color and size, crumpled paper. Method of obtaining an image: a child presses crumpled paper onto a stamp pad with paint and makes an impression on the paper. To get a different color, both the saucer and the crumpled paper are changed.
Stained glass technique - glue pictures
The outline of the future design is made with PVA glue from a bottle with a dosed spout. You can first draw a sketch with a simple pencil. Then the boundaries of the contour must dry. After this, the space between the contours is painted with bright colors. Adhesive borders prevent the paint from spreading and mixing.
Stained glass example:
- Using a simple pencil without pressure, divide the sheet with intersecting lines in different directions, always from edge to edge (snowflake design).
- Draw lines from the ends of the resulting snowflake to the middle of each ray to create windows - “pieces of glass.”
- Trace the outline with PVA glue and let dry.
- Paint the space between the adhesive borders with bright colors.
Unconventional drawing techniques as a means of mental correction allow you to overcome feelings of fear. One might say, it allows the little artist to move away from the subject image, express his feelings and emotions in the drawing, give him freedom, and instill confidence in his abilities. Modern research proves that non-traditional image techniques help reduce the arousal of emotionally disinhibited children. At the same time, as a rule, overly active people need ample space to develop their activities. The bottom line is that attention is scattered and extremely unstable. In the process of “playing the artist,” the area of activity narrows and the amplitude of movements decreases. By acquiring appropriate experience in drawing in an unconventional technique, the child thereby overcomes fear. Further creativity will only bring him pleasure, even from working only with a brush and paints.
Drawing with dots
Drawing with dots can be distinguished as a method of visual creativity for children. This simple technique is understandable even to the little one. You will need paints and cotton swabs or regular markers. We dip the stick in the paint, and with gentle pressure we draw a dot on a sheet of paper, then another one - until the invented image appears on the album sheet. You can help your child by drawing the outline of the future drawing, and he will fill it with a large number of bright prints. The theme of the dotted pattern can be anything – a winter fairy tale or bright sunshine. Education at such a tender age should be carried out unobtrusively, in the form of a game.
Let's continue to fantasize. Stamps, impressions
Children of all ages like to use stamps when drawing. This unique technique of non-traditional drawing in kindergarten is so easy to perform and diverse in manifestation that it is perfect for work both in kindergarten and at home. Ready-made stamps can be purchased at an art supply store. But it’s much more interesting to make a stamp yourself, or even better with your baby.
Almost anything that can be dipped in paint and then left an imprint on a piece of paper will work as a stamp. You can cut an apple or a potato - this is the simplest stamp. You can cut out some kind of shape on half a potato: a heart or a flower. Another stamp is made from ordinary threads, wound around any base. You don’t have to wind the threads, but simply immerse them in paint. After thorough impregnation, they are laid out on one sheet, covered with another, pressed lightly, and the intricate pattern is admired.
It is easy to make a stamp from ordinary plasticine. Come up with an interesting shape and decorate a small piece of plasticine. It is better to choose thick paint for classic stamps. You can give the background an unusual texture by using a crumpled napkin or paper, and then follow the proven scheme: dip it in paint and stamp it. Very beautiful stamps are made from dried leaves: paint the leaf on one side, place it on paper and press. After the painted leaf was removed, the picture “Golden Autumn” was created – the baby was absolutely delighted.
Drawing with foam rubber
There is another unconventional drawing technique, similar to a stamp, but with an interesting feature - drawing with foam rubber. Cut a small piece from an ordinary sponge, dip it in paint and cover the sheet with gentle pressure. This is how you easily and simply get a wonderful background for further drawing, and if you use stencils or templates for children’s drawing, you will get an amazing floral or geometric pattern.
Non-traditional techniques of artistic and creative activity
Anna Raeva
Non-traditional techniques of artistic and creative activity
Preschool age is most favorable for the development of not only imaginative thinking, but also imagination, a mental process that forms the basis of creative activity . Therefore, creativity and the development of creativity is one of the main tasks of education.
Visual activities using non-traditional materials and techniques contribute to the development of the child: fine motor skills and tactile perception; spatial orientation on a sheet of paper, eye and visual perception; attention and perseverance; visual skills and abilities, observation, aesthetic perception, emotional responsiveness. In the process of this activity , the preschooler develops control and self-control skills.
Artistic and creative activities will be more varied and interesting if you use the following non-traditional techniques :
• "Finger painting"
. Apply the paint with your fingers or palm. In this case, paint is poured into flat sockets and water is placed. The rule is that each finger picks up one specific paint. Fingers washed in the jar are immediately wiped with a napkin. To paint with your palm, paint is poured into saucers.
• "Monotype"
. The paint is applied to cellophane or a piece of paper, glass, and only then this piece is applied to the paper on which the image is applied and pressed with your fingers. Depending on the size of the spot and the direction of rubbing, different images are obtained. A variation - a sheet of paper is folded in half, unfolded and paint is applied to only one side of the sheet, then the sheet is folded in half and the image turns out to be a mirror image.
• Blotography. A child drips paint from a brush onto a piece of paper. Then, turning the sheet in different directions, he watches it “walk”
a drop, and what the image looks like. Variation: drip paint from a brush onto a piece of paper, then cover the sheet with another sheet of paper and press. Next, the top sheet is removed and the image is examined to determine what it looks like.
• Drawing with a candle. The drawing is applied with a candle, the result is a “magic drawing”
- it is there and it is not visible. Then ink or paint is applied to the sheet - and the design appears on a colored background.
• Poking with a hard, semi-dry brush. The brush is dipped into the gouache and hit the paper with it, holding the brush vertically. When working, the brush does not fall into the water. Thus, the entire sheet, outline or template is filled. The result is an imitation of the texture of a fluffy or prickly surface.
• Drawing on wet paper. The sheet is moistened with clean water, and then the image is applied with a brush. It looks like it's blurry in the rain or fog. If you need to draw details, then you need to wait a little until the drawing dries, or put thick paint on the brush.
• Printing method: Foam rubber imprint: the child presses the foam rubber onto a stamp pad with paint and makes an impression on the paper. In older groups, children complete the details with a thin brush. You can also use any objects, for example: cork, leaves from trees, the bottom of a plastic bottle and generally anything else you come across.
• Spraying technique . The child puts paint on a brush and hits the brush on the cardboard, which he holds above the paper. Paint splashes onto the paper. You can also spray the paint using a toothbrush and stick.
• Drawing with soap bubbles. It is advisable to mix paints for drawing with soap bubbles the day before the day of drawing. They should sit mixed with water and shampoo. Their bright color depends on this. The paint needs to be poured into trays and mixed. Using a straw, blow into the tray with the paint solution, foaming it until a stable foam forms. Then take a piece of paper and place it on the foam. The bubbles will begin to burst and leave marks on the paper.
• Drawing with a cotton swab. We dip a cotton swab into the paint and make precise movements along the landscape sheet. The sticks will leave a clear imprint. The shape of the print will depend on the shape of the poked item. If the poke is done purposefully, for example, along the finished contour and inside it, then the depicted object will turn out to have an interesting heterogeneous texture. Using this method you can draw falling snow, mimosa, decorate a mitten, a scarf.
• Plasticineography. A pencil sketch of the intended image is applied to a sheet of cardboard. Then, using techniques such as pinching, pulling, rolling, sticking, smearing and mixing colors of plasticine, he creates a molded picture depicting more or less convex, semi-volume parts on a horizontal surface. During the work process, you should remove excess plasticine with a stack, and do not go beyond the contour line. Complete the resulting image with details made from waste material.
In conclusion, I would like to say the following: drawing for a child is a joyful, inspired work, which is very important to stimulate and support, gradually opening up new possibilities for visual activity . And the main thing is that unconventional drawing plays an important role in the overall mental development of the child. After all, what is intrinsically valuable is not the final product - a drawing, but the development of personality: the formation of self-confidence, in one’s abilities, self-identification in creative work, purposefulness of activity . The main thing is that classes bring only positive emotions to children.
Monotype technique
For older children, you can offer more interesting types of artistic creativity. For example, an interesting technique, which is also based on prints, is “Monotype”. Its goal is to create a symmetrical drawing, such as a mushroom, an insect (butterfly or ladybug); for the senior preschool group, you can depict a landscape reflected in a lake.
We take a landscape sheet of paper, bend it in half, then unfold it and draw on one half relative to the fold line. Since we have agreed to depict a butterfly, we draw one wing, then stroke the folded sheet with our hand. Let's open it - the butterfly already has two wings and they are exactly the same! The missing elements can be completed with a brush.
A feeling of delight is guaranteed, while the child understands that his “hooligan” actions, when blots and splashes fly onto the album sheet, are also a form of art. “Blotography” also has the name “Spraying”. Using these techniques you can achieve unusual artistic effects.
Splashing paint, also known as "Spraying". A toothbrush will come to our aid. Gently dip it into the paint and lightly tap it towards you with a pen or pencil. A huge number of small droplets remain on the sheet. Using this unconventional painting technique, you can create a very realistic winter landscape or deep space with many stars. “Blotography” will help the young artist populate the uninhabited planets of space with funny aliens. All you have to do is put more paint on the brush and let it drip onto a sheet of paper, and you get a blot. And now we blow on it, dispersing the rays in different directions. Let's add a pair of eyes to the dried blot, or maybe two pairs, this is an unknown animal, and send it to populate distant worlds!
An interesting texture can be achieved by using a dry brush. Lightly dip a dry wide brush into the gouache and wipe off the excess paint on the jar. We draw with vertical poking movements. The image turns out “shaggy” and “prickly”, in this way Christmas trees and hedgehogs, a field with green grass turn out to be very realistic. In this non-traditional way, you can draw flowers, such as asters, in kindergarten.
Incredible possibilities of ordinary things.
- Bubble.
It turns out that you can not only blow and burst soap bubbles, but you can also draw with them. Dilute a little paint in a glass of soapy water, take a tube and blow bubbles into the glass. Your kids will enjoy doing this trick. Well, there is a lot of bright multi-colored foam, apply a sheet of paper to it, and as soon as bubbles begin to appear, the paper needs to be removed - the colorful pattern is ready!
- Salt.
Don't be surprised, but salt can be used for more than just cooking. An interesting texture will be obtained if you sprinkle the undried drawing with salt, and when the paint dries, just chicken out.
- Sand, beads and various grains are also used to create creative textures. There are several options for using such materials.
- Sprinkle the pre-glued sheet with cereal, sand or beads, and then draw on the textured surface.
- We cover the areas where the design will be depicted with glue.
- Paint and dry the necessary materials in advance, and then decorate the drawing with them.
MAGAZINE Preschooler.RF
“ROLE OF USING NON-TRADITIONAL DRAWING TECHNIQUES IN THE ARTISTIC DEVELOPMENT OF PRESCHOOL CHILDREN”Compiled by:
- Kolmakova E.V.
- Volkova O.A.
Municipal autonomous preschool educational institution - general developmental kindergarten "Antoshka" in the village of Zudilovo S. Zudilovo, 2022.
The formation of a child’s creative personality is one of the most important tasks of pedagogical science at the present stage. The most effective means for this is visual activity. Visual activity promotes knowledge of the world around us, developing the ability to creatively reflect one’s impressions in a drawing. Non-traditional drawing involves the use of new materials, tools, and drawing methods that are not common in the teaching practice of preschool institutions. Drawing with unusual materials and original techniques allows children to feel unforgettable positive emotions, show imagination and creativity, help instill confidence in themselves, their strengths and skills, and help them more fully reveal their feelings and abilities. When using these techniques, the child learns not to be afraid to show his imagination, since they do not turn the child to a standard, do not introduce him into any framework.
The development of creative abilities cannot be the same for all children due to their individual characteristics. But every child is capable of creating brightly and talentedly, they just need to create a favorable environment based on trust and understanding.
The world of a little person is colorful and emotional. Already in the very essence of a child lies the desire to learn and create. Working with different materials expands the child’s capabilities, ensures his liberation, develops imagination and fantasy. Daily hand massage and finger exercises accelerate speech development, which is very important for children. Motor activity of the hand increases the vocabulary, promotes their meaningful use, forms grammatically correct speech, develops memory, contributes to the automation of sounds and prepares the hand for writing.
Childhood can be considered as a period of formation of physiological and mental functions. And drawing here acts as one of the ways to complete a program for improving the body.
In addition, conducting classes using non-traditional techniques:
- Helps relieve children's fears;
- Develops self-confidence;
- Develops spatial thinking;
- Teaches children to freely express their ideas;
- Encourages children to creative searches and solutions;
- Teaches children to work with a variety of materials;
- Develops a sense of composition, rhythm, color, color perception; a sense of texture and volume;
- Develops fine motor skills of the hands;
- Develops creativity, imagination and flight of fancy.
- While working, children receive aesthetic pleasure.
Work using non-traditional techniques should be carried out according to the principle “from simple to complex .
The role of using non-traditional drawing techniques in the artistic development of preschool children
There are a huge number of non-traditional drawing techniques. Such an activity is not only interesting for children in the garden, but also has great benefits, as it contributes to the development of creative thinking and imagination in the child.
Due to the fact that completely atypical objects can be used in drawing, preschool children are given the opportunity to think outside the box.
With children of primary preschool age it is recommended to use:
- drawing with fingers, palms
- potato signet imprint
- palm painting
- painting with cotton swabs
Children of middle preschool age can be offered more complex techniques:
- poke with a hard semi-dry brush
- foam rubber printing
- cork printing
- wax crayons + watercolor
- candle + watercolor
- leaf prints
- palm drawings
- painting with cotton swabs
- magic ropes
And in older preschool age, children can be offered even more difficult methods and techniques:
- sand painting
- drawing with soap bubbles
- drawing with crumpled paper
- blotography with a tube
- landscape monotype
- stencil printing
- subject monotype
- regular blotography
- plasticineography
Some types of non-traditional drawing in kindergarten
- Fingergraphy
The simplest and most common method of non-traditional technique is drawing with fingertips. Special finger paints are well suited for this; you can also use gouache or watercolor, after wetting it with water.
All that is required of the child is to dip his finger in the paint and leave a print on the paper.
Drawing with palms
This method can be considered the next step after finger painting. The entire palm will be involved here. The same paints can be used as for fingerprinting.
The open palm most closely resembles a bird. Therefore, using this technique you can make any bird of your child’s choosing.
Drawing with cotton swabs
This method is reminiscent of fingerprinting, but it uses an alternative tool for making an imprint - a cotton swab. The mark from it turns out to be small and more round. If you completely color the image with pokes, you will get a mosaic effect.
You can also use a few pokes to create an object of the required shape, for example, tree leaves or flowers.
You can draw with several sticks at once; for convenience, they can be secured with a string.
Drawing with bulk substances
For this method, you can use salt, sand or any cereal. Drawing occurs in stages. First, you should put some design on the paper. Then drop PVA glue into certain places and sprinkle them with salt or cereal. After drying, shake off excess. The result will be an unusual three-dimensional drawing.
It’s more interesting and colorful to use colored cereals colored with food coloring or buy ready-made colored sand.
Drawing with crumpled paper
For this method it is more convenient to use gouache. You will need a small piece of paper that needs to be crumpled. Then dip this lump in paint and start applying it to the paper. The drawing turns out airy and light.
In this way you can color an image in an unconventional way. For example, make a shaggy cat or a fluffy owl.
Drawing with threads
String drawing can be a little challenging for preschoolers, so it is recommended to do it with older groups. To create such a pattern you need to prepare threads. Next, you need to cut the thread to the desired length and dip it thoroughly in the paint. Then you should put the thread on the paper, for example in a loop, and pull it down. For convenience, you can use two sheets of paper to properly press the thread on both sides.
Nitography is the most difficult technique for children. But the result is very unusual, and the creation process is interesting and will appeal not only to children, but also to adults.
Monotopy
This is a technique of creating an image using a print. For kindergarten, a suitable method is when a sheet of paper is folded in half and an image is painted on one side. The design is then pressed onto the other half of the sheet, thus creating a symmetrical image.
Monotopy is interesting because That its result may be unpredictable. The resulting drawing always comes out unique.
Wax painting
A paraffin candle can be replaced with a wax crayon. The essence of this technique is that with the help of a chalk you can draw any design, which will then not be painted over with watercolors and will appear on the surface.
If you use white chalk, you can make a secret drawing or note, since the image will appear on paper only after using paint.
Spray
Creating an image using this technique involves splashing paint onto paper. To do this, you can use a toothbrush or a hard brush. In this case, the splashes are small and distributed randomly. Therefore, it is better to use stencils to obtain the desired shape.
In addition, using spraying you can fill in the background of the future drawing. It could be grass, starry sky, snowfall.
Stamping
This technique is quite simple to implement and is suitable even for younger kindergarten groups. The idea is to dip a stamp in paint and leave an imprint on the paper. Moreover, you can choose anything as a stamp: leaves, vegetables, fruits, twigs. It is very convenient to cut stamps of various shapes from potatoes. You can also make stamps from foam rubber sponge or cork.
All considered non-traditional drawing techniques are applicable only indoors. What about walks in the fresh air in summer? Are only outdoor games suitable for outdoor activities? No, you can do fine art. Drawing in summer in kindergarten can be done outside using classic chalk. Drawing on asphalt in kindergarten is a wonderful entertaining and educational activity. Children draw with crayons wherever there is a more or less hard surface: asphalt, tiles, fences, walls of the house. It’s wonderful to see a bright embodiment of fantasy instead of gray asphalt.
When working with non-traditional drawing techniques, it is necessary to form coherent speech in children. To do this, you need to use short nursery rhymes and songs in class. They need to be repeated in chorus, thus developing memory, attention, and activating vocabulary.
For example:
Christmas tree, Christmas tree
Green needle...
It is also necessary to carry out finger exercises before and during class to give the opportunity to relax and switch attention.
Finger exercises are very good for developing fine motor skills and stimulating children’s speech activity. Finger gymnastics prepares the hand for writing and drawing. The main goal of such games is to switch attention and improve coordination. The exercises are best done together: the adult shows and the child repeats.
For example:
We wrote, we wrote
Our fingers are tired...
The successful outcome of teaching non-traditional techniques largely depends on what methods and techniques the teacher uses to convey certain content to children, to develop their knowledge, skills and abilities.
Conclusions drawn from the study: artistic activity is the leading way of aesthetic education of children, the main means of artistic development of children.
Visual activity is of invaluable importance for the comprehensive moral, labor and mental development of children; it acts as an emotionally rich activity that activates all processes (attention, ideas, imagination, thinking).
In the process of work, children improve their observation and creative abilities, develop visual coordination, spatial orientation, eye perception, develop fine motor skills, coordination of movements, and a sense of color.
Drawing is a joyful work that should not be forced, but it is important to interest the children, gradually opening up new possibilities for visual activity.
Unconventional drawing techniques allow you to reveal a child’s capabilities, allow you to feel their character and mood.
The most important thing is not to teach drawing, but to introduce children to art through artistic activities.
Non-traditional materials: corks, tree leaves, grass, cellophane, plastic stamps, seals, straws, sponge, foam, poke, toothpicks, cotton swabs, soap bubbles, foam rubber are curious for children as a game with the unknown. Children are involved in the creative process.
Drawing is a great opportunity for a child to express himself. In fine art, a child conveys his attitude towards the world around him, shares fears and negative emotions, and maybe conveys a feeling of joy. Any of the presented non-traditional techniques is a kind of child’s game that allows you to feel more confident and courageous. They develop imagination and give complete freedom of self-expression.
Used Books:
- Davydova G.N. Plasticineography for kids. – LLC Publishing House “Scriptorium” 2003
- Kazakova R. G. Drawing with preschool children. Non-traditional techniques, planning, lesson notes. - M. Sphere 2006 - (Series “Together with children” ).
- Utrobina K.G. Utrobin G.F. “Fun drawing with the poking method with children” M, 2004.
- Fateeva A.A. “Drawing without a brush” , Yaroslavl, 2006
- Beloshistaya A.V., Zhukova O.G. Magic colors. 3–5 years: A guide for activities with children. – M.: Arkti, 2008. – 32 p.
- Sakharova O.M. I draw with my fingers: Litera Publishing House, 2008. – 32 p.
- Kazakova T. G. Classes with preschoolers in visual arts: A book for kindergarten teachers. Garden and parents. – 2nd ed., revised. – M.: Education: Textbook. Lit., 1996. – 159 p.
- Grigorieva G. G. Visual activity of a preschooler. – Textbook for students. avg. ped. textbook establishments. – 3rd ed., rev. M.: Publishing house. , 1999. – 272 p.
- Davydova G. N. 22 drawing lessons for preschoolers. Unconventional techniques. – M.: Publishing house “Scriptorium 2003” , 2014. – 112 p.
| Next > |