Why do you need this kind of drawing?
- Unlike traditional drawing, a child has much more opportunities to show and develop his creative abilities, fantasy, and imagination.
- The child learns to work with different materials.
- By feeling materials and textures, he develops fine motor skills.
- In the process of work, the child becomes familiar with volume, texture and space.
- The child works with color, learns to mix and match colors, and develops artistic taste.
- Unconventional drawing calms and captivates, promotes the development of perseverance, and encourages the search for non-standard solutions.
- There is no word “impossible” in this type of activity. We saw cones, leaves, berries, a tea bag - all this can be useful.
- Drawings using non-traditional techniques are obtained much faster than conventional ones. This plays a huge role for young children when they lack perseverance and patience to complete their work.
- Such activities add confidence in yourself and your abilities, and simply bring great pleasure.
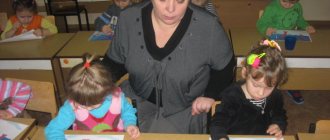
OOD progress:
1. Main part. Surprise moment.
Educator: Guys, someone is knocking on our doors! Let's see who came to us!
The doors open, the teacher brings in the sun.
Educator: Guys, look, the sun has come to visit us. Let's go together
Children: Hello, sunshine!
Sunny: Hello guys (sad)
.
Educator: Our sun doesn’t smile today, doesn’t warm us with its rays.
I think my sunshine is missing something?
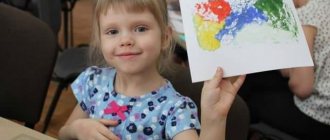
Drawing with fingers and palms
Usually this is the first technique with which children begin to draw even before going to kindergarten. The drawing comes out very quickly, and this is extremely important when working with very young children. Dip your child's hand into the paint and let your child make an imprint on the surface. See what it's like. Perhaps it is some kind of animal? Ask your little one what needs to be completed to get the finished image. Maybe ears, nose or tail? the missing details can be drawn with your fingers. It is much easier to control your fingers and palms than a brush. And therefore more interesting for young children.
For this you will only need finger paints. If your child is still very small, don’t even doubt that he will be covered in paint. Therefore, it is better to immediately send him to the bath and give out the paints there. Don't worry about repairs. Good finger paints will be easily washed off both the bathtub and the tiles.
These paints are good, but expensive. One package costs about 500 rubles. He grabs her several times. After all, children do not stand on ceremony with any materials and scoop up not as much as they need, but as much as they can fit into their hand.
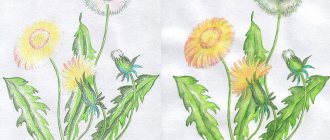
Templates for sketching grades 1-2 (can be printed for free)
Sketching is a great way to improve your skills and learn how to draw. Below you will find a selection of summer illustrations. It is enough to save one of them and later transfer it to a blank canvas. Copying will help you spot new solutions and styles.
Summer holidays
The kids look forward to this time with special impatience, when they can go to grandma, have fun with friends, or go to warm countries. This time of year gives all people bright and cheerful memories, so at school they are often asked to show how the child spent the summer in fine arts lessons.
Swimming pool template:
Children are playing football:
Kids with a ball:
On warm evenings it’s so nice to sit with dad fishing and discuss the past day. For example, you can print a boy with a fishing rod:
Or father and son fishing:
Family fishing:
The berries are just about ripe, it's time to collect full baskets and give them to your beloved grandmother.
Guys on a picnic:
Girl in the forest:
Girl with berries - a simple template for beginners:
Children with baskets:
We also have an article on how to draw Maslenitsa with a pencil, you will like such ideas!
Cote d'Azur
Many families go on vacation to the south. The longest holiday period, hot sun and fresh fruit, is much more pleasant to spend near the water. We will also take a creative trip to the sandy beach and depict the surf.
Surfing:
Beach, a simple template for the little ones:
Picnic under a palm tree:
Another simple template for sketching:
Guys on the beach:
Stamps
Also quite a popular technique for early ages. You will need any object that you don’t mind and gouache or any other paint (but it’s better not to take watercolor). The technique is simple - dip an object in paint and make an imprint on paper.
Stamps can be made from apples, potatoes, wine corks, threads, pine cones, shells and many other materials. The easiest way to make this is with potatoes if you have metal cookie cutters. Simply press the mold into the potatoes and carefully trim the excess pieces around the edges with a knife.
It can be made even simpler. Take a small box, sponge or cork, glue various materials to the side surface or wrap it with threads in a chaotic manner.
Rollers with a pattern are also of interest. They are sold in construction and craft stores.
The leaf prints are especially delightful. Select leaves of various shapes, paint them and press them onto the paper. The entire texture of the sheet will be clearly imprinted on the paper.
Drawing with watercolors on wet paper
To do this, you will need a sheet of thick paper (preferably watercolor), the watercolor itself and a brush. Moisten the entire sheet evenly with water so that it is thoroughly wet, but not so that there are no puddles. Put some paint on your brush and start creating. Any stroke spreads one to two centimeters across the paper. Now is the time to show your child how colors are mixed and explain what shades are.
If the paint does not want to spread, then the sheet is dry; if it spreads in all directions, it is too wet. We need to find a middle ground. In this lesson, show your child that all movements are made easily and smoothly. There is no need to press the brush into the paper, as many children like to do. A light touch is enough.
The web in the right picture was drawn using a wax candle. Read about this below.
This technique works well for drawing backgrounds. Especially water. And after drying, you can continue to draw fish and algae as usual.
Forest landscape in pencil easy: 2-3 grade
So, now let’s depict a sunny, summer birch grove. During this warm season, the forest amazes with its carefree nature, pristine purity and incredible beauty of Russian nature. It may seem that this is a very complex drawing, but it is not at all, and now you will see it. In addition to paper, you will need pencils, markers and a white pen. Creative success!
- First we draw a square frame. We use a light gray marker to mark the horizon line approximately at the height of the lower third. We select a brown branched path. The closer it is to the viewer, the wider it will become.
- We outline the tree trunks; it is better to make them not perfectly straight, but with a slight slope and bend. In the foreground, the birch trees will be wider; the further they are from us, the thinner they need to be drawn. We draw the greenery with loose strokes. We go upstairs and paint the entire space between the trees by about two-thirds. Using a dark green felt-tip pen, we move higher towards the light fill. Add leaves with small strokes. At the border of shades we make the texture more dense.
- We highlight the long shadows from the trunks. We darken the thicket of the forest in the lower part with a deep green pigment, highlighting the leaves and grass. Apply the dark blue shade in an arc, so the focus will be on the center of the image, where the path begins. It's time to add a continuation of the shadows to the path using dark brown. Next, we will add volume to the trunks; to do this, we cover them almost entirely with gray, except for a thin strip on the left side.
- Let's go over the distant trees with a second layer so that the darkening is more clear. We recommend using cool shades. Using a yellow felt-tip pen, draw the sun's rays directly over the forest. Using a pencil, highlight some contours, thin branches and strokes on the bark. At the bottom of the composition we will add fireweed flowers. We draw them with pink spots, which are collected in brushes. In general, we make them very conditional and simplified.
The last step is to add sunbeams and blades of grass using a white pen.
"Blotography" and "spraying"
In the "blotography" technique, children take a large amount of paint onto a brush, splash it on the drawing in a chaotic manner, then try to understand what it looks like. With a sufficiently developed imagination, you can get a whole plot. Details are completed with colored pencils.
The spray technique is similar. Only spraying is done using a toothbrush and a ruler. Put paint on the brush and run it with a ruler towards you. If you do everything correctly, there will be no paint splashes on yourself. But there may well be around the leaf. Therefore, you need to think in advance about what the sheet will be attached to and how to secure the space around it.
Refreshing ice cream: drawing on the theme of summer with colors
Drawing is the best way to relax, relax and become happier. To clear your mind of pressing problems, we recommend doing something creative with your children in the evening after work. Now you will learn how to draw the most delicious summer sweet - ice cream in a waffle cup! It is truly refreshing, saving you from heat and thirst. Here's what you can draw in the summer:
For work we need:
- Watercolor paper A5 size
- Pencil and eraser
- Liner
- Brushes and paints
- Water
- Palette
Let's get creative:
- Let's start by building our composition. To do this, put a notch in the center and draw a line of symmetry. We designate the sizes and parts of the future ice cream. We outline the trapezoidal shape of the cup and the delicacy itself resembling a cone.
- Now we draw all the lines of the cup more roundly, so we convey the volume. Let's denote the checkered texture of the waffle by drawing diagonals in one direction and then in the other. Draw the ice cream in light waves to create swirls. We add a loop on top.
- We outline all the contours with a liner. To create a subtle color effect, dilute the lilac shade with plenty of water. Let's go over it on the right side under the contours of the curls. While the top part is drying, let's work on the bottom. We fill the glass with translucent ocher, leaving empty spaces in some places. We highlight the right side with a more saturated tone, since the light in our composition falls from the left.
- Using purple pigment, we once again go over the treat, blurring the boundaries. We’ll create a pink halo around it, without a clear outline; we should get a slight haze.
Our illustration is ready. After completing this, you will definitely want to buy a real ice cream in the store!
What other drawing options are there: video master classes
- Master class for those who want to draw a summer landscape with a simple pencil:
- A summer image in a non-standard technique that kids will definitely like. We will draw using a regular sponge. This method will develop imagination and fine motor skills:
- A very simple and cute picture of a watermelon, which is so refreshing in hot weather. Children from 3 years old can cope with the work:
A master class on drawing spring with a pencil will also be useful to you.
Collage
This is not really drawing, but only an intermediate stage. Surely, you have old postcards at home that you don’t need, but it’s a shame to throw them away. It's time to use them. Cut out individual elements and let your child arrange them on the paper. Newspaper and magazine clippings are also suitable for this purpose. After the child decides on the location of the objects, hand him a brush and glue and give him the opportunity to glue everything himself. Ready-made elements will be very useful for children under three years of age. After all, they still don’t know how to draw complex objects, but they will definitely be able to add details to them.
Drawing using sand, grains or sawdust
There are different options for drawing in this technique.
- Cover the entire sheet with glue, sprinkle with sand or grain and paint with your fingers or a brush on the rough surface.
- Apply glue only to those areas where the elements will be drawn. Sprinkle everything with sand and paint after drying.
- Paint bulk materials in advance, dry them and apply the design in parts. To prevent colors from mixing too much, you need to apply glue at a time only to those parts that should be painted the same color. After each such coloring, excess sand and grains must be thoroughly blown off.
Summer landscape: a step-by-step lesson for beginners in gouache
On a hot summer day there is nothing better than going to the seashore. The expanse of the sea is impossible to take in with your eyes, and the whisper of the waves and the conversation of the seagulls are truly mesmerizing. Therefore, in the next lesson we will paint a beautiful gouache picture with palm trees, sea and sandy shore! Both beginning artists and experienced painting enthusiasts can handle this.
Materials for work:
- gouache
- brushes (synthetic flat, round, fan, bristles)
- jar of water
- paper napkins
- Paper
- masking tape to secure the canvas (optional)
Drawing stages:
- Approximately mark the line of the horizon and the coast. Next, we prepare the sheet for work by applying whitewash to the entire surface. Using the same brush, apply ultramarine to the sky area and blend thoroughly. We make the coating heterogeneous, somewhere there are light areas, somewhere dark places. The closer to the straight line of the horizon, the lighter the shade should be.
- For the sea, mix dark blue with ultramarine and apply the mixture with horizontal movements. Clouds can be depicted with white paint using patting movements of the finger. Now let's do the sand, for this we fill the lower left corner with ocher. Adding some greenery to the beach.
- Next, draw the palm tree trunks and their leaves using a fan brush. Try twisting the canvas to make strokes from the best angle.
- Let's complement the picture with yellow and white highlights from the sun. Excess can be removed with your finger. Let's show the waves using whitewash. Let's complete the illustration with the shadow of a palm tree.
This drawing would be perfect for the Summer of My Dreams homeschool assignment.
"Scratch"
This is a more complex and completely unconventional type of drawing, which will require preliminary preparation. You will need a sheet of thick paper, wax crayons or a candle and mascara. First you need to evenly cover the entire sheet with wax, then with ink. You can also use gouache, but it crumbles and gets dirty during further work. Therefore, when using gouache, you need to add a little PVA glue.
When everything is dry, you can start drawing. In this technique, the drawing is created not by applying paint, but rather by scraping it out. Take a thin non-writing pen refill, an awl, a knitting needle, a stack or a stationery knife. Start by drawing the basic outlines, then move on to shading the surfaces. Depending on the type and intensity of the stroke, the object acquires its “character”. Children really enjoy the process of gradually developing a drawing.
If you want to make children's work more interesting, it is better to use colored wax (regular colored wax crayons). If you don’t have such crayons, then colored pencils or paints will do. After preparing the background, the sheet must be covered with colorless wax (rubbed with a candle). The best effect is achieved when the entire sheet is chaotically covered with strokes of different colors or spots with smooth transitions. The technology is surprisingly addictive for children, but I would recommend getting acquainted with it no earlier than 4 years old. Still, the tools are sharp and require extreme caution.
Read also
Topic of the week: “My Home”
Theme of the week “My Home” Lesson 22. House for a bunny and a rooster (Plasticine modeling) Program content. Strengthen children's ability to bring a product to the desired image using plasticine. Learn to retell fairy tales based on illustrations. Demonstration material. Heroes
Theme of the week: “Summer is coming”
Theme of the week “Summer is coming” Lesson 36. Beautiful butterfly (Applying plasticine to the surface) Program content. Continue to teach children to apply plasticine to the surface in a thin layer inside the outline of the design and decorate the product. Develop speech and thinking. Teach with
Theme of the week: “Summer is coming”
Theme of the week “Summer is coming” Lesson 36. Swan on the lake (Modeling from plasticine using natural materials) Program content. Strengthen the ability to combine natural materials and plasticine in crafts. Practice connecting parts. Learn how to complete a craft
Theme of the week: “Goodbye, summer”
Topic of the week: “Goodbye, summer” Lesson 1. How I spent the summer (Free choice of material) Program content. Bring back pleasant memories of summer. Give children the opportunity to independently choose the material and method of conveying their impressions. Develop
Topic of the week: “My Home”
Topic of the week: “My Home” Lesson 41–42. Houses of the Three Little Pigs (part 1–2) (Drawing with pastel crayons, sanguine, charcoal, wax crayons) Program content. Continue learning how to make illustrations for fairy tales. Develop the ability to arrange objects on a sheet of paper. Learn
Theme of the week: “Summer is ahead”
Theme of the week “Summer is ahead” Lesson 69. Khokhloma patterns (Gouache painting) Program content. Expand knowledge about Khokhloma fishery. To cultivate interest and love for the art of Khokhloma masters, to teach how to highlight plant and grass patterns. Continue to teach children
Theme of the week: “Soon to school”
Theme of the week “Soon to school” Lesson 71. My first letter (Drawing with felt-tip pens) Program content. Strengthen children's ability to draw large and accurately. Teach children to make a decorative pattern from a variety of elements. Exercise children in choosing beautiful
Topic of the week: “My Home”
Theme of the week “My Home” Lesson 21. Houses for nesting dolls (Drawing with colored pencils) Program content. Teach children to draw small and large objects consisting of a square and a triangle. Continue learning how to compose a plot composition. Cultivate responsive
Drawing with plasticine on glass
This will require a little preparation - you need to place a drawing under the glass and use a marker to draw all the contours on it. After this we begin to “color”. To do this, softened plasticine is applied inside the contours, without going beyond the edges of the parts. To soften the plasticine, you need to warm it. This can be done by kneading it with your hands or simply placing it in the sun or radiator.
On the working side, everything doesn't look very neat. But on the reverse side there is a beautiful color drawing with clear contours. The finished picture is inserted with the reverse side into a frame with a background made of colored cardboard.
Before starting work, do not forget to seal the edges of the glass with tape to protect the child’s hands.
If the child has not yet mastered this technique, it is better not to spend money on frames. It makes sense to purchase a regular coloring book with a large pattern.
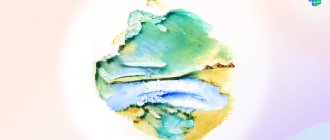
Painting with salt
We cover the entire sheet with watercolor paints and pour a little salt on different parts of the drawing. Salt absorbs excess water, sticks and creates a very interesting effect. Excess salt should be carefully shaken off after drying.
If you liked the selection of non-traditional drawing techniques for kindergarten, please share it on social networks.
Summary of a lesson on unconventional drawing in the senior group
Topic: "Hello summer"
Purpose of the lesson: