boletus
This mushroom has a high, curved stalk. The hat is thick and red. They have a spongy layer underneath. It won’t be difficult even for a child to draw it. Here is a small easy master class.
- 1 step. Let's draw a hat. To do this, draw a horizontal line. Its length is the width of the cap. From the ends of the line at the top, draw an arc.
- Step 2. We depict the leg in the form of an elongated vertical oval. That's the whole lesson. All that remains is to paint.
- Step 3. The hat can be dark brown or gray. The bottom layer is white. The pattern on the leg resembles birch bark. Everyone can imagine this tree and repeat a similar drawing, only in a smaller form.
Honey mushroom family
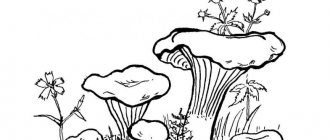
Small mushrooms with round caps are always arranged in groups. They grow on green meadows and stumps. Every mushroom picker loves these fragrant babies. When starting to depict these beauties, it is better to look at them in person. After all, it is so unusual for them to gather in friendly companies. But, if this is not possible, you can look at the photo and make our step-by-step lesson.
- Let's draw a cylinder - this is the future stump. We mark the location of the mushrooms with thin lines. Two will be at the bottom left, and a group of five will be at the top right on the edge of the stump.
- We thicken the legs. We draw semi-oval caps.
- Now we color the work with colored felt-tip pens. The mushrooms themselves will be light brown. Don't forget to show the skirt under the hat and on the leg. The stump is dark brown in color. The top of the cut is yellow.
- We add a little yellow to the mushroom itself, showing the transition from dark to light areas. We darken the bottom of the stem of each honey mushroom.
- Draw the roots of the stump and the grass.
You can make a drawing unique by adding just a little bit of your vision. Even following our general step-by-step master classes, each person’s paintings will be different. And that's great. After all, every video world is different.
How to draw a mushroom step by step for children: 1st grade
So, let's begin our journey to the forest kingdom with a lesson for the smallest and youngest artists. We will use only simple geometric shapes and a bright palette of colors. Make sure that the child holds the tool correctly in his hand and carefully paints over the elements without going over the edges. It is drawing that develops fine motor skills, perseverance and diligence. A child can express his emotions and inventions on canvas, so give him this opportunity!
Suggest a theme for the picture: “Autumn mushrooms,” we’re sure he’ll definitely like this idea.
Let’s quickly begin the creative process of drawing a simple mushroom :
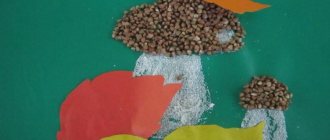
- Use a pencil when sketching so that if you make a mistake, you can easily erase the lead with an eraser. We outline the first small, rounded hat. Let's mark a larger semicircle a little further away.
- We add legs to the ovals. Below we denote grass sticking out in different directions. It should have pointed ends, almost like hedgehog spines. In the background we depict two branches with leaves.
- Fill the base of the mushrooms with beige pigment, and shade the element on the left side with an orange tone to give it volume.
- We paint the foliage with a yellow tint and highlight the veins with a red pencil. This will add detail to our composition. The painstaking work will be immediately visible.
- We use a wide range of green to fill in the grass. Make strokes in different directions to show tousle and naturalness.
- Finally, we pour the brown pigment into the caps, without pressing too hard on the tool. Next, we shade them with great pressure, repeating the contour of the figure.
We've got a real autumn still life that can be placed in a frame in the most visible place! The main thing is not to stop there.
fly agaric
This is the leader of the inedible mushrooms. Despite its beautiful coloring, it is strictly forbidden to eat. To draw it, you need to choose only bright shades of pencils. It is better to use watercolors. Additionally, you will need a black gel pen and an eraser. Let's get to work. We will depict a family of three representatives of the species.
- We draw three contours of future legs. The tallest one should be in the center.
- Adding hats. Fly agarics of different sizes have different shapes. For the central one, we make a circle with wavy edges at both the top and bottom. For the left mushroom, draw a circle and add an arc on top, dividing the entire cap into two parts. The top half is much smaller than the bottom. For the right one - a small elongated oval.
- Adding details. It is necessary to show folds on the legs: some in the center, others in several rows at the bottom. Add plates under the mushroom caps.
- We draw white dots on the head using circles of different sizes. Moss can be depicted below. Now everything needs to be outlined with a black pen. After it dries, remove all pencil lines.
- Let's color the picture. We make the legs gray. The cap plates are the same color. We use brown to show shadows. The hat consists of three layers of color. The top is orange. The edges are burgundy and the central part is red. We correct everything with smooth transitions. Paint the moss with a dark green shade. The work is completed.
Basket with mushrooms | Large size photos and vector clipart
|
| Wooden cart with fresh mushrooms in the forest, close-up. Raw wild chanterelle mushrooms. Vegetarian food. Selective focus — © Bochkarev Valery |
Wooden cart with fresh mushrooms
- ID 6637659
| Wooden cart with fresh mushrooms in the forest, close-up. Raw wild chanterelle mushrooms. Vegetarian food. Selective focus — © Bochkarev Valery |
Wooden cart with fresh mushrooms.
- ID 6640337
| Wooden cart with fresh mushrooms in the forest. Raw wild chanterelle mushrooms. Vegetarian food. Selective focus — © Bochkarev Valery |
Wooden cart with fresh mushrooms
- ID 6637660
| Wooden cart with fresh mushrooms in the forest. Raw wild chanterelle mushrooms. Vegetarian food. Selective focus — © Bochkarev Valery |
Wooden cart with fresh mushrooms. Vegetarian food
- ID 6637661
| Wooden cart with fresh mushrooms in the forest. Raw wild chanterelle mushrooms. Vegetarian food. Selective focus — © Bochkarev Valery |
Wooden cart with fresh mushrooms. Vegetarian food
- ID 4480022
Basket with mushrooms — © mrivserg
Basket with mushrooms
- ID 3554407
| Basket with mushrooms on a white background — © Givaga |
Basket with mushrooms
xn--80apfevho.xn--p1ai
Fantastic mushrooms with watercolor pencils: step-by-step instructions
We invite you to plunge into a fairy tale and dream a little. What kind of plants would there be if you were, for example, in Wonderland? Big ones? Green? Or maybe all together? You can think about this topic for hours and come up with new images and color solutions. Everyone can have their own idea of the magical world, but we propose to draw our vision.
This is not difficult at all if you carefully read the recommendations and description. We are confident that everyone can cope. Inspired by the work below, perhaps you will create a completely different plot. Unleash your imagination!
Prepare the necessary materials in advance:
- Watercolor pencils
- Thick paper
- Eraser
Work progress step by step:
- We use simple shapes to designate mushrooms, one of which we make as large as possible. Our composition is mainly composed of toadstools, and they are characterized by drooping caps and curved legs. Below we outline a little old man with a stick, who slowly wanders towards the real mutants.
- We start painting with the darkest color, namely the dark blue tinting of the edges of the toadstools. Next we move upward to a lighter range, turning into a blue tint. We consistently apply layers to obtain smooth transitions and leave light spots. Our plants may be completely poisonous, but most importantly, they are beautiful.
- We complete the gradient with green pigment.
- We shade the bases of the mushrooms with dirty colors so that they shimmer and emphasize the texture of the paper. We move on to the design of the remaining items using the same technique. Take the time to do detailed work. Show some curves and irregularities here and there.
- We draw shadow areas on the earth's surface. To prevent the toadstools from merging with each other, add more blue in some places and more green in others, so they will acquire an individual color.
- We work on the foreground and sketch out the green grass. Make the silhouette of the resident completely black.
Our truly mysterious picture is ready! You can leave your autograph in the corner of such a masterpiece and then hang it on the wall.
What can be used as a motivating start to a lesson?
In order for preschoolers to better understand the signs and properties of the depicted objects, the teacher constantly works to help children understand the world around them. Without this, no drawing activity is possible. So, before inviting the children to draw mushrooms, the teacher conducts a lesson on this topic, where he talks in detail about what kind of living objects these are. Be sure to show pictures depicting all kinds of mushrooms, the teacher explains the difference between edible and poisonous ones. It is also good to touch on the topic of behavior in the forest.
As a motivating start to the lesson
It is possible to offer a fairy tale about mushrooms, of which there are a great variety. For example, it is worth recalling the work of Russian folklore “The War of Mushrooms and Berries”, adapted by V. Dahl, or the famous fairy tale by V. Suteev “Under the Mushroom”. The children's task will be to draw their favorite episode from a fairy tale. By the way, this fairy tale can be played out in an interesting way: toy characters came to visit the children and asked them to help them hide from the rain - to draw a big mushroom where they could all take shelter.
In addition, we can recommend other, lesser-known literary works: E. Shim “The Brave Honey Mushroom”, N. Pavlova “Two Tales of Mushrooms”, A. Lopatina “Acquaintance with Mushrooms”, N. Sladkov “Amanita” and “Round Dance of Mushrooms” ", V. Zotov "Autumn Honey fungus". These literary fairy tales and stories touch on various issues, such as how the names of mushrooms came about, whether it is possible to grow mushrooms in the garden, and how beneficial mushrooms can turn into harmful ones. Many of these aspects can be played out in class and an interesting motivation can be created based on them. For example, tell that mushrooms grew near the road and became harmful (because they absorbed harmful exhaust gases), and the children’s task is to draw new, useful, environmentally friendly mushrooms that grow in the forest.
To develop speech and broaden the horizons of children, it is good to introduce them to signs and proverbs about mushrooms. For example, according to the superstition “Where there is a red fly agaric, there is a white mushroom sitting nearby”, you can create an entire composition (as an option “Where one butterfly was born, others fled side by side”).
Pencil drawing master class
Regardless of the chosen type, the diagram of how to draw a mushroom with a pencil requires the following steps:
- Creating outlines. This is an oval cap with a stem attached to the bottom.
- Contour detailing.
- Erase auxiliary lines.
The completion is painting. To do this, you can use colored pencils, felt-tip pens or paints.
