How to draw a Dymkovo toy horse in gouache
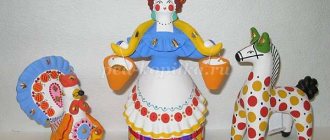
The Dymkovo toy is a real work of folk craft, which craftsmen sculpt from clay and then proceed to painting. Most often these are birds and animals. In this lesson we will make the drawing “Dymkovo Horse Toy”.
Here are the materials and tools we will prepare:
- gouache of different colors and shades; - brushes; - HB pencil; - eraser; - a glass of water; - palette; - paper.
Step-by-step drawing: 1. Draw the shape of our folk toy from clay. Draw it in a simple shape with rounded lines.
2. Add a mane with ears and a tail using simple arched lines. Let's also outline the hooves.
3. Draw eyes and details on the muzzle. We will also decorate the toy with circles of different diameters, which we will later paint with different bright gouache colors.
4. Now let's move on to paints. To paint the base color we will use light brown gouache, which can additionally be diluted with white. We paint the body and head with ears.
5. Now let's take black gouache. We use it to paint the mane, tail and hooves.
6. Add a little brown color to add volume to the toy.
7. Fill in some elements on the horse’s body with red gouache.
8. We also paint large and small circles with green gouache.
9. Paint the remaining decorative elements on the horse yellow.
10. At the end, be sure to make an outline of the entire figure, as well as the details in the middle. We use black gouache after the previous layer has dried.
This is how a beautiful bright drawing of the Dymkovo toy “Horse” turned out using gouache.
Source
How to draw a Dymkovo toy
Here we will analyze in detail with pictures how to draw a Dymkovo toy. An interesting horse with a funny pattern is a good object for drawing with a child, it’s not too difficult, and the result will be very bright and pleasant. You can also see how to draw a horse and a horse.
We start drawing the Dymkovo toy with such a smooth rounded line. This line will indicate the size of the toy, the length of its head and back.
Now we draw the front part using a similar line.
Using smooth lines, draw the outline of the toy’s front legs.
Let's mark the position of the toy's back leg.
Let's draw a smooth, rounded leg in the background; it is partially covered by the body of the toy.
Along the upper contour we need to draw the horse's bangs, mane and tail. You can draw only the outline or immediately paint the entire surface black, there is no difference.
Again, paint the hooves of the Dymkovo toy with black. We draw the harness with thick, smooth lines.
Take a green pencil or felt-tip pen. We draw the ears of the Dymkovo toy. You need to draw circles in green on the surface of the horse in a chaotic manner.
We continue to draw the pattern characteristic of this style. Here we need red and black colors, draw circles with a dark center.
Let's draw the eye of the Dymkovo horse and add black droplets to the body.
All that remains is to add yellow circles with black stripes to the empty spaces.
This is how easy and simple we managed to draw a Dymkovo toy for children. You can decorate an album or a wall in a room with a beautiful design.
Other lessons that your child will definitely enjoy:
Source
Creativity in modern times
Painting figures in Dymkovo painting is included in the program of preparatory classes for kindergartens. And many craftswomen are engaged in the production of high-quality real toys; their works are in demand in the souvenir market, preserving and continuing the traditions of Russian crafts.
The Dymkovo toy for souvenir gifts is created in genre scenes, however, which naturally implies the meaning of the toy - to play and fulfill a certain role in the plot. Young ladies with gentlemen on teams of multi-colored horses, wedding performances, festivals and festivities, fishing, people playing balalaikas and accordions are still relevant in crafts of this kind.
Creation technique
Let's start with the fact that initially the Dymkovo toy figures were molded from a mixture of bright red clay with brown sand, which was mined on the river, and then fired in a kiln until completely dry. Then the toy was covered with chalk diluted in milk, creating a snow-white background for subsequent painting.
As in other ancient Russian crafts, tempera paints were used for coloring - dry pigments on egg yolk with kvass. They painted with feathers or sticks. The color scheme of toys is replete with bright colors, mainly red, yellow, blue, green. Diamonds made of gold leaf or gold leaf are added to the toys, as seen in the pictures.
Note. Nowadays they use pieces of foil, copper potash or simply golden paint.
The creation of the Dymkovo toy has reached our times as a type of modeling for children with their parents. You can try to make a Dymkovo toy yourself based on a sample, having studied the principles of sculpting figures and the elements of patterns and painting on toys. There are plenty of materials and paint choices on the market these days. Dymkovo figures are made from dough, polymer clay, and painted with bright colors that do not contain varnish.
To make a horse or a young lady, we take special modeling clay and plaster. We make the white background with white in two layers. Dry well.
For those who have never encountered modeling, the work may seem difficult, but even if it is just fun with children, the quality of the work does not matter, the process itself is important. Now we take bright colors and apply patterns. The painting is special and has its own elements and ornaments that have been established over many centuries. Geometric patterns, bright without smooth transitions or halftones. Photo below:
Gold inclusions in the patterns are done with paints that can be bought in the store. At all times of paganism in Rus', geometric shapes and patterns were used as symbols, the rhombus was used to mean fertility, wavy lines meant water, the red color of fire, so the red circle is a symbol of the sun, blue is the sky, green is the color of nature, earth , arable land and so on. Black color was also used mainly for coloring hair and eyebrows.
Painting such toys is not a very difficult task and is a good training for children’s fine motor skills; simple drawings will help teach how to draw lines evenly with paints and brushes.
The process of sculpting a product is carried out in stages, piece by piece, and then the parts are joined together. Now more attention is paid to the process of making the figure and painting so that the toy turns out to be of high quality.
The main bird of Vyatka toys was the turkey, because it can be painted as brightly as possible and there is a lot of space on the open tail for bright ornaments.
