How to draw a truck step by step in 5 steps
In this section I will show you how to draw a truck step by step.
You can draw it by hand while looking at your computer monitor, or print this page for more detailed instructions on each step. Follow the red line in each illustration to find out exactly what to draw in this step. Lines drawn in previous steps are shown in gray. I'll show you illustrations of each step and then give you a description of how to draw it.
1. Draw an outline
Connect two vertical rectangles to form a cabin. On the lower right side, add a U-shaped shape lying on its side. Draw a straight and curved line vertically inside the U-shape to show the outline of the rear tires.
Form three full tires. Attach the bottom of the unfinished oval to the bottom of the front tire. To the left of the two rear tires, add a partial oval. On the left side, draw two unfinished ovals. Above and to the left of the rear tire, add a long straight line from right to left.
3.
Wheels and gas tank
Draw a rectangle for the bumper and the cab roof line. Add a cylinder for the gas tank. Draw ovals for the tires and lines dividing the tires. Decorate the roof of the truck. Erase all unnecessary lines from the previous step.
4.
Windshield and Grille
For the windshield, draw a rectangle. Add two slanted lines with circles on one end and double lines on the other for the windshield wipers. Draw the shape of the front grille. On either side of the grille, draw a circle inside another circle for the headlights. Add four small rectangles on the front bumper for the side lights and turn signals. Draw four curved lines like the straps on the fuel tank.
5.
Add Details and Shading
Draw the shape of the door and window using three rectangles. Add a tiny rectangle to the door for the handle. Fill in the dark areas as shown in the picture.
Your car drawing is finished! Even if you don't get it right the first time, keep practicing until you get it right!
Source
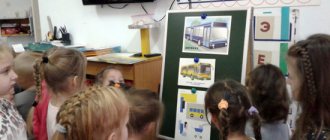
Visual arts lesson on the topic “Bus”, middle group
Lesson summary for visual arts in the middle group
" Bus"
Target
: teach children to convey rectangular and round shapes in a drawing, draw an object large, in accordance with the size of a sheet of paper, and maintain proportions.
Tasks
:
1. To develop children’s knowledge about transport and its types; convey the shape of the main parts of the parts, their size and location.
2. Form rules for painting with paints: in one direction (from left to right or from top to bottom) with the entire brush, tearing it off the paper and each time bringing it to the outline.
3. To develop interest in drawing, artistic taste, attention and logical design in drawing, creative thinking and imagination.
Handout:
Landscape sheet, gouache, bus drawing algorithm, toy bus, video presentation depicting transport (plane, helicopter, bus, trolleybus, tram, ship).
Preliminary work
:, conversations about transport, looking at illustrations depicting transport, looking at transport toys.
Progress of the lesson:
Organizing time:
The guys came to visit us. But we need to guess what type of transport they arrived on. To find out, you need to solve the riddle. The teacher asks you to guess the riddle:
A strange house rushes along the road -
Round rubber feet.
filled with passengers
And the tank is filled with gasoline... (bus)
- Children, let's look carefully in the group and find out if we have a bus.
When the children find the bus, they sit in a semicircle on chairs near the TV.
Main part: Video presentation “transport”
- Now I will show you pictures of transport, and you will say the name of this transport. (I show and the children name). Well done. Now let's remember the types of transport. What type of transport is a ship?
(Water)
- Why?
(Because he floats on water)
- Well done. Bus, tram and trolleybus - what type of transport is this?
(Terrestrial because it moves on the ground).
- Fine. Plane and helicopter - what type of transport?
(
Aerial because they fly through the air).
- Right.
Today we will draw a representative of a terrestrial species - a bus. Let's look at and touch our bus, remember what parts the bus consists of, I will show the parts of the bus, and you will name them. (
Wheels, windows, doors, headlights).
- Fine. Why does a bus need windows?
(
So that people can see where they are going).
— Why does the bus need doors?
(
To board and disembark passengers at stops).
- That's right, but why does he need wheels?
(
To move along the road).
— Why do the bus have headlights?
So he can ride in the dark).
- Well done.
- Show and name the geometric shapes that the parts of the bus look like:
What shape do the doors look like? ( rectangular
)
What shape do windows look like? ( square
)
What shape do the wheels look like? ( round
)
- Well done!
It's time for us to go to the creative workshop. Let's go.
Outdoor game "Bus":
Our bus goes on and on, spinning and spinning its wheel. (rotate clenched fists)
Our bus goes and goes, Turns, turns the steering wheel, the steering wheel
(we depict how we turn the steering wheel)
Our bus goes and goes, With windshield wipers, bzhik-bzhik bzhik-bzhik
(parallel with both hands left and right)
Our bus goes, twists, turns the wheel.
Doors open, doors close. (we bring our palms together and separate them)
Our bus goes and goes, Spins, spins the wheel.
Our bus is coming and going. Everyone beeps beep (we press on our nose).
Children do the exercise and sit down at the tables. Demonstration of an algorithm for drawing a bus on a magnetic board.
Explanation and demonstration to children how to draw a bus from geometric shapes, showing the sequence of the image of the bus. (draw in the air)
1. First, let's draw a rectangle. We paint it from left to right with the entire bristle of the brush. This will be the main part of the bus. 2. From the upper left corner, draw an arc to the upper right corner with the whole brush. The result is a solon of a bus, then we draw vertical straight lines to make the windows. 3. Now we draw two wheels (circles). We paint the wheels black in a circle.
- Let's paint the buses in different colors, think about what two colors you want to choose and take the jars of paint on the table.
Children's work.
- Now think about how you would like to decorate and complement your drawing, for example, you can draw a road along which a bus is traveling or the sun in the sky.
Bottom line
:
Children show their works and talk about them.
Encouraging children.
Learning how to draw a truck
Good afternoon, boys, rejoice, today's lesson is for you! Today we are learning how to draw a truck with a step-by-step drawing of each element. This drawing is very simple, so even a child or a parent can easily draw it for their child.
Our truck is rushing along the highway to do its delivery business. It is red with a van body, but you can make it absolutely any other color, as well as with any other body, for example, a dump truck. It all depends on your imagination.
how to draw a truck
So let's get started. To make it easier for you to learn how to draw a truck , at each stage we have marked in red those lines that need to be drawn exactly at the step being described.
Step 1 To draw a truck we will need a ruler, an eraser and a pencil. It is advisable to choose an HB pencil as it is best for simple sketches. Let's draw guide lines as shown in the figure.
Drawing the main lines of the truck
Step 2 Next, draw the outlines of the truck cabin.
Drawing the contours of the cabin
Step 3 Next, use a ruler to draw the corners of the cargo compartment. Now let's draw the windshield, door and side mirror.
Drawing a truck van
Step 4 Next, draw the remaining parts of the front of the truck: bumper, headlights, air vents, door handle and second side mirror. Drawing trucks is not very difficult as they have straight lines, if you learn how to draw a truck you will be able to draw other large cars and buses.
Draw a truck bumper and radiator
Step 5 Now draw the wheels as shown in the picture.
Draw the wheels, tank, frame and wings of the truck
Step 6 That's it. The drawing on how to draw a truck is ready. Now you can color it to your liking.
Summary of a drawing lesson in the middle group “Truck”
Sofia Mironova
Summary of a drawing lesson in the middle group “Truck”
summary of drawing classes in the middle group
Theme " Truck "
Goal: to teach children to convey rectangular and round shapes in a drawing, to draw an object large , in accordance with the size of a sheet of paper, to maintain proportions.
1. To achieve clarification of knowledge about the truck and its main parts.
2. Fix the rules for painting with paints: in one direction with the whole brush, tearing it off the paper and each time bringing it to the outline.
3. Learn on your own, choose the color of car .
4. Instill interest in drawing , develop artistic taste, attention and logical design in drawing . Develop creative thinking and imagination.
Handouts: landscape sheet, watercolor, brush, napkin, jar of water.
Progress of the lesson:
-This car is a passenger car , this one is a truck, and I also have a sports car, look, there’s even a bus. You like my cars , let’s now play the game “Colorful Cars ”
.
— Children roll cars along ready-made tracks on the carpet. Guys, you liked my cars . "Yes"
- Let's draw our cars ! Look, on the tables I have prepared sheets of paper for you, on which we will now draw our fast and beautiful cars .
-Well done guys, what wonderful, interesting cars you have created , I really like your drawings. And now we will arrange an exhibition of your works for moms and dads, your parents will be proud of you.
Look guys, do you like our exhibition? "YES"
.
-Well done, you did a good job.
concludes our .
"Fast bugs." Summary of a physical education lesson in the second junior group. Educational activities in the second junior group “Fast bugs”. (According to Penzulaeva L. I Lesson No. 11. November. Page 35.) Instructor.
Summary of a comprehensive lesson for the middle group “Drawing by design. Drawing a favorite toy" Summary of a comprehensive lesson for the middle group "Drawing a favorite toy" (drawing according to plan) Objectives: to introduce children to the names.
Abstract of the educational field in the educational field "Artistic and Aesthetic Development" in the secondary group "Fairy Tale Machines" MKOU "Ortolyk Secondary School named after M. I. Lapshin" Preschool Educational Institution "Solnyshko" Abstract of the educational field in the educational field "Artistic and Aesthetic Development".
Summary of a developmental lesson in a preparatory group for school on the topic “Our Feelings” Synopsis of a developmental lesson in a preparatory group for school on the topic “Our Feelings”. Goal: To develop students’ interest in the world.
Lesson summary (junior group) “Our hands” (palm drawing) Lesson summary (junior group) “Our hands” (palm drawing) Types of children's activities: visual, playful, communicative.
Summary of a mathematics lesson in the middle group “Cars on our street” Purpose: Generalization of children’s knowledge in the educational organization “Cognitive Development”. Objectives: Educational: • To consolidate ideas about the rules of the road.
Summary of the lesson in the middle group “Drawing military equipment” Program objectives: teach children to draw military equipment according to a model, continue to learn how to draw with pencils, develop figurative ideas.
Joint holiday for February 23rd for children and fathers “Our dads and cars” Joint holiday for children and fathers. “Our dads and cars” (the holiday can be dedicated to Defender’s Day or Father’s Day) for children of the older group.
GCD for modeling in the middle group “Our tanks are fast” GCD for sculpting in the middle group on the topic: “Our tanks are fast” Prepared and conducted by teacher Isheeva L.V. All the boys love to play.
Source
