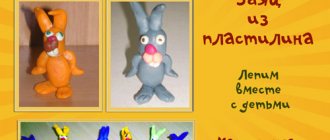
In this lesson, we have published several step-by-step master classes that clearly show how to make birds from plasticine with your own hands. Let's look at the step-by-step steps of sculpting a crow and a woodpecker. First, tell your children interesting information about these birds, and then proceed to carry out your plans.
Birds are amazing creatures of nature that literally fill our lives with new meaning. They can be colorful, such as parrots, hummingbirds, flamingos or other exotic birds, or seemingly inconspicuous, such as crows, sparrows and others. But they are all amazingly beautiful, graceful and lead a special way of life.
In both the first and second cases, the main color of the plasticine will be black. Only the first craft will be completely dark, and the second will be diluted with white and red.
How to make a crow step by step
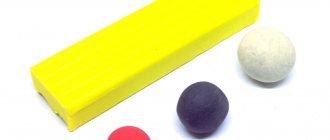
To sculpt a bird you need to prepare:
- plasticine set;
- stack.
Step 1 . Prepare a black block of plasticine. You need 1 or more pieces, depending on the size of the craft you plan to make.
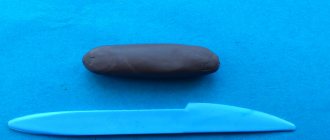
Step 2 . Sculpt the body of the bird. Make an elongated part - a pear. If there is not enough plasticine, then inside mask any other shade, damaged plasticine, or a rolled up piece of foil.
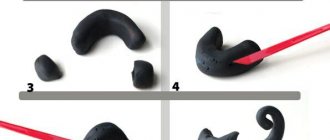
Step 3 . Glue a small black ball at the wide part of the pear and smear the plasticine at the joint. Connect the head and torso. The skeleton of the crow will be ready.
Step 4 . Move on to the flat parts: the tail and two wings. Make models of triangles and drops, also leave a little black plasticine for the crow's beak, because it is also black.
Step 5 . Glue 2 wing drops on the sides of the body, and begin to bring out small hangnails in a stack, thereby imitating feathers. If the plasticine is dense, then at this stage you can use small scissors; they can simply cut out such small corners, completely filling the surface of the wings.
Step 6 . Perform identical operations on both wings. After you do this, do not touch the top with your fingers so as not to press down the selected corners (feathers). Attach a tail that flares to the bottom at the back.
Step 7 . All that remains is to design the head. Turn the last small piece of plasticine into a beak. This will be a small cone, glue it in front and carefully bend it down. Glue 2 gray circles as eyes with pupils. Only these lighter spots will stand out against the otherwise dark background.
Step 8 . The bird should also have legs; make these parts from black and gray pieces. Glue small cones in wide parts to the body, and on the bottom - legs.
The crow figurine is ready.
If desired, you can carefully mix blue into black plasticine to make the plumage believable, with a beautiful tint. Everything is simple and clear.
Bullfinch - making winter birds with your own hands
First of all, it is necessary to sculpt the body, which smoothly flows into the head. Next, add a yellow spot to the bird's breasts. We make white spots under the eyes and insert beads. We attach a green layer of plasticine to the back. Attach the blue-gray wings. Add a gray tail and paws.
Sculpting a woodpecker in stages
The next master class will be on sculpting a woodpecker from plasticine. Remember that the color of these birds is black and white with variegated splashes of red or yellow. Therefore, prepare the appropriate colors of regular plasticine or air plasticine.
Step 1 . As in the previous case, the main block of plasticine will be black. But in this case you need to add white fragments to the plumage. You will also need a small piece of red and brown or orange for the beak and crest.
Step 2 . Divide the black block to form the body, wings, head and tail.
Step 3 . Roll the largest piece in your hands, smooth it out, and turn it into a body.
Step 4 . Attach a small black ball to one side of it. For security, secure a toothpick inside. Glue 2 white cakes on the sides of the small head ball. Glue the chest on the front of the body.
Step 5 . Using additional pieces of black plasticine, fashion wings. Their shape has already been examined using the example of sculpting a crow. Glue the same long tail.
Step 6 . Glue thin white stripes across the wings. Do this on the first and second wing. Also attach a small red plasticine sausage to your head in the form of a tuft. On the reverse side, lift up a kind of comb; the woodpecker should have it.
Step 7 . Attach a long beak in front - a powerful weapon of a woodpecker, with which he heals trees, breaks through wood, and gets worms. Glue 2 small black balls, like eyes, onto white cakes on the head.
Step 8 . Glue the legs in the same shape as in the case of sculpting the crow. Only the paws themselves can be made from orange plasticine.
Step 9 . The bright woodpecker craft is ready.
We looked at a creative lesson in sculpting birds using the example of two individuals familiar to the smallest children of kindergarten age (preschoolers) and older children who have already started school.
Crane step by step - sculpting migratory birds in the senior group
We make a small mound from green plasticine. We stick a white and a red piece onto an oval of gray plasticine. Using a stack we show the bird's plumage. We attach two gray wings and a neck on top. We also show feathers. We glue on the eyes, beak and comb. We place the crane on one leg. For strength, the leg can be made from a skewer covered with plasticine. You can create a composition from different plastic plants around the bird.
Flamingos - we sculpt exotic birds in the senior group
Let's sculpt a graceful flamingo step by step. Take the wire and cover it with a thin layer of pink plasticine. Attach a round head to the tip and bend the neck in a wave. We roll an oval for the body and insert the neck into it. From three pieces we sculpt two wings and a tail. We use a stack to represent feathers. Let's make legs from wire and gray plasticine. We insert them into the body of the bird. We glue on the eyes and pink beak.
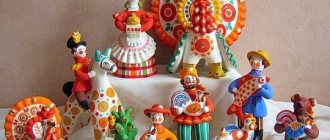
Similarly, you can make a swan, woodpecker, starling, heron or even a firebird. There are also Kargopol, Dymkovo, Kalinin birds or whistles, which can also be sculpted from plasticine. Crafts on this topic are suitable for children in the preparatory group or schoolchildren.
Titmouse - crafts for the older group
We connect a small head and a large body. We add a yellow layer to the bird’s breast, and a green layer to the back. The wings at the base will be blue, and then black and white. We designate the feathers as a stack. We sculpt a blue tail and attach it along with the wings. We sculpt the beak, eyes and paws.
Rooster - we sculpt poultry
Mix red and green plasticine and roll the ball. We attach a neck made of yellow-green mass to it. We sculpt a red comb and black eyes. Attach the beak. For the tail and wings, mix green and red in equal quantities. It is important not to overmix the colors because we want a non-uniform mass. We make the tail from short strands. We construct the legs from matches covered with plasticine mass. Attach the legs to the cockerel and you're done!