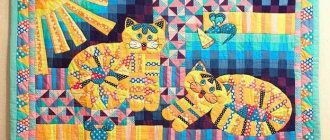
Stencils for children 3, 4, 5, 6 years old - the best selection
Stencils for children 3, 4, 5, 6 years old - the best selection:
Stencil for children 3, 4, 5, 6 years old
Stencil for children 3, 4, 5, 6 years old Stencil for children 3, 4, 5, 6 years old Stencil for children 3, 4, 5, 6 years old Stencil for children 3, 4, 5, 6 years old Stencil for children 3, 4 years old , 5, 6 years old Stencil for children 3, 4, 5, 6 years old Stencil for children 3, 4, 5, 6 years old Stencil for children 3, 4, 5, 6 years old Stencil for children 3, 4, 5, 6 years old
How to make notes for a lesson on drawing in non-traditional techniques
The lesson notes indicate:
- goals and objectives,
- preliminary work (if carried out),
- materials and equipment,
- progress of the lesson.
Working on organizing the lesson is the responsibility of the teacher
According to SanPiN standards, a drawing lesson in the preparatory group lasts 25–30 minutes.
- Organizational moment - 1 minute.
- Introductory stage – 4–6 minutes.
- Practical part - 16–20 minutes.
- Display and discussion of works - 2–3 minutes.
- Reflection and summing up - 1 minute.
Between the structural elements of the lesson, didactic games and dynamic pauses are included.
Outdoor games and warm-ups are a form of health protection in drawing classes
Table: summary of a lesson on drawing in an unconventional technique, scratch paper “Dinosaur Excavation” (preparatory group)
| Author | Semenyako T. |
| Tasks |
|
| Preliminary work |
|
| Materials and equipment |
|
| Contents of the lesson | Children sit in a semicircle on chairs on the carpet. V.: Guys! Today we will meet dinosaurs again! She will be unusual. Want to go in search of dinosaurs? (Children’s answers are usually positive.) Reading the poem “Dinosaurs” by E. Aerova V.: Guys, why can’t we meet dinosaurs anywhere other than the museum? D: Because dinosaurs became extinct. They don't live now. Q: How then did dinosaurs get into the museum? Maybe they live in a museum? (Children's answers) V. gives the correct answer: Of course, dinosaurs do not live in museums. There they are kept in the form of stuffed animals, skeletons or fossils. In the museum you can find out what dinosaurs looked like, their height and weight, and coloring. Let's remember which scientists helped us learn everything about dinosaurs? How did they find them and where? (Children's answers) <…> V.: Let's imagine that on your tables there is an excavation site. Here is a “piece of earth” (shows the prepared cardboard for scratching), and tools (shows a sharp stick and a napkin). Using a sharp stick, you will “find” the dinosaur you want on a black background. But this work is not only interesting, but also difficult, and you need to prepare for it. Let's stand freely in front of the chairs and warm up. Physical education Setting an educational task V.: Guys, how to “find” a dinosaur? It’s very simple - you need to scratch it on a black background with a sharp stick. This image method is called “scratching”, or in other words, scratches. Think about what kind of dinosaur you want to find and scratch the drawing. Think about whether your dinosaur is tall or short, what kind of neck, tail, paws does it have? Are there horns, spikes or claws? You can draw a dinosaur as if it were alive, or you can draw its skeleton. Look what dinosaur I recently dug up. Next, show a sample and explain the scratching technology. Practical work for children At the end of the lesson, an exhibition is organized and the work is analyzed. V.: Well, our excavations have come to an end, and now I invite young paleontologists to tell us what they managed to find, what are the names of your dinosaurs. 2-3 children speak, and the opinions and assessments of those interested are heard. You can suggest making an illustrated magazine: “Dinosaurs”. |
| Quote from: https://www.maam.ru/detskijsad/konspekt-zanjatija-po-risovaniyu-v-netradicionoi-tehnike-gratazh-raskopki-dinozavra-podgotovitelnaja-grupa.html | |
Non-traditional drawing classes are often conducted in a playful way, for example, children go on a dinosaur dig
Dinosaur Dig is an ideal pedagogical development. The lesson is combined with topics on studying the surrounding world (“Professions”, “Animal World”), satisfies children’s desire to experiment and undoubtedly develops their imagination. The list of preliminary work includes a visit to a paleontological museum - unfortunately, they are located in only a few cities of the Russian Federation. Make a presentation and let the children visit the Museum of Antiquities virtually!
This is probably every child's dream - to become a paleontologist and dig up a dinosaur.
Drawing stencils for children - ideas, photos
Drawing stencils for children - ideas, photos:
Drawing stencil for children - idea, photo
Drawing stencil for children - idea, photo Drawing stencil for children - idea, photo Drawing stencil for children - idea, photo Drawing stencil for children - idea, photo Drawing stencil for children - idea, photo Drawing stencil for children - idea, photo Drawing stencil for children - idea, photo Drawing stencil for children - idea, photo Drawing stencil for children - idea, photo
Non-traditional drawing techniques: meaning and tasks in the preparatory group
Children aged seven years confidently use classical drawing techniques. Colored pencils and paints are used for the work. The techniques of folk painting are studied for their technical aspects. Classical drawing classes in the preparatory group are aimed at developing independent composition, the ability to convey movement and plot on a sheet of paper. Monotonous brush strokes and pencil shading can provoke emotional burnout in students. The desire to draw fades away.
Monotony in classes discourages the desire to draw and fantasize
Unconventional drawing techniques are the creation of an image using unusual tools/materials or alternative techniques. It is recommended to combine or alternate classical drawing classes with non-standard techniques. Children gain a sense of novelty in the creative process. The imagination is activated. The use of unexpected tools - threads, toothbrushes, straws, etc. - is experimentation for a child. Children gain new knowledge and new opportunities in non-traditional drawing classes.
Unusual materials for drawing attract children and make them want to start drawing right away
The inclusion of non-traditional drawing techniques in the educational process is carried out within the framework of the preschool education program. The importance of alternative fine art techniques is significant for the education of a well-rounded personality, as required by the Federal State Educational Standard. In the preparatory group, non-traditional techniques contribute to the fulfillment of educational tasks:
- improving fine motor skills and motor coordination of hands,
- preparing the brush for writing,
- forming an idea of the properties of certain materials through research and experimentation,
- development of imaginative and logical thinking,
- development of a sense of color and shape,
- maintaining the psycho-emotional health of children,
- stimulating imagination
- the formation of a sustainable interest in independently thinking through a plan and implementing it,
- development of aesthetic taste.
Unconventional drawing is a good mood, self-confidence and the fight against fears
Stencil for coloring for children - ideas, photos
Stencil for coloring for children - ideas, photos:
Stencil for coloring for children - ideas, photos
Stencil for coloring for children - ideas, photo Stencil for coloring for children - ideas, photo Stencil for coloring for children - ideas, photo Stencil for coloring for children - ideas, photo Stencil for coloring for children - ideas, photo Stencil for coloring for children - ideas, photo
Stencil for coloring for children - ideas, photos
Stencil for coloring for children - ideas, photos Stencil for coloring for children - ideas, photos
Long-term planning for non-traditional drawing for the preparatory group
The program on alternative drawing techniques contains:
- Explanatory note: place of the course in the educational program of the preschool educational institution,
- goals and objectives.
- consultations,
- exhibition of works,
Table: long-term plan for unconventional drawing (fragment)
| Month | Subject | Goals | Execution technique |
| October | "My hometown" |
| Students' choice |
| “Red, yellow, gold - all over the colored sheet” |
| Leaf prints | |
| November | "Birch" |
| Charcoal drawing |
| "Painted Forest" |
| Poking drawing | |
| Author | Naumova E. N., teacher of the Municipal Preschool Educational Institution “Kindergarten No. 164” | ||
| Quote from: https://www.maam.ru/detskijsad/perspektivnyi-plan-po-netradicionomu-risovaniyu-podgotovitelnaja-grupa.html | |||
Creativity is meant to bring joy to children. Let drawing in each non-traditional technique become a small but memorable game. Experiments with materials and tools, unexpected results and unbridled flights of imagination! Unusual drawing techniques expand possibilities and strengthen children's courage to express artistic talents.
Stencils for ornaments for children - ideas, photos
Stencils for ornaments for children - ideas, photos:
Stencil for an ornament for children - idea, photo Stencil for an ornament for children - idea, photo Stencil for an ornament for children - idea, photo Stencil for an ornament for children - idea, photo
Stencil for an ornament for children - idea, photo Stencil for an ornament for children - idea, photo
Stencil for an ornament for children - idea, photo Stencil for an ornament for children - idea, photo Stencil for an ornament for children - idea, photo Stencil for an ornament for children - idea, photo
Examples of finished works
Children put their finished work on the table so that the teacher can evaluate their talent. Most often, children like to draw images on the theme “Defender of the Fatherland Day”, “March 8”, “Autumn”, “Spring has come”, “The coldest month”, “Profession”, “Forest”, “Why day follows night”, “Clothing” ", "Our kindergarten is like a home."
Works of preschoolers
The most popular theme for children is “Headdress”. The children learn to correctly name hats and their parts, telling what types they come in. For example, to come to the beach, you need to wear a Panama hat and a hat. When late autumn comes, women wear scarves and light scarves. And already in February and January you need to wear a warm pompom.
Classes on theatrical activities in secondary groups of the Children's Center
Stencils for cutting, appliques for children - ideas, photos
Stencils for cutting, appliques for children - ideas, photos:
Stencil for cutting, appliques for children - idea, photo Stencil for cutting, appliques for children - idea, photo
Stencil for cutting, applications for children - idea, photo Stencil for cutting, applications for children - idea, photo Stencil for cutting, applications for children - idea, photo Stencil for cutting, applications for children - idea, photo Stencil for cutting, applications for children - idea, photo Stencil for cutting, applications for children - idea, photo Stencil for cutting, applications for children - idea, photo Stencil for cutting, applications for children - idea, photo
Simple stencil templates for children - ideas, photos
Simple stencil templates for children - ideas, photos:
Simple stencil template for children - idea, photo Simple stencil template for children - idea, photo Simple stencil template for children - idea, photo Simple stencil template for children - idea, photo Simple stencil template for children - idea, photo Simple stencil template for children — idea, photo
A simple stencil template for children - idea, photo A simple stencil template for children - an idea, photo A simple stencil template for children - an idea, photo A simple stencil template for children - an idea, photo
Materials and drawing rules
For a creative activity, prepare the necessary materials:
- gouache or finger paints (the second, if the child is small, can pull his smeared fingers into his mouth);
- paper or drawing cardboard;
- packaging of sanitary sticks;
- palette;
- templates for sketching (or full-fledged pictures that require additional drawing with dots).
Be sure to use the palette. It is inconvenient to pick up gouache from a jar with chopsticks: the child can grab too much with the cotton tip, and as a result the drawing will be smeared. In the cells of the palette, place the colors that are needed to create a thematic design, dilute with water to the optimal consistency. Do not add other colors, otherwise the little artist will be tempted to use them too, and as a result the picture will be ruined.
When creating a design with cotton swabs, the surrounding surfaces are almost not contaminated. Therefore, a protective oilcloth covering is not required.
The rules for unconventional drawing with cotton swabs are simple:
- There should be enough sticks. One copy for each color used.
- Cotton swabs do not need to be wetted. There is also no need to wash the stains after applying them.
- To apply a dot, dip a cotton tip into the paint well, then gently press it onto the paper.
- Do not allow spots of different colors to merge. Any distance between the points is possible, depending on how the picture appears.
- Press the stick perpendicularly to the paper sheet. Make short movements, do not keep the cotton tip on the paper for a long time.
- First process the outline of the design, then fill in the middle of the design with spots.
The first pointillism lesson for children is introductory and should last 5-10 minutes. Then, if preschoolers wish, creative lessons can be gradually extended.
Printable paper stencils for children
Paper stencils for children to print:
Paper stencil for children to print
Paper stencil for children to print Paper stencil for children to print
Paper stencil for children for printing Paper stencil for children for printing Paper stencil for children for printing Paper stencil for children for printing Paper stencil for children for printing Paper stencil for children for printing Paper stencil for children for printing
Types of non-traditional drawing in kindergarten
What is especially valuable about non-traditional methods is that most of them can be done by young children, in contrast to the usual drawing with a brush or felt-tip pens and pencils. For middle-aged children (4-5 years old), more complex techniques are available, which are performed with the help of adults. Children aged 6-7 years can use all non-traditional methods independently.
The following describes various methods for practicing non-standard drawing, as well as recommended ages for children.
Fingergraphy
The simplest and most common method of non-traditional technique is drawing with fingertips. Special finger paints are well suited for this; you can also use gouache or watercolor, after wetting it with water.
All that is required of the child is to dip his finger in the paint and leave a print on the paper. It’s fun to decorate the templates this way (you can print them out or draw them by hand):
- Add leaves to the bare tree;
- On the stem and core - petals;
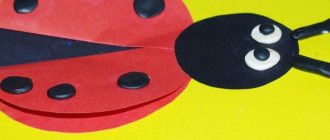
- For the ladybug, make spots on the back;
- For the New Year tree - toys;
- White spots on the fly agaric cap;
- Butterflies have spots on their wings.
Note! Any picture can be fully colored using fingerprinting or the missing elements can be added.
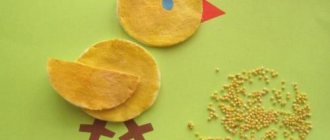
Drawing with palms
This method can be considered the next step after finger painting. The entire palm will be involved here. The same paints can be used as for fingerprinting. Here are some options for drawing with your palms:
- Chick. You should apply yellow paint to your palm and leave an imprint on the paper - you get a body. Then apply paint to the fist and thus make a head for the chicken. All that remains is to add the beak, legs and eyes.
- Fish. To do this, you can apply different colors to your palm, then leave an imprint on the paper and add eyes and fins to the image.
- Tree. To do this, use brown or black palm print paint. Then decorate the resulting tree with leaves using fingerprinting.
- Peacock. This beautiful bird will come from two or more handprints. Then you should draw the head, paws, eyes and decorate the tail.
- Flower. It is worth using bright paint to leave an imprint. Then add a stem with leaves to it.
Cockerel made from a palm print
Note! The open palm most closely resembles a bird. Therefore, using this technique you can make any bird of your child’s choice.
Drawing with cotton swabs (poking method)
This method is reminiscent of fingerprinting, but it uses an alternative tool for making a print - a cotton swab. The mark it makes is small and more round, so this method is good for drawing spots on animals. Another option is to completely paint the image with pokes, thus obtaining a mosaic effect. Using cotton swabs you can draw the following:
- Grains from a mouse or chicken;
- Rowan berries;
- Snowfall;
- Rain;
- Starry sky.
Didactic game with environmental content for preschoolers
You can also use a few pokes to create an object of the required shape, for example, tree leaves or flowers.
Note! You can draw with several sticks at once; for convenience, they can be secured with a string.
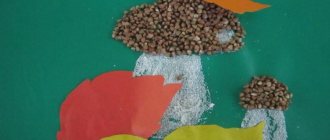
Drawing with bulk substances
For this method, you can use salt, sand or any cereal. Drawing occurs in stages. First, you should put some design on the paper. Then drop PVA glue into certain places and sprinkle them with salt or cereal. After drying, shake off excess. The result will be an unusual three-dimensional drawing. You can experiment with this method of drawing on the following topics:
- Winter forest;
- Fireworks;
- Snowstorm;
- Pattern on butterfly wings;
- Flowers.
Snow-covered birch tree made with salt
Note! It is more interesting and colorful to use colored grains or sand. To do this, you can use food coloring or buy ready-made colored sand.
Drawing with crumpled paper
For this method it is more convenient to use gouache. You will need a small piece of paper that needs to be crumpled. Then dip this lump in paint (if necessary, add water to the gouache) and begin to apply it to the paper. The drawing turns out airy and light. Here are some ideas of what you can draw this way:
- Lilac branches;
- Dandelions;
- Clouds;
- Snowy spruce trees;
- Blooming meadow.
Lilac branches
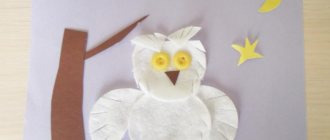
Note! In this way you can color the image in an unconventional way. For example, make a shaggy cat or a fluffy owl.
Drawing with threads in kindergarten
Thread drawing can be a little challenging for preschoolers, so it is recommended to do it with older groups. This is a rather complicated technique and little ones cannot cope with it. To create such a pattern, you need to prepare threads (it is advisable to choose thicker ones, for example, wool). Next, you need to cut a thread about 30 cm long and dip it thoroughly in paint. Then you should place the thread on the paper, for example in a loop, and pull it down. For convenience, you can use two sheets of paper to properly press the thread on both sides. Another option is to fold the sheet in half and thread the thread inside. You can create a variety of patterns, for example:
- Abstraction;
- Flowers;
- Snail (the thread for this should be folded into a spiral);
- Butterfly.
Note! Nitography is the most complex drawing technique for children. But the result is very unusual, and the creation process is interesting and will appeal not only to children, but also to adults.
Monotype
This is a technique of creating an image using a print. A suitable method for kindergarten is when a sheet of paper is folded in half and an image is painted on one side. The design is then pressed onto the other half of the sheet, thus creating a symmetrical image. What can you depict using this technique by drawing only half of the image?
- Butterfly;
- Reflection in the water of the landscape;
- Ship with reflection;
- Vase with flowers;
- Sun;
- Tree.
Landscape with reflection using monotype technique
Note! Monotype is interesting because its result can be unpredictable. The resulting drawing always comes out unique.
Drawing with foam rubber in kindergarten
The execution process and the result are ultimately similar to drawing with crumpled paper. For this technique you will need a piece of foam rubber or a dishwashing sponge. Foam rubber does not need to be soaked in water; it should be immediately dipped in paint. Ideas for images using this technique:
- Snowman;
- Christmas trees;
- Tree crown;
- Winter in the forest.
Landscape painted with foam rubber
Using this technique, you can paint animals, then they will look fluffy.
Blotography
The essence of this method is to initially drop paint onto a piece of paper, forming a blot. Then you should supplement it with various details, obtaining some kind of drawing. This method perfectly develops children's imagination.
To get blots or splashes of paint on paper, you can use a cocktail straw. Using the same tube, you can inflate the blot, obtaining the desired image, for example, the following:
- Tree branches;
- The man's hairstyle;
- Any character.
Note! You can supplement the image with the same paints or felt-tip pens, or even plasticine.
Drawing with wax crayons
Wax crayon can be replaced with a paraffin candle. The essence of this technique is that with the help of a chalk you can draw any design, which will then not be painted over with watercolors and will appear on the surface. Examples of possible images:
- Fireworks in the night sky;
- Sea bottom;
- Cloudy sky;
- Stained glass.
All about cognitive development in preschool educational institutions
Note! If you use white chalk, you can make a secret drawing or note, since the image on the paper will appear only after using paint.
"Secret" image
Spray
Creating an image using this technique involves splashing paint onto paper. To do this, you can use a toothbrush or a hard brush. In this case, the splashes are small and distributed chaotically. Therefore, it is better to use stencils to obtain a drawing of the desired shape. This could be a stencil:
- Christmas trees;
- Cat;
- Colors;
- Tree.
Note! In addition, with the help of spraying you can fill in the background of the future drawing. It could be grass, starry sky, snowfall.
Drawing on wet
In this method, paint is applied to a damp surface. As a result, you can get a blurred background for your future drawing. At the preparatory stage, it is better to mark the future drawing with a pencil on a sheet of paper. This should be done before you need to wet it with water. Do not wet it too much; excess water should be removed with a sponge. Watercolor on wet paper will spread evenly from the brush. This way you can let the different colors mix on their own, so the color transition will look even. What can you draw on the raw side, except for a plain background:
- Setting sun in the sky;
- Clouds and storm clouds;
- Flowers;
- Trees;
- Sea bottom.
Note! After the background has dried, you can add any details to the drawing: birds, fish or an outline.
Batik
This is a technique of painting on fabric. For this activity you will need a piece of white cotton material. For kindergarten, the simplest painting option is suitable - knotted. To do this, you need to tie several knots on the fabric, then dip them in paint. After drying, the knots should be untied - interesting patterns will remain on the fabric.
Drawing with traffic jams in kindergarten
Balsa wood stoppers are great for making circular impressions on paper. It is better to take several corks so that you can use each one for a different color of paint and do not mix them. Using this technique you can draw:
- Berries;
- Caterpillar;
- Chickens;
- Leaves;
- Flowers.
Note! If you cut the cork, you can give the prints a different shape.
Stamping
This technique is quite simple to implement and is suitable even for younger kindergarten groups. The idea is to dip a stamp in paint and leave an imprint on the paper. Moreover, you can choose anything as a stamp, for example, the following:
- Leaves;
- Vegetables;
- Fruits;
- Twigs.
Note! It is very convenient to cut stamps of various shapes from potatoes. You can also make stamps from foam sponge.
Ebru
The Ebru technique involves painting with liquid paints on water. Paint and water have different densities, so you can make some kind of pattern on the surface of the water. Then a sheet of paper or cloth is applied to the surface, and the design is transferred to the new surface. Water can be made more dense with a special solution, which is sold in an art store. Thanks to this, the paint does not dissolve in water, but remains on the surface in the form of a film. You can drip the paint onto the water and then use a stick to make patterns.
This technique is suitable for older groups of kindergarten or lower grades of school. Exercises with ebru can be turned into a fabulous game. Children of all ages really like this technique. Without any special skills, already in the first lesson you can feel like an ebru master.
Drawing on water using the ebru technique
Stencils for 3D pens for children - ideas, photos
Stencils for 3D pens for children - ideas, photos:
Stencils for 3D pens for children - ideas, photos Stencils for 3D pens for children - ideas, photos Stencils for 3D pens for children - ideas, photos Stencils for 3D pens for children - ideas, photos
Stencils for 3D pens for children - ideas, photos Stencils for 3D pens for children - ideas, photos Stencils for 3D pens for children - ideas, photos Stencils for 3D pens for children - ideas, photos Stencils for 3D pens for children - ideas, photos Stencils for 3D pens for children - ideas, photos
Animal stencils for children - templates
Animal stencils for children - templates:
Animal stencils for children - templates Animal stencils for children - templates Animal stencils for children - templates Animal stencils for children - templates
Animal stencils for children - templates Animal stencils for children - templates Animal stencils for children - templates Animal stencils for children - templates Animal stencils for children - templates Animal stencils for children - templates
Templates for drawing with cotton swabs
For children of younger kindergarten age, templates are indispensable. It is difficult for a child to draw a picture on his own, and template images provide convenience and simplicity of the creative process.
It is noteworthy that children’s pictures when using similar templates are not the same. After all, little artists put emotions, character, and ideas about the world around them into their drawings.
Tree stencil for children - templates
Tree stencil for children - templates:
Tree stencil for children - templates
Tree stencil for children - templates Tree stencil for children - templates Tree stencil for children - templates Tree stencil for children - templates Tree stencil for children - templates Tree stencil for children - templates Tree stencil for children - templates
Tree stencil for children - templates Tree stencil for children - templates
Flower stencils for children - templates
Flower stencils for children - templates
Stencil of flowers for children - template Stencil of flowers for children - template Stencil of flowers for children - template
Stencil of flowers for children - template Stencil of flowers for children - template Stencil of flowers for children - template Stencil of flowers for children - template Stencil of flowers for children - template Stencil of flowers for children - template Stencil of flowers for children - template
What is painting with cotton swabs called?
The use of sticks is one of the variations of the common pointillism drawing technique. The French word "pointillisme" translates as "dotted" or "made by dots." The technique was used by many painters, the first was the French neo-impressionist Georges Seurat, most famously his bright canvas “Sunday on the Island of La Grande Jatte.”
When working in the pointillism technique, artists do not always make round dots. The painting can be done in rectangles or strokes.
Pointillism is a mathematical technique, the result is determined by the peculiarities of human vision. Spots of different colors in the picture do not mix, but merging occurs on the retina, due to the specificity of the perception of visual information by the brain. If the viewer looks at the drawing close up, he will see only a lot of multi-colored spots, but if he moves away a few steps, the picture will appear.
The purpose of drawing with cotton swabs is to improve creativity through familiarization with a new art technique.
Tasks:
- mastering an unconventional way of drawing;
- improving finger motor skills and tactile perception, strengthening hand muscles;
- fostering accuracy, perseverance, concentration in performing work, and hard work;
- memory training, improving concentration;
- development of emotionality, the ability to express thoughts and feelings, enrichment of the inner world;
- development of creative inclinations, imagination, ability to come up with non-standard solutions;
- formation of an aesthetic sense, understanding of a beautiful, creative approach to any business;
- acquaintance with the world of fine arts, the work of famous artists.
Letter stencils for children - templates
Letter stencils for children - templates:
Letter stencils for children - templates
Letter stencils for children - templates Letter stencils for children - templates Letter stencils for children - templates Letter stencils for children - templates
Number stencils for children - templates
Number stencils for children - templates:
Number stencils for children - templates
Number stencils for children - templates Number stencils for children - templates Number stencils for children - templates Number stencils for children - templates
Car stencil for children - templates
Car stencil for children - templates:
Car stencil for children - templates Car stencil for children - templates Car stencil for children - templates Car stencil for children - templates Car stencil for children - templates
Car stencil for children - templates Car stencil for children - templates Car stencil for children - templates Car stencil for children - templates Car stencil for children - templates
Stencils for stained glass paints for children
Stencils for stained glass paints for children:
Stencils for stained glass paints for children Stencils for stained glass paints for children Stencils for stained glass paints for children Stencils for stained glass paints for children Stencils for stained glass paints for children Stencils for stained glass paints for children Stencils for stained glass paints for children Stencils for stained glass paints for children
Stencils for stained glass paints for children
Stencils for stained glass paints for children
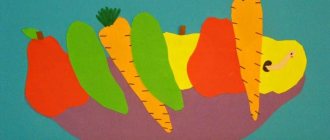
Paper craft stencils for kids
Stencils for paper crafts for children:
Stencil for paper crafts for children Stencil for paper crafts for children Stencil for paper crafts for children Stencil for paper crafts for children Stencil for paper crafts for children Stencil for paper crafts for children Stencil for paper crafts for children Stencil for paper crafts for children Stencil for paper crafts for children Stencil for paper crafts for children