Updated: 04/05/2021
All children love to draw, but many are unable to draw beautifully using “standard methods.” Unconventional techniques will come to the rescue, turning aesthetic education into a fun game. Which is very good for younger children. Unconventional techniques simplify a child’s work: there is no need to master a brush or draw complex compositions, but the end result is wonderful drawings.
Drawing with palms or legs
For this technique, you will need children's palms, plain white paper and gouache (or finger paints are better, as they wash off well). The main blank is created using the imprint of children's palms or feet. Then the adult himself or together with the child completes the small elements.
Rocket in the form of a footprint
Pink flamingo made from handprint
Preschool children will enjoy drawing with their palms. Animals, birds, and natural phenomena are the best.
Interesting video lesson on drawing with palms
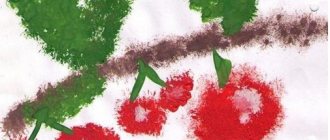
Spray technique
Description
Another interesting unconventional drawing technique, although it requires a lot of additional materials. To prevent drops of paint from staining everything around, cover the surrounding surfaces with oilcloth. It is best to paint over a sink or bathtub.
The paint is mixed with water to the consistency of thick sour cream. The brush or toothbrush is wetted in water, and excess moisture is shaken off. Splashes cover individual areas of the canvas. If necessary, the position of the hand changes, and the paint is sprayed horizontally, vertically, etc. If you need to increase (decrease) the size of the drops, the bristles are brought closer (further away) from the paper.
Examples
Trees, leaves, the sun and other natural phenomena are produced interestingly using the “spray” technique.
tree created using the spray technique - lesson
You can use stencils, cover certain areas of the sheet with them, and cover the background with splashes of paint.
Autumn forest using spray technique
Instructions
Video lesson that can be used as instructions.
The author makes a spray with a workpiece that is pre-coated with acrylic varnish.
Video tutorials on painting using the spray technique
I have put together three video lessons on this drawing technique.
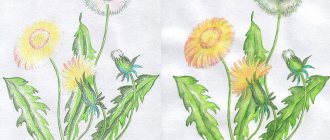
How to draw dandelions
A master class that beginners can take as a basis for drawing. The author sprays three tones of blue paint onto white paper. Then use a cotton pad to wipe away any excess drops in the middle of the pattern. The stems of the flower are already drawn in them with a brush.
How to draw winter
Great tutorial showing how to spray paint a snowy landscape.
Still life with flowers using spray painting
Master class on drawing a still life with flowers
It is carried out by two people - an adult and a child.
Drawing with natural and other stamps
Another technique for preschool children, which is attractive due to its accessibility and simplicity. Dried flowers and leaves, branches and other natural materials are used as stamps. How to draw? Paint is applied to the natural stamp and an imprint is created on the canvas. It is convenient for novice artists to use fruits and vegetables cut in half, and wooden blocks.
Tulip from a print with a bow
Pattern with lines from a natural stamp with thread
Suitable stamp drawing video tutorial
Also suitable as stamps:
- disposable forks
- combs and brushes
- cotton buds
- cut paper blanks
- bubble wrap
- and much more
Examples of stamps
Examples of stamps for drawing
Example of drawing tulips with forks
Tulips made from imprint with forks
Rosette from a Chinese cabbage stamp
Drawing roses using Chinese cabbage stamps
Acrylic pouring technique
Description
This is an abstract painting with liquid acrylic on canvas, which is called Acrylic fluid art. Paints are diluted with water or a special solution so that they can flow freely over the paper. You can pre-mix several colors. If you add liquid PVA or car oil to acrylic, you will get additional effects.
Abstract fill with a shout
Beginners use the simplest technique. The canvas is tilted in different directions, liquid acrylic (approximately the consistency of shampoo) is freely poured over it.
Examples
The popularity of this method of drawing is explained by the lack of a unified technique (no matter how paradoxical it may sound). Each painting with liquid acrylic is unique; the filling cannot be repeated. The process of painting itself is reminiscent of psychological relaxation: the canvas will absorb everything that is in your soul. You let the paints flow freely across the paper, and you don’t know what will come out. And this is the main advantage of technology.
Acrylic pouring - sea and sand dunes
Acrylic pouring - river and sand
Abstract acrylic pouring in dark colors
What materials are needed
For successful creativity you will need:
- acrylic paints;
- thinner (the simplest is water);
- plastic cups and mixing sticks;
- canvases;
- gold leaf, car oil, glitter - to give additional effects;
- disposable towels, oilcloth, robe - for protection from paint.
The list of basic materials is elementary - canvas, acrylic paints and water. But even with such a minimal set the work turns out excellent!
Instructions
I recommend watching the video for beginners
The author mixes yellow paint in a plastic cup and dilutes it with an acrylic compound (40% liquid PVA glue + 60% water). The composition varies from artist to artist.
Similar actions are repeated three more times with different colors. Then the artist mixes the colors together and begins to create.
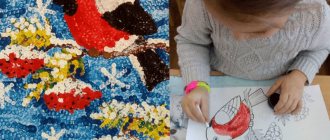
Drawing with plasticine
This is a harmonious combination of modeling and appliqué art. You will need wax plasticine (it is softer and easier to spread over the surface), a flat base (cardboard, plexiglass, plastic), a knife and a rolling pin to level the plasticine. The technique is simple: you need to smear plasticine over the workpiece (ladybug, blue sky, snow, trees).
Baby elephant made of plasticine using smearing technique
Smearing is the simplest technique for painting with plasticine. A more complex one involves creativity with plasticine balls.
This video shows how to draw raspberries with plasticine.
In an interesting way, you can draw such a tree with plasticine.
Wood made of plasticine flagella
To do this, you need to fill a regular syringe with soft plasticine and lower it into hot water. The mass will become even more plastic and will be easy to squeeze out. You will get flagella from which you can assemble interesting pictures, as in the example above.
One stroke painting
Description
The “one stroke” decorative painting technique is very popular, which translated from English means “one stroke”. It was invented in Europe. Among the Slavs, this technique is known under the term “Khokhloma”. The upper part of the brush is dipped in paint of one color, the lower part in the second. In one motion, images of flowers, trees, and animals are applied. The meaning of the technique is a smooth transition from one color to another. This makes the image very bright and realistic.
Examples
As a basis, you can take a cardboard blank, for example, a flower. You need to paint it with a brush with a beveled edge; it is convenient for making halftones. By painting the petals one by one, you will end up with a wonderful bud.
Birds and portraits come out well with this technique. First, a blank is created on a sheet of white paper with a simple pencil. The brush is dipped in two paints and drawn over the surface of the drawing. It is important to tilt and rotate the brush correctly.
Blue firebird painted using the one stroke technique
Drawing a carnation using the one stroke technique
Blue flower using one stroke technique
What materials are needed
To successfully use this technique you will need:
- paints with an acrylic base of medium viscosity;
- synthetic brushes with smooth and beveled edges;
- container with water.
At first, you can use regular gouache.
Instructions
The technique of drawing with one stroke is shown in the video lesson
The artist teaches techniques for putting paints on a brush and two basic strokes.
The materials you will need are 1 paper plate, 1 flat brush, two colors of paint (white and green), paper towels and a glass of water.
Video lessons of drawing with one stroke
I chose two videos on the technique of drawing with one stroke.
Bud and rose in one stroke
Good master class for beginners
The artist dips the top of the brush in white paint and the bottom in burgundy. And he draws a flower on white paper.
Christmas tree in 2 minutes: draw with “one stroke”
In this lesson, the artist draws a New Year's tree.
Drawing with salt and glue
Excellent drawing lessons for children 3-8 years old can be carried out using salt, colored cardboard, PVA glue, and a brush. The technique promotes the development of fine motor skills and perseverance.
First, you need to print the selected composition on colored cardboard. The child applies glue along the contour, then takes salt and sprinkles it on the desired areas. When the composition is ready, the cardboard is tilted to shake off excess salt.
Next, using a brush and watercolor paint, color is applied to the dried salt.
Bullfinch made of salt and glue, painted with paints
Colorful jellyfish made from salt and glue
The video lesson shows how to paint beautifully with salt and glue.
Child development through drawing
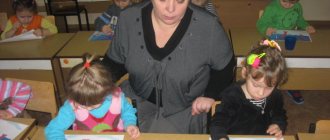
Artistic representation is the first opportunity for a child to develop on the creative side. Any artistic process is closely related to thinking and logic; the child thinks through every little action to make his creation perfect. In addition, this process perfectly develops creative thinking, fine motor skills of the fingers, attentiveness and concentration on one action. Any artistic work perfectly develops creativity: fantasy and children's imagination.
Monotype
One of the types of printed graphics, for which you will need paints, a brush and white paper. We fold the sheet in half, then unfold it and apply a design on one half. Then we fold the sheet back, pressing the drawn part tightly against the empty one. Let's unfold it and see what happens!
Butterfly drawn using monotype technique
Video lesson on drawing using the monotype technique
Drawing with children “21 ways to draw using non-traditional techniques”
Elena Nikitina
Drawing with children “21 ways to draw using non-traditional techniques”
Drawing is one of the most favorite activities of children. Drawing in unusual ways evokes even more positive emotions in children. Using non-traditional drawing techniques, abilities develop . The child develops an interest in drawing , and as a result, a desire to create.
Today I will tell you and show you how to draw without using a brush.
1. Drawing with cotton swabs . We put paint on a stick and decorate the image on a sheet of paper with dots. (Christmas tree, snow, teapot, sundress, rowan branch)
.
2. Drawing with palms . Pour the paint into a flat container. Dip your palm and press it to a sheet of paper. (Flowers, fish, Santa Claus, swan, carrots)
.
3. Drawing with cotton pads . draw with cotton pads by folding them in half, quarter or whole. (Moon, snowdrifts, various flowers)
.
4. Drawing with prints . A simple drawing method : paint is applied to the surface to be printed and a print is placed on a sheet of paper. (Use: flowers, shells, fruits, vegetables)
.
5. Blotography. A spot or blot of watercolor paint is made on a sheet of paper. Take a tube and blow air onto the blot.
6. Drawing with a fork . We put paint on a fork from a flat plate and make an imprint with the flat surface of the fork. You can draw grass , a fence, flowers, a hedgehog.
7. Drawing with thread . It is best to draw with wool thread . We dip the thread in paint and apply it to a sheet of paper and create a pattern by imprinting with the movement of the thread. The wool thread creates a fancy pattern that is suitable for depicting clouds, clouds, sheep, or an unusual flower.
8. Drawing with a sponge or piece of foam rubber. We clamp a piece of foam rubber with a clothespin, dip it in paint and apply prints that create the texture of the object. They are used to paint animal fur, fluffy bunches of flowers, clouds, and tree crowns.
9. Spray painting . You will need a toothbrush and comb. Take a little paint on the brush and spray it with a comb. Move the brush over the comb over a sheet of paper. You can apply paints of different colors, it will turn out very beautiful.
10. Drawing with stamps . The stamp is easy to make from plasticine. We apply plasticine to a block, cube, etc. Using any sharp object, we depict some object or abstract pattern on it. The stamp is ready. We make a pillow from a sponge. Pour paint onto the sponge. We apply the stamp to the sponge with paint. Now you can make prints. A stamp can be made from the bottom of a plastic bottle, you get beautiful flowers.
11. Drawing with imprints of cups and necks of different diameters. Pour the paint into a flat plate. Dip the glass in paint and apply the design to a sheet of paper.
12. Drawing with a comb . We will need a comb with fine teeth. Apply multi-colored paint (next to each other)
on a sheet of paper in the shape of a drop.
Then we run a comb over all the drops of paint, connecting and smearing them. It turns out to be an amazing rainbow. You can also draw different patterns by adding drops and moving the comb in different directions.
13. Drawing with wax crayons . Using colored wax pencils or wax crayons, apply the design to a sheet of paper. Then we cover it with one or several layers of watercolor. The result is an unusual and bright pattern. (You can draw stars , flowers)
.
14. Scratching (waxography)
. We paint the surface of the entire sheet of paper with wax crayons, then cover the sheet with black gouache. When everything is dry, scratch the paint and create a drawing with lines. You can scratch with a pointed stick, skewer, or toothpick.
15. Drawing with gauze . Apply a layer of gauze to a wet sheet of paper, straightening it. The gauze should remain motionless on the paper. Paint on top of the gauze with a brush and paint. Let the drawing dry. We remove the gauze - a pattern remains on the paper in the form of an imprint of the texture of the gauze fabric. (Landscape, sky, tree, grass)
16. Drawing using plastic film. Let's draw a picture. Before the paint has dried, quickly apply the film to the drawing in the right place and carefully, using rotating movements, create wrinkles of the film on the paper. The wrinkles collect paint. Allow to dry and carefully remove the tape.
17. Monotype. Drawing symmetrical objects. To do this, fold a sheet of paper in half and draw an object on one half. While the paint is still wet, fold the sheet in two again. You will get a print on the other half. After this, the image can be completed or decorated .
18. Painting with bubble wrap. Using this wonderful material you can very simply draw falling snow . We apply white or pale blue paint to the film and apply it to a sheet of paper with a pattern. Using this technique you can create an extraordinary background for winter appliqué.
19. Painting with salt . Apply a design to a sheet of colored cardboard using PVA glue. We draw a picture on the theme of winter. Sprinkle salt on top. When everything is dry, shake off the excess salt.
20. Drawing with semolina . For drawing in this technique, colored paper or cardboard is used. PVA glue is applied to the outline of the design. Semolina is poured on top and a sheet of paper is placed tightly on top. Then remove the paper and shake off the excess semolina. In this way the next part is created.
21. Drawing with a candle . On a thick sheet of paper or cardboard, children draw with a candle according to plan. The sheet is painted over with watercolor paint. Wax images will appear through the watercolor. (Christmas tree, snowflakes, animals)
.
You can also use the following non-traditional drawing : drawing with a feather , drawing with a finger , drawing on a stencil with a stamp, drawing with the poke method , drawing with soap bubbles , drawing with crumpled paper , drawing with leaves .
Drawing on ice
Your child will definitely enjoy this very exciting process. Pre-freeze the water in a small container. Then take out a piece of ice and place it on a plate next to your child.
Use watercolor paints. By lowering a brush with paint onto ice, you can create both abstract drawings and more understandable images.
It is very interesting to watch how the paint spreads over the ice layer and gradually paints it over, mixing with other colors.
Rainbow on Ice
Shaving foam drawing
An unconventional technique that your baby may also enjoy.
We will need:
- 2 parts shaving foam
- 1 part PVA glue
- Dyes (food or gouache)
Mix glue with paint, mix and add foam - you get foam paint.
Apply it to a pre-prepared contour or as you wish, for greater imagination.
Using this technique, natural objects are produced well, and the drawings are soft and voluminous. They will fall off over time, but the texture will remain the same. The result will please you, and even more so the child.
Using foam paint you can paint balls like this
Shaving foam balloons with glue
or watermelon
Watermelon slice made from shaving foam with glue
or this cloud with a rainbow
Rainbow in the clouds made of shaving foam with glue
Drawing on shaving foam
Another non-standard way to use this accessory.
The drawing technique is simple:
- Apply a thin layer of foam to the tray
- Level it with a ruler so that the surface is even.
- Apply paint using dotted movements (preferably undiluted gouache)
- Using a cotton swab, draw patterns on the foam
- If you want to transfer the drawing to paper, then carefully place the piece of paper on the surface of the foam and just as carefully lift it. The design will be imprinted on its surface.
This drawing technique is good because you don’t have to draw a picture, but simply paint with paints, mix them, get new colors. Explain to your child how this is done and he will be delighted. The soft texture of the foam will make the combination of colors even brighter and richer.
Abstract drawing of shaving foam
Bright mixture of colors on shaving foam
Drawing with a sponge and cotton swabs
Description
One of the most striking non-traditional techniques is painting with a sponge and cotton swabs. The results obtained using this technique can be called impressionistic painting. And everything is very simple.
A foam sponge is dipped into paint, then it is used to make prints that create texture on objects: tree crowns, animals, clouds.
Imitation of the painting “Starry Night” with cotton swabs
Or, as an option, paint is applied to a bunch of cotton swabs, and images are drawn point by point: spruce, teapot, rowan branches or lilac.
Drawing lilacs with cotton swabs (lesson for this painting)
Examples
It is convenient to use a sponge to convey the roughness of an image, fluffiness, and volume. Geometric shapes, such as squares, look great. It is best to use gouache.
Drawing a tree with a sponge
Cotton swabs work well for small round objects: dandelions, daisies, snowflakes.
Colored dandelion drawn with cotton swabs
What materials are needed
To successfully use this technique you will need:
- gouache or watercolor;
- glass of water;
- cotton buds;
- sponge or parts of a sponge.
Additionally, you can take a plate into which the paint will be poured, and paper napkins.
Videos and instructions
As examples, I will give video lessons that impressed me the most and which I really want to repeat.
Autumn tree with cotton swabs
In the video, the artist, after preparing the background, draws the outline of a tree and branches with a brush. Then he takes a bunch of cotton swabs, dips them in paint and makes a voluminous crown.
Multi-colored dandelions with cotton swabs
The author of this video tutorial promises that such a masterpiece can be completed in 5 minutes. And I willingly believe him! One of the main conditions is to choose the right color. Look at the beautiful shades of paint the artist uses. In this case, it is acrylic.
Standard gouache sets do not have such a variety of pigments and such delicate shades can hardly be achieved by mixing. Therefore, I advise you to still use acrylic paint.
First, the author uses a sponge to apply green paint in dotted movements, creating a gradient background. Then, using a bunch of cotton swabs, he draws dandelion caps and highlights on them. Finishes the work with a brush, drawing the stems of the flowers. And splashes a little yellow paint, imitating the movement of pollen in the sun.
Delicate lilac with cotton swabs
Another video from the same author. The technique is the same - the result is simply amazing. I’m sure after watching this tutorial, you will run for acrylic paint. I have already.
Landscape with a tree using a sponge
In this lesson, the main character is an ordinary sponge for washing dishes, and of course, paint.
The artist paints almost everything with a sponge, applying acrylic paint and a sheet of paper with dotted movements. He only paints the tree trunk with a brush.
Gorgeous lilac tree with sponge and chopsticks
In the next lesson, the author uses a sponge not for washing dishes, but for the bathroom. Using a wide brush, he paints the trunk of a tree, then, using dotted movements, applies lilac acrylic paint to the paper, forming the crown of the tree. Finish off the leaves with lighter highlights applied with cotton swabs. Creates shadows on the trunk using a brush as well. It turns out very beautiful! I advise everyone to try this!
Winter landscape with a sponge
Another example of a mesmerizing landscape, now winter, created using a foam sponge. Of course, small details will have to be applied with a brush, but this will not require any special skills.
The black and white palette makes the drawing very stylish, and the process of choosing paint is simple. Both gouache and acrylic are suitable.
Drawing with an iron sponge
Another very interesting way to create an original painting. Instead of a soft sponge, use an iron scrubber. Use point movements to change the texture of an already applied layer of paint or create a new color layer, as the author of the next lesson does.
In this case, the author first applies acrylic paints to the canvas, distributes them with a brush, and only then works with an iron sponge. The lesson is suitable for beginners, and its result can inspire everyone! Try it and you will definitely succeed.
Drawing with threads
This technique appeared recently, but has already found its connoisseurs, especially among children.
Everything is simple here:
- Take the album and open it.
- Dip a thread of medium thickness into paint or coat it with several paints (gouache)
- Lay out the thread in any shape on the right side of the open album and close it.
- Then you pull the thread from the folded album.
- Open the page where you drew and admire your creation.
This technique is shown very well in the following video.