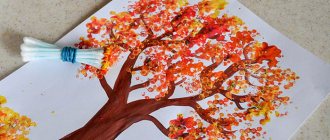
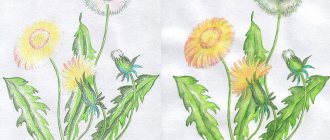
Experts recommend developing a child with the help of fine arts. It is not necessary to use only pencils and felt-tip pens, because modern techniques are rich in their variety. Creativity should definitely be introduced into a child’s life so that in the future his thinking will develop in a comprehensive manner. You can find interesting unconventional drawing techniques for children in our article.
What you need to draw with a pencil
Pencils
.
They are soft and are marked with the letters “H” , “B” and numbers. The higher the H , the harder the pencil and the paler the line it leaves. B value means a soft lead and a rich black color. Hard pencils are used most often in sketching, and for drawing you will need: HB for sketching and 4B , 6B and 8B for various types of shading.
Choose pencils for drawing
Paper. It should be dense (90-110 g/m2) and smooth. Then you will have a chance to correct the mistake you made and draw small details. Special sheets for drawing or drawing or graphics paper are best; in extreme cases, use watercolor paper. If you plan to just practice your hand on sketches or shading, without corrections, you can use good quality office paper.
Choose paper for drawing with a pencil
Eraser. You should not buy multi-colored children's erasers - they do not serve their purpose well enough and can stain the paper. You don't need a hard eraser either - they are most often used when working with hard or colored pencils. Take a soft eraser in a neutral color, such as FaberCastell.
Stationery knife or cutter. When drawing with a pencil, you will need to frequently adjust the point of your pencils. An ordinary sharpener is not always able to help, since in drawing, in addition to the classic cone sharpening, “spatula” sharpening is used. With its help, depending on the position of the pencil relative to the paper, you can get a thin or thick line - useful for quickly setting tone and creating complex strokes.
Online drawing lessons / Drawing courses / Drawing school
Do you want to learn how to draw, so that the learning process is easy and enjoyable, and the result is realistic and beautiful? The Artcolor.Online drawing school was created with the goal of giving everyone such an opportunity. It's no secret that every year drawing and coloring attract more and more people of all ages. Not only children, but also adults now enjoy drawing with pastels, pencils and paints.
If you live in a large city such as Moscow, it is not difficult for you to find suitable training, but it is much easier and more convenient to study online than to attend school or courses in person, especially now. An online art school differs from a regular school in the absence of strict schedules and deadlines for submitting homework. You don’t have to stand in traffic jams if you live in a large city like Moscow, you can study at home, at a time convenient for you. You will not need to take into account the teacher’s schedule or the group’s schedule, comply with training deadlines and submit drawings on time. You will be able to draw at your own pace, in a cozy home atmosphere, without stress and discomfort. Study as long as necessary to learn new material and learn to apply the acquired skills in practice. No rush or fuss. By studying online, you get the most out of developing your creative skills with maximum comfort!
The main focus of the creative online course is graphics, and the lessons will help you learn how to draw with colored and pastel pencils. By taking this course, you will be able to significantly improve your skill with colored pencils and pastels, as well as additional work with watercolors and markers. Online drawing courses by artist Yulia Omelchenko contain the theoretical knowledge and techniques needed to learn realistic drawing skills. Classes are recorded and are accompanied by clear and detailed explanations and advice from the teacher. You can easily follow along with your teacher and learn useful knowledge that will improve your skills and make your color drawings and illustrations more colorful, expressive, and realistic. All video tutorials contain a palette of shades and are accompanied by sketches and supporting materials necessary for successful creativity. You will get expressive and realistic color drawings that you can be proud of.
It should be noted that realistic fine art is more suitable for adults than for children, because realism requires perseverance and patience from the artist. Each course participant will be able to learn and adopt the necessary skills. In the “drawings and reviews of course participants” section you can find more than a hundred drawings made by course students. And this is only a small fraction of all the pictures that were drawn during the learning process. All works are different, differ in execution technique and drawing, but each of them is worthy of attention.
Online drawing courses not only contain an impressive amount of ready-made material, but are also regularly updated with new educational master classes. You will learn to use light and shade and temperature contrast, apply complementary shades, work with composition and emphasize shape. The ability to draw is a skill that is available to everyone, which can be developed by obtaining the necessary knowledge and regular practice.
Drawing lessons are available in video format. Drawing lessons are taught online, with a subscription that provides you with access to all video lessons at the selected level. The videos are shot in high resolution, in good quality, you will see the smallest details of the process. The course is divided into two levels: Basic and Advanced. The basic level of the course contains master classes on drawing animals with simple anatomy, inanimate objects of nature, elements of still life, and botanical illustration. You will learn how to depict realistic textures on paper. You can draw metal, glass, stone, wool, hair and fur. Every month, two new video lessons appear at the Basic level, containing useful knowledge for your creativity.
At the Advanced level of the course you will receive twice as much useful information and opportunities. You can draw a portrait of a person, girl or child. You will be able to draw various animals, birds, insects and inhabitants of the underwater world. As a bonus, Advanced course participants receive monthly access to five high-quality, specially selected photographs by the instructor, which participants can use for their own illustrations. The application of acquired skills in practice has a positive impact on the learning process and helps to better assimilate acquired knowledge.
To easily search for master classes, go to the Drawing Lessons menu section on the website. There you will find all master classes available for viewing. You can jump to any lesson or part of it using the navigation buttons located below the detailed lesson description. If you want to attend classes via smartphone, download the mobile application developed specifically for Yulia’s educational project. You can find it on Google Play by searching for drawing lessons.
You can join the training and also finish it at any time. In order to complete the training, just cancel your subscription in your profile on Boosty or Patreon. If you wish, you can renew your subscription at any time and return to classes. Online courses in drawing with pastels and colored pencils are designed for creative people of any age. People aged from 10 to 65 years study in the online drawing school. Drawing is not an activity for the elite; it is a skill that can be developed at any age and with any level of training. The main thing is to find and allocate time for training.
Artcolor.online is, without exaggeration, the largest project for drawing with colored pencils in Russian. Our online drawing courses are adapted for people with different skill levels. Everyone can achieve good results: both those who draw on their own and those who choose coloring as a creative hobby. The ability to paint beautifully is an art. Experienced colorists are able to create amazingly realistic and beautiful illustrations using colored pencils.
Many people underestimate coloring as a form of creativity, considering coloring and drawings with colored pencils to be something frivolous, like a child’s hobby, but this is not at all the case. Based on the results of the research, scientists were able to prove that any creative activity is useful for personality development and health preservation. Studies have shown that older adults who engage in creativity and coloring feel happier and healthier than their non-creative peers. Creative people have better memory and their brains are more active even in old age. Art and creativity help fight depression and stress. Creativity has a positive effect on the development of children and adolescents. Children who are actively involved in creativity grow up healthier and more balanced, and are better able to withstand stress and external factors. Developing artistic skills is not just a hobby, but also a useful, developing activity.
Some course participants study together with their children. Learning to draw together strengthens relationships and understanding between people. In addition, the child studies the world around him and its inhabitants more deeply and attentively. He learns to see and appreciate the beauty of nature. There is and will not be anything in the master classes that you would not want to show your children. The topics of the master classes and the teaching style are thought out so that you can study together with your child or give him a subscription to drawing courses. A useful educational gift is better and more useful than just a beautiful toy, plus it is a great way to broaden a child’s horizons and show him the world around him through the prism of art and creativity. So together we not only draw the world around us with colored or pastel pencils, but also learn to see it through the eyes of an artist.
In fact, anyone who is motivated enough to show the patience and perseverance necessary for this type of creativity is capable of drawing realistically. We can say that drawing with colored and pastel pencils is akin to meditation. You pick up a pencil, begin to move the lead over the paper, gradually transferring images of plants and animals onto the paper. A smooth, unhurried form of art relaxes, immersing the artist in a wonderful world of creativity and fantasy. The surrounding world recedes before the artist, who creates his own reality on a piece of paper.
How to hold a pencil correctly
to limit yourself to the way you’ve been accustomed since childhood to hold a pencil (by the way, this grip is called Tripod ). It has several disadvantages.
- when working, the hand covers a significant part of the image, as a result you see individual fragments, but not the drawing as a whole;
- since the fingers are bent and the hand lies on the sheet, the possibilities of shading are limited to short lines;
- your hand constantly touches the sheet, and you can smear part of the drawing.
If Tripod a little - take a pencil with the same grip, but closer to its middle and lift your hand off the paper, your capabilities will expand. By using your hand and forearm, you can draw a long, straight line in one movement. In addition, you will not cover the drawing with your hand and certainly will not be able to accidentally smear the image.
There is another method - Overhand - it is especially convenient if you are working with an easel and the sheet is fixed in an almost vertical position. The pencil is fixed between the thumb on one side and the index, middle and ring fingers on the other. Depending on the work being performed, the position of the fingers may change slightly, for example, the index finger moves to the outside of the pencil relative to the paper - this way you can increase the pressure when drawing lines.
Pencil drawing techniques
Drawings can be linear or three-dimensional. A line drawing is a drawing, linear constructive drawing or sketch. It uses the only method of depiction - a line, with which you can convey the contours of objects and perspective.
But in addition to contours and locations, objects have such important properties as volume and surface texture. To convey them, the following pencil drawing techniques are used.
Hatching is strokes of various shapes and lengths with which the master gives volume to a flat image and shows the texture of the depicted material. What matters is the distance between the hatching lines, the angle of inclination and the color intensity, which is achieved by the degree of softness of the pencil used and the pressure applied. Hatching is considered a classic of pencil drawing and comes in the following types:
- parallel short strokes
- cross strokes intersecting at different angles
- long parallel strokes - vertical, horizontal or diagonal
- zigzag lines
- wavy lines
- chaotic short strokes
Shading is a type of shading in which the pencil does not come off the paper, and the strokes lie close to each other. Used on small parts of the image, the result is an even tone.
Feathering - "smearing" after preliminary shading - is used to give the image the effect of a photograph, so that even upon close examination it is impossible to see the fragments that make up the image. The disadvantage of this method is that when shading, the texture is partially lost. When drawing a portrait, this does not matter much, but when drawing, for example, fur, the shaded image will lose its realism.
To help shading convey the texture of an object, additional techniques have appeared.
The eraser lightening technique is used to lighten part of a drawing, sometimes to create a highlight. A small ball is rolled out of a soft eraser - a kneaded eraser - and the selected area is lightened by lightly touching the paper.
Engraving (scratching) - used to develop a textured surface. With its help, surface roughness and the effect of hairs are reproduced.
Basic drawing rules
You shouldn’t start right away with complex plots. First, practice with linear drawings, paying attention to the proportions of objects. Sketch a street or railway going into the distance - this will help you become familiar with perspective and the horizon.
Take a sheet of paper, draw it into random sections and shade it using different types of shading. Use pencils of different softness, change the pressure, create smooth transitions.
Then move on to drawing simple three-dimensional images from life - for example, a ceramic vase or fruit. Experiment with light sources. You will become familiar with the laws of chiaroscuro and learn about 6 of its varieties: highlight, light, penumbra, own shadow, reflex and falling shadow. You will also notice that it is the boundary between light and shadow that conveys the basic shape of the object.
Try to depict several objects together so that they partially overlap each other. You will study more deeply the laws of perspective, composition, and understand the principles of arranging images on a sheet.
Copy paintings by famous artists. Pay attention to the types of shading, proportions, ways of conveying the dynamics of objects.
Take the risk of drawing something more complex in shape from life and conveying the texture of the surface. Which strokes will better convey the softness of cat fur, and which ones will depict the fluidity of a silk scarf? Practice and after a while you will be able to create a legend on the topic of depicting draperies from various fabrics.
The creation of any drawing must begin from the general to the specific. Analyze the image, mark the location of the main objects on the sheet. Break down complex shapes into simple ones, sketch them out, observing proportions. And continue to gradually complete the details of the image - from large to small.
How to learn to draw?
Of course, everyone has their own abilities and talents, characteristics and predispositions. For some, the art of drawing will come easily, while others will have to be more diligent and diligent in their independent learning. But, be that as it may, everyone can learn to draw beautifully.
In each of the drawing lessons you will find theory with a lot of illustrations, practical tasks and exercises. As we said, the course consists of seven lessons, and this was not done by chance - each lesson can be called a big step towards mastering the ability to draw.
As you progress through the lessons you will progress from simple to complex. As a result, what seemed difficult to you just yesterday will begin to yield today, and tomorrow will not cause any difficulties. As with our other training programs, when creating this course we tried to present the material as intelligibly, understandably and concisely as possible, which makes it even more accessible to master.
To immediately pick up a high pace and start learning to draw quickly, you can watch all the lessons before the first lesson. This will allow you to understand what you have to deal with, and will also prevent you from rushing and eliminate the desire to get ahead of yourself (you should not move on to the next lesson without completing the previous one).
Plus, try to pay more attention to tasks that cause increased interest or difficulty. If something doesn’t work out the first time, try again to fully understand the basics and sufficiently master a particular skill.
Simple step by step lessons
Maple leaf in three steps
Step 1 - Sketch
Start your maple leaf drawing by roughly sketching its basic shape and central axis in light, thin lines. You don't need to draw any smaller curves of the sheet, just some basic lines respecting the proportions of the different sides of the sheet.
Step 2 - Outline
Add an outline drawing of the outer shape of the leaf to your sketch. Once you're done, you can erase the guide lines left from the previous step.
Step 3 - Details
Within the resulting outline, draw the main veins running from the base of the leaf to the tips, and smaller veins extending from them.
Additional tools
| 1 | Nag. This is both an alternative to an eraser and a drawing tool. It wrinkles like plasticine, you can give it the desired shape (more rounded or with a sharp tip) and draw on top of the shaded area. |
| 2 | A piece of fine-grained sandpaper (it’s very convenient for quickly sharpening the tip of a pencil). |
| 3 | Thin liner. Liner is a type of capillary pen with water-based ink. The drawing liner produces fine, rich lines. |
| 4 | Color pencil. |
| 5 | Tablet for drawing. |
| 6 | Scotch tape to secure your work on the tablet. |
| 7 | Tracing paper or parchment paper for baking (needed in the last lesson). |