What you need for drawing
The table lists the main materials and tools needed for drawing.
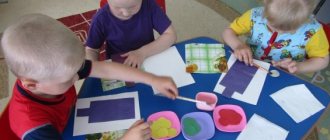
To draw, your child will need an album, pencils, and an eraser.
| A simple pencil with a hard-soft lead | Required to complete the sketch |
| Eraser | To remove unnecessary lines. |
| Sharpener | Pencils, colored pencils and wax pencils should always be sharp. |
| Art brush set | Tools must be of different sizes and rigidity. |
| Container for washing brushes | To prevent water from spilling when the glass is touched by your hand, you need to purchase special sippy cup containers with a narrow neck. |
| Paper | Landscape sheets and watercolor paper are suitable. |
To draw a beautiful cosmic landscape, you need a foundation. If the drawing is made with paints, then the paper can be pre-painted dark blue, purple or black. You can use blue and ultramarine paint.
The planets will look good against a background with smooth transitions from dark to light colors (gradient). You can use colored cardboard as a base.
The leaf shape may be unusual. You can cut a circle out of paper and invite your child to color it so that the white circle turns into the Moon, Earth or any other planet. On the surface of the drawn planet you can depict its inhabitants, as well as plants and unusual spaceships.
Teachers at children's art schools advise using gouache to draw cosmic landscapes. It will allow you to create bright and rich pictures, which in turn will help to interest the child.
You can also color the drawings with wax and colored pencils, as well as felt-tip pens. Work done using such techniques will help older preschoolers train their hands and prepare them for writing. You can combine different coloring methods in 1 drawing. Then the picture will turn out more interesting.
Drawings about space for children can be created using non-traditional artistic techniques that will help develop fine motor skills, attentiveness, color perception, and imagination.
Examples of developing drawing techniques:
- grattage;
- finger painting;
- blotography;
- stencil designs;
- drawing with glue;
- creating a relief pattern from salt or semolina.
Further in the article you can consider several instructions for creating drawings on a space theme, made in various artistic techniques.
Exhibition of drawings for Cosmonautics Day: the most beautiful examples
If you had to urgently prepare a drawing on the theme of space for a school competition, then there are different options for images. Show your child how to combine paints of different colors, make smooth transitions, and what available objects can be used to depict planets and a rocket.
Materials:
- Watercolor paper
- Pencil
- Eraser
- Watercolor paints
- Jar of water
- Toothbrush
- Brushes
Take several lids from jars of different diameters. Arrange them in random order on a piece of paper. Leave room for the rocket.
In order to depict a rocket, you can use a bottle of corrector.
Draw all the details of the rocket - legs, nose of the rocket, porthole.
Dilute the watercolor with water and use a brush with lilac paint to paint the background from the corner. Then you can apply emerald color paint. If there is enough water, these two colors will merge.
We paint the background with lilac, violet, pink and green shades, you can add blue and cyan. We paint the planets with completely different colors - which were not present when painting the background.
You can add green to the orange to mix them up. Another planet can be painted green and blue. Using a thin brush, paint the rocket.
Trace the outline of the rocket with a felt-tip pen. When you have drawn all the small details, we will proceed to the final stage. Place on the rocket and planets the details with which they were drawn.
Dilute white paint with water on a palette and apply paint to your toothbrush. Spray it using a brush.
Such a drawing can take its rightful place at an exhibition.
A drawing competition for Cosmonautics Day is held every year in schools, and in every class there is a child who is passionate about space, rockets and astronauts. Most often these are boys, but some girls also like to depict space objects. For girls, they can turn out sweeter and more tender, with details drawn. Boys pay more attention to spacecraft models.
Drawings on space themes often provide an opportunity to show your imagination - learn to depict the Milky Way, spirals of the Galaxy, space mountains, clouds.
Finger drawing
This style of drawing is suitable for children of primary preschool age (from 3 to 5 years old). Finger painting helps develop motor coordination.
For classes you need special paints that will not cause allergic reactions on children's skin. You can buy them in craft stores. Finger paints are easily washed off hands with wet wipes and are easily washed from clothes without leaving stains.
Adults need to prepare the basis for the drawing:
- Tint a sheet of paper black, or use black cardboard as a base.
- Take a large, hard-bristled brush with white paint and spray the surface of the sheet. Small drops will imitate stars.
- You can add some more blue and red splashes.
- When the base is dry, use white paint and a thin brush to draw circles that the child will paint over.
How to conduct an activity with your baby:
- Open jars of brightly colored paint.
- Tell the child that these are unknown planets that need to be colored. Show the largest circle and invite the child to choose the color it will be painted in.
- The child should put paint on his index finger and begin to smear it along the contour of the circle. When there is less paint, you need to add more and continue painting the planet.
- Circles of smaller diameter can be made multi-colored. Let the child choose the colors himself and try to color the rest of the planets.
It is advisable to store such drawings in frames or files. Folding or twisting the paper can cause thick layers of paint to crack.
Ideas for prints
Forms
When you (or your children) get tired of scratching simple landscapes and fireworks on rectangles, try cutting out shapes and decorating them using the scratchboard technique.
Photo paper
Print the photo onto paper, wax it, and cover it with engraving paint. This way you can make amazing greeting cards and make your parents, grandparents or friends happy with such a gift.
Color
Experiment with color: in addition to black, gold and silver shades look good.
Blotography
Drawings about space for children, made using this technique, help develop imagination. Before you begin, you need to moisten a sheet of watercolor paper with clean water, using a wide brush with soft bristles.
The surface of the table should be protected from paint splashes with oilcloth. It is advisable to use watercolor, as it flows better.
How to draw:
- Invite your child to choose the colors for future aliens themselves.
- When the choice is made, moisten a medium-sized brush with soft bristles in 1 of the paints. There should be a lot of paint so that it flows off the brush.
- Raise the brush above the drawing at a distance of about 30 cm.
- Run your fingers along the bristles of the brush from top to bottom.
- A colored drop will fall on the piece of paper and spread across the paper. You need to wait until the color is slightly absorbed into the paper.
- Wash the brush. Use a different color of watercolor. By analogy, make 1 more blot.
- Make a new blot of a different color.
- Dry the drawing completely.
- Use a black felt-tip pen to draw a silhouette of the planet behind the characters. You can draw unusual plants, craters and volcanoes.
- Detail the characters. Here the child must show imagination. You can finish drawing arms, legs, eyes. Add bows for the alien girls, and ties for the boys.
- Fill the empty space in the background with small drawings. These could be spaceships, stars, meteorites.
To make aliens in the form of blots look more fun, you can glue plastic eyes on them, intended for decorating toys. These eyes are sold in sets at craft stores.
How to make a painting in the grattage style: examples
Looking at the work of professionals, I can’t believe that this can be done with your own hands. But even an inexperienced artist is capable of creating an amazing picture - you just need to approach the matter responsibly and show imagination.
View from space
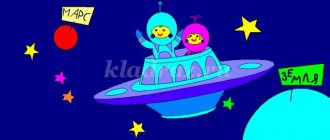
A black background often makes children think of space. To depict the mysterious night sky, the base can be painted over with any colors: from orange to purple. It is best to use oil pastels to then shade the edges of the spots - this will make the transitions between tones smoother. The youngest artists will love the idea of depicting a city at night under the shining stars, whose life is observed by a friendly alien traveling in his “flying saucer”.
Magic tree
Spiral elements look very impressive in the grattage technique. In the composition “Magic Tree” the branches occupy almost the entire space with their large curls. The base is covered with clear transverse stripes of color, smoothly merging into each other: the cool tones from below gradually become warmer as they move to the top. The transitions are clearly visible due to the fact that the tree trunk is quite wide, as are the branches. The difficulty level of this work is average.
Peacock
Small spots of color, randomly located, and thin lines of the design give the effect of a more delicate, subtle play of colors. To depict a peacock, the artist should be patient, this increases the complexity of the painting. Pre-designed head, body and main tail feathers of the bird will help you avoid losing symmetry. When these main lines are ready, you can begin to methodically detail the design: scratching thin lines-beards and scale-like plumage on the neck and chest of the peacock.
There are an infinite number of ideas for creating grattage canvases of varying complexity. To work with a group of children, adults often prepare primed sheets themselves. But for a closer acquaintance with the technique, it is better to divide the lesson into two parts. During the first lesson, young artists will prime the base the way they want, and in the second lesson they will scratch their drawings.
Space grattage
An entertaining art technique that allows you to develop hand motor skills. To perform such work, you need a set of wax crayons, as well as black gouache and artist's ink. You can scrape out pictures with toothpicks or old pen refills that are no longer suitable for writing.
How to create a space grattage:
- Shade a sheet of paper tightly with multi-colored crayons. You can apply strokes randomly, the main thing is that there are no large gaps between the strokes. The fattier the wax layer, the better.
- Mix gouache and black artist's ink in equal parts on a palette. This step is necessary to create a thick black paint that will not bleed off the wax layer.
- Using a large, hard-bristled brush, paint the colored sheet black. If necessary, you can dry the drawing and apply 1 more layer.
- Dry the sheet. It is not recommended to use a hairdryer for drying. Hot air may crack the black layer as the wax begins to liquefy and flow. Let the paper dry at room temperature.
- Using a toothpick or a rod, start scraping out the silhouettes of planets, satellites and spaceships.
- Shade some objects. Strokes must be applied in 1 direction.
- Scratch out the drawings that remain outlines again. The lines should be thick and clearly visible.
- You can scratch out a few stars and falling meteorites.
This drawing style is suitable for children of older preschool age (from 6 years old). Toddlers can hurt themselves using sharp objects.
How to draw space. Drawing using the passe-partout technique
This is a very unusual and fascinating drawing technique. First, as in the previous technique, you need to color a sheet of paper with colored wax crayons. The result is a bright, colorful rug. After this, draw templates of planets, flying saucers, space rockets, stars, etc. on cardboard. Cut out the templates. On a thick sheet of black paper, lay out the cut out templates in the form of a composition. Trace them with a pencil, then cut out the silhouettes using nail scissors. Note: This step of the job must be performed by an adult. Now place a black sheet of paper with cut out silhouettes on the “rug” painted with crayons. The drawing of space using the passe-partout technique is ready. Link to the original source.
Drawing with PVA glue
You can add volume to a space design using glue. To work you will need 2 sheets of white paper and 1 yellow sheet. You also need blue and gray gouache, as well as scissors and a simple pencil.
How to make a drawing like this:
- Using a wide, soft bristle brush, paint 1 of the white sheets of paper blue. Dry the sheet.
- On another sheet of paper, draw a circle with a simple pencil. For convenience, you can use a compass. If you don’t have such a tool, you should trace a small saucer on paper.
- Cut out a circle.
- Make a relief on the surface of the moon. To do this you need PVA glue in a bottle with a narrow spout. If this is not the case, you can pour the glue into a container containing hydrogen peroxide. Draw several ovals with glue, depicting lunar craters.
- Leave the circle with glue to dry.
- Cut out several stars from yellow paper.
- When the glue on the circle hardens, it needs to be painted gray. The paint should be thick. It is better to use a brush with soft bristles.
- Dry the shaded circle.
- Apply glue to the back of the circle and attach it to the center of a sheet painted blue.
Glue yellow paper stars along the edges of the picture.
Drawing on the theme of space in kindergarten6 we draw in the middle and junior groups
In kindergarten, the theme of space and the drawings associated with it are aimed at preparing the child to understand the world. They can learn how people are sent into space, how a rocket is drawn, and how an astronaut must fly in a spacesuit.
In kindergarten, children often draw with pencils. You can help them with geometric shapes by drawing them with a compass or using a round object.
Drawing with glue and salt
Drawings about space can be in relief. To work you will need gouache, PVA glue and fine table salt. For children, this drawing technique will help develop fine motor skills and also teach them how to correctly paint textured surfaces.
How to make a drawing like this:
- Prepare the base by painting the paper dark blue, or take black cardboard.
- Apply PVA glue in the form of circles of different diameters.
- Give your child salt and encourage him to sprinkle it on the glue stains. You need to sprinkle it generously and quickly so that the glue does not have time to dry.
- Leave the paper until the glue dries.
- Using a medium-sized brush with hard bristles, pick up thick paint and paint all the circles. It is advisable to use different colors to make the planets appear bright. You need to paint by positioning the brush vertically and making poking movements. This way the bristles will penetrate between the grains of salt and paint over all the recesses, leaving no gaps. You should move from the center to the contours.
- Dry the drawing.
Using a soft bristle brush, pick up yellow liquid paint. Place dots of different diameters in a chaotic order, filling the background of the picture. These dots will imitate stars. By analogy, you can add several white stars.
Drawing with stencils
Drawings about space for preschool children can be made using paint, sponges and cardboard stencils. Adults need to prepare the base and cut out stencil figures.
How to do it:
- Paint a piece of paper pink. It is advisable to apply all strokes in 1 direction, for example, diagonally.
- Add some blue, purple and orange strokes.
- Dry the base.
- On white cardboard, draw the kennels of a star, a UFO, a comet and an alien.
- Cut out the blanks.
How to conduct an activity with a child:
- Add a little water to the chosen paint to make it a little thinner.
- Show your child how to apply a stencil to paper, and also explain how to apply paint with a sponge.
- Take a small foam sponge for washing dishes. Cover the paint can with it.
- Turn the can over so that the paint is absorbed into the sponge.
- Lightly crush the cup in your hands. There will be a lot of dirt, so classes can be done with gloves.
- The child must apply paint on top of each stencil, slightly protruding beyond its borders.
- Remove the cardboard templates and dry the drawing.
Stencils for drawing space
Using gouache and a thin brush, outline the contours of all objects. Draw small details: stars, sparks around a comet, rays of light near a star. Complete the alien's eyes and mouth. Design a spaceship.
Solar system, drawing with watercolors and felt-tip pens
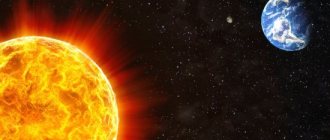
Drawings about space for children can be not only fantastic, but also educational. You can study the location of planets in the solar system and find out their names.
How to do this job:
- Using a simple pencil, draw a large circle in the center of the sheet. It will be the sun.
- Schematically depict the orbits of all the planets.
Drawings about space for children - Solar system in watercolors and felt-tip pens
- Draw the planets.
- Use blue watercolor to paint over the background of the sheet without touching the circle.
- Dry the drawing.
- Use a brown-red felt-tip pen to color the first planet from the Sun. This is Mercury. You can make signatures on the bottom using a black felt-tip pen.
- Venus is in the next orbit. It can be colored with a yellow felt-tip pen or khaki.
- The Earth is in orbit 3. We need to draw the continents. Color the water blue and the continents with a green and brown felt-tip pen.
- Color the planet Mars red.
Drawings about space for children – Solar system in gouache
Drawings about space for children - Solar system with pencils
Drawings about space for children - Solar system in watercolor
- Jupiter will be next. It needs to be shaded with stripes using orange and beige markers.
- Saturn is located in a different orbit. It should be gray-blue.
- Color uranium blue and its rings gray.
- Color in Neptune with a blue marker.
- You can finish drawing Pluto and paint it gray.
Trace all the orbits with a black felt-tip pen.
Astronaut drawing with wax crayons
This is an easy drawing that won't take much time to complete. An excellent option for restless children.
Drawings about space for children - astronaut with wax crayons
How to draw:
- Place a sheet of paper horizontally on the table.
- Draw a round planet on the left side of the picture.
- Complete the continents.
- In the first part of the drawing, depict an astronaut. First you need to draw a round head, then a helmet, and then finish drawing the torso and limbs.
- Make the astronaut's spacesuit more voluminous. Draw rivets, add gloves.
- Use an eraser to remove excess lines.
Drawings about space for children using wax crayons
- Draw the astronaut's face in the form of a smiley face.
- Draw a small spaceship on top. Small - because it is far away.
- Connect the person and the ship with a smooth line.
- Color the water on Earth blue. Paint over the background behind the astronaut, as well as the glass of his helmet.
- Use green chalk to paint over the continents on the planet, as well as the helmet of the spacesuit and some parts of the ship.
- Use yellow chalk to complete the spots on the continents and paint over the astronaut’s gloves.
- Use orange chalk to paint over the man's suit and the remaining details of the spaceship.
Trace the outline of the drawing with a black marker. Select a person's face.
About space for children: talking about the stars
The Universe for children is an unusual and amazing world in which the Sun and Stars shine the brightest. To get acquainted with the bright night “pebbles”, invite your child to take a walk in the evening. Show him that there are many bright Stars in the sky, they twinkle mysteriously. In fact, they are not as small as they seem. In real size, these are huge hot balls of gas: the hottest ones glow blue, others glow red. They come in different sizes. The most famous and brightest stars are Polaris and Sirius. The beloved warm Sun is also a star, the most important for us and our planet Earth. There are also colorful constellations in the sky - silhouettes of bright Stars. For example, the Big and Little Dipper.
Comet, drawing with acrylic paints
This design can be done with acrylic paints using a brush, or you can apply special paints with your fingers.
Procedure:
- Paint the sheet with dark purple paint.
- Dry the drawing.
- Dilute white paint with water and apply several vertical strokes to the center of the picture.
- When the paint has dried, use a hard-bristled brush to pick up white color and spray it over the surface of the sheet, running your finger along the bristles from bottom to top.
Drawings about space for children - comet with acrylic paints
- Dry the paper again.
- Draw a small ball with red paint. This is a comet.
- Draw her tail on top. The further it is from the comet, the wider it is.
- Without waiting for the red color to dry, apply several yellow strokes to imitate flames.
Make some yellow and orange splashes around the comet. They will simulate sparks and small burning fragments.
Advice for young artists and their parents
Artistic secrets you need to know:
- The scratch paper can be done in black and white if you use candle paraffin instead of wax crayons.
You can start drawings about space for children with coloring books
- To create a relief pattern, you can use not only salt, but also semolina or fine sand.
- You can practice finger painting with children of primary preschool age in the bathroom. Paint comes off easier from tiles than from carpet.
- To finish painting an object on a dark background with blue or purple, you must first paint it with white paint. Color can be applied only after drying. This way, the completed element of the drawing will not merge with the general background.
Drawings about space can be created using different artistic techniques. The main thing is that the drawing style is appropriate for the child’s age. Young children should not be allowed to use sharp objects or sharpened pencils without adult supervision.
Author: Frolova Ekaterina
Lunokhod: children's drawing for 1st grade children
Before you start drawing, consider the models of the lunar rover to understand the general principle of depicting this device. For first grade children, you can draw a lunar rover using the following steps.
First of all, we draw the cabin of the lunar rover.
On each side we depict 4 wheels.
Draw an antenna above the cabin.
To make the drawing funny and childish, you can supplement it with original elements.
You can color it with pencils or crayons.
A drawing of this kind can be transformed by adding surrounding objects, placing it in outer space, or sending it straight to the moon.
