In this article you will find many ideas for modeling from plasticine with step-by-step instructions and photos, as well as what crafts you can do with a child at different ages.
Working with plasticine has a beneficial effect on a child's development. These activities improve memory, attention, have a good effect on thinking, develop fine motor skills of the hands, which in turn contributes to the development of speech, form the imagination, open up creative abilities, and force one to exercise imagination. You will learn more about the benefits of practicing with plasticine and other materials in the article Let’s sculpt with children from plasticine. Plasticineography
Is plasticine necessary for children under one year old?
It is recommended that children engage in modeling from the age of 1; until the child is one year old, the child will most likely show no other interest in plasticine other than trying it out. But children are all different, so you can try modeling with your child earlier. Show your baby plasticine of one color, tear off a piece of it, roll the ball, let him hold it in his hands. If the child is not interested, put it aside and try again after a while.
For small children, it is best to use soft plasticine, for example, or better yet, prepare your own salt dough. Read about salt dough and crafts made from it in the article DIY salt dough crafts. Crafts for the holidays
What to sculpt with a 4 year old child?
Some teachers and educators claim that both at the age of 4 and in the first grade of school they make crafts of the same format. This is not to say that the statement is very accurate, because everything depends on the degree of development of the children. Typically, such comparisons are more suitable for older children, but due to the growing demands on children, it is quite possible that your four-year-old child will find their ideas useful too.
Usually the instructions for plasticine contain some simple modeling patterns; with certain changes they can be turned into anything. Nowadays, cartoons and heroes that have a very non-standard shape are trending. You can give your child an order to sculpt a character he has invented or seen from a cartoon. At first it will only vaguely resemble him, but over time the little one’s work will become more similar. It is very important that your child will create his favorite characters with his own hands.
You can start sculpting after a trip to the zoo. Let the kid do the animals he saw. Start with an elephant, it will use more material, which all children love, and there will not be any special difficulties in making it. Next, you can make a giraffe, which attracts with its long neck and spots on its skin. Gradually you can accustom him to more graceful animals. From the plant world, we also need those plants that the child has seen in person and, preferably, touched with his hands. Gradually move on to creating more monumental works, such as compositions from the flora and fauna or entire scenes from his favorite films.
Modeling from plasticine for children 2 and 3 years old
At the age of 2 to 3 years, a child still cannot cope with ordinary plasticine, so it is worth choosing special soft plasticine for small children.
Children are still learning to control their hands and it is difficult for them to practice modeling. Select tasks that are not difficult for your child so that he can cope with them; this will inspire him, give him self-confidence and he will want to continue to engage in this useful type of creativity.
By the age of three, a child will already be able to:
- tear off pieces from plasticine
- make balls out of them
- flatten them
- stick plasticine to paper and smear it
- crush the balls with your palms
- make sausages
- twist them into rings
- combine all the components into one craft.
The parents' task is to teach their child this.
Show your child
- how to cut a sausage and get rings
- how to cut out figures from flat cake
- how to cut dough into squares, triangles and other shapes
- how to stick various objects onto plasticine smeared on cardboard, for example, seeds, beads, cereals, pasta
The duration of a modeling lesson at the age of 1-3 years is 5-15 minutes and depends on the child’s mood and desire to work with plasticine.
For this age, it is recommended to use plasticine only in primary colors, so as not to overload the child with a large variety and not distract from the modeling activity itself. In addition, if desired, colors can be mixed and new shades can be obtained.
Modeling from plasticine for children 4 and 5 years old
At the age of 4-5 years, a child already skillfully handles a modeling knife, his hands are already stronger and he can work with ordinary plasticine.
Children of this age know how to roll balls and sausages, and now it will be more interesting for them to make more complex and interesting crafts themselves.
Invite your child to make a mushroom meadow or forest lawn with bushes and trees around. Maybe the child will want to make something of his own, don’t interfere with this. On the contrary, this is good and fosters independence.
Also, the mother can sculpt one part of the composition, and the child another, then combine everything into one craft. This way the child will feel responsible for his part of the work.
A child at this age can sculpt simple figures of animals, plants, birds, and food for dolls.
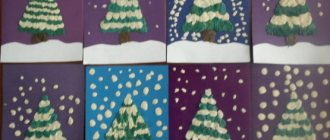
You can begin to master the technique of plasticine printing with your child and make simple plasticine paintings and panels. Invite your child to add natural and waste materials to such paintings.
The time of working with plasticine is 10-20 minutes; if the child is very enthusiastic, it can be extended a little, depending on the child’s perseverance.
Modeling from plasticine for children 6 and 7 years old
You can use regular plasticine or buy different sets, for example, for modeling confectionery products. There are also kits with mass for modeling; they harden well in air and are preserved in the future.
At primary school age, children already know how to independently fantasize and bring their ideas to life. They sculpt more complex figures following step-by-step instructions.
Help your child make a picture from plasticine; he can already make more intricate drawings with a lot of small details, transitions of colors and different textures.
There is no need to limit the time for modeling at this age; let the child do as much as he wants and as much imagination and perseverance as he has.
Insect figurines
With the arrival of spring, spring plasticine crafts dominate the work of young sculptors. Children begin to sculpt flowers, trees, animals and insects.
To achieve a positive result, it will be better if a novice creator works under the supervision of a parent or teacher; they will always tell you what is wrong and help in time to correct the mistakes that inevitably occur in the creative process.
How to make food for dolls from plasticine?
Soft plasticine is good for creating toy food. It will be boring for the baby to just make balls, but if they are used as decoration for a toy cake, it will be more interesting. You can make various cakes, pasta, sandwiches, pastries and much more with your child, as long as your imagination is enough. You don’t have to throw away the candy boxes, but make your own toy candies for them. Be sure to fit your doll food to the container they will eat it from.
For older children, you can combine the lesson with mathematics, divide the cake into equal parts and study fractions, feed guests and count how many cakes you need to prepare for them.
Below we give you several step-by-step instructions on how to make some food for dolls from plasticine.
Broccoli made from plasticine
Take plasticine in three different shades of green. From the lightest one, make a sausage leg for cabbage, divide it in a stack into several small branches. Take three pieces of plasticine of different shades and press them through a kitchen strainer, and you have broccoli florets. Connect these parts together.
Modeling sausages from plasticine
Prepare sausage-colored plasticine. Make a flat cake out of it, put white stripes on top. Roll the cake, roll it like a sausage between your palms and put it in the refrigerator for a while. You need to cut the sausage using sawing movements, not pushing.
Making ice cream from plasticine
Take a piece of sand-colored plasticine and stamp cells on it, like on waffles. Now make a cone and one or three balls, the same color as you want to make ice cream, you can take different colors. We stick the balls onto the cone to its base, and wrap it with our wafer cake. You can add jam on top by smearing two or three sausages crosswise on the balls, stick small multi-colored pieces and sprinkle with crumbs.
Modeling cheese from plasticine
The cheese is made from yellow plasticine with a small addition of orange. Make a cake, cut out a triangle and press holes in it, it is convenient to make large holes with the back of the pen, and small ones with a writing tip or pencil.
Making a cake from plasticine
Make several plasticine balls of different colors, it is better to take two brown ones for the chocolate layers of the sponge cake, two different berry colors and one of whatever color you want for the icing.
We make chocolate and berry cakes very simply, flatten the ball a little and roll it out into barrels to even them out.
We combine all the cakes into one cake and roll it sideways again to even out all the layers.
We take our icing ball and roll it out as thin as possible, wrap our entire cake in it, cut off the excess edges and smooth it out.
Now we make the cream: roll out the plasticine into a thin and long sausage, fold it in half and twist it. We spread it around the perimeter of our cake.
We cut the cake into pieces and use a toothpick or toothbrush to add porosity to our chocolate layers of the sponge cake. Each piece can also be decorated with fruit beads and topped with glaze.
Bread can be sculpted using sand-colored plasticine. To make a loaf, add toothpick prints to it diagonally.
How to make a watermelon from plasticine?
We take black plasticine and roll several thin sausages. We roll out the red plasticine into a not very thin oval-shaped cake. Place one sausage in the middle and fold the flatbread in half.
Add a couple more sausages and fold them again and repeat this several times. Finally, give it a round shape.
We wrap our watermelon in a white cake, and then in a green one, thus making a peel.
Add lighter colored green stripes.
And cut it. Look how ripe our watermelon turned out!
Plasticine grasshopper
To make this figurine, you will need to prepare green plasticine, it will be used as the main one, a supply of yellow and black plasticine will not hurt
The green material will be used to make balls of different sizes.
The largest piece will be the torso. It should have an oblong shape. One ball of green material will be used as the head, it must be secured to the body. On the finished head you will need to attach eyes made of yellow plasticine
To make wings, you can use two small balls. The result should be two oblong flat wings. Using a stack, a pattern can be applied to the surface of the wings that resembles that seen on real wings.
Grasshopper legs are made as follows:
First of all, it makes sense to make the large hind legs, after which the remaining four legs are rolled up and also attached to the carcass.
To make the antennae, reinforcement (thin wire) is used; a thin layer of plasticine is applied to it; the manufactured parts can be installed in place.
Photos of plasticine crafts in 4th grade can usually be seen on school stands dedicated to the applied labor of schoolchildren.
Modeling a bird from plasticine
Let's blind a parrot. Follow the step-by-step instructions below and you will have a beautiful and talkative bird.
- Take red, yellow, blue, white and black plasticine
- Make an oval body for a parrot from yellow plasticine
- Add a smaller red circle - this will be the head of our bird
- The wings will be blue, to do this, stick two droplets on the sides of the body
- Add a white breast to your parrot
- Make a yellow beak, stick on the eyes and make a crest from the cones
- Let's add another tail and use a stack to push through the grooves on the bird's chest and wings that resemble plumage
- All that remains is to attach the paws and the parrot is ready
This kind of cockerel can be made from plasticine.
This is how a penguin is made from plasticine.
How to sculpt dinosaurs from plasticine?
- Take plasticine of any color, because you can make a dinosaur whatever you want
- Divide a piece of plasticine into three parts, one will go to the head, from the second we will sculpt the body, and the third will be divided into all other parts
- Divide one piece into three more parts, and one of them also into three
- From the two largest pieces we make the body and the head, to do this we roll them into sausages and stretch them out, connect them to each other and align the junction. What you should get is shown in diagram number 3
- Roll the two middle pieces into cylinders and stretch them out a little, flatten them from the bottom and top, leaving a thin “waist” - form the legs as shown in diagram 4
- Make sausages from small pieces - front legs
- Now assemble the figure from what is already ready and smooth out all the joints
- Roll a lot of small balls from the remaining piece of plasticine and stick them, pressing them on the sides, onto the dinosaur's crest.
- Make his eyes and don't forget about his eyelids
- Use a plasticine knife to cut the dinosaur's mouth and open it. Push down the nostrils with a toothpick, trim the paws a little
- Make teeth and claws for our figurine from white plasticine
You can also make such a dinosaur from a pine cone.
And here is another dinosaur - stegosaurus, one of the most popular among children.
If a child wants to make a predator dinosaur, invite him to make a Dimetrodon.
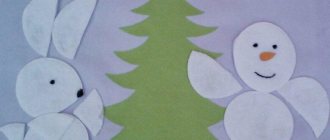
Snow Maiden
The New Year is unthinkable without such a character as the Snow Maiden. If you sit a little and work meticulously, you can get a rather original figurine. The most worth stocking up on is white, blue and yellow plasticine. A fur coat can be made from blue plasticine by rolling a cone. Use white rollers to complement the design of the Snow Maiden's clothing. After this, you can proceed to the formation of mittens and sleeves. At the last stage, make the head, shape the face, and make a hat. It is better to fix the head on the body with a toothpick.
How to sculpt a pony from plasticine?
After watching the My little pony cartoon, your daughter will probably want to make the same pony. Let us help her with this.
- Take plasticine of the desired color, pink, purple, red and blue shades are perfect
- Roll a sausage of the chosen color - this will be the body of the pony
- Pull one side of the sausage up into a cone - this will be the neck
- Roll the ball and stretch it out a little, forming the face of a small horse
- Make droplets out of two small pieces and stick them to the top of the muzzle - these will be the ears
- Use a toothpick to press down the pony's nostrils and mouth.
- Roll four cones from plasticine of the main color, cut off a little plasticine diagonally from the narrow side with a special knife, this is where the legs will be attached to the body
- Tap the wide part of the cones on the board to create horse hooves
- Assemble your figurine. Smooth out the joints
- To make the mane and tail, roll several thin multi-colored sausages, connect them together and cut them, stick them to our pony, bend them a little, imitating the curves
- Don’t forget about the eyes, make them not round, but elongated, in the shape of a leaf
Our pony is ready!
You can make several small horses of different colors and you will have many cartoon characters to play with.
You can make a pony in another way, see step-by-step photos below.
Father Frost
The form of Santa Claus can be different. Most of all you will need red and white plasticine. You may also need the following color range of plasticine: pink, black, brown, blue. The most convenient and correct way to make a toy is to start from the head. After Santa Claus is ready, do not forget that an important detail of his image is a bag of gifts.
Crafts from plasticine
Show your imagination and combine natural materials and plasticine in one craft. It will be unusual and interesting for the child.
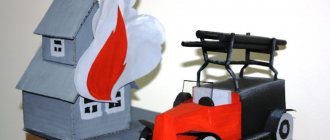
Making a boat from plasticine and nutshells
- Prepare nut shells, plasticine, leaves from trees, small sticks
- Stick a ball of plasticine into a cleaned shell and place a mast on it - a small stick
- Place leaf sails on the mast and attach another plasticine ball on top
- Launch your boats into the water
Making a caterpillar from plasticine and chestnuts
- Cook some chestnuts
- Roll several colorful plasticine balls
- Connect the chestnuts, alternating them with plasticine, press them down so that they stick firmly
- Make eyes from white and black plasticine
- Add a red balloon nose and a sausage mouth
- Don’t forget about the horns, they can be made from pieces of a match, combined with plasticine with chestnuts
You can also make a hedgehog like this from chestnut peel and plasticine.
These are such cheerful multi-colored snails made of plasticine and chestnuts.
Required Tools
To productively produce voluminous plasticine crafts, you should have the following tools at hand:
- Scissors.
- Wire for forming frames.
- Spatula.
To create “monumental” creations, natural materials, such as river pebbles, shells, matches, etc., will not be superfluous.