Progress of the lesson
Show the children pictures of mushrooms and describe each mushroom with the children. Please draw their attention to the fact that there are mushrooms that should never be picked or eaten - fly agaric and toadstool. Carefully examine the fly agaric with your children, tell them: “This is a large mushroom with a red cap decorated with white spots. The red color indicates danger; the mushroom warns everyone that it is poisonous. Fly agarics have a white leg with a wavy ring under the cap.”
Invite the children to sculpt this dangerous mushroom to help them remember it better.
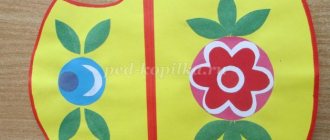
Explain the sequence of work: red plasticine is applied to the cardboard inside the outline and the cap is decorated with white dots. The leg is made of white plasticine. You can place green grass at the bottom.
The children begin to sculpt.
Progress of the lesson
Read the poem by S. Marshak to the children:
There is a hedgehog living under our chair, a prickly, quiet hedgehog. It looks very much like a brush, When the legs are not visible.
Do you understand why a hedgehog has needles? So that the Boys or wolves do not touch him.
Ask the children: “Who is this poem about? (About a hedgehog.) What does a hedgehog look like? (Children’s answers.) Why do I eat needles?” (So that no one offends him.)
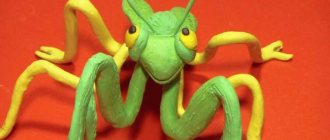
Invite them to look at a pine cone and think about how they can turn it into a hedgehog. Discuss with the guys the sequence of work: first sculpt a muzzle and attach it to the blunt edge of the cone, then make legs, eyes, a nose out of plasticine, cut the mouth with stacks. You can attach small apples, mushrooms, and needles to the back of the cone. Place the hedgehog on a cardboard coated with green plasticine, decorated with grass in the form of pine needles, fallen leaves, and tree branches.
Lesson 8. Hedgehog (Modeling from plasticine in combination with natural materials)
Program content. Continue to teach children to combine natural materials and plasticine in crafts. Strengthen the ability to convey in sculpting the proportional relationship of parts and their location. Learn to achieve expressiveness of the image. Continue learning to connect the parts by pressing them. Develop your imagination when adding the necessary elements to the product (mushrooms, leaves, grass, etc.). Strengthen the ability to understand and analyze the content of a poem.
Material. Pine cones, plasticine, various natural materials (pine or spruce needles, small twigs, small dry tree leaves), cardboard stands, modeling boards (for each child).
Progress of the lesson
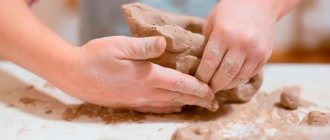
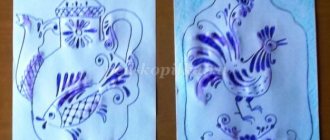
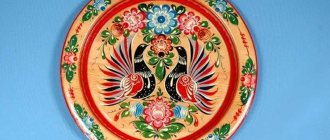
Tell the children about the Dymkovo toy: “This toy originated in ancient times in the village of Dymkovo near the city of Kirov. In winter, the houses of craftsmen were full of clay, bags of chalk, boxes of paints, boxes of eggs, and jars of milk. That's pretty much all you need to make clay toys. The craftsmen knew how to turn a piece of clay into a duck or a rooster.”
Consider a duck whistle with your children. Explain how to attach a beautifully curved neck and a high-raised head to the body, and pinch the tail. Attach thick short legs-stands to the base body. Remind that the joints of all parts must be moistened with water and smoothed.
Invite the children to become Dymkovo craftsmen and sculpt such a duck.
When the toys are dry, they should be coated with water-based paint or white gouache mixed with a drop of PVA glue, and during a drawing lesson the ducks should be painted with Dymkovo patterns.
Lesson 7. Fly agaric (Applying plasticine to the surface)
Program content. Strengthen children's ability to use familiar methods of conveying an image: carefully apply plasticine in a thin layer inside the outline and decorate it using the molding method. Expand and clarify knowledge about mushrooms. Give an idea that mushrooms can be edible and poisonous. Develop creativity when designing your crafts.
Material. Cards with images of mushrooms: porcini mushroom, boletus, honey mushroom, russula, red fly agaric, toadstool. Cardboard with a drawn silhouette of a fly agaric, plasticine, stand boards (for each child).
Progress of the lesson
Start your lesson with finger gymnastics.
Educator: “We twist our hands, twist them, twist them and make a table. (One hand in a fist, the palm of the other hand lies on the fist.)
We twist our arms, twist, twist, we get a chair. (One hand is clenched into a fist, the palm of the other hand is placed on the side of the fist in the form of a back.)
We twist, twist, twist our arms and pretend to be a bed. (The palms of the hands are pressed to each other by the sides.)
We twist, we twist, we twist, we make a sofa. (The sides of the palms are connected perpendicular to each other.)
We twist, we twist, we twist, we show the closet.” (The palms are connected by the sides in the form of cabinet doors and can move in different directions like sliding wardrobes or open outwards like regular cabinets.) And so on.
Invite the children to first fashion a table out of plasticine: roll up a ball, press it into a disk with your palms and trim the edges with a stack to make a quadrangle. Then roll up four rollers of equal length - table legs - and attach them to the table top. Moisten the joints with water.
The chair is made in the same way as the table, only smaller in size. A square made from a plasticine disk is attached to the side of the seat by cutting off the edges.
Modeling “Beautiful Bird”
(According to the Dymkovo toy)
Program content. Learn to sculpt an object consisting of several parts. Strengthen the pinching technique with your fingertips (beak, tail); the ability to firmly fasten parts, pressing them tightly against each other. Learn how to model a folk (Dymkovo) toy.
Methodology for conducting GCD. Examine a toy bird with your children, highlight the parts of the figurine and determine their shape. Ask how you can make a bird, where to start; determine which part of the bird is larger: the body or the head. Call the child to the board to show how to sculpt the body of a bird.
When the children are sculpting the body of the bird, ask them to show with their hands in the air how they will sculpt the head. When the guys are sculpting the head, ask how they can sculpt the bird’s beak.
Invite those who know how to do this to demonstrate the technique of pinching with two fingers on a lump of clay (plasticine). During the sculpting process, remind children of the need to firmly fasten the parts together, pressing them together.
You can give the kids who finish their work earlier than others additional lumps of clay (plasticine) and offer to make grains (small lumps of clay), worms, or anything else that makes sense for the bird.
Materials. Toy bird. Clay or plasticine, boards (for each child).
Connection with other activities. Observing birds on a walk, looking at illustrations and toys. Comparison of different birds. Didactic game “Which bird is missing?” Introduce children to the images of Dymkovo birds.
Appendix 5
Appendix 6
Experimental activity on the topic: “Sand. Properties of sand. Making Easter cakes from sand."
Goal : To develop the cognitive activity of children in the process of experimentation. Help expand children's knowledge about the properties of dry and wet sand, activate speech and enrich children's vocabulary.
Training tasks:
Introduce children to the properties of sand.
Learn to handle sand carefully, do not spill it.
Renew your interest in working with sand.
Develop the ability to put forward hypotheses, compare and draw conclusions.
Learn the new game “Grains of Sand” with the children.
Developmental tasks:
Develop children's hand motor skills.
Enrich your vocabulary.
Develop skills of interaction with peers in the process of joint activities.
Educational tasks:
Cultivate feelings of empathy and compassion.
To develop cultural and hygienic skills in children (neatness, neatness).
Form of implementation: Subgroup, practical activity.
Materials: large children's sandbox, set of molds, scoops, watering cans, napkins.
The teacher shows the children sand.
- Look what I have in my hands? (Sand.)
- Right. This is sand. Tell me, do you like to play with sand? (Answers.) Let's play with it a little and get acquainted with its properties.
But first, let's agree that during the game:
— we don’t put sand in our mouth;
- don’t rub your eyes with dirty hands;
- We don’t cover ourselves with sand.
Go to the sandbox and touch the sand with your hands.
— What color is the sand? (Brown).
Educator: I’m pleased, I feel the coolness of the sand. What do you feel (children’s statements).
Progress of the lesson
Read G. Sapgir’s tongue twister to the children:
The Seagull warmed up the teapot, invited the Nine Seagulls: - Come, everyone, for tea! - How many seagulls? Answer!
Ask the children: “Why did the seagull invite nine seagulls?” (Drink tea.) How many cups do you need for all the seagulls?” (Ten.)
Invite the children to make a beautiful cup for each seagull. From a piece of plasticine you need to separate a small part for the bottom of the cup with a stack. Roll it into a ball and flatten it into a disk. Divide the remaining plasticine into equal pieces, roll into sausages, and roll into rings. Attach the first ring to the bottom of the cup, then attach all the other rings on top of each other. Roll up another roll and attach it to the side of the cup in the form of a handle.