Making a winter application from cotton wool
Cotton pads can be purchased at your local store or pharmacy. You can take the most budget option, since the quality of the material does not really play a role in such creativity. Using them you can create: snowmen, snowdrifts, a snowstorm and much more. The main thing is that the work does not require a tool, so you can make panels even with the participation of small children.
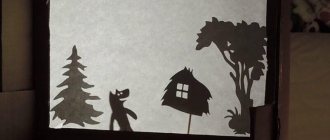
For inspiration, you can study photos of ready-made winter fun applications. There are no rules or any restrictions in this creativity.
The discs can be torn into small pieces to imitate snow caps on trees, spread into strips to create a thin snow covering on the ground, etc. The main thing is to use your imagination or use ideas already implemented by someone.
Crafts from cotton swabs
Cotton swabs are a simple budget material. It can be easily cut, painted, glued. It is not surprising that it began to be actively used in art classes.
Snowflakes
The light weight of cotton swabs allows them to be glued even with ordinary PVA. Older children can come up with patterns for snowflakes themselves. You can offer kids ready-made templates - printed diagrams on which they will lay out the parts before gluing.
Snowman
It’s even more interesting to collect three-dimensional figures from cotton swabs.
Elementary technique:
- You can use polystyrene foam as a base into which the sticks will be stuck. Due to its high density, plasticine can crumble.
- One edge of the stick needs to be cleaned so that it sticks in easily.
- The tiers can be secured together with a toothpick or pastry skewer.
For the eyes and buttons, the sticks need to be painted first, otherwise the work may get dirty.
Applications
For applications you will need not only cotton swabs, but also a background. If the material is not painted, you should choose a dark base. This will make the drawing look more contrasting.
On the panel, sticks can turn into logs of a house, spruce paws and branches of snow-covered trees. Some examples of use should be shown to children in advance, inviting them to further show their imagination.
Making a penguin out of paper
In terms of complexity, this option is more suitable for older groups or schoolchildren. The child’s main task is to carefully cut out parts from colored paper or cardboard according to a template, and put them together into a composition on whatman paper or any thick sheet of paper. An adult does not need to invent anything, it is only necessary to ensure the availability of:
- Safety scissors.
- Glue stick.
- A set of colored paper - the child can independently choose the palette of shades that he will use.
Photos of winter applique penguins and other animals can be found in the public domain.
A few ideas on how to depict winter
Using simple colored paper, you can make a very beautiful applique. Snowflakes will fit perfectly on a blue or pink background. Try making small three-dimensional snowflakes and placing them on cardboard with glue. If the snowflake is two-dimensional, but you want something more, then make a “slide” as described above. Vata can also be a great addition. If the rays are thick enough, decorate them with cotton wool (fluffier) or rhinestones if there is no room for it.
What can you use other than snowflakes? We cut out tree trunks from brown or black paper, and branches separately. We form trees. We put cotton wool snow on top of them. There are stars made of foil in the sky. This will be a forest applique “Winter”.
Templates will come to the rescue if we cut out angels. Use white and blue paper for their dresses and yellow paper for their hair. For faces, look for beige or pink. Make wings and musical instruments from foil. Girls will love creating an outfit for Grandma Winter from magazine clippings; try doing her face the same way. Cotton wool is a universal material. You can “make” a snowman from disks of different diameters. By the way, CDs are an excellent field for creativity. Create applications on them with cotton wool, paper, rhinestones.
Tissue paper polar bear
The original craft was made from tissue paper. It is thin, folds well and is very easy to use (doesn't cut your fingers). However, if you don’t find one in the house (which is very likely), you can use a similar packaging option. When buying new equipment, you can find white thin paper inside the box; you don’t have to throw it away right away. Also for work you will need a 0.5 liter plastic bottle, white paint, and a skein of black thread. Instructions:
- Take a disposable paper plate, which is then painted white.
- Next, the bottom of the bottle is cut off, about 5-6 cm.
- The cut bottom is glued in the middle of the plate. It also needs to be painted white.
- The bottom is the nose of the composition; by measuring out a little space, eyes are made from black skeins of thread, and they are also glued to the plate.
- Next, the plate is completely covered with glue until it sets - sprinkled with scraps of tissue paper.
What paint to use is up to everyone to decide for themselves; the standard is gouache. The main thing is not to leave the composition near the battery to dry. Due to the high moisture content, the work will appear crumpled. A black bear nose can be made from a pompom.
Winter birds
This option is designed for an older group. There are quite a lot of options; by studying ready-made templates for winter appliqué, you can make something unique. What are some examples:
- Draw a tree branch on thick paper. Next, the birds are assembled according to a pre-printed template and glued to the base.
- Bullfinch on a branch - you need to find a real branch from a tree. While it is drying on the radiator, you need to make a background (the sheet of paper is painted blue). Next, the branch is glued and the bullfinch puzzle is printed. To make the picture more voluminous, scraps of cotton wool are glued to the branch and blue canvas. Later, when the composition dries, a bullfinch is glued on top of the cotton wool.
This is just a small part of what you can do with your child on a winter evening.
Summary of GCD in the senior group of kindergarten. Application on the theme: Winter
Notebook on non-traditional appliqué techniques “Winter” for children of the senior preschool group
Author: Elena Viktorovna Salova, teacher, MBDOU - kindergarten No. 7, Yekaterinburg Description: this summary on non-traditional appliqué techniques is intended for pupils of senior preschool groups. It will be of interest to educators, additional education teachers and parents. The goal is to create conditions for the development of creative abilities of preschool children. Objectives: Educational objectives:
- consolidate ideas about winter and its signs;
— introduce the works of Russian artists; — introduce an unconventional appliqué technique – cotton wool applique. Developmental objectives:
– develop children’s creative abilities;
– develop cognitive interest, careful and aesthetic attitude towards nature; – develop attention and logical thinking. Educational objectives:
– to cultivate restraint and perseverance;
– to cultivate sensitivity to the perception of the beauty of the winter landscape. Planned result:
- be able to apply acquired knowledge;
- be able to listen carefully and answer questions asked; — be able to perform work according to a given algorithm. Form of joint activity: gaming, communicative. Form of organization: collective, individual. Educational area: “Artistic and aesthetic development”, “Cognitive development”, “Speech development”. Educational and methodological set: Tools: visual – reproductions of paintings, samples of completed work; literary - poem by A.S. Pushkin; materials
- cardboard, pencil, PVA glue, brush, cotton wool, colored paper.
Progress of the lesson
Organizational stage
The teacher attracts the attention of the children. Educator. Guys, guess the riddle. Snow on the fields, Ice on the rivers, Blizzards are blowing, When does this happen? /winter/ The teacher reads a poem by A.S.
Pushkin Here the clouds are catching up with the north, They breathed, howled - and here comes the sorceress winter herself! She came, crumbled into clumps, hung on the branches of oak trees, lay down in wavy carpets Among the fields, around the hills. Frost flashed. And we are glad for the pranks of mother - winter.
Updating children's knowledge
Educator. Guys, do you like winter? What's good in winter? What's bad in winter? Children's answers. Educator. Okay, now let's remember all the signs of winter and natural phenomena that occur at this time of year. Children's answers. Educator. Let's look at pictures of winter nature. Do you remember what paintings depicting nature are called? /landscape/ They look at reproductions of winter landscapes (A. Savrasov “Winter Landscape”, K. Yuon “Winter”, A. Meshchersky “Winter Landscape”).
A. Meshchersky “Winter Landscape”
A. Savrasov “Winter Landscape”
K. Yuon “Winter”
Creating a problematic situation
Educator. Today I will tell you a story that happened to a little girl from our kindergarten. Mom read her an interesting book “Winter Forest”. The girl wanted to see what this amazing forest looked like, but, unfortunately, there were no illustrations in the book. She turned to me for help. Let's help this girl? Children, let's create winter landscapes that will become illustrations for the book, and show the girl what the forest looks like in winter. Guys, have you been to the winter forest yourself? What does he look like? Children's answers.
Motor activity
Educator. And now we will play the game “Snowfall”. You walk in a circle with the words: “One, two, three - the snowball is flying towards us!”, Take one or two snowballs at a time and throw them up. They play with the teacher.
Visual activities
Educator. Guys, let's sit down at the tables and make an applique illustration of a winter forest. Look, there is cotton wool on our tables, does it look like snow? The teacher explains the progress of the work. Educator. Guys, for work we need a sheet of cardboard, glue, cotton pads, scissors.
Educator. From cotton pads, cut out three small rectangles and two thinner rectangles.
Educator. Next, we glue these parts: the large ones are the tree trunk, the thin ones are the branches. We glue round cotton pads onto the branches - these are branches covered with snow.
Educator. We glue the remaining cotton pads above and below those already glued.
Educator. In winter there are a lot of snowdrifts in the forest, so we also make snowdrifts under a tree. Cut the cotton pad in half and glue it. And from the remaining pieces we make snowflakes.
Reflection Educator. Guys, did you like the time we spent with you today? What did we do today? What new did you learn today? What did you like most?
We recommend watching:
Summary of a mathematics lesson in the senior group on the topic: Winter Summary of GCD on application in the senior group on the topic: Winter Summary of a lesson on application in the senior group of kindergarten. Application “Polar Bear” from cotton Notes of a lesson on application in the senior group of kindergarten
Similar articles:
Walk “Wind Watching” in the senior group
Observation in the senior group of kindergarten. It's frosty outside
Deer from disposable tableware
If you have a plastic plate lying around from an autumn picnic, you can use it in a winter composition. Application pictures can be found in the public domain. The work is suitable for all ages. How to do it:
- The plastic plate is cut into two parts (one is made a little larger). Next it is painted brown - this will be the body of the deer;
- horns can be made from colored paper. The child places his hand on the sheet and traces it with a simple pencil. After this, they are cut out with scissors;
- The background of the applique will be blue cardboard - a plate, pre-cut legs and horns are glued onto it.
It looks very interesting and unusual. Quite suitable for a winter competition.
Application lesson notes: what you need to know
The abstract is drawn up according to a clear plan. First you need to create a “header” that identifies the topic, purpose, and equipment. The next step is to outline the course of the lesson. At the same time, all stages of the lesson must be recorded in the notes, starting with the survey and ending with the final words. Between these stages there is motivation for work, physical education, an explanation of how to make a picture, answers to children’s questions, and so on.