What to draw
Based on the topic of the creative task, it is easy to guess that the content of the drawing can be everything related to:
- military equipment;
- weapons;
- scenes of battles.
In addition, it is important to remember that Victory Day is a holiday, so you can’t do without a parade and fireworks. In addition, fireworks are a suitable theme for creating drawings using non-traditional techniques, for example, spray painting and fingerprinting.
To add brightness to the picture, fireworks can be done on a black background
Analysis of the resulting works
The final stage of the lesson is analysis of the drawings with the children:
- What do you like about your drawings and those of your friends?
- what was the most difficult?
- what can you add to the background?
Important! To reinforce the patriotic theme, new concepts and words, you can play the didactic game “Get a ring - say a word.”
Work on honing human drawing skills, as can be seen, is carried out purposefully throughout the entire development process of preschoolers. In parallel and in a complex manner, additional educational and educational tasks are solved in accordance with the standards of preschool education. The main thing is to draw up a detailed outline of the lesson and clearly outline the stages of drawing.
What and how to draw
As for materials, drawings can be made:
- paints - both for traditional and non-traditional techniques for children of any age;
- pencils - a universal material that, for example, is convenient for younger preschool children to color;
- felt-tip pens - to add brightness to the drawing and outline contours;
- wax crayons - usually children of middle and senior preschool age are armed with them to make their works brighter.
The most unusual and very beautiful drawings for May 9th for sketching
If you don’t have any special skills, but your soul requires creative expression, which is especially great when it comes to such bright and patriotic holidays as Victory Day, then you can use the following universal templates for copying or sketching.
If you don’t have enough talent for independent art, you can always use ready-made templates for sketching or copying
Or you can make it even easier by printing a ready-made template and coloring it at your discretion
Our T-34 made a huge contribution to bringing the Great Victory holiday closer! So why not depict this iron hero on paper for the holiday?
Victory Day is an excellent occasion to tell the younger generation about the exploits of our ancestors. Tell them everything you know about this holiday and the events preceding it, and be sure to give the children the opportunity to convey their impressions of what they heard in a drawing.
A selection of drawings for Victory Day
Considering the fact that children of all ages receive creative tasks on the theme “Victory Day”, it is appropriate to divide the selection into three groups: for children 1.5–4 years old, 4–5 and 5+.
For younger preschoolers
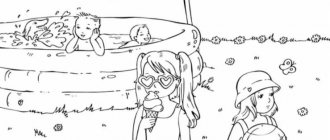
When working with this age category, it is better to turn to ready-made plots that only need to be colored. That is, to coloring books. Pencils or paints are used for this. An important nuance: as in the case of drawings on other topics, you should not select pictures with small details or too colorful - it will be difficult for kids to focus on the plot. Typically, children of this age group are offered the following stories:
- postcard for Victory Day (with the number 9, helmet and/or star);
- St. George's ribbon, made with pencils (the task is not to go beyond the contours of the plot being painted);
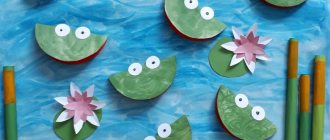
- fireworks (usually using the finger technique).
Photo gallery: a selection of coloring pages on the theme “Victory Day” for children 1.5–3 years old
There should not be many colors in the drawing
Coloring books with inscriptions are best offered to older children, 3–4 years old.
When coloring a star, kids try not to go beyond the contours of the picture.
Photo gallery: examples of finished drawings for younger groups
Poking a cotton swab makes the salute less natural than drawing with your fingers
It is convenient for children to use the finger technique when drawing fireworks
Fireworks can be an element of a collective application on the theme of Victory Day
The basis of this drawing is a coloring template
For the middle group
For children 4–5 years old, coloring books are still relevant; felt-tip pens are added to paints and pencils, with which children not only color, but also trace the outlines of drawings, for example, the outlines of military equipment. To add brightness to the composition, wax crayons are added, for example, for coloring bouquets of lilacs and festive fireworks. Added to last year's stories:
- military equipment (tank);
- obelisk.
In the middle group, children practice creating collective drawings. And if the weather allows, then such a group drawing could be a postcard for Victory Day, made with colored chalk on the asphalt. The subjects chosen for such drawings are multi-colored but simple, for example, fireworks, St. George's ribbon. Complex elements - tank, inscriptions - are performed by adults.
Drawings on asphalt require the active help of an adult, since it is difficult for children to navigate the scale of the drawing; moreover, it is possible that the children only color the picture, and the teacher or parent draws the outlines
Photo gallery: a selection of coloring pages for the middle group
In the middle group, children learn to color people and their costumes
To color a picture with a dove and a star, you can use wax crayons
Coloring military equipment is especially attractive to boys
To color the Eternal Flame, children use gouache and brushes of different thicknesses: medium and thin.
Photo gallery: samples of finished drawings on the theme “Victory Day” in the middle group
Gouache is used to make a drawing of paratroopers
The drawing can be an assignment for a project on a topic; in this case, parents can get involved in completing the assignment, for example, to draw elements of the composition
Children can sketch with colored pencils, without first drawing outlines with a simple
Coloring with felt-tip pens requires strict adherence to the contour boundaries
For the older group
Children 6–7 years old draw more complex scenes, for example, a victory parade depicting military equipment and people. In addition, the children draw illustrations for stories about the Second World War, in particular, pictures of a battlefield with soldiers. It is the drawing of a picture of war that can become a design task for older preschool children on the eve of Victory Day.
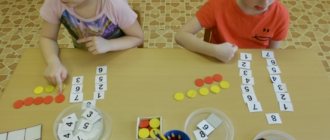
During FEMP classes, an excellent way to practice counting would be to create a thematic drawing, for example, a tank, using the cells.
Photo gallery: examples of drawings by cells
The cell from which the drawing begins is indicated by a dot
It’s easy to draw an airplane, since the entire drawing moves in one direction from the starting square
To complicate the task, the drawing can be “composed” immediately in color
Photo gallery: samples of finished drawings for senior preschool age
If the drawing is made with wax crayons, then they can also be used to outline the contours of the image
It is important that children try to maintain proportions in the drawing.
Children come up with the composition of the drawing for a postcard for Victory Day themselves.
An additional task for the drawing may be to compile a description of its plot
Drawing on the theme of the Second World War is an effective way to consolidate acquired knowledge.
Lesson Objectives
First of all, you need to decide on the tasks of the NOD: developmental and patriotic-educational.
Plan diagram of a step-by-step drawing of a soldier figure
Educational:
- development of children's creative abilities;
- improving spatial thinking and visual perception;
- strengthening the skill of drawing geometric shapes: rectangle, oval, triangle;
- development of fine motor skills of the hands, consolidation of the skill of neat coloring.
Patriotic-educational - instilling a sense of patriotism through:
- expanding knowledge about the history of Russia and our native land;
- developing a sense of respect for Defenders of the Fatherland, soldiers, border guards;
- instilling a sense of pride in the heroic deeds of participants in military operations.
Classes on traffic rules in the 2nd junior groups of kindergartens
Drawing diagrams on the theme “Victory Day”
Let's look at step-by-step instructions for children of different ages.
How to draw a tank
Children's age is 4–7 years.
Toddlers may have difficulty drawing straight lines, so an adult may need help
Instructions:
- Draw an elongated oval.
- We add a trapezoid to it on top without a lower base.
- We add another trapezoid to this one.
- We show another line parallel to the base of the trapezoid - the thickness of the tank tracks.
- We finish drawing the cannon, wheels, and detailing the tank body.
- We draw a star, draw the details of the wheels.
- Color the drawing.
Video: drawing a tank
How to draw an airplane
The first option is suitable for children 3–5 years old.
In this airplane drawing, kids practice creating symmetrical elements.
Instructions:
- Draw a vertical oval, narrowed downwards.
- We finish drawing the wings on the right and left.
- Draw the porthole.
- We draw a line to the middle of the military machine.
- Let's detail the tail section.
- Color the drawing.
The second version of the airplane image is more complicated, so it is recommended for children 6–7 years old. The depiction of military aviation equipment is dominated by sharp angles and clear lines.
This is a complex version of an airplane drawing, as it contains many small details and symmetrical elements
Instructions:
- Take a ruler and draw the main lines of the car body.
- On the horizontal line we draw a small rectangle - the cockpit.
- On the wings we use additional lines to show the flaps.
- We outline the contours of the car.
- We make the contours of the “nose” curved and the cockpit rounded.
- We finish drawing the wings and rockets.
- Detailing the tail.
- Color the drawing.