TECHNIQUES OF VISUAL ACTIVITIES FOR CHILDREN IN PRESCHOOL AGE
There are many non-traditional drawing techniques; their unusualness lies in the fact that they allow children to quickly achieve the desired result. The use of unconventional drawing methods evokes an abundance of positive emotions in children; makes it possible to use often unexpected objects as visual materials, surprising children with originality and unpredictability. Knowledge, skills, pedagogical tact enable the child to create his own picture of the world, and non-traditional drawing methods make the drawing beautiful, understandable, attract him and interest him. The idea of pedagogical experience is to develop the creative abilities of each child using non-traditional techniques, to help realize themselves, to be able to combine various materials in one drawing to obtain an expressive image.
Factors that allow me to prevent monotony and boredom in children's visual activities, ensuring the vividness and spontaneity of children's perception:
• diversity and variability of work with children;
• novelty of the environment;
• unusual start of work;
• beautiful and varied materials;
• interesting and non-repetitive tasks for children;
• choice.
The teacher’s task is to support children’s initiative, developing their creativity. The main task that confronted me regarding artistic and aesthetic development was not only the implementation of a personality-oriented approach to each child, but also the ability of children to work in pairs and collectively. This develops communicative qualities in children: the ability to negotiate, plan their work, and achieve results through joint efforts.
Working with children of senior preschool age, I noticed: children love to draw, diligently master the skills of working with various tools and visual materials, master individual techniques and methods of drawing, but when creating their own works, children’s visual and expressive skills remain at an average level, many compositions stand out for their scarcity content, stamps. There is no main thing - “our own”, sincere drawings, there is no creative approach, they do not reflect what is significant for the child drawing them. After analyzing the drawings of preschoolers, I came to the conclusion that it is necessary to facilitate drawing skills, because not even every adult will be able to depict any object. This can greatly increase preschoolers’ interest in drawing.
Every time I create a new situation so that children, on the one hand, can apply previously acquired knowledge, skills, abilities, and on the other hand, look for new solutions and creative approaches. This is what evokes in a child positive emotions, joyful surprise, and a desire to work creatively. I try to diversify both the color and texture of the paper, since this also affects the expressiveness of the drawings and confronts children with the need to select materials for drawing, think through the coloring of the future creation, and not wait for a ready-made solution.
Methodology for working with operational (technological) maps.
Operational cards allow the teacher to clearly and clearly introduce children to a new way of drawing; help children analyze what materials will be needed to perform work using a particular technique; what sequence of operations needs to be performed to achieve the desired result.
After the children have become familiar with the new technique, the operation card is placed in the center of the art. Children use it in independent activities to remember how to work with this technique. Gradually, as they become acquainted with other innovative technologies, a selection of cards is collected in the center, which allows the child to independently make a choice of techniques and materials in accordance with his idea.
Modeling
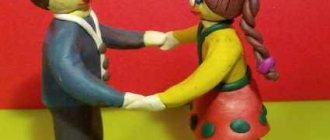
The uniqueness of modeling as one of the main types of visual activity lies in the possibility of creating a three-dimensional image. Thanks to the special plasticity of materials (clay, plasticine, dough), the child very quickly masters the skills of conveying the structure, spatial thinking, and dynamics of movement of the depicted object.
The main means of creating an image in sculpting is the transfer of a three-dimensional form. We also recommend using color, especially when coloring hand-made folk toys.
Individual approach and team work with children
Each child is instilled with the ability to feel a balance between collective activities with a teacher and the manifestation of their own individuality. The whole group receives a given topic, but everyone completes this task in their own way.
Conducting GCD on drawing on a chosen topic
- A selection of demonstration materials for the conversation (photos and drawings) form the basis of the visual aid for the lesson. Such pictures should be selected taking into account the age of the children. The image should be clear, three-dimensional, moderately bright, understandable for children, and not difficult to reproduce.
- Music and poetry appropriate to the topic of the lesson will help create a favorable background and creative atmosphere. They are also selected taking into account age characteristics. The positive influence of classical instrumental music, such as Bach or Beethoven, has been proven. Thematic children's songs about the depicted object are also perfect for a subject image.
- The lesson notes on drawing in the chosen technique for different age groups are prepared by the teacher in advance.
Didactic game with environmental content for preschoolers
| Age group | Subject | Method and technique | Materials |
| 2-3 years, junior group | Apple | Dot drawing with a cotton swab. | Watercolor or gouache, cotton swabs, thick paper or cardboard with the outline of an apple. A jar of water, 3/4 full. |
| 3-4 years old, second youngest group. | Blooming spring tree | Graphics with colored pencils. | Set of colored pencils: pink, green, brown. Paper or cardboard. |
| 4-5 years old, middle group. | Autumn kindergarten. | Watercolor | A set of watercolor paints 10-12 colors, paper or cardboard, 2-3 small or medium sized squirrel brushes, a jar of water. |
| 5-6 years old, preparatory group | Undersea world | Application. Using stencils, drawings are drawn onto paper with a simple pencil, then they are cut out and pasted onto a background sheet. | Base - turquoise colored cardboard, PVA glue, hard glue brush, glass of water, a set of colored paper or cardboard of different colors, scissors, stencils (clams, shells, starfish, fish, octopuses, etc.), a simple pencil . |
Application
Application as a type of activity differs from others in the already existing forms of various objects, their parts, which do not need to be created or drawn. The main task in applique for preschoolers is to correctly place and stick the finished elements, thus recreating a decorative pattern or a certain image.
Applique classes contribute to the development of a sense of color, rhythm, symmetry, spatial orientation on a sheet and the formation of the first aesthetic tastes. During the course of work, the teacher should pay special attention to instilling organization in children. After all, creating an application requires a clear sequence of actions.
In order to enhance the manifestations of artistic creativity, we advise you to involve children in the production of individual and. collective works through the creation of images of objects of the surrounding reality through a harmonious combination of the various above-mentioned types of visual activities, materials (paper with clay, plasticine with natural materials) or techniques (appliqué from torn paper and palm painting) and the like.
Preschoolers really like this integration and contribute to the search for new interesting solutions in creating already familiar images.
Description of visual techniques.
Sprinkling
Not an easy technique. Its essence is to spray drops using a special device, which in kindergarten will be replaced by a toothbrush and a stack (a wooden stick with ends widened in the shape of a spatula). Using a toothbrush in your left hand, we will pick up a little paint, and we will move the stack along the surface of the brush - with quick movements, towards ourselves. The splashes will fly onto the paper, and maybe not only onto it... That's all.
Over time, the drops will become smaller, they will begin to lie more evenly and where they need to be. But this will happen over time, so it’s better to start mastering this technique during a walk in the summer. Now let's get to work. "A napkin for mom." Let’s “spray” it with different colors and admire the resulting effect. "Snowfall". White “spray” on different colored backgrounds. White snowflakes dance and weave into a round dance. “Golden autumn has spun.” Spray the swirling foliage with gold paint. Use a brush to draw the trunks. Material: regular comb, brush or toothbrush, paint.
Using this method of drawing in your work, you can convey the direction of the wind - to do this, you need to try to ensure that the spray falls in the same direction throughout the entire drawing. Express seasonal changes vividly. So, for example, the leaves on the awn turn yellow and red earlier than on birch or other deciduous trees. They are yellow and green and orange on her. And the method of spraying will help to convey all this diversity. Children aged 6-7 years are engaged in spraying.
Drawing with palm, edge, fingers
Drawing technology: in the middle of the sheet the child draws with the edge of his palm, or with his palm or fingers. It is dipped in paint and imprinted on paper as necessary for the design it represents. Then the paint is wiped off with a rag. Materials: a sheet of landscape paper, sockets with gouache paint, brushes, a wet rag.
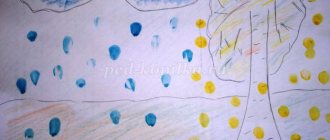
Lesson topics: “Tulips”, “Tree in summer”, “Spring tree”, “Rain”, “Mimosa”, “Edge”, “Fish”, “Rowan twig”, “A snowball is falling, falling”, “Magic butterflies”, “Festive Fireworks”, “Cheerful Palms”, “Chicken”, “Swan”, “Rabbit”, “Snail”, “Winter Tree”, “Sunshine”
Drawing with a candle
Material: paper, wax, paraffin candles, watercolors or paints. Gouache is not suitable for this method of drawing, because... does not have shine. You can use mascara.
First, the children draw with a candle everything that they want to depict on the sheet (or according to the topic). A magical drawing is obtained on the sheet, it is there, and it is not there. Then watercolor is applied to the sheet using the wash method. Depending on what you're painting, watercolor may be combined with ink. Similarly, work is performed using the “Watercolor and wax crayon” technique.
Mirror reflection
Develops imagination and creativity.
Materials: gouache of all colors, brushes, paper.
First, fold a sheet of paper in half. Then they unfold. Apply gouache stains of various sizes (at random). Then they roll it up again, run it with their hand, let the paint mix, unfold it and get anything they want, from moths to Christmas trees, from puppies to robbers. This type of drawing is very popular with children of all ages.
On crumpled paper
Painting technology: this technique is interesting because in places where the paper bends, the paint becomes more intense and dark when painted - this is called the mosaic effect. Drawing on crumpled paper is very easy. Before drawing, carefully crumple the paper, then carefully smooth it out and begin drawing.
Materials: crumpled paper, gouache paints, brushes, napkins.
Class topic: “Sea Kingdom”
Tamponation
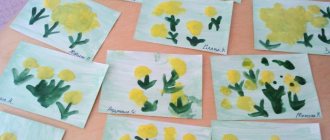
A fun activity! Let's make a tampon from gauze (it can be replaced with a piece of foam rubber). The stamp pad will serve as a palette. Let's pick up some paints and, with light touches on the paper, we'll draw something fluffy, light, airy, and transparent.
In the younger groups - clouds, sunbeams, snowdrifts, dandelions. And it doesn’t matter that not only your heroes, but also your hands will become colored: they will wash off easily!
In the middle group, with a large swab it is very pleasant to draw fluffy chickens, funny hares, a kind snowman, bright fireflies (finishing the necessary details).
And older preschoolers can combine this technique with the “Stencil” technique in integrated classes (application and drawing). First, let's cut out the stencil. Who wants which one! Then, pressing it with your finger to a sheet of paper, we trace along the contour with light touches of the swab. Carefully lift the stencil... Miracle! Crisp and clear, it remained on paper! All the same things can be repeated in a different color and in a different place.
Painting technology: dilute watercolor paint in a saucer. Crumple the paper or plastic bag, dip it in paint and make an imprint on the paper. Then we will use a brush to complete the details of the drawing.
Materials: crumpled paper or plastic bag, watercolor paints, brushes, saucer, napkins, sheet of paper.
Lesson topics: “Spring foliage”, “Gardens have bloomed”, “Autumn foliage”, “Trees in winter”, “The owl is a wise head”, “Happy ducklings”, “Snowman”, “Winnie the Pooh and Piglet”
Monotype (obtaining an image by transferring it from one surface to another, imprinting the image)
One of the most interesting, colorful and inventive methods is monotype. To solve this, you need to have photo paper or any other paper (the higher quality the paper, the better the image), watercolor paints, soap, brushes or toothbrushes, water, glass or plastic plates. They can be of any shape and size.
The monotype technique requires the child to have developed visual skills, precision and accuracy, and the need for consistent actions. The difficulty of monotype lies in the quick creation of the drawing. Therefore, it is recommended: - at the initial stage of training, use the technique of co-creation with an adult; - the child should receive a sheet of paper with a ready-made fold line; — it is better to organize training in monotype technique with a subgroup of children.
Method of work: Watercolor is applied to a glass (plastic) base using paint, water, soap, and a brush or toothbrush. A sheet of paper is placed on top and an impression is made with your fingers, palm or swab. You can add the necessary details to the resulting image or leave the drawing as is. Frame the dried work.
Drawing with crumpled paper or plastic bag
Painting technology: dilute watercolor paint in a saucer. Crumple the paper or plastic bag, dip it in paint and make an imprint on the paper. Then we will use a brush to complete the details of the drawing.
Materials: crumpled paper or plastic bag, watercolor paints, brushes, saucer, napkins, sheet of paper.
