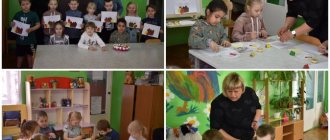
Summary of a drawing lesson for older children. Autumn
Summary of the drawing lesson “Golden Autumn” in the senior group.
Compiled by: Educator Tatyana Valerievna Strokova Program objectives: 1. To cultivate interest in autumn natural phenomena, emotional responsiveness to the beauty of autumn. 2. Develop a sense of composition and color perception. 3. Continue to teach children to reflect autumn impressions in drawings, draw various shapes of trees, large, small, tall, slender, continue to depict leaves. 4. Fix the working techniques with a brush (with the end of the brush with all the bristles). 5. Correctly place the plot on paper. 6.Develop children's aesthetic perception and love of nature. Materials and equipment: watercolor paper A 4 format, watercolor paints, brushes No. 1, No. 4, napkin, sippy cup. Preliminary work of the teacher: reading poetry, a story about autumn, selecting illustrations for the lesson, paintings about autumn, conversation, observation on a walk, writing notes, preparing material for the lesson.
Progress of the lesson:
Today we have an unusual activity; we are going with you on an unusual journey to an art gallery where we will look at the works of Russian artists on the theme “Golden Autumn”.
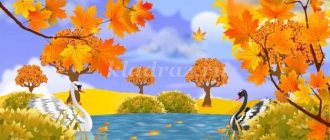
Display of paintings by Russian artists on the theme “Golden Autumn” Teacher: Guys! Please tell me what time of year is depicted in the paintings? Children: Autumn Teacher: That's right, autumn. Educator : Guys! What is autumn like? Children: Cold, rainy, gloomy, golden, sunny. Educator: Who knows why autumn is called golden? Golden leaves, golden trees. Children: because in the fall all the leaves on the trees and bushes turn yellow and therefore everything seems golden. Yellow and orange leaves lie everywhere on the ground - like a golden carpet. Educator: guys, when it rains, there are drops on the leaves and when they shine, the leaves seem golden. - Guys, do you know what the autumn phenomenon is called when leaves fall from the trees? Children: - This is leaf fall. Educator: - That's right. Why do trees shed their leaves in the fall? (it becomes cold, in winter it will be difficult for the branches to hold leaves and snow, in winter the tree sleeps and rests). No one tells a tree when to shed its leaves. But then autumn is approaching - and the leaves on the trees change their green color to yellow or red and fall off. This happens because water freezes and stops flowing into the twigs and leaves. The tree falls asleep for the winter. Leaves fall from all trees in autumn. The wind carries them through the streets and parks. The next year, new leaves appear on the trees. Listen to the poem called "Falling Leaves." The conversation is barely audible among the fallen leaves: - We are from maples... - We are from apple trees... - We are from elms... - We are from cherries... - From aspen... - From bird cherry... - From oak... - From birch... Leaves are falling everywhere: Frost is on the doorstep! Y. Kapotov Educator: - In autumn, the leaves on the trees become not only yellow, but also red, orange, brown and even purple. The color of the leaves depends on what the weather is like: the sunnier the autumn days, the brighter the color. Many artists love to paint autumn nature precisely because of this variety of colors. Today I want to bring to your attention reproductions by Russian artists. The very name of the paintings indicates what time of year the artists depicted on it. Looking at these pictures and observing nature on a walk, you and I can be convinced that autumn itself comes up with outfits for trees, bushes, and all of nature, as if organizing a competition to see who has the brightest and most beautiful leaves. I want to admire them every day. What a shame. Autumn uses a long thin brush to repaint the leaves. Red, yellow, gold - How beautiful you are, colored leaf!.. And the wind puffed up your thick cheeks, puffed up, puffed up. And I blew, blew, blew on the colorful trees! Red, yellow, gold... The entire colored sheet flew around!.. I. Mikhailova Educator: Now let’s take our brushes in our hands and let’s practice. We draw the tree trunk from top to bottom, the tree thickens towards the bottom. We draw it until the end of the grass so that the tree does not hang in the air, we draw the branches on the tree with the end of the brush, they reach towards the sun. Educator: what kind of paint do we take to paint a tree? Children: brown. Educator: when we paint the leaves, apply the entire bristle of the brush. Educator: What kind of paint do we take to paint leaves? Children: green, yellow, orange, red. Educator: let's get to work. During the lesson, the teacher pays attention to those children who are not doing well. Encourages. Helps.
1 . Draw the sky. Use brush number 4. We apply blue paint in large strokes from left to right, without changing the direction of the stroke.
2. The second color is yellow. We remind children the direction of the stroke is from left to right.
3. At the next stage of our work, we need to add two more colors: orange and brown. We remind children not to change the direction of the stroke from left to right. We wait a few minutes for the paint to dry.
4. At the next stage of work, draw the trees with brush number 1.
5. Draw leaves of different colors, yellow, green, orange, red. (Leaf fall).
The teacher collects all the works and arranges a vernissage of children's works. You guys see what wonderful pictures you turned out, you were real artists.
Educator : What did you and I draw? Children : Golden autumn. Educator: Do you like your work? Children: yes. Let's give ourselves a clap. Well done!
We recommend watching:
Drawing on the theme Autumn for kindergarten Monotopia in elementary school on the theme: Autumn Drawing with heated wax crayons on the theme: Autumn Batik in kindergarten. Master Class
Similar articles:
Drawing lesson for primary schoolchildren on the theme Autumn
Drawing lesson for schoolchildren on the topic “Autumn”
Abstract of the GCD “Drawing. Winter forest"
Educational objectives:
To form an idea of a sketch as a stage of drawing planning;
To develop children’s ability to depict a winter landscape, determining in advance the content and some methods of depiction;
Foster love and respect for our native nature.
Didactic materials: tinted paper (landscape sheet), pencil, watercolor, cups of water, napkin for blotting brushes, educational game “Make a winter landscape”, sketches of a winter landscape, a letter from the inhabitants of Africa, cards with an image; sun; months; rising sun.
Equipment: magnetic board, tape recorder, CD music by P. I. Tchaikovsky “The Seasons. January", easels.
GCD move:
1. Introduction to the situation
Didactic task: to motivate children to participate in activities.
Educator: Children, what time of year is it now? (Children's answers: winter).
Educator: Children, tell me, do you like winter trees? How? (Children’s answers: trees in winter are beautiful, elegant, fluffy...)
Educator: That's right, the trees dress in white hats, fluffy, winter outfits, white fur coats, shine and sparkle in the cold.
Children, children living in Africa sent us a letter. They write that they have never seen winter trees and ask us to help them, to draw a northern winter forest for them. Want to help? Can you? (Children's answers: yes, we want to help, we can).
2. Update
Didactic task: to consolidate children’s ideas about winter trees, their structure, shape.
Educator: Children, what trees can be found in our northern forest? (Children’s answers: Birch, pine, spruce, rowan). How do coniferous trees differ from deciduous trees in winter? (Children's answers: needles grow on coniferous trees that do not fall off, they are green even in winter, but on deciduous trees the leaves fall off...).
Educator: What do deciduous trees look like in winter? (Children's answers: in winter, deciduous trees stand without leaves, resting).
Educator: What color is the bark of birch, pine, and spruce? (Children's answers: birch has white bark, pine has brown bark, spruce has gray bark).
Educator: What height do the trees grow in the forest? (Children's answers: different, high and low). It’s true, there are trees with thin and thick ones, with forked trunks, young and old. Children, think and tell me how you will place a winter forest on a sheet? (Children's answers) Children, I suggest you draw up a sketch of a future drawing of a winter forest.
3. Difficulty in the situation
Didactic tasks:
– create a motivational situation for the formation of children’s ideas about a sketch of a picture;
– to form the experience of fixing a difficulty and understanding its cause.
Educator: Children, can you make a sketch of a winter forest? (Children's answers: no). Why couldn't they? (Children’s answers: we don’t know what a sketch is).
4. “Discovery” of new knowledge (mode of action)
Didactic tasks:
– introduce a sketch of a painting, like a drawing made with a simple pencil;
– consolidate the ability to overcome difficulties by “asking someone who knows”, to form an emotional experience of the joy of discovery.
Educator: Where can we find out what a sketch of a painting is? (Children's answers: ask, look in the encyclopedia, search on the computer).
Educator: Would you like me to tell you? I invite you to a creative workshop. Here is a sketch of the future painting; this is the composition of the painting, drawn with a simple pencil.
Educator: Every artist, before painting a picture with paints, must imagine what it will look like, where everything will be located, how much space certain objects will take up, that is, think through the composition of the picture. First you need to determine where the horizon line is. This is that imaginary line where the earth seems to connect to the sky (shows). It is very important to think in advance about the size of the images in the painting. Please note that the nearest trees are drawn in the foreground, at the edge of the sheet - large, and those objects that are in the background, near the horizon line - small.
Educator: Why do you think you need to sketch a drawing? (Children's answers: in order to correctly position the drawing on a sheet of paper, observe the size and ratio of the parts of the drawing). Children, how do they make a sketch? (Children's answers: with a simple pencil, use light pressure).
Educator: Children, I invite you for a walk. Physical exercise “Winter Forest” is being held
We came to the winter forest (walking in place)
There are so many miracles around here! (spread arms to the sides)
On the right is a birch tree in a fur coat standing (hands move in the indicated direction and look.)
On the left the tree looks at us
Snowflakes are spinning in the sky (they move their hands away and follow with their eyes)
And they lie beautifully on the ground. (movement (flashlights) and look up)
How beautiful they are!
There is beauty and peace in the forest, (spread arms to the sides)
And it’s time for us to go home (steps in place).
Educator: Children, I invite you to sit at the tables. I suggest you help the people of Africa by drawing a winter forest for them. Think about how you will depict a winter forest. Children, what color of paint will you use to depict the winter forest? (Children's answers: cool colors: blue, green, indigo, white). What will you add to the drawing? (Children's answers: animal tracks, snowflakes, draw the sun, birds, bunny, etc.)
Educator: Children, where will you start your drawing? (Children's answers: from a simple pencil sketch).
Educator: Get to work. Children choose tinted paper (prepared in advance), go to their places and begin independent productive activities accompanied by musical accompaniment, the music of P. I. Tchaikovsky “Seasons. January". The teacher pays attention to how children make a sketch, hold a pencil, brush, and draw straight and oblique lines. Helps with advice if children find it difficult to complete a task.
Educator: Everyone got their own, unique landscape. How beautifully the trees are depicted, they are drawn slender and covered with snow. From the drawings we will compile an album “Northern Forest in Winter” and send it to the people of Africa.
5. Incorporation of new knowledge (method of action) into the child’s system of knowledge and skills
Didactic tasks:
– consolidate children’s understanding of a sketch as a compositional construction of a drawing with a simple pencil;
– develop communication skills.
Educator: Children, I invite you to play the game “Make a Landscape.” Look at the future picture in front of us with the image of heaven and earth and clear horizon lines. Choose one contour image each (silhouettes of trees small, medium, large), clouds, snowdrifts of different sizes (small, medium, large) and draw it on the overall composition when your friends invite you. I am the sun, I am walking high in the sky (I draw a sun with a simple pencil at the top of the sheet), I want to take you into the picture. Tell me who are you? The child names the image, draws it, gives reasons for his choice and invites another, until all the children have placed the images in the picture. Children, what have we done? (Children: sketch of a painting).
6. Reflection
Didactic tasks:
– reflection on activities in the classroom;
- create a situation of success.
Educator: Who did you help today? (Children's answers) Did you manage to help the people of Africa? What knowledge did you find useful? What new did you learn? (Children's answers: we learned what a sketch is). Annex 1
Appendix 2
