Abstract of GCD in the senior group experimentation in art activities: Drawing on water
Lesson summary for the senior group: experimentation in artistic activities: Drawing on water.
Ebru technique Author : Zaitseva Maria Aleksandrovna Place of work : Municipal preschool educational institution kindergarten No. 22, Rzhev, Tver region Integration of areas : artistic and aesthetic development, cognitive development, speech development, social and communicative development. Description of the material . Eastern technique Ebru is a technique of painting on water. To work in this technique, special tools and paint are used. In this work, I used improvised means, because a teacher must be able to find substitutes. This summary will be of interest to educators and simply creative people. Goal : development of children's cognitive activity through experimentation in artistic activities. Objectives : • Updating and systematizing children's knowledge about the properties of water. • Introduce children to the technique of drawing on water. • Develop creativity, aesthetic perception, color combination, imagination, fantasy and fine motor skills of the fingers. • Cultivate a sense of beauty, independence, accuracy. Material : Plastic plates, brushes, paints, sheets of watercolor paper (cut to fit the plates, you can use whatman paper, but it should be treated with sandpaper), glue, palette, disposable forks, cocktail tubes, magnetic board, symbols: nose, eyes, mouth. Preliminary work : updating children's knowledge about the properties of water, observing snow and ice outside, studying cold and hot water.
Move .
Educator : All the children gathered in a circle. I am your friend, and you are my friend. Let's hold hands tightly, And smile at each other. Educator : Guys, do you like to experiment? Look, our group has turned into a laboratory. Guys, here are scientists, before entering the laboratory, they put on gowns so that they don’t get dirty. What do we need to get into the laboratory? (aprons)
The teacher ties the aprons and invites them to enter the laboratory. The children take their seats. (3 minutes) the children have objects laid out on the table: two plates: in one there are colored tubes, napkins, chopsticks, a disposable fork, in the other there is water poured on the bottom, a glass of water, gouache, a palette, brushes.
Educator : There are safety rules when working in the laboratory. Let's remember them (posture, legs, arms, that you need to do everything in order). (2 minutes) Educator : Look at the glasses of water in front of you. What is water? What do you think it is for? (children's answers) Yes, everything is correct. Water is necessary for all living organisms. Educator : Let's explore it. I will show you a sign, and you tell me how we will explore? The “Eye” sign appears on the magnetic board.
Educator : So what do we see? (water is liquid, transparent). What kind of water is there? (warm, cold, hot). Take the straw and lower it. What we see. Draw a conclusion... And now the next sign (nose sign). How will we explore the water now? Does it have a smell? Next sign (mouth). Give it a try. What does the water taste like? That's right, water has no taste. What needs to be done to make the water taste? (berry, lemon, sugar) Educator : Let's draw a conclusion. Water is... (liquid) without (color, odor). May be in... (liquid, solid, vapor). I see you and I have stayed a little late. Let's get moving. Don't forget to push the chairs back. Physical education minute. We'll rest a little, get up and take a deep breath. Hands to the sides, forward. The children walked through the forest and watched nature. They looked up at the sun and the rays warmed them all. Miracles in our world: Children became dwarfs. And then everyone stood up together, We became giants. Let's clap and stamp our feet! We had a good walk and got a little tired. Educator : You and I have learned a lot about water. What happens to sugar if you throw it into water? Of course it will dissolve. Do you think it is possible to draw on water? (no) Why? Of course, paints dissolve in water. But it is still possible. But what is needed for this? How do you think? After all, water is liquid, and we need to make it... What kind? (thick) You're right, it needs to be thickened. Methods of drawing on water - ebru techniques. Moreover, it is a very ancient drawing technique. The Ebru technique came to us from Turkey and is translated precisely as drawing on water. Guys, what is the name of the technique of drawing on water? The base solution is poured into the container, then the paints are applied manually with “brushes”. The artist mixes colors, stretches, twists. As a result of this painting, the paint on the water also acquires a pattern similar to marble. This is what a drawing might look like. (show picture) To find out what thickener we will use in our work, we need to solve a riddle. I am a very important subject. To make a cube of paper, an airplane, a cardboard house, an applique for an album, don’t feel sorry for me. I am sticky, viscous... (glue) Educator : Yes, guys, it is glue that will help us change the ability of water to dissolve paints. Now my assistants will help distribute the glue. Before you start drawing, what should you do? (play with fingers, warm them up) Finger gymnast Spring has just dropped in on us - They stretch their arms forward
dipped their palm into the snow
, Hands below, perpendicular to the body
, And a delicate flower blossomed there,
Hands join into a bud at eye level
A small snowdrop.
Slowly spread their fingers (“the flower has opened”) Educator : Let’s try to draw together on the water. Take a jar of glue and pour it into a plate of water. Now take a fork and stir gently. Now that we have prepared the base, take the brushes, dip them in paint and put them in water, we will make several multi-colored drops. Now we take forks and “comb” the paint. Now let’s take the paper, it’s on your table. Attach it to a clothespin and lower it into our magic solution. Now be careful. As soon as the edges of the sheet begin to curl, you can turn the sheet over and put it in front of you.
Pour some water into a plate.
Add glue and stir gently with a fork.
We put paint on the brush and shake it into a plate with our fingers in the form of drops.
Place a sheet of paper on top, rough side down.
When the edges of the sheet of paper begin to rise, the sheet can be turned over. Children experiment on their own. The teacher goes through the group and helps those who have difficulties. Educator : Guys, look at the magical pictures we got. What new have you learned? What else did we do in class today? What is the name of the water painting technique? Guys, did you like the lesson? We accomplished so much today. Well done to all of us. Let's invite guests to look at our unusual drawings.
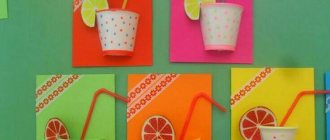
Gallery of children's drawings made using the Ebru technique.
We recommend watching:
Summary of a walk in the second junior group Drawing ebru on the water on the theme: New Year. Master class for children Non-traditional drawing technique for preschoolers - Ebru Drawing using the Ebru technique for children. Master class with photo “Tree”
Similar articles:
Cognitive lesson in the senior group