Who among us does not like to be photographed and photograph loved ones and loved ones? Over time, a huge number of photographs accumulate in our home, which, of course, we want to preserve and pass on to future generations. That’s why today we will discuss with you ideas for decorating a family photo album with your own hands. It would be nice to make this pleasant activity one of the most basic traditions of the family.
The editors of Colady will tell you how to make a family photo album with your own hands.
Pixabay Photos
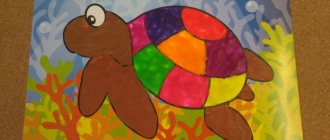
Album "My Family"
Tatyana Korepanova
Album “My Family”
Probably in almost every garden they are working on the “My Family ”
.
After all, this topic is very important for a child. We also developed our own project and worked to bring it into reality. I won’t cite the project itself now - there are many of them on the Internet. I would like to introduce you, dear colleagues, to the final result of this project - the album “My
Family ” .
Of course, before creating it, we read a lot, drew, had various conversations related to family , watched cartoons discussing what we saw. For example, the same “Barboskins”
or
“Belka and Strelka”
family relationships very well .
Homework for parents and children was to search for photographs for the album , as well as a short creative research work on the topic “What’s in your name?”
, in which it was necessary to talk about the meaning of the names of the child and parents and some household names and nicknames. Here are some works.
After the children brought their research papers, we decided to arrange something like a defense, that is, listen to a performance.
Then we put together works, photographs, drawings on the topic “My family "
to
the album .
Now guys often take the album and look at it . And not only your photographs. Every now and then you can hear exclamations: “Oh, I was there too.”
,
“Wow, I have one too”
,
“Wow, a car just like my dad’s”
...
The children will grow up and leave us in a year and a half (we are now the senior group, but the album will remain for us to remember for a long time!
Thank you, dear colleagues, for your attention and votes!
Summary of the final lesson “My family is my fortress” Objectives: to consolidate the idea of a family as people who live together; cultivate a desire to care for loved ones, instill a sense of respect.
Summary of OOD on visual arts together with parents in the middle group “My hand is my family” Program content: • Attract children and adults to the fine arts using non-traditional imaging techniques; • Acquaintance.
Summary of cognitive activities in the second junior group “My family is my Motherland” Topic: My family is my Motherland. 2nd junior group. Goal: to form ideas about the family and its members, about the friendly relations of relatives.
Presentation of the long-term project “My family is my little homeland” Long-term project Moral and patriotic education of preschool children based on spiritual and moral traditions “MY FAMILY IS MY LITTLE.
Presentation for the second younger group “My family is my joy” Presentation for the second younger group on the topic: “My family.” Guys, today I invite you to play a little. (Slide No. 1) Listen to the riddle:.
Project “My family, my home - my homeland!” Municipal budgetary preschool educational institution of the city of Abakan Kindergarten “Nastenka” PROJECT “My family, my home.
The final event of the project “My Family. My pedigree" in the middle group Project on the topic "My family. My Pedigree" in the middle group. Final event. Goal: to cultivate love and respect for the family as people. Project in the senior group “My family is my little country” MBDOU “Kindergarten No. 29 “Golden Key” Project for children in the senior group “My family is my little country” Educator:.
Source
Photos for any occasion
Working together to create a photo album is not only a fun process, but also a creative one, where everyone can give the world their own original idea. Agree that photographs printed on paper carry some kind of special warmth that cannot be expressed in words. They are so nice to hold in your hands and look at with your loved ones.
Every home has themed photo albums dedicated to special occasions, beloved children, or simply an exciting trip with the whole family. Every man who returned from military service has a demobilization album - this is the simplest and most obvious example of a thematic album. Every family today has its own wedding album, which sometimes echoes images from the “stag” and “bachelorette” parties or honeymoon.
With the arrival of your baby, arranging photos in an album becomes even more interesting. We meticulously select the best of the best, illustrating the childhood of our beloved little one day by day. We come up with funny captions and endlessly review evidence of his pranks and early successes printed on photographic paper. Then there will be albums from kindergarten graduation, which can always be supplemented with your own photographs of the baby. There will also be albums about summer holidays in a health camp, sports successes, and finally, an album from the main prom of the future student, where you can place photographs of the presentation of the certificate, pictures of concert performances or watching the sunrise on the seashore.
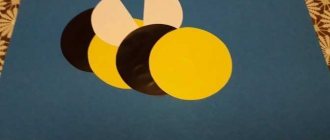
Master class “Creating a group family album”
Natalia Pavlova
Master class “Creating a group family album”
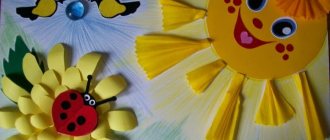
Dear Colleagues! I would like to share with you how I designed a family album for the group . I have 1 junior group , I decided to create it for our children , to form children’s initial ideas about family, to cultivate a sense of affection and love for their parents and relatives. The first stage was collecting photographs and purchasing a regular album . After the photographs were collected, the question arose of what material to make the album . The choice fell on felt. I chose different colors. For the cover I used gray felt in size A4. Using a glue gun, I formed the base, bending the edges inward.
Then I treated the fold of the album with nylon thread
The basis of the album is ready
I wrote the inscriptions for the album
Having cut out the letters, I transferred them to felt
Then I cut out the letters from felt.
I placed the finished letters on the base of the album and glued them with a glue gun.
Then I decided to make a family out of felt, also drawing on plain paper, cutting them out and transferring them onto felt, and also glued the finished figures onto the base of the album using a glue gun
With this the album cover was ready.
All that remained was to decorate the inside, before putting the photographs in their places, it was necessary to sign the names of the children, parents and relatives. I designed this using stickers
Master class “Correctional and developmental work with hyperactive children through group gathering technology” Goal: to introduce teachers to the basic elements of group gathering technology by L. V. Svirskaya Objectives: to create conditions for cognitive and business.
Advantages of a baby book
Educational crafts have a huge number of advantages:
- folds easily, does not take up much space, so you can take it with you on trips or for a walk;
- if the book is made of felt, it can be washed;
- it is possible to periodically change pages and add new ones;
- multifunctionality - depending on the content, develops the child’s fine motor skills, teaches writing and other skills;
- if desired, you can make a whole play complex out of the craft, giving it the shape of a house, car, etc.;
- You can use a felt book to play games, construct buildings and much more.
Scrapbooking
Scrapbooking is a decorative and applied art. At the moment of its greatest popularity - with the advent of photography, this was the compilation of photo albums from sheets of paper. Now fashion is back. and scrapbooking is interpreted somewhat more broadly. This technique is used to make postcards, notepads, notebooks, and albums for collecting.
Types of photo albums
The key to success in creativity is a good idea. The reason for creating a handmade photo album can be any important event or anticipation of it. Suffice it to recall the huge variety of albums that all conscripts prepare for demobilization.
It’s good to give a homemade gift to a relative or close friend. Such efforts and your sincere feelings will be appreciated. And both the recipient and the giver will enjoy the gift.
Wedding
Wedding album design is at the top of the list of popular scrapbooking ideas. The event of the birth of a family will be immortalized for the spouses, and they will return more than once or twice to touching, dear moments, leafing through the wedding album.
For a newborn
Such an event is never forgotten. But an album with images of the first minutes of a baby’s life, his smile, and his first steps will help preserve the smallest details.
Such an album will also include a tag from the maternity hospital, a lock of hair, a cast of a foot, a handprint, record the first dimensions, stages of growth and maturation of the baby, his popular sayings, funny incidents.
It is better to make the album so that new pages can be added over time. Thus, its creation can be extended in time for several years.
Children's
Thematic children's albums continue the theme of growing up. They reflect certain periods of life - preschool in kindergarten, elementary school. As the child grows up, he will be able to take part in the creation of his personal album.
It will contain drawings, applications, funny notes and other creative works of children. And of course, photographs capturing various important and everyday moments.
It will be possible to truly understand how important all this is only after many years.
From the trip
We bring a good set of photographs from vacations and travels. From them you can create collages or chronicles of impressions and new places explored.
If you bring back from vacation several shells, dried flowers, branches of strange plants, small flat souvenirs, all of them will be useful for decoration.
For the anniversary
You can make an original gift for a relative’s anniversary with your own hands. The main idea of the project will be warm memories that connect you and the hero of the day for many years.
The gift will emphasize your attention, effort and devoted feelings. Rest assured, the birthday boy will be moved to tears.
Family
Everyone probably has a family album with photos. If you think it's time to update it, get to work. Add old greeting cards, newspaper clippings, letters to photos from years gone by, make a list of significant dates, write down your family's motto or mission. The result will be a real chronicle of generations.
To other events
Other ideas include a demobilization album, thematic albums of an athlete, a student, a cook, and handicrafts. An interesting idea is to compile a New Year's chronicle of different years and see how you and the New Year's surroundings around you have changed.
Filling ideas
The family album must be complete. This means that it is based on a certain idea. This can be a chronicle of the life of generations of one family. Or maybe the story of one couple. Or one person - from the moment of birth to the present. The result and the final appearance of the product depend on which idea is chosen for the design of the album.
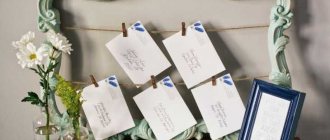
The title page is the key point, when looking at it it becomes clear what this album is about.
A properly designed title page creates the right mood for viewing the photo.
Recently, albums that are made to order have become widespread. Often this is handmade - using scrapbooking, stamping, collage techniques, and so on. Experts name more than 100 different techniques that can be used in the design of family albums. When professionals get down to business, the result is impressive - a family history book looks like a real hand-made masterpiece.
Bright family photos from professional photo shoots - New Year's or themed ones - look great. No less good are funny moments from ordinary everyday life, photos of which were taken not by a photographer, but by family members - on a phone or tablet.
A few years ago, albums with a family tree inside were popular. This is useful and educational for subsequent generations. Now the family tree can be one of the elements of the album, but it is far from the only one.
The name of the photo book of family photographs also needs to be correct, so that it is immediately clear what it is about. For example, “The Story of Oleg and Alena” or “The Kryukov Family”. The title can be written on the cover or on the flyleaf inside.
Homemade albums (or those made to order) can be absolutely anything - with folding large sheets, pockets, “secrets”, collages, and the collage can be made not only from family, but also from magazine photos, creating your own unique images.
This is an incredible scope for creativity and an opportunity to please your loved ones with an original design of family history.
Performance technique
Anyone can make a simple, beautiful and original craft. A ready-made album or creativity kit can be found on sale. But even in its design there is room for imagination, a sense of humor and taste.
Before starting work, it would be a good idea to draw a layout by hand, plan out the pages, and sketch out the design. This will help you save money without buying unnecessary materials, which are quite expensive. And time will not be wasted on a labor-intensive process.
The simplest DIY album
To gain first experience, we offer a simple master class. It describes the standard algorithm of actions. You can make your own adjustments by replacing materials and using various decorations.
Materials and tools
For a simple homemade album we may need:
Cover design
The base is covered with decorative fabric, artificial leather or suede, and designer paper. Decorate to your liking.
Binding
You can connect the album sheets with or without binding. The first option is more labor-intensive, the second is very simple.
Holes are made in the album sheets at equal distances using a hole punch. Thread a ribbon or cord through the holes and tie the ends. You can use special split rings of a suitable size. For a homemade album, two or three of these clips are enough, but you can make more.
If desired, make an album with a classic binding.
Decoration
All kinds of decorative elements are used for decoration: beads, rhinestones, lace, fur, artificial flowers, pieces of leather, curly pendants, decorative tape and much more.
For beginners, ready-made page templates are recommended - sketches with a ready-made layout of pictures, recommendations for color, materials and decor. As you gain experience, you will definitely develop your own taste and style and will create not according to prompting, but according to personal inspiration.
Try this unusual type of creativity, and you will understand how sweet it is: on a quiet, cozy evening, sit back on the sofa, unfold an album with photographs and immerse yourself in the magical world of memories.
Source
Required materials and tools
For beginners, before making a photo album with your own hands, you need to study step-by-step instructions, be patient, and have the necessary tools and materials. The easiest way is to buy a ready-made kit for creating a photo album in a store, but it is much more interesting and cheaper to create using improvised means. In addition, all family members can participate in this entertaining process.
Looking at the finished album, one gets the impression that it is simply unrealistic to recreate this on your own. But nothing is impossible!
So, to create such a masterpiece you will need:
It is important to use decorative details when decorating. This could be lace, fur or leather details, chains, beads, clasps, etc.
How to make an album cover
First you need to decide on the size of the future photo album and choose a design style. There are a lot of interesting original ideas for design. The cover can be soft fabric, leather, paper, decorated with various elements.
To make the back cover of an album measuring 25x25 cm, you must perform the following steps:
The algorithm for making the front cover is slightly different due to the use of decorative elements. For example, you can make a window for a photograph that will tell you in advance about the contents of the future photo album instead of the name.
To do this, the following steps are required:
Then, using a hole punch, neat holes are made in both blanks at a distance of 1.5-2.5 cm from the edge. Rings or tape are inserted into them to connect the parts of the cover.
Manufacturing process
Having dealt with all the aspects, you can begin the master class on creating an album with your own hands, from the materials we will need:
- Very thick cardboard;
- Scrap paper;
- Glue;
- Gauze, bandage or adhesive cloth;
- Decor for decoration.
Let's start creating:
- Initially, draw in your notebook how you want to design each page, this will help you avoid mistakes in the future.
- We cut out the required format of album pages from thick cardboard.
- Then, from a less dense material, you need to cut strips 3 cm wide and height equal to the height of the page.
- We find the middle of the stripes and retreat from it in both directions by 2 mm if the decor on the pages is voluminous, and 1 mm if it is a regular format. We make bends according to the marked mark.
- Using these blanks we fasten the pages of the album.
- At the next stage, you can start decorating the pages. Just distribute all the parts evenly so that the sheets do not become deformed.
- Now we need to make the binding. In the part where the pages are held together, we glue gauze, with an overlap of 1.5-2 cm on the main and last pages.
- Then we create a spine, on the inside it is necessary to make longitudinal lines in increments of 1 mm. Afterwards the edges are attached to the cover. The spine itself cannot be attached to the binding; there must be space there.
- All that remains is to make a presentable appearance and you’re done.
Pages and binding
You can not connect the photo album with ribbon or rings, but arrange it in the form of a voluminous book with binding. Accordingly, then there will be no need for holes in parts of the cover. For album pages, it is better to take thick white paper.
The sheets are connected to each other as follows:
The number of pages can be arbitrary and is determined only by the desire of the master and the availability of the necessary materials. After this, you can begin making the binding.
To do this you will need:
Do not attach the spine to the pages of the product, otherwise they may not open properly.
That's the whole secret of how to make a photo album with your own hands. Step by step, it won’t be difficult for beginners to create such a masterpiece. Now all that remains is to fill the album with photographs.
Fastening sheets together
The next step for the master is to attach the album sheets to each other. But before this stage, the master will have to decide on the number and location of the photo on the sheet. The standard option is with one card per sheet.
But today, with the help of virtual design programs, you can create a template for the most original photo albums. The sheets themselves are paper of sufficient thickness, onto which photographs are later glued.
These sheets are fastened to each other in two ways:
- Using a satin ribbon that connects all the pages of the album through several holes.
- Using cardboard bookmarks.
Cardboard “accordions” are a more practical and convenient way. For this purpose, cut out long narrow strips from cardboard and fold them in half. The strips are glued together, and leaves-pages are glued into the resulting “accordion”.
Scrapbooking technique in creating a photo album
Scrapbooking is an art form with which original photo albums are created and designed. Transforming an ordinary boring photo album into a unique story of our life.
The origin of this technique goes back to the distant 16th century. At that time, notepads for recording important dates, valuable advice, recipes, etc. were at the peak of popularity. By the end of the 17th century, books began to appear with additional blank pages for making notes and pasting in illustrations. This was the birth of the scrapbooking technique.
In the 19th century, with the beginning of the mass distribution of photographs, a real revolution took place - special pockets were made for photographs, and the pages were painted with different colors and designs. Albums for girls with pictures, photos and various inscriptions were especially popular.
Today, there are many ways to design photo albums, and scrapbooking is popular all over the planet.
Ready-made sketches for pages
A sketch is a small page template for a future album. In scrapbooking, a sketch is a prepared sketch to speed up and convenient the work process. Ready-made sketches are a godsend for beginners who are wondering how to make an original photo album with their own hands. By step-by-step selecting shades and photographs, you can easily create inimitable pages of your future album.
These ready-made sketches are simply an inexhaustible source of ideas and inspiration! Gradually, as the work progresses, templates will be used less and less, and soon they will completely fade into the background, clearing the way for the uncontrollable imagination of the master. Everything depends only on the desire to act and create. Such ready-made sketches are also useful for visualizing a future photo album.
Themes of homemade albums
Making an original photo album with your own hands if you have the necessary tools and materials, as well as ideas for its design, is not at all difficult.
All that remains is to choose a plot and some significant life event, for example:
In general, the theme of a homemade photo album can be any bright event in life, the memories of which you want to keep in your memory for a long time.
Another reason to do this kind of handicraft could be creating a gift for relatives, colleagues or friends. It’s enough just to make an original photo album and present it for any holiday of a loved one. Such a surprise will not leave anyone indifferent!
Design ideas and themes
Albums can be filled with diverse photographs - without hesitation. But it’s much more interesting to leaf through a product that has a specific theme. Such a product will refer us to a particular event, evoking pleasant memories. Finding an idea for album design is not difficult. You just need to choose some bright significant event from your life.
Most popular options
- Birth of a child.
- The first year of your baby's life.
- Graduation celebrations at the end of kindergarten or school.
- Wedding celebration.
- Anniversary or birthday.
- Journey.
- Gift for a colleague or boss
- Favorite city.
- Life of a pet.
As you can see, themes for photo albums are often suggested by life itself.
Album for a newborn
The birth of a child is one of the most popular reasons for creating a themed album. You can come up with a huge variety of options for its design. Albums of unusual shape look very interesting - in the form of a favorite toy - a car, a boat or a bunny - for a boy, a tumbler or a carriage for a girl. On each page you can place cards on which it will be very convenient to note all the changes occurring with the growing baby.
You can print these cards yourself or purchase a ready-made set. On them it will be possible to mark height and weight indicators, the appearance of each tooth, the day when the baby smiled for the first time, took a rattle in his hand, sat down, took his first steps, tearing away from the hands of adults.
On the first pages of the album it is worth placing a photo with images of mom and dad waiting for a happy moment, an ultrasound image, preferably three-dimensional, a meeting of the mother with the baby in her arms at the moment of discharge from the maternity hospital. After this, all that remains is to fill out the following pages as the child grows up. It is better to do this every month, noting all the changes and new achievements of the baby. Don't forget to take a photo of his stroller, his favorite toy, and his first sandals. Decorate the pages with stickers and cute little things to match your chosen theme.
Wedding album
This album is dedicated to the most significant day for every family. Telling a story about it in photographs will make it unforgettable. Any wedding accessories are suitable for decoration - bride's gloves, images of connected wedding rings, flower arches, doves, wedding cake, glasses with the names of the bride and groom and the wedding date, bouquets, voluminous flowers. Lace, tulle, ready-made flowers and butterflies made of organza, white crepe satin, pearls, and satin ribbons are suitable for decoration.
Attach a sign in the center of the cover that says “Our Wedding” or “Wedding Album.” If there are too many good photos and you don’t want to part with any of them, equip the album with folding pockets. This way you can place several photos on one page at once. In the album you can also organize a place to store a disc with a video recording of the celebration. To do this, you need to glue a beautiful CD sleeve to the endpaper of the cover.
Family album
Over many years of family life, a lot of photographs accumulate. They reflect the entire history of an individual family. In the stack of photographs is the very beginning of the journey - wedding photographs, and joyful events throughout life, and photographs of children, and numerous relatives. People keep family archives not only to be nostalgic for bygone times, but also to talk about the life of the family in its various periods.
You need to start keeping an album from the first days of family life. And what could be a better decoration for the cover of such a product than a wedding photograph. If it was made as a gift for a married couple, an image of the spouses celebrating their next wedding anniversary would be suitable. It would be useful to write on the cover a title that corresponds in meaning to its content.
Each period of life that the couple lived together can be assigned a separate spread. Restore the chronology of events from the time they met to the present day. People often keep various souvenirs, love notes, and tickets from joint visits to events in secluded corners. All these little things should not be forgotten when preparing a family photo chronicle.
The most important milestones in the life of every family are a wedding, the expectation and birth of children, birthdays of relatives and friends, joint travel and events, the purchase of common housing, calendar holidays, marriages of children and the birth of grandchildren. Amateur photos telling about everyday life are also very important to preserve. A family tree would look logical on the flyleaf.
Birthday photo album
A photo album can be a great gift for a loved one. In this case, the choice of page design and cover will depend on his personal interests and hobbies. Don't forget to take into account the person's profession and marital status. Since your relative or friend will add pictures themselves, it is better to make pockets or envelopes for photos of different sizes.
When making a gift item, you will have to tinker a lot, but the result will not only please your relatives, friends or colleagues, but will also give you a reason to be proud of yourself. And if everyone around you knows about your skills, guess who they will want to order a gift album from next time.
School or graduation photo album
School photographs allow you to refresh your memory of images of classmates and teachers. The album must certainly contain classic general options - when the whole class is filmed simultaneously in the assembly hall, in the classroom, in the school yard.
Individual photographs of your child are no less relevant. Nowadays, when each of the children has a smartphone with excellent shooting quality at hand, it will not be difficult for anyone to take a self-portrait right in the classroom during a lesson or recess.
Photos from the prom can become the final touch of the school version or live in a separate cardboard “apartment”. On the cover you must indicate the class number, school and year of graduation. A homemade album with original design is an excellent gift for yesterday’s “chicks” who are so eager to fly away into adulthood as quickly as possible. Looking at it a few years later, they will easily remember the joyful events from their school time.
Sometimes it takes time for your gift to be appreciated. But in a couple of years, the children will longingly remember their carefree school life. And the photographs from the album you donated will allow them to return to childhood again and experience unusually warm feelings when they see their classmates and teachers.
Journey
With the proliferation of digital media, it has become unfashionable to print photographs. Thousands of snapshots fill the space of hard and virtual disks. People take countless pictures when traveling, but the trouble is that almost no one sees them except for a small selection posted on a social network.
Guests and relatives who come to the house are simply unable to view such a huge number of similar photographs. It is much more pleasant to offer your loved ones a small album with the best photographs and interesting design.
Flipping through such a product is much more pleasant than looking through gigabytes of images on the monitor. In addition, old pictures on the computer and on social media pages. You have to search for networks for a long time. But in a self-made album they will always be at hand.
For decoration, you can use any items that came into your hands during the trip. These are symbols of the country being visited, postcards depicting attractions, as well as all sorts of little things - tickets, boarding pass stubs, dried exotic plants, small shells, a bar of soap from the hotel, food labels. Very often we keep such things only for the first time, and then throw them away during the next “de-littering” raid.
We throw away most of our memories with them. To prevent this from happening, add the little things you brought to the album design. Every time you take this product in your hands, you will be covered with a warm wave of joy mixed with a slight touch of sadness.
Wedding album. Step-by-step instruction
The process of creating a wedding photo album is extremely interesting and exciting, because a piece of your own soul is put into it. Beautiful happy newlyweds, their sincere smiles, are the main characters of the emerging fairy tale, the beginning of a completely new life together.
It’s an extraordinary feeling to pick up a tattered, dusty photo album after many years, flip through it and understand that love, true love, is beyond the control of the years.
For beginners, before making a wedding photo album with your own hands, you should study the step-by-step instructions for its design:
In the process of creating an album, it is important not to overdo it with additional elements and decor, because the main thing is still the photographs.
DIY album for a newborn
The birth of a baby is a new exciting stage in life together, filled with emotions and experiences. I so want to remember every moment, every smile of a child, his first inept steps. But over time, even the most vivid memories are erased from memory and dissolve in the everyday bustle. Therefore, it is worth thinking in advance about preserving these emotions.
A handmade photo album for a newborn is perfect for this purpose. It will be interesting and exciting not only to look at pictures of the baby in the future, but also to participate directly in the process of making it. Loving parents can show all their creativity and imagination, putting a piece of their love into their work.
Decoration materials
When designing a newborn's album, you want to use the softest materials and the most beautiful, elegant elements. So that tenderness and boundless love for the baby can be conveyed even through them. Velvet or velor in pastel colors is perfect for the cover.
Additionally, it can be decorated with the following details:
In the decorating process, it is important not to overdo it with the number of additional elements and combine them harmoniously with each other.
Designing photo album pages step by step
For beginners, before making a photo album with your own hands, it is recommended to pay attention to the step-by-step instructions:
The homemade album is ready. All that remains is to put pictures of the baby in it, and it is important to fill out the pages of the album regularly and with love.
Varieties
Photo albums vary in the way photos are attached to the pages. The safety of the images and the ease of use of the products depend on it.
Models with pockets
The most common options. Pockets are attached to the sheets, into which photographs are placed.
Pros:
- ease of use;
- sheets are made of plastic or paper.
There are several disadvantages.
- A limited set of pocket sizes: 9x13, 10x15, 13x18, 15x20 cm. For photographs of different formats, you will have to purchase several albums.
- The polyvinyl chloride from which the pockets are made decomposes over time. This results in spots appearing in pictures.
Magnetic models
They have a low cost, good appearance and a convenient fastening system. The album pages have a film with an adhesive surface under which photographs are placed.
Pros:
- You can place several pictures on one sheet, the number depends on the page size;
- Photos can be rearranged or removed from the album as desired.
Minuses:
- It is not recommended to use decorative elements in albums, they will increase the likelihood of pictures falling out;
- the film does not always lie flat on the photo and bubbles;
- The adhesive surface of the sheets turns yellow over time, leaving stains on photographs.
Paper and cardboard models
The very first version of photo albums, which remains popular to this day. The photographs are attached to the pages with special corners, double-sided tape or glue. Between the sheets there are protective inserts that prevent the photographs from touching and deforming.
Pros:
- albums have an aesthetic appearance;
- You can place inscriptions, clippings, and decorative elements on paper sheets;
- wide choice of page design styles;
- You can paste several photographs of different formats.
There are also disadvantages. To make such an album look beautiful and not “empty”, you will have to devote a lot of time to design.
In addition to photo albums with ordinary sheets, there are also unusual solutions. Such models are made in several of the most common styles.
European. The sheets are decorated in a restrained style, with a minimal amount of decoration.
Photo albums also differ in the material of the sheets. The pockets are always made of polypropylene, and the base can be paper or plastic. The sheets are held together by heat sealing, stitching or metal rings.
Photo album in vintage style
An interesting idea for creating an album with your own hands would be a photo album in a vintage style, i.e. "antique"
This genre of creativity has a number of features:
It should be noted that black and white photographs with frayed edges will look more organic in such an album.
Family photo album step by step for beginners
You can make an album with your own hands not only for some special event, but also for telling a story about family life in general.
To create it, you can use the following sections:
- Candy-bouquet period. With the help of photographs, you can tell about where and how the spouses met, how their relationship developed, and celebrate their first joint holidays.
- Family life itself. You can start the story from the wedding day. Let the photographs tell in general terms about the past celebration, the young spouses and the invited guests.
- Rest. It would be a good idea to include joint travel, family holidays and traditions in a separate section.
- Children and pregnancy. You should definitely pay attention to children, their birth and subsequent growth and development, attaching more general photographs to the album.
- Shared life. It is worth telling about everyday life with the help of photographs, how they made repairs or how everyone prepared Sunday dinner together.
Creating a family album will require you to spend time and effort, but the result will definitely be worth it.
How to decorate pages and cover in an original way
Before starting work, it is imperative to think through the idea of the future creation and sketch out sketches. On the draft, depict everything that is planned to be included in the album, down to the smallest detail. This will allow you to clearly examine the result of the work, taking into account all the nuances. The number of pages is calculated based on the number of photographs.
Each album sheet must contain:
It is important to think in advance about what ink, color, font size and inclination of letters will be used to describe the photographs. You can also use letters cut out from a newspaper or magazine and assembled into whole words.
First of all, flat parts are attached to the album, and at the very end - three-dimensional decorations.
For an original cover design, you can use a collage made from small photographs. It can be created in the form of a simple geometric figure or come up with a more complex artistic design. For beginners, before making a photo album with your own hands, you should step by step understand how and how the finished copies are decorated.
Otherwise, the process of creating your first album may cause some difficulties. It will be more convenient to design the pages before they are stapled into the finished product. It is important to remember that on one sheet of paper attention should be focused on one bright element in order to avoid information overload on the page.
Start of production
We fold the paper in half, paying attention to the edges, which should be even. If desired, we give the sheets a shape by cutting them
When you have decided on the number of sheets to insert, we place some kind of press on our structure, for example, books.
Place thick cardboard around the edges so that the paper does not wrinkle, and attach it on both sides with binders (clothespins) to definitely secure the shape. Leave the sheets under pressure for several hours.
Upon completion, remove the press, transfer the cardboard and clothespins to the side that will need to be sewn later. Leave the cardboard to make holes for the needle. Mark a distance of 3 cm along the entire length.
The markings can be applied just to the cardboard, which is located above the sheets. Then, using a stationery knife, we make small cuts, approximately 3 mm deep. Preferably, a little more than the thickness of the incoming needle.
We unravel the paper from under the binders and open them exactly in the middle in order to sew them together. We start stitching from top to bottom with an ordinary, simplest seam. We start from the very bottom leaf. We will place the subsequent paper on top, stitching it in the same way.
Consider the order of the sheets in advance if they differ from each other. First, leave the thread up to 15 cm for further fastening. At odd intervals, starting from the third, we apply strips of fabric that are approximately equal to the distance of the segments themselves.
Using this technique, we stitch the finished assembly of leaves to the end. Again, when we reach the fabric, we thread the thread so that we get a cross. After you reach the edge, tie the thread with the 15 cm that you left at the beginning of the work.
Thus, we sew together the number of notebooks required for you. We glue the finished block between the assembly to secure them together.