What a beautiful time of year - winter! Fluffy snow, sledding, frosty cheeks. And how great it is to come home from a walk, drink tea and do what you love! Draw, make appliqués, sculpt from plasticine, create!
We offer you the most interesting winter crafts for school and kindergarten : we will make fairy-tale characters, invent clothes out of paper, sculpt Christmas trees and animals in winter clothes, and do winter plasticineography. Many crafts come with ready-made templates for printing. If you don't have much time or don't have colored paper, print them out. They are especially convenient if you want to make New Year cards for a large number of friends.
The ideas in this collection can be used as creative activities for your advent calendar. You will find a lot of inspiration and creative ideas for activities with children throughout the winter.
Crafts “Christmas trees”
We offer you 4 options for how to make a craft with a Christmas tree. We will make cards, applications and a New Year's toy.
New Year's card "Delicate Christmas tree"
Let's make a postcard - a transformer. When closed, the Christmas tree looks like an ordinary one, but as soon as you open the postcard, the holiday begins!
Craft “Christmas tree” from a sleeve
Crafts made from bushings are a special love! Such affordable material and so many interesting things you can make from them, for example, a Christmas tree. To do this, we will fold the sleeve in half and make cuts. The final work can be used as a Christmas tree decoration. This craft can be done by children aged 3 years and older.
You can think about what a green beauty might look like in the “Living Christmas Tree” master class. Download the finished template. Children under 4 will need help cutting out as the lines are curved.
Or make an applique from paper circles. For children under 4 years old, make a lot of blanks from colored paper and show them how to fold them. Then they can handle it themselves! As an additional decoration, we use semolina, which is so similar to snow.
For older children (from 6 years old), we invite you to try out elements of the origami technique to create your own New Year’s cards. Three craft options for your choice!
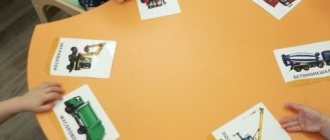
Sectional pictures of furniture
Pictures of furniture for children in kindergarten can be used in cut form. To do this, the finished colorful images are divided into parts of regular/irregular geometric shape.
Starting from early preschool age, the child is able to match puzzles and put together a picture. The benefits of such activities cannot be overestimated. They contribute to the development of the following functions and abilities:
- logical and spatial thinking;
- fine motor skills, coordination of movements;
- orientation in space;
- making independent decisions;
- fantasy;
- creative skills;
- visual perception of information.
Fairy tale characters
It is impossible to imagine the New Year without Santa Claus. He is the symbol of the New Year, which occupies the minds of all boys and girls. Let's figure out how to make Santa Claus out of paper. And so that you can play with it, let’s glue it to a skewer (or twig). You can make other New Year's characters and stage a real home performance!
Pattern applique “Snowmen”
In the master class “Applique - Snowmen Pattern” we will learn how to cut out even circles, form a uniform composition and learn the basics of creating patterns. This application is suitable for children aged 3 years and older and will be interesting for older children who can add additional elements to it. Take the idea and repeat it with other fairy-tale characters or make a magical forest.
Application “Snowman with a gift”
Or you can make a snowman who will give candy to friends and family. An excellent option for a DIY gift for the New Year for which the only materials you need are paper.
Papier-mâché snowman
I really like this “Snowman” craft, but it can’t be done in one go. The napkin base should dry thoroughly. This will take a couple of days. Children will love the papier-mâché technique, which can be used to form three-dimensional shapes.
Card index of games for young children
Card index of games
for
young children
№.1.
D/I “LONG - SHORT”
GOAL: To continue to develop the sensory abilities of children, to be able to distinguish objects by length, to use “long - short”, “longer - shorter” in speech, to develop imagination and thinking. GUIDE: The game is played with 2-3 people. First, we consider the ribbons by length, then the children are offered cards and flat sticks of different lengths and colors. By unfolding, the child determines where the long and short sticks are.
№2.
D/I "INSERTS"
GOAL: To be able to perform actions with geometric shapes (circle, square, triangle), insert shapes, develop memory, thinking and attention. GUIDELINES: The game is played with a subgroup of children of 4-5 people. The teacher first shows geometric shapes, names them and shows the children how to insert them into stencils. During the game, constantly fix the names of the figures - circle, square, triangle.
№3.
D/I “FIND THE SAME FLOWER”
GOAL: Continue to develop children’s sensory abilities, consolidate 4 primary colors, and the ability to name flowers by demonstration. GUIDELINES: The game is played with 4-5 people. First, the teacher shows the children large illustrations of flowers of different colors. Children tell what color these flowers are. Then the teacher gives the children 4 small cards, having examined them, he offers to show the same flower as the teacher shows.
№4.
D/I “CIRCLE AND SHAD”
GOAL: To develop and consolidate children’s sensory abilities, the ability to shade a circle, square, triangle using a stencil on a white sheet, and to consolidate primary colors. INSTRUCTIONS: First, the teacher shows the children (2-3 people) stencils of geometric shapes. The children look at what color it is, then the teacher shows how he shades on a white sheet of paper with the same pencil as the stencil. The teacher distributes paper, stencils, pencils, and he himself makes sure that the children correctly select the color of the pencil to the stencil.
№5.
D/I “ONE IS MANY”
GOAL: To develop first mathematical abilities, develop attention, thinking, and the ability to distinguish the color of objects. GUIDELINES: Games are played with 2-3 children. The teacher shows pictures of toys on a magnetic board - one, many, and fixes the color. Then he invites the children to find and attach the same pictures as shown.
№6.
D/I “MULTI-COLORED BALLS AND CLOSES PEGS”
GOAL: Continue to develop fine muscles of the hand, consolidate knowledge of color, develop attention and imagination. GUIDELINES: The game is played with 2-3 people. “Granny” comes and complains that the kittens have unwound all the balls, invites the kids to wind up a ball for each, and then hang the clothespins on the handle of the basket. Constantly involve children in productive activities.
№7.
D/I “BIG, SMALL, SMALL”
GOAL: Continue to develop the ability to distinguish geometric shapes by size, develop conversational speech, thinking, memory, and the ability to distinguish primary colors. GUIDE: The game is played with 2 children. The teacher shows a set of geometric shapes (circle, square, triangle) of different colors, and suggests showing first a large figure, a smaller one, then a small one. You can complicate the game by asking: “Show me a small red triangle”; "Large circle of yellow color"; “A smaller yellow square,” etc. at the discretion of the teacher's imagination.
№8.
D/I “MULTI-COLORED DROPS”
GOAL: Continue to strengthen children’s sensory abilities, the ability to pipet as directed and drop into cells by color, develop memory and thinking. GUIDE: The game is played with 2 children. The teacher shows jars with multi-colored gouache. At first 2 colors, by the end of the year 4 main colors. Gives everyone a drawing and a palette with cells by color. Shows actions. Then he invites the children, following a verbal guide, to type in a jar and drop into the cells without mixing the colors. Each action is discussed with each child.
№9.
D/I “SHOW THE SAME”
GOAL: Continue to strengthen the ability to find the desired geometric figure (circle, square, triangle), develop thinking, conversational ability to name the color of the figure. GUIDELINES: The game is played with 2-3 people, as it is necessary to focus the attention of the children. Bunny comes to visit and brings a box with geometric shapes and asks to tell the children what it is. First, the teacher shows the figure and its color separately. Then he distributes sets of figures to the children and, according to his demonstration, asks to show the child, constantly involving him in speech activity.
№10.
D/I "RED, YELLOW, BLUE, GREEN"
GOAL: To develop the ability to distinguish, name and show pictures by the color of objects, to develop children’s sensory abilities. GUIDELINES: The lesson is conducted with 5-6 people. Each child has a picture of objects on the table (toys, flowers, clothes of different colors). The teacher shows either a picture of a certain color or an object of the same color. The child must show his own picture with the same image and color.
№11.
D/I “FIND A BUCKET FOR MATRYOSHKA”
GOAL: continue to consolidate and name the 4 primary colors, develop thinking, memory, and speaking. GUIDE: The game is played with 2 children. A set of matryoshka dolls of red, green, blue colors and buckets of the same color are separated. First, the teacher shows which bucket each nesting doll needs. Then he invites the children to find a bucket for the nesting doll, fix the name of the color of the matryoshka dress and the bucket, and involve the children in speech activity with various questions.
№12.
D/I “INSERT BUSHING”
GOAL: Continue to develop hand motor skills, attention, and thinking. GUIDELINES: The game is played with 4-5 children. The teacher shows the planes, along the edges of which there are holes for bushings. He shows and discusses his actions, then invites the children to repeat what they saw.
№13
D/I "BUSINKS"
GOAL: To develop motor skills of the hands, the ability to take beads with tweezers and arrange them into cups according to external features, to develop thinking and memory. GUIDELINES: The game is played with 2 children because it requires a lot of attention. First, the teacher shows actions with tweezers and beads, and then invites the children to sort the beads into cups.
№14
D/I “LACE YOUR BOOT”
GOAL: To develop the ability to perform actions with screwing, to develop small muscles of the hands, and to develop thinking. GUIDELINES: The game is played with a subgroup of 4-5 children. A child from another group comes and asks to help him lace his shoes. The teacher performs the action. And then he hands out “boots” and laces to the children and offers to lace the doll’s boot.
№15
D/I "COLOR DOMINO"
GOAL: Continue to develop children's sensory abilities by finding an object of a given color, fixing the 4 primary colors. GUIDELINES: The game is played with 4-5 children. 2-3 colored dominoes are distributed to everyone. Children are invited to lay out a path, looking for dominoes of the same color as the color of the domino the previous child placed.
№16.
D/I “LAYING OUT HOMOGENEOUS OBJECTS OF DIFFERENT SIZES”
GOAL: To learn to find the same geometric shapes (circle, triangle, square), but of different sizes. GUIDELINES: The game is played with 4-5 children, each with plane images of a circle, triangle, square of different sizes and can be of different colors. The teacher suggests choosing your own geometric shapes based on the demonstration.
Winter clothes
We associate winter with snow, New Year and, of course, cold. To avoid freezing, we wear warm clothes and winter accessories. Look at the crafts we made on the theme of winter clothes.
Application “Winter hat”
What does your head get cold without in winter?
Of course, without a warm winter hat. Let's make a beautiful head pattern with a pompom from paper and plasticine. In this master class, your child will learn how to make beautiful patterns from plasticine and an interesting technique for folding paper patterns. Children from 5 years old can handle this craft. Watch a detailed master class here
Application “Mittens” made of paper and plasticine
To keep our hands from freezing, we wear warm mittens! Ours will have very beautiful patterns, which we will draw with markers and felt-tip pens. And we will definitely make decorations from plasticine: flagella and circles. This applique can be made for a New Year’s card or hung in a frame on the wall to create a festive mood.
Detailed master class here
DIY New Year decorations for the home
Sometimes the preparation for the holiday is much more interesting than the holiday itself! Does this happen to you? When we prepare for the New Year, we decorate the house, put up a Christmas tree and hang garlands. We will tell you what crafts you can make with your children from scrap materials.
New Year's wreath made of paper and pompoms
How beautiful New Year's wreaths look on the doors of the apartment. And we will make one from paper and pom-poms. To do this, we will cut out fir branches from paper, draw patterns on them and decorate them with multi-colored pom-poms. What kind of wreath will you make?
Craft “New Year's boot”
Or you can make a personalized boot from cardboard. Look how hard Varya tried and decorated her felt boots with stickers. This is a very simple and easy craft that children from 3 years old can handle.
Do you remember how they used to sew elastic bands to mittens? And we decided to make a pendant from cardboard and white paper mittens. It turned out great!
Pendant “Winter City”
Another pendant is a winter city, which we decorated with snow wool and sparkles. As a basis, we took a piece of cardboard, of which so much remains after the goods are delivered. Cardboard from boxes makes very strong crafts.
We not only decorated the house, but also came up with a winter crown! Download a ready-made template or make a sample with us. Sequins are suitable for decorations, you can take nail polish with sparkles or simply paint with felt-tip pens.
Card index of didactic games in the nursery group card index (junior group)
Game: Multi-colored beads.
Goal: to teach the child to alternate objects by color.
Equipment: Four white and red beads (other colors can be used) in a box, cord or soft wire.
Progress of the game:
White and red beads are alternately strung on the thread. The basis for the successful alternation of other color combinations is precisely white, a well-known color that is often mentioned in everyday life (white snow, white hands, etc.).
Game: “Who has what dress”
Goal: to teach children to choose objects based on the word denoting color. group shades of the same color tone.
Material: Demonstration material: Dolls. Cut out of cardboard in dresses of different colors (plain dresses, flannel, magnets.
Progress of the game:
1. Look, guys, what beautiful dolls dance in a circle on our flannelgraph. Let's take a closer look at them and find out how they differ from each other.
2. How do our dolls differ from each other? That's right, the color of the dress. I will show you a doll, and you will tell me what color her dress is. I show one doll at a time and interview younger preschoolers one by one, clarifying and correcting their answers.
3. Conclusion: Well done guys, many of you named the colors correctly. Our dolls are happy, because now they know what color their dress is. We also found out that primary colors have shades and they have their own names.
Game: Hen and Chicks
Goal: to draw the child’s attention to the fact that color is a sign of different objects and can serve to designate them.
Equipment: A box with a mosaic containing six yellow elements and one white.
Progress of the game:
The teacher shows the children toys: a white chicken, followed by yellow chickens (or a picture). Then - a white mosaic element and says: “We will have a chicken. She is white". Shows a yellow mosaic element and explains: “The chickens will be yellow.” The teacher puts a white mosaic into the hole in the panel, reminding once again that the chicken will be this white, and places one yellow mosaic after the white mosaic, saying that the chickens will be this color. Then he gives the child a box with a mosaic and asks him to find another chicken and place it after the mother chicken. After all the chickens have been found and placed in single file behind the chicken, the child repeats the task independently.
Game: Christmas trees and mushrooms.
Goal: to teach the child to alternate objects by color.
Equipment: a box with a mosaic containing ten green and red elements.
Progress of the game:
The teacher shows the children the mosaic and explains that Christmas trees are green, and places a Christmas tree on the panel - a green element. Shows an element of a red mosaic, explains that mushrooms come in this red color. Having placed a Christmas tree, a mushroom, a Christmas tree, a mushroom on his panel, the teacher invites the child to continue the series of Christmas trees and mushrooms. The game is played as a reinforcement after the corresponding lesson.
Game: Place the bouquet in the vase.
Goal: teach children to group objects by color.
Equipment: four vases of yellow, red, green and blue colors, made from plastic bottles, paper flowers of the same colors.
Progress of the game:
The teacher shows the children flowers that are randomly mixed on the table or carpet and offers to collect bouquets from them and put them in vases. Then, the teacher takes, for example, a red flower and places it in a red vase, emphasizing that the flower is the same color as the vase. The teacher does the same with flowers of other colors. Next, children are invited to collect bouquets.
Game: “Hide the Mouse”
Goal: to consolidate the names of colors, to promote the accumulation of ideas about the main varieties of color, to develop hand coordination and fine motor skills of fingers in children, to help consolidate the qualities of objects.
Demonstration material: pieces of paper of 4 colors (20 - 15), in the middle there is a white square (8-8, on which a mouse is drawn (mouse house), squares of the same 4 colors - doors (10x10), a large cardboard toy - a cat, a soft mouse.
Handouts: 10x8 colored sheets, 5x5 white squares on them, colored squares.
Progress of the game:
Look, guys, what a little guest we have today. Who is this, right, a mouse? How small, fluffy, and gray she is. Pet her. Children take turns petting the mouse.
- Do you know where the mouse lives? In a mink. Who is the mouse hiding from? From a cat. Look if there is a cat somewhere, otherwise our mouse is afraid. Can we help the mice hide in the hole? Now we will play with you the game “Hide the Mouse”. We will learn to play it together. I have mouse houses. I arrange three houses on the demonstration board, next to them I place 4 squares of four colors. You see mice looking out the window. To hide the mouse, you need to close the window with a door - a square of the same color as the house, otherwise the cat will come and see where the window is, open it and eat the mouse.”
I call 3 younger preschoolers in turn and invite them to close three windows in turn, I find out whether all or the windows are well closed.
If someone has made a mistake, I call the child to correct it. I take out the previously hidden cat, which goes to “catch mice.”
“I’ll go and find where the mouse lives here. Children, have you seen the mouse? The cat leaves without finding the mouse. The children are given one piece of paper - a “mouse house” (I give leaves of different colors to those sitting next to them) and 4 squares of all colors. “Now you hide your mice while the cat sleeps. From the squares that are on your plates, choose a square of the same color as your mouse’s house.” When all the children have completed the task, the cat “goes hunting” again. I walk at a stealthy pace with a cat in my arms, walk through the rows and see whose mouse is poorly hidden. At the same time, I give the children the opportunity to correct the situation before the cat approaches them. If the mistake is not corrected, the cat takes the piece of paper with the mouse from the child.
Conclusion. “Everyone played well today, everyone hid their mice, only some guys made mistakes (I indicate exactly what mistakes were made). Next time they will definitely hide the mice well.
Game: Let's treat the bear with a berry.
Goal: to teach children to choose objects of a given color from several offered, to develop hand coordination and fine motor skills of the fingers.
Equipment: a box with a mosaic containing ten red elements and five yellow and green elements each.
Progress of the game:
The teacher shows the bear to the children and examines it together with the children. Then he invites the children to treat him to a berry, emphasizing that the bear loves only ripe red berries. Next, the teacher takes a red mosaic element (a berry) from the box, inserts it into the panel and invites the children to pick berries too, making sure that the children take only ripe red berries. When all the red berries are collected in the “basket”, the bear thanks the children .
Game: Multi-colored balls.
Goal: To teach children to match objects by color.
Equipment: A card with multi-colored stripes glued vertically on it - “strings” parallel and at some distance from each other, balls cut out of cardboard of the same colors.
Progress of the game:
The teacher shows the children the balls and offers to tie strings to them so that the balls do not fly away. Then he takes a ball, for example, yellow, and applies it to a yellow stripe - a yellow “thread”. Next, the children complete the task. This game can be played with other equipment: multi-colored “book” cards with cut-out “windows” - balls, insert cards of the same colors. Then the move will be like this: the teacher shows the children cards with balls and invites the children to paint these balls with the appropriate color, after showing how to do this.
Game: Match the cups to the saucers.
Goal: to teach children to match objects by color.
Equipment: cups and saucers cut out of cardboard in different colors.
Progress of the game:
The teacher shows the children saucers and offers to put cups on them and clarifies that each saucer has its own cup of the same color. Then the teacher shows how to do it. Next, the children complete the task.
Game: Mittens.
Goal: to teach children to match objects by color.
Equipment: several pairs of multi-colored mittens cut out of cardboard, dolls.
Progress of the game:
The teacher tells the children that the dolls are going for a walk, but cannot find their mittens, because the mittens are mixed up. Then the teacher takes one mitten (for example, a red one), asks the child what color it is and invites the child to find the same red mitten. The child completes the task and the game continues.
Game: What shape is this?
Goal: teach the child to alternate objects according to shape
Equipment: Four round and square clay beads of the same color (diameter 2cm). Cord or soft wire, doll and basket.
Progress of the game:
It is played in the same way as the game “Big and Small” with the only difference that round and square beads are alternately strung on a thread. The teacher invites the child to touch each bead on the string with his hands, fixing the child’s attention on this and saying: “Ball, cube...”.
Game: "Circle, Square"
Goal: Learn to group objects by shape.
Equipment: Five cardboard circles and squares of the same color.
Progress of the game:
The teacher shows the children geometric shapes randomly mixed on the table. Then he says: “This is a circle, this is a square. I will put the circle on a round plate, and the square on a square plate.” Next, the teacher invites the children to put the figures in their places and activates the children’s speech with questions: “What is this? (Circle). And this? (Square), etc.”
Game: “Mand your pants”
Purpose: To teach children to insert objects of a given shape into the corresponding holes.
Equipment: A cardboard image of a wolf (matryoshka dolls, dolls, etc.) with round, square and triangular holes on the panties and corresponding circles, squares and triangles, the same color as the panties.
Progress of the game:
The teacher shows the children the wolf and draws their attention to the fact that the wolf has holes in his pants. Then the teacher shows the children geometric shapes - patches - and offers to help the wolf mend his pants. The children complete the task, the wolf thanks them. This game can be played with more complexity, for example, by “darning” sundresses of different colors in nesting dolls with various large and small geometric shapes of the corresponding colors.
Game: "BIG AND SMALL"
Goal: To teach the child to alternate objects by size
Equipment: Four large and small beads (approximately 2 and 1 cm) of the same color. Cord or soft wire, doll and basket.
Progress of the game:
The teacher shows the child a beautiful doll and says that the doll came to visit the child and brought something in a basket. Then the teacher places the doll on the table and, taking the box out of the basket, shows the child that there are large and small beads and thread there. Having said that the doll asked the child to make beautiful beads for her, the teacher draws the child’s attention to the fact that beads can be strung in different ways. First, the teacher himself shows how to collect the beads, and then asks the child to do it. It is important to start alternating with a large bead, because if you alternate beads the other way around, that is, first take a small one, then a large one, it will be difficult for the child to complete the task, because he is primarily attracted to large beads. Then the doll is shown how the beads turned out.
Game: “WHAT BALL IS BIGGER?”
Goal: To learn to distinguish objects by size and select them according to verbal instructions.
Equipment: Large and small balls, randomly mixed.
Progress of the game:
The teacher stands at a distance of 3 - 5 m from the child and asks to bring him a large ball. If the child makes a mistake, the teacher explains and shows the difference by giving the child to hold a large and a small ball. With the child’s hand, the teacher traces the circumference of the large and small ball, saying at the same time whether it is a “big” or a “small” ball. The game repeats itself.
Game: "ORDERS"
Goal: To teach children to distinguish and name toys, as well as to identify their size; develop auditory perception, improve understanding of speech.
Equipment: Large and small dogs, cars, boxes, balls, cups, cubes, matryoshka dolls.
Progress of the game:
The teacher shows the child toys and objects and asks them to name them, noting their size. Then he gives the baby the following tasks: Give the big dog tea from a large cup, and the small dog from a small one; Ride the nesting doll in a big car; Place a small dog near the nesting doll; Build a house from large cubes for the big dog, and from small ones for the little one; Take a small dog and put it on the carpet; Take a big dog and put him in a big box; Collect small cubes in a small box, and large ones in a large one, etc. If the child makes a mistake, the dog or matryoshka shows its displeasure (growls or turns away).
Game: “TREAT A BUNNY”
Goal: To teach children to group objects by size.
Equipment: A toy hare, a large and a small bucket, five large and small dummies of carrots on a tray.
Progress of the game:
The teacher shows the hare, invites the children to examine it and stroke it. Then he says that the bunny asks the children to help him collect carrots and shows a tray with carrots, emphasizing that the carrots are large and small. Next, the teacher says that the large carrot should be placed in a large bucket, and the small carrot in a small bucket. The children complete the task, the bunny thanks them for their help. (Fig. 23) Using the same principle, you can group other large and small objects into containers of various sizes. For example, playing the following games “Help the doll collect the cubes”, “Put the balls in the baskets”, “Put the cars in the garage”, etc.
Game: “THE DOLLS ARE LOST”
Goal: To teach children to group objects by size.
Equipment: Several large and small dolls, a large and small house.
Progress of the game:
There are toy houses on tables or carpet in different directions. On the contrary, dolls are sitting at a short distance. The teacher shows the children dolls. He examines them together with the children, noting that the dolls are large and small. Then he says that the dolls are lost and offers to help the dolls find their house, explaining that big dolls live in a big house, and small dolls live in a small house. Children complete the task, the dolls thank them for their help.
Game: “Wonderful bag”
Goal: To teach children to recognize objects by their characteristic features, finding familiar objects by touch.
Equipment: an opaque bag and objects of different shapes, sizes, textures (toys, geometric shapes and bodies, etc.).
Progress of the game:
There are items in an opaque bag. The child is asked to find the desired item by touch, without looking into the bag. When organizing the game, the teacher selects objects familiar to the children. Having seated the children in a semicircle, so that all objects are clearly visible to them, the adult has a short conversation. Then he asks several kids to repeat the names of the objects and answer what they are needed for.
- Now we'll play. The one I call must guess what I will put in the bag. Masha, look carefully at the objects that are on the table. Do you remember? Now turn away! I'll put the toy in the bag, and then you can guess what I put. Place your hand in the bag. What's in there? (Child's response) You named the object correctly. Other children can be called in this way. In order to complicate the game, another rule is proposed: several toys are placed in a bag. None of the children know about them. The called child, putting his hand into the bag and feeling for one of the toys, talks about it. The bag will open if the children recognize the toy by the description.
Game: “Identify by touch”
Purpose: determining the differences between familiar objects by touch; comparison of objects by touch by length, size, width.
Equipment: an opaque bag and paired objects that differ in one feature (long and short pencils, large and small buttons, wide and narrow rulers, etc.).
Progress of the game:
An opaque bag contains paired items. The child is asked to identify the object by touch and name its characteristics: a long pencil; short pencil; large button, etc.
Game: “FOLD THE MATRYOSHKA”
Purpose: to learn to distinguish objects by size
Equipment: Matryoshka doll that holds several smaller dolls nested inside each other.
Progress of the game:
The teacher and the child open the nesting doll, saying: “Matryoshka, matryoshka, open up a little!” He takes out a smaller doll and places it next to the big one, inviting the baby to compare them by size and color. When all the nesting dolls are open, the teacher invites the child to fold them back, starting with the smallest one. We are nesting dolls, we are sisters, Play hide and seek with us, All little friends. Gather us quickly - Once we start dancing and singing, If you make mistakes, No one will be able to sit still! We won't close! (S. Reshchikova) First, the game should be played with a two-syllable matryoshka, then with a three-syllable one, etc. In the same way, instead of a doll, you can use barrels, cups, opening boxes, inserts of various shapes, etc.
Game: “ASSEMBE A PYRAMID”
Goal: to teach children to arrange objects in descending order
Equipment: A pyramid consisting of 4-5 rings, decreasing in size.
Progress of the game:
The teacher shows the child the pyramid and helps him take it apart. Together with the child, the teacher examines the rings, noting their shape and color and focusing on their size. Then the teacher asks the child to assemble a pyramid. He explains that first you need to choose the largest ring and put it on the rod (the kid completes the task). Next, the teacher suggests doing the same with the remaining rings until the pyramid is assembled. In the future, the child is given the opportunity to independently manipulate the pyramid, trying to assemble it correctly. You can collect different pyramids depending on what goals are being pursued. For example: a pyramid consisting of rings of the same size or color; from cubes, balls, prisms of the same or different sizes and colors; from objects increasing in size, etc.
Exercises to help develop fine motor skills
Clothespins
You can use the following exercises with clothespins: “Hedgehog”, “Christmas tree”, “Sun” - children attach thorns and rays to the silhouettes of a hedgehog, Christmas tree, sun made of cardboard. To secure the color, you can use multi-colored silhouettes and clothespins that match them in color.
Corks
You can use the following exercises with corks: “Flowers”, “Bug” - children untwist and twist corks from plastic bottles to their necks - the middle of flowers or spots on the back of a beetle. To fix the color, screw multi-colored corks to matching necks.
Clasps
You can use the following exercises with fasteners: “Button up your boots,” “Tie a shirt,” “Sew on a button,” etc. - children thread the lace through the holes. Various rugs and pads are also used, on which buttons, Velcro, zippers, hooks, snaps, etc. are sewn, which are manipulated by children.
Groats
You can draw on the cereal, look for any objects in it, pour it from one container to another with pinches or fists, etc. You can also use the following exercises: “Let’s feed the bird” - children sprinkle the cereal with pinches into the bird feeder, “ Help Cinderella” - children sort, for example, peas and beans, “Collect beads” - children collect peas or beans one pea at a time into a vessel with a narrow neck.
Winter plasticineography
Santa Claus's house
Do you know where Santa Claus lives? We fantasized about this topic and decided that grandfather lives in a very nice red house with a huge snowdrift on the roof. And always with a round window from which he waves to all the kids! We made Santa Claus from plasticine using the reverse plasticine technique in a sour cream lid.
In this master class we combined plasticineography classes and watercolor painting. It will be interesting and will keep the child busy for a long time!
We really love it when the city is covered in snow. We invite you to depict a beautiful country house using plasticine. Let's learn how to sculpt patterns from plasticine and draw a monochrome background.
How to make plasticine cards
For the New Year we often make plasticine cards. To make them last longer, you can fix them on top with varnish. Look at the postcards we made with the children using the plasticine technique.
- Christmas tree made of flagella and circles;
- making a snowflake from flagella (a rather difficult and painstaking task);
- New Year's balls using the smearing technique (a simple and easy master class for children over 3 years old).
See plasticine New Year here
Winter plasticineography for children from 3 years old
Make an applique with a warmed dachshund. We will learn how to make flagella and make a sweater out of them.
A penguin with a warm heart, he really wants to please your loved ones. Great idea for a card. You will need black paper, a white pen (can be replaced with gouache) and plasticine. Remember that if you do not have some material or tool, you can always replace it with an alternative (white pen for gouache, plastic eyes for plasticine eyes, black paper can be drawn with gouache on white).
We sculpt from plasticine on a winter theme
If your child loves to sculpt with plasticine, see what we can offer for creative inspiration. With the help of detailed step-by-step visual diagrams, you can sculpt winter animals and learn how to sculpt different textures.
How to make a Christmas tree from plasticine: 7 detailed instructions
7 detailed diagrams for sculpting a Christmas tree from plasticine are waiting for you. Look how bright and beautiful they are! This is a very useful master class for developing fine motor skills and more. Plasticine has a calming and positive effect on children.
You can make funny hedgehogs from plasticine, which are insulated: put on hats, scarves and mittens. See detailed instructions for modeling in the diagrams. Recommended for children over 5 years old.
Or this New Year's pig. Children will practice making clothing items and learn how to make textures from plasticine using stacks.
Photo report “Subject developmental environment in the first junior group”
Olga Zhigalova
Photo report “Subject developmental environment in the first junior group”
Educator: Zhigalova O. Yu.
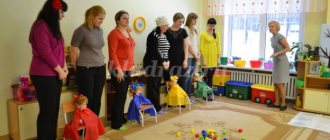
One of the important conditions for educational work in a preschool institution is the correct organization of the subject-development environment .
When creating a developmental space in a group room, it is necessary to take into account the leading role of play activity in development, this in turn will ensure the emotional well-being of each child, the development of his positive sense of self, competence in the field of relationships with the world, with people, with himself, inclusion in various forms of cooperation, which are the main goals of preschool education and upbringing.
When creating a developmental environment for children of primary preschool age, first of all, we paid attention to creating conditions that ensure the safety and psychological comfort of each child in the group . We strived to ensure that the atmosphere in the group was close to homely and cozy.
Functions of a subject-related environment in the junior group :
Cognitive – satisfies the child’s need to master the world around him, stimulates cognitive activity;
Communicative – stimulates speech development, allows the child to learn the basics of communication and interaction;
Wellness – stimulates motor activity, enriches motor experience, introduces to the culture of health;
Creative – introduces children to creative activities, promotes self-development and self-realization.
In our group, the subject-development environment is divided into corner-centers for children’s independent activities:
Fine Arts Center:
Objectives: To develop interest, attention, curiosity, and emotional response of children to individual aesthetic properties and qualities of objects in the surrounding reality.
Center for Psychological Relief
Objective: reducing the child’s anxiety level, performs a calming and relaxing function.
Music and theater center:
Objectives: Development of auditory perception and attention; formation of performing skills; development of children's creativity based on literary works.
Nature Center:
Objectives: Environmental education and education of children. Foster love and respect for nature.
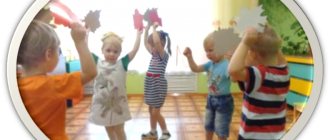
Center for role-playing games.
Objectives: to promote the emergence of the game; develop the ability to choose a role and perform several interrelated actions in the game; formation of communication skills in the game; development of imitation and creative abilities.
Physical Culture Center:
Objectives: Create conditions for physical exercise in a group , stimulate children’s desire to engage in physical activity.
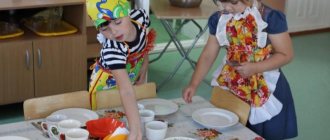
Sensory center.
An important condition promoting sensory development is a specially organized developmental environment , which includes: a teaching table, pyramids, different colors, different shapes and textures, lacing, a variety of inserts, educational games, large mosaics, volumetric inserts of 5-10 elements, prefabricated toys, a set of geometric figures, objects of various geometric shapes, insert boards, insert frames.
Book Center:
Objectives: Formation of listening skills, ability to handle a book.
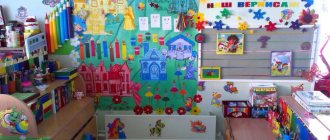
My kids love it when we read books with them and look at pictures, so here we have a lot of bright, colorful and interesting literature on the program.
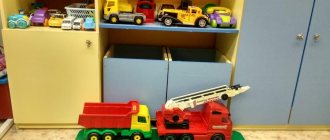
Our favorite center in our group is the construction center. After all, it contains construction sets of various shapes and sizes, from different materials, as well as characters and cars for playing out buildings. The main tasks of this center are to develop the desire to build buildings according to one’s own design, to develop fine motor skills of fingers and hands, and to acquire the ability to build furniture, slides, and houses.
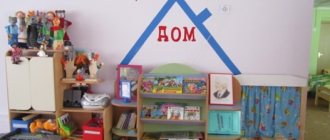
LOCKER ROOM AND BOOTH MATERIAL IN LOCKER ROOM
in the group is accessible to every child, is age appropriate and takes into account their individual characteristics and developmental capabilities.