Goals and objectives
The goals and objectives of plasticineography classes vary depending on the age of the child and the characteristics of their development.
At the age of 2-3 years
Plasticineography for children 2-3 years old should be aimed at developing fine motor skills. This will help the child not only develop physically correctly, but also stimulate his speech skills.
Adults, when asking children to create pictures from plasticine, should not just give a task, but use various methods to awaken the child’s creative abilities and his interest in the work process (for example, come up with a fairy tale, including in the plot an object that the child will then sculpt.
It could be a flower, an ax or a hat - something consisting of a minimum number of parts and not requiring a lot of time to create).
Since children at an early age are not able to independently come up with a task for plasticineography, and quickly lose interest in the work process if they understand that they are left to their own devices, an adult should set a clear task for them at the beginning of the lesson.
Plasticineography for children 2-3 years old should be easy to perform
Control and assistance from an older friend should be aimed at developing the child’s accuracy, perseverance and concentration on the sequence of actions.
Using plasticineography, you can also teach a child to navigate on paper , each time describing the location of the next part of the object being created. For example, it is important for children 2-3 years old to say where the left side is and where the right is, to prompt and guide their hands to the desired edge of the working surface.
When the young creator begins to better navigate the horizontal plane, the adult should begin to give instructions verbally, giving the child the opportunity to independently determine the place where the next detail of the final image needs to be placed.
4-5-6 years
Plasticineography for children 4-5-6 years old should be aimed at improving skills in working with plasticine. At this age, the younger generation begins to develop an interest in visual arts.
By the age of 6, tasks on plasticine applications can become more complicated.
If parents support their child in a timely manner and take action to unlock his creative potential, they will not only be able to strengthen the psycho-emotional connection with their baby, becoming his support and support, but will also give him the opportunity to try himself in art.
Modeling from plasticine for children 4–6 years old is also useful because it effectively develops the eye and improves hand coordination. This not only makes the child more physically developed, but also has a beneficial effect on the formation of neural connections in his brain.
At this age, children prefer to work collectively, which means that plasticineography for them in this case will be an opportunity to improve their communication skills with other members of society - it will teach them to explain their intentions, prove they are right, or correctly express disagreement.
7-8 years
Plasticineography for children 7-8 years old, its main goal involves instilling in younger schoolchildren new sculpting skills - pressing, smearing, rolling, squeezing out of syringes.
Already possessing the basic ability to create images from plasticine, young creators will be captivated by the process, discovering new facets of their usual form of creativity.
This will help them distract from negative thoughts, get rid of stress and release emotions associated with joining a new team at school, as well as accepting the great responsibility and demands placed on them by teachers and parents.
At the age of 7-8 years, children prefer to work individually. Creating pictures from plasticine will be an effective method for them to develop their imagination, as well as a vivid way of self-expression.
It is not necessary for younger schoolchildren to be given a clear plan of action; it is enough to simply limit them to a theme, for example, “Golden Autumn,” allowing them to independently come up with an idea and the main stages for their further work.
Space
The following option for creating an image of space using plasticine is suitable for children of any age. For children under 3-4 years old, it will become a full-fledged craft, while for older children such a picture will become a background image, implying further refinement of the drawing with details.
Step by step execution:
- Using blue and deep blue plasticine, make multiple strokes over the entire area of the sheet of paper being used so that they look like a single whole.
- Roll small balls from white plasticine. Place them randomly on a blue-blue background, then slightly flatten them with your finger (celestial bodies).
Mosaic of balls
A similar technique for children's plasticineography is available to most children. When the child learns to independently roll small spheres from the material, offer him the task of filling the pre-drawn outline with these multi-colored lumps, without pressing the plasticine too much to the surface. This activity perfectly develops imagination and fine motor skills. When performing the exercise, you will be able to color the most fantastic drawing, giving it volume.
Any errors in the work can be easily corrected - you just need to move the colored ball to the right place.
Flowers
The easiest way to make a flower using plasticine printing:
- In the center of a sheet of paper or thick cardboard used, draw the outlines of an open flower (middle and petals).
- Using a small amount of yellow plasticine, rubbed over the middle of the flower, paint the inside area of the bud.
- Grind the red plasticine evenly, covering the inside of the drawn petals with it, without going beyond the middle.
- Twist several sausages from blue plasticine, and then use them to mark the boundaries of the flower. As an alternative to sculpting additional elements to create borders, the simplest rubbing of blue plasticine along the contour of the image using a finger or a special spatula is allowed.
- Cover the image with 2 layers of clear varnish, then let it harden on its own.
- Draw several thin lines from the middle of the flower by rubbing a small amount of plasticine, directing them to different petals.
Plasticineography methods
Methods of plasticineography in the creativity of a particular child or group of children should be selected taking into account the skills of young creators, as well as their abilities and developmental characteristics.
The most commonly used of them are:
- Strokes. A small amount of plasticine is placed on the pad of the index finger or a special plastic spatula, after which it is applied to the work surface in the right place with sharp, randomly directed movements.
- Plasticine balls. Typically used when placing accents on a flat image (for example, the middle of a flower) or as basic shapes to fill the inner surface of an object schematically depicted on the working plane.
- Flattening the rolled balls. It is not recommended to use a lot of force when flattening the balls. Otherwise, the resulting figure will be deformed, thus losing its clear rounded shape.
- Smearing on the surface. This technique is used to create a background or fill the inside of a figure with colored material.
- Scratching patterns on plasticine. Patterns are created on a flattened piece of plasticine using a special plastic knife or tools with already formed threads.
- Rolling plasticine sausages. You can roll sausages both for placing them on the final image, and for the purpose of using them as a blank.
- Squeezing plasticine out of a syringe. For extrusion, it is recommended to use a special syringe, which allows you not only to easily extrude thin strips of plasticine, but also to remove the remaining working material from the main body of the tool.
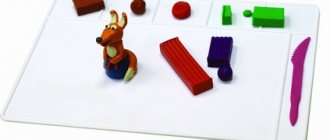
Materials for work
Proper organization of a lesson in plasticineography requires the presence of a basic set of working tools:
- Thick cardboard or large sheet of paper.
Materials and tools for working with palstiline
Depending on the age and practical skills of a particular child or group of children, on the working surface you can draw the outline of an object, the inside of which will be filled by the child.
- Set of multi-colored plasticine. It is not recommended to provide a child with more than 7-8 colors of plasticine, as this may cause distraction. The need to obtain a shade that is not in the presented set will stimulate the imagination of the young creator, as well as encourage him to experiment by mixing the viscous mass.
- Hand wipes and antiseptic. Necessary for removing plasticine residues from the skin of your hands.
- Stacks. Special small plastic knives designed for working with plasticine.
- Modeling board. On a separate wooden surface, the child will create a specific detail of the object by rolling, cutting, smearing plasticine, which will subsequently be transferred to cardboard or paper used as a base.
- Original image. If a child is given a task to create a specific picture, he should be provided with a final image, demonstrating what he should get as a result of his creative activity.
General recommendations
Correctly organizing plasticineography classes for children can only be done taking into account the general recommendations:
- The total time for modeling from plasticine should be no more than 30 minutes. (otherwise the child’s attention will be distracted, and productivity will accordingly decrease);
- It is necessary to create pictures from plasticine in a well-lit place, a comfortable environment for the child, excluding the presence of distracting objects nearby, for example, a smartphone, computer, tablet, TV or toys;
- in classes with children 7-8 years old, it is recommended to use thick cardboard, since plain paper will be deformed when using the techniques of smearing, rolling and smoothing plasticine;
- It is recommended to cover the working surface with transparent tape before starting modeling (this will eliminate the possibility of greasy stains and streaks from plasticine);
- In order for the final image to retain its original appearance for as long as possible, it is recommended to cover it with colorless varnish in 2-3 layers;
- During the creative process, not only the basic working tools for plasticine printing, but also wet wipes, a knife or scissors, as well as sheets of thick paper (you can use it to correct the plasticine image) should be within reach of the child.
Planar modeling
You should start introducing your child to plasticineography by learning the skills of drawing with longitudinal strokes. Show your child how to rub several multi-colored slices of crushed plasticine over the surface. Then start “coloring” geometric shapes in the form of the sun, a large flower, a pyramidal poplar, and animals. Children often use only their index finger when working, but try to get them to use both limbs. Such exercises will help improve the synchronization of the brain hemispheres.
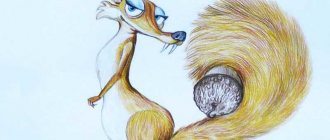
Animals
To create an image of an animal using plasticine, children will need pre-prepared templates. The inner surface of the drawn animal is filled with balls of plasticine (the color of the working material corresponds to the shade of the animal’s skin), placed closely, or painted over by evenly rubbing it or creating numerous strokes.
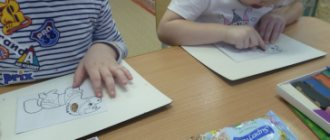
Classes on creating images for children from 2 to 8 years old using plasticine should be regularly conducted under the supervision of parents or teachers of preschool and school institutions.
Plasticineography helps representatives of the younger generation to reveal their creative potential, develop taste in art, improve physical development, and at the same time normalize the state of their own nervous system, thereby minimizing the occurrence of depressive mood.