Preview:
Age group: middle group
Summary of educational activities
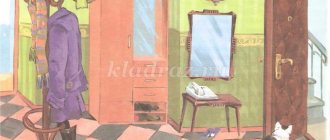
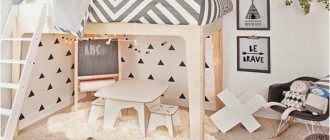
Topic: “Furniture in my room”
Goal: creating a social situation for the development of the process of productive activity
- Create conditions to encourage children to engage in speech activity;
- Create conditions for developing the ability to correctly hold a pencil in your hand;
- Continue to create conditions for the development of the ability to carefully paint over a drawing with colored pencils, apply strokes in one direction: from top to bottom, from left to right, diagonally, without going beyond the contour of the drawn object;
- Create conditions for the development of independence in drawing;
- Cultivate a willingness to help;
- Continue to teach how to convey shape and relative size in a drawing;
- Continue to form an idea about pieces of furniture and their purpose.
Children's goal: What furniture is in my room?
Organization of children's activities:
- Communication between a child and an adult;
- Communication of the child with peers;
- Play activity
Methods and techniques: visual (showing, demonstration), verbal (conversation, questions), problematic (creating problematic situations), gaming (using a surprise moment).
Preliminary work: Viewing and conversation on a multimedia presentation, looking at illustrations, an album on the topic: “furniture”, looking at furniture in a group. Conducting the didactic game “Arrange the furniture in your room.”
Handouts: Landscape sheet, colored pencils.
Children, do you hear someone knocking on our door? I'll take a look now.
-Guys, there's a letter here, let's take a look. Look, here are pictures of objects and riddles. Let's solve the riddles together and clarify what is shown in the pictures.
(Children guess riddles by putting pictures on the board - answers)
There is a back, but it never lies. Has four legs, but doesn't walk. He himself always stands, but tells others to sit. (Chair)
People sit on it, but not a chair. With armrests, but not a sofa. With pillows, but no bed. ( Armchair )
He has a big back, and he allows it. And write, and draw, and sculpt, and cut. (Table)
How to draw a room step by step: the basic subtleties of creating a sketch in pencil and on the computer
In order to draw a room, you will need knowledge of several drawing methods or a special computer program. Which one to choose depends on your goal. If you need to figure out how best to arrange furniture to fit, you'll need a scale plan of the room.
If you want to work out the interior design in detail, then frontal and angular perspectives will help with this. If you don't want to draw by hand or, on the contrary, want to make your sketches digital, turn to interior design programs.
On the topic: methodological developments, presentations and notes
Goal: To develop children’s ability to convey in a drawing the image of a little man - a forest gnome, composing an image from simple parts, to consolidate the ability to draw a picture.
Description of the material: I offer you a summary of fine arts activities for children of the middle group (4-5 years old) on the topic “Little Dwarf.” This material will be useful for teachers in kindergarten.
Notes on drawing in the middle group on the topic “Little Dwarf”. Goal: to teach children to convey in a drawing the image of a little man - a forest gnome, making up an image from simple ones.
Teach children to convey in a drawing the image of a little man - a forest gnome, making up an image from simple parts: a round head, a cone-shaped shirt, a triangular cap, straight arms.
Notes on drawing in the middle group on the topic “Little Dwarf”.
Source
On the topic: methodological developments, presentations and notes
Goal: Drawing indoor plants: sansevieria and speckled begonia from life.
Abstract of the GCD “On the Seabed”.
Visual tasks: - Learn to draw indoor plants from life. - Correctly convey the structure of two.
With the help of paintings by great artists, develop the child’s imagination and spiritual world. Develop thinking and creativity. Understanding the world around us through works of art.
Topic: Drawing indoor plants from life.1. Program content: Purpose: Drawing indoor plants: sansevieria and speckled begonia from nature. Tasks.
Summary of a drawing lesson in a preparatory group using non-traditional types of drawing on the theme “Bouquet for a beloved mother.”
Source
How to draw a room with a pencil step by step for beginners easily
The most important rule that must be used when working with the construction of a room is perspective. in order to study perspective in a drawing, let’s examine the concept.
Perspective is an image of space in which objects are distorted as they move away from the front plan pictures. A vivid example of perspective - this is reducing width rail at least from from distance to horizon line.
There are several types of perspectives. Linear perspective reduces the width and size of objects as moving away towards the horizon line.
Aerial perspective - changes in saturation and brightness of colors in the background. Let's look at the basic concepts , which we will use:
Line horizon -conditional line, which is at level our eyes. Vanishing point - point, which is located on the line of the horizon, and in which all lines of objects are directed.
When linear perspective appears perspective abbreviations anddistortions.Using linear andaerial perspectives make the image realistic, add spatiality anddepth.
Learn to draw a room with a pencil
Let's draw a room with an end image. For the work we will need paper in A4 format, simple pencil, eraser.
On the sheet, we draw a line of the horizon. It’s better to draw all the lines by hand, in this way You improve thequality of future works. We designate two vanishing points. The first vanishing point will be located in the center of the horizon line, the second vanishing point is conditional, and may not even appear in your image.
They appear because we draw three-dimensional space.
Let's draw a wall that we see in front of us. The larger part of the rectangle should be located below the line horizon. From the central vanishing point through corners of the rectangle draw lines to edges of the paper - these guides walls.
We erase the lines of the construction, depict a fireplace ledge in the center of the rectangle, and begin to outline the main objects. premises.
We draw the door and the windows. We draw lines from the vanishing points, they indicate the perspective shortening of the door and windows. We mark with ovals lamps.
We continue to build objects of the interior - we finish drawing the base of the sofa, the recess under the fireplace, the windows and the door. We don’t forget that all objects we are voluminous, therefore they have their recesses, which need also to be depicted.
We continue to draw lines from the vanishing point to the vertical objects that we have already designated. We finish building windows, plinths, sofa. Drawing logs in fireplace.
Using round and oval shapes we are working on a future coffee table, we use semicircular lines to designate all three-dimensional items. At this stage we’ll work with details of items, which already are on our image.
Let's move on to one more element of the picture - the chair. In order to draw the chair correctly but, we will need additional vanishing points. From them we draw lines. They will define one plane chairs.
Nod move:
Introductory part. Organizing time.
Educator. Guys, we received a letter today.
"Hello guys! Little gnomes from a fairyland are writing to you. We're in trouble.
The evil witch turned our furniture and household appliances into sand. But she has bewitched the inhabitants of our country, and no one remembers what kind of furniture and household appliances . We sleep on the floor, we also eat on the floor, and our plates are also on the floor. Help us".


