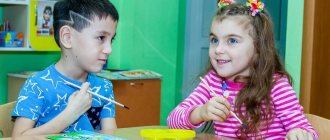
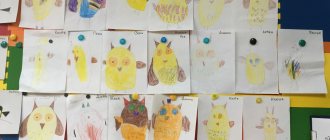
Questions for children based on their drawings
The images taken are hung on the board, the children look at them, and the teacher asks questions:
- Are facial features depicted correctly? Why do you think so?
- What's your mom's mood? In which portrait is she kind and cheerful?
Teaching children to draw on the theme “Portrait of a Mother” helps them not only learn to create masterpieces on paper, but also develops creative self-expression, love for family, and helps them better understand people. The example lesson notes presented above will help the teacher create a lesson so that all children are captivated by the process, and at the end they give a gift for their mother.
Lesson Objectives
The educational process always has certain goals that the teacher strives to achieve. The result of learning helps to develop certain skills and abilities or to cultivate feelings. Both of these can subsequently be the foundation for individual character traits and the development of the child as a person.
Developmental
The tasks that encourage the development of skills on a given topic include the following:
- consolidate children's knowledge about the portrait genre in fine art;
- give an idea of the step-by-step creation of a portrait, expanding knowledge about the proportions of a person’s face;
- improve graphic skills and sense of line;
- develop creative, imaginative thinking, fine motor skills, and the ability to navigate on a sheet of paper;
- develop fantasy, imagination, artistic taste.
Educational
Tasks that are educational in nature boil down to awakening in children:
- interest in works of art;
- accuracy, hard work, independence, concentration and perseverance.
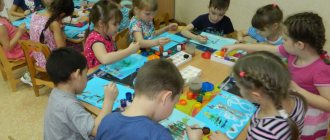
Materials and equipment needed for the lesson
It is best to ask parents in advance to bring a photo of their mother to the preschool educational institution, so that the baby has something to rely on during the work process.
Also needed:
- easel or board for the teacher;
- felt-tip pens, paints, colored pencils;
- album sheet for each child.
Note! During art lessons, children often get dirty both themselves and their clothes. Therefore, it is worth warning parents and checking that each child has an apron and sleeves immediately before the start of the lesson.
Demonstration and distribution
The use of demonstration and handout visual material in the work allows the child to achieve conscious perception and comprehensive assimilation of the topic of the lesson.
The demonstration material used to create a portrait of the mother is a drawing already created by the teacher. It should have well-drawn facial features.
Note! You can use photographs that the kids bring from home as handouts. Additionally, it is better to print a template on which the face will be schematically depicted (oval, eyes, nose, lips)
Every child should have this material.
Additionally, it is better to print a template on which the face will be schematically depicted (oval, eyes, nose, lips). This material should be available to every child.
Materials for drawing classes
Easy drawings for mother's day
It is not necessary to create complex compositions for a drawing for Mother's Day. It will be enough to draw flowers in a clearing, a vase of flowers, as well as animals that you do best.
Children's drawings for Mother's Day are simple; they may not have a specific plot. The child draws what he sees or feels at the moment, and can also draw what he saw recently. If you went to the zoo with him, then the baby will draw animals; if you walked in a clearing or in a park, then expect flowers in the drawing.
Drawings for Mother's Day in kindergarten
Teachers often draw themed drawings with children for various holidays. And Mother's Day was no exception. Teachers usually select simple drawings that any child can do. After all, not everyone has talents. With the help of teachers, each child will be able to create a gift for their mother on Mother's Day.
In order not to spoil such a beautiful drawing, take breaks so that the paint gradually dries, and then you can continue. Then the colors will not mix and the drawing will look clean.
Mother's Day drawings for school are distinguished by the presence of a plot, they are not so primitive, and children often use different materials when creating a drawing.
Materials and equipment needed for the lesson
It is best to ask parents in advance to bring a photo of their mother to the preschool educational institution, so that the baby has something to rely on during the work process.
Also needed:
- easel or board for the teacher;
- felt-tip pens, paints, colored pencils;
- album sheet for each child.
Note! During art lessons, children often get dirty both themselves and their clothes. Therefore, it is worth warning parents and checking that each child has an apron and sleeves immediately before the start of the lesson.
Demonstration and distribution
The use of demonstration and handout visual material in the work allows the child to achieve conscious perception and comprehensive assimilation of the topic of the lesson.
The demonstration material used to create a portrait of the mother is a drawing already created by the teacher. It should have well-drawn facial features.
Note! You can use photographs that the kids bring from home as handouts. Additionally, it is better to print a template on which the face will be schematically depicted (oval, eyes, nose, lips)
Every child should have this material.
Additionally, it is better to print a template on which the face will be schematically depicted (oval, eyes, nose, lips). This material should be available to every child.
Materials for drawing classes
Creating a drawing with felt-tip pens
Coloring a portrait with a felt-tip pen comes down to outlining a pencil portrait; it is important to use different shades of the same color to make the portrait more voluminous
Maybe for some, the question of how to draw a mother according to these instructions will become closed, it will seem easy, but someone will want more details and little things, we advise you to use your imagination, communicate with your mother, then your drawing will be even more “lively”.
For older children, it is important “What will other people say?”, whether my friend, teacher, and finally my mother will like my work. Therefore, teenagers think about how to draw beautifully, sometimes wasting time and resources
The format is a master class, suitable not only for young beginners who love painting, but will also help an adult draw a beautiful portrait of a loved one in the shortest possible time.
List of drawing materials:
- Watercolor paper.
- Watercolor and palette.
- Brushes (No4) and a simple pencil (marked TM).
- Liner or gel pen.
Let's figure out how to draw a mother with a pencil, by the way, some artists stop at this stage, but the instructions given below are in pencil and color. It will be good if you draw your mother from a photograph, so her facial features will be more original.
Practical part of the lesson
At the beginning of the practical part, children need to be given a couple of minutes to imagine their mother's face. You can ask to look carefully at the photo or close your eyes and imagine what your mother looks like.
Note! When a child begins to draw, he should imagine, if not a clear image, then at least its main details. Theatrical games and dramatization of fairy tales in preparatory groups
Theatrical games and dramatization of fairy tales in preparatory groups
What techniques can be used to apply an image?
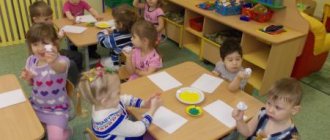
The course of GCD is the mental or practical educational activity of children, during which they acquire certain knowledge and skills, selected in accordance with their age and level of development. During the work, the following stages are noted:
- sample demonstration;
- independent completion of the imitation task;
- summing up the lesson.
In addition to drawing with colored pencils, felt-tip pens or paints, you can use other image drawing techniques:
- Draw a portrait of your mother with wax crayons. Wax crayons are easy to apply and have bright, rich colors. Well suited for children of primary and secondary age.
- Portray your mother using cotton pads or swabs. In this case, the end of a cotton swab or a cotton pad is dipped in gouache, which is then used to draw on a piece of paper.
- Small stroke technique. Here kids learn to control the work of their hands and apply small strokes to each other. For this technique you will need gouache and a medium-sized brush.
Drawing process step by step
In the middle group, first there is an explanation, and then the teacher begins to draw a new portrait, and the kids repeat his actions.
Note! At the same time, you need to control the drawing process, point out mistakes and help children who are lagging behind. The first face to be drawn is an oval.
In the middle are the eyes. It is explained that the distance between them should be small. A colored circle is drawn inside the eye: “What color are your mother’s eyes? Brown? Then take brown.” And inside the colored eye there is a small black circle - the pupil
The first face to be drawn is an oval. In the middle are the eyes. It is explained that the distance between them should be small. A colored circle is drawn inside the eye: “What color are your mother’s eyes? Brown? Then take brown.” And inside the colored eye there is a small black circle - the pupil.
Important! When drawing the eye, it’s worth reminding the guys about the eyelashes (both on the upper and lower eyelids). Please note that the top ones are longer than the bottom ones.
Above the eyes you need to draw arcs - eyebrows. Next, the nose is smoothly drawn, which starts from the eyebrows and is rounded, and the nostrils and wings of the nose are depicted on the side.
When drawing a mouth, be sure to note that the upper and lower lips are different from each other. The upper one consists of two arcs, and the lower one of one. Then the neck, ears and hair are depicted. You can draw a necklace on the neck, and earrings on the ears.
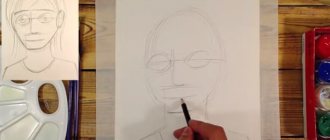
Draw mom with a pencil
The easiest option is to draw a portrait using a simple pencil.
First we draw the oval of the face. We make the chin pointed.
We outline the location of the hair, ears and eyebrows. At the bottom of the oval we draw lips and nose.
Let's start drawing the eyes. In shape it resembles an oval, inside of which there is a round pupil.
Then we add the neck and complete the hairstyle. The portrait can be colored with pencils. This will make it colorful and unique.
Applique and rampling
Let's look at another way to create a portrait using a combination of appliqué and ramping. Draw on paper a complete portrait of your mother down to the smallest detail. First, cut out the outline, cut the same on cardboard. This will be the base on which you will glue all the parts.
Cut out the hair from the sample, attach the piece to the base, and trace the bottom edge. Now roll balls from napkins or tissue paper and glue them on your hair. Cut out eyes from white paper, like a sheet of paper, and black pupils.
Glue the finished eye to black paper, cut out a strip, and cut through the eyelashes. Place the finished parts on the portrait. Draw a nose and cut out eyebrows and a mouth from paper. Cut out clothes from fabric and glue them to cardboard. It can be decorated with buttons, lace, braid. Glue earrings and hair decorations onto white cardboard. Now glue the entire portrait onto cardboard and place it in a photo frame.
If you look at appliques for children, you will find the same method of making with different fabrics and threads. That is, all the details are cut out of fabric, glued, and the nose is drawn with paints or a marker. The pupils of the eyes are made of buttons. But you can make a bouquet of flowers, a hat, or beads from fabric, which will make the portrait more vivid and unusual.
Portrait with colored pencils
You can draw a gift for mom with colored pencils. In addition to them, it is worth preparing a landscape sheet and a black felt-tip pen.
Instructions on how to draw a mother step by step:
- Draw an oval for the head. In the center of the oval we draw the eyes, their shape resembles petals. At the top of the eyes we add arcs - eyelids, and in the center - pupils. Add eyebrows above the eyes.
- The part of the face from the eyes to the chin should be divided in half. Mark the middle with a dot. Up to this point, draw a line for the nose. Add a small wavy line to it below.
- Mark the location of the lips. Draw a wavy line for the upper lip. Draw the central part of the mouth and add the lower lip.
- It remains to add a few details. Under the chin we draw the neck and shoulders. At the top of the head we draw hair.
- The sketch is ready and you can move on to coloring. It's worth starting with the skin. To do this, it is preferable to choose colors that are as close as possible to natural shades.
- We highlight eyebrows and eyelashes with black color. We paint over the pupils. Using a thin black pencil, draw long eyelashes from the outer corners of the eyes. Paint over the lips.
- Then we move on to the hair. We draw long strokes from the roots of the hair. To depict them, it is better to take pastel pencils or a simple one, but with a very soft lead.
- You can add a dress if you wish. To do this, just draw a line for the neckline and paint it with the color you like. You can decorate the portrait by drawing beads or earrings.
The portrait is ready. To make it memorable, use your mother's facial features.