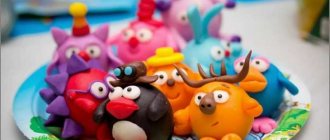
Experiments with paper
Experiments with paper
Experience No. 1
"Magic Paper"
Children are offered landscape sheets of white paper and markers of different colors. Let's draw a circle.
Conclusion: paper can be used for drawing.
Experience No. 2
"Water and Paper"
You will need a paper napkin and a bath of water.
Place the paper in a bath of water. The paper immediately gets wet and tears in the hands of children.
Conclusion: paper is afraid of water. All paper objects deteriorate when exposed to water - paper is not a durable material.
Experience No. 3
"Rustling or singing paper."
- Can paper make sounds, sing? For this experiment, you need to take paper and perform the “washing clothes” movement. The paper rustles and creaks.
Conclusion: when crumpled, the paper makes a sound.
Experience No. 4
"Paper Gluing"
-For this experiment we need: colored paper, glue.
-What can you do with glue and paper? (glue) Let's check if the paper can be glued?
Conclusion: paper objects can be glued together.
Experience No. 5
"Flying Paper"
Children are offered colorful paper napkins
-Can paper fly? To do this you need to blow to create a breeze. Multi-colored napkins are scattered everywhere.
Conclusion: the strips are very light, so when the wind blows, they fly apart.
Experience No. 6
"Paper Crinkling"
Now we will perform an experiment and get acquainted with the property of paper - paper wrinkles. Here we have several samples of paper of different densities and purposes (landscape sheet, cardboard, paper napkin), let's try to wrinkle it.
Conclusion: paper wrinkles, but thicker paper is harder to crease.
Experience No. 7
"Paper Comparison"
The children were offered two types of paper: cardboard and simple landscape paper. We tried with the children to cut paper first with scissors. The paper was cut quickly and easily. The children had difficulty cutting the cardboard.
Conclusion: cardboard is thicker than paper.
Experience No. 8.
"Tearing Paper"
We offer children two types of materials: paper, fabric.
It was necessary to tear the paper. The paper quickly and easily tore into strips. Then it was necessary to tear the fabric, but the children could not cope with this work.
Conclusion: fabric is stronger than paper
Experience No. 9.
"The paper bends"
Children are offered sheets of paper of different colors and thicknesses; fold the sheet into two rectangles, clearly highlight the fold line, and then unfold the paper and try to remove the fold line. Will we be able to do this? (It won’t work because the line has already left an imprint on the paper.)
Conclusion: when folded, a fold line remains on the paper.
Experience No. 10
I have two ribbons. One is paper, and the second is made of fabric. Now two girls will try to tie these ribbons to the Masha doll. A ribbon made of fabric is tied, and a ribbon made of paper is torn.
Conclusion: The paper tears easily.
Lotus flowers
Cut out flowers with long petals from colored paper. Using a pencil, curl the petals towards the center. Now we lower the multi-colored lotuses into the water poured into the basin. Literally before your eyes, flower petals will begin to bloom. This happens because the paper gets wet, gradually becomes heavier and the petals open.
Dancing confetti
To conduct this experiment, we will need a transparent plastic box with finely chopped multi-colored paper. If you have a hole punch, you can use it. Pour colored confetti into a box. Now we take fruit packaging made of foam polystyrene and cut out the bottom to a size slightly larger than the jar (it’s convenient to do this with a stationery knife). Rub polystyrene vigorously on woolen fabric or fur and immediately cover the plastic box. Confetti begins to fly up and stick to the makeshift lid. After a short time, the pieces of paper will begin to fall off.
You can repeat this experiment with your child several times, competing to see who can collect the most confetti. Experiment with materials that attract paper: a plastic comb, a plastic lid, a ruler, etc.
The baby will probably be interested in why paper is attracted to some objects and not to others. Tell him about static electricity, which is created by rubbing two dissimilar substances (usually natural and synthetic) against each other. During friction, some electrons (small particles that make up all surrounding objects) move from one material to another, and then these foreign electrons can attract light particles: paper, dust, garbage.
Attractive balloon
This experience is a logical continuation of the previous one. We inflate a balloon, rub it against wool, fur or hair (be careful: with frequent electrification, the ends of the hair split) and sprinkle multi-colored pieces of paper on top of it. The confetti sticks to the balloon, thereby decorating it. Now you can play with this beauty; the multi-colored pieces of paper will last for quite a long time.
Snake Tamer
For this experiment we will need a snake, which you can easily make yourself by cutting a circle in a spiral and decorating it with a suitable pattern. Don't forget to decorate the snake's head so that no one has any doubt about your magician's skill.
When all the preparations are completed, take the polystyrene plate from the first experiment and rub it against the wool. Now you can say any suitable words of the spell and bring the plate to the head of the snake. Rest assured, the snake will obediently stick to the electrified plate and will move behind your hand. As the charge is used up, the snake will fall onto the table and the experiment will have to be repeated again.
Strong paper
. We take two supports, in our case these are two glasses of water. We place a sheet of paper on top and place a figure in the middle. What happens to the figurine? That's right, she falls between the glasses. Now we take the paper and fold it like an accordion. We place the accordion on the glasses and place the figurine on top. The figurine now stands stable.
Experiment with the weight that the folded paper can support. Tell your child that similar structures, only in the form of arches, have been used in construction since ancient times. They allow the weight to be redistributed, and the entire building becomes much more stable and can withstand enormous loads.
Secret letter
Take lemon juice or dissolve citric acid in a small amount of water. Using the back of a brush (or any other stick), apply text or a design to the paper, using lemon juice as ink. We are waiting for the inscription to dry. Now we make a weak solution of iodine in a plate (you can see other experiments with iodine here) and place a secret note in it. As soon as the paper gets wet, the baby will be able to read the hidden text or examine the drawing.
It is advisable to apply the text with a stick, since the brush wets the paper excessively, the text spreads, and then it is difficult to read such a note.
Draw your child’s attention to how the color of the paper has changed, because before placing it in the iodine solution, the sheet was completely white. The thing is that in the process of making paper, modified starch is used to improve its appearance and printing properties (in printing, this process is called paper coating), and when interacting with iodine, starch turns blue.
«
"Journey into the Past of Paper"
For a very long time people wrote on birch bark. Birch bark is the outer part of birch bark. In the city of Novgorod, scientists found birch bark letters. The letters are scratched with special bone tools.
But this method of writing was inconvenient, because birch bark scrolls took up a lot of space. Then people came up with sheets of thin skin of young animals - parchment.
Later in China they came up with a recipe for making paper. To learn how paper is made, you need to go to a paper mill. Logs are brought there from the forest - mostly spruce and pine. At the factory, the bark is stripped from them, crushed into chips, and the chips are sorted and sent for cooking. Then the wood goes into a paper machine, which has many, many rollers.
Some rollers are wrung out, others are dried, and others are polished. So, moving from roller to roller, the wood turns into white paper. It takes a lot of trees to make paper, but nature suffers as a result. In order to avoid cutting down forests, they are already trying to make paper from stone, glass, and synthetic fibers.
Where can you find paper products?
Student supplies,
products for apartment decoration -
wallpaper, rugs,
products for the home - napkins, towels, tablecloths.
Paper is used to make filters, pipes, boxes, food containers, construction
materials
.
Paper collections.
“One candy, two candy” (collecting candy wrappers)
“Paper” (collection of different types of paper)
Collections of postcards, stamps, travel tickets
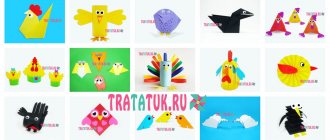
Collections of crafts made in the form of origami, quilling
"Bubblegum" (a collection of chewing gum inserts)
Get text
Summary of experimental activities in the middle group “The Tale of Paper”
The professor brought us an envelope, what does it contain?Look, we have a fairy tale here, shall we listen?
Far away in a paper country they lived - there were Kartonych (a sheet of cardboard),
Leaflet (sheet of paper) and Fetochka (paper napkin).
And they had a dispute: “Who is more necessary and important among them.” They thought for a long time, and then they decided to find out everything on the journey.
And then on their way they met the Kitty. She wanted to play with the snow, but it was very cold. Friends offered their help to the cat.
Educator: Tell the guys: “How can I help the cat?
Experience: The guys try to make a snowball from three types of paper.
Experiment No. 1 » Let's crumple the paper
«
Invite the children to crumple paper, napkin and cardboard.
-Guys, was it easiest for us to crumple paper, napkin or cardboard? Why ?
Conclusion:
Paper snowball is the best. Cardboard is thick and difficult to fold. The napkin is very soft, tears quickly and does not hold its shape.
Experience No. 2 » Wrinkles, tears
«
— What happened to a piece of paper, cardboard, or napkin when we made a “snowball” out of it?
- What were they like before?
Now try to straighten our paper lumps.
— Has our paper become as smooth as it used to be?
You and I learned that paper wrinkles, but... does not straighten, does not smooth out.
I’ll tell you a secret, the paper can also rustle. Try to crumple the piece of paper and repeat after me the magic words: shi-shi-shi-paper rustle!
Listen now - is it rustling?
- Take our lump from a napkin and pull it in different directions.
- What happened?
- Was it difficult for you to tear the napkin?
Repeat with cardboard and paper.
- What did you do with the leaf?
Tell me, what was easier for you to tear cardboard, paper or napkin? Why?
Conclusion:
This means that thin paper breaks easily, it is not durable. Cardboard is durable and hard to tear.
The kitten said thank you. . Leaflet was proud that he helped.
The friends set off further on their journey, and they met a fox. She wants to drink from the stream, but does not know what to pour the water into.
Educator: Tell the guys: “How can I help the fox?
Guys, we can make a cup out of paper or a napkin or cardboard, but we need to find out which of this material can hold water better.
- Guys, what kind of water do we have, tell us about it?
-That’s right guys, the water is wet and that’s why you and I will now conduct an experiment and find out what kind of paper you have
It won't get wet for a long time.
Experiment No. 3 “Wet the paper”
Invite the children to wet the paper, napkin and cardboard.
Conclusion:
: A cardboard cup is the most convenient, thick, and does not let water through quickly. A glass made from a napkin and paper is not suitable, it gets wet quickly and leaks water.
The fox drank some water and said thank you and ran off into the forest. Kartonich is arrogant!
The friends set off further on their journey. They see a butterfly sitting on a stump and crying loudly, and its wings are stained with dirt. And because of this, she cannot take off, and the houses are already waiting for her.
Educator: Tell the guys: “How can you help a butterfly? (wipe the wings).
Experiment No. 3 “Let’s get some water wet”
Invite the children to wipe the stains on the table with paper, cardboard and a napkin.
- Guys, what was the most convenient way for you to wipe off the dirt? Why?
Conclusion
: The napkin is soft, wrinkles easily and wipes and absorbs better. Cardboard is rough and hard to wrinkle. Paper is less rough, but it is also inconvenient to wipe the table surface with.
Fetochka helped the butterfly put its wings in order. The butterfly thanked her and flew home. And Fetochka became proud, she is the most important.
The friends walked and walked through the mountains and forests, but they were never able to find out: “Which of them is the most necessary and important.” They walked, they walked, and met Professor Shar Sharych. He invited them to visit us. So that we help them. Let the children tell them why they are all very necessary and important to us.
Interesting experiments “Properties of paper” as a research activity for children
Vera Gusakova
Interesting experiments “Properties of paper” as a research activity for children
What is paper and what are its properties?
Let's talk about this.
It is important for humanity to distribute and transmit various information and knowledge, so knowing where and when paper appeared is very interesting to everyone. The paper is felt, the thickness of which is about 0.2 mm, it is made from finely ground plant fibers.
Before the creation of paper, dishes were used as information carriers using various materials:
1. Papyrus - used in Egypt as early as 4000 BC, they used the processed stems of a giant herbaceous perennial plant.
2. Parchment - made by artisans of Asia Minor using sophisticated technology using calfskin. It was distinguished by greater strength, elasticity and durability.
3. In Rus' they wrote on birch bark - birch bark.
4. The ancient history of the world contains examples of writing on clay bricks - tiles, wooden tablets covered with wax, for writing on which they used sticks - “styles”.
So the guys and I decided to explore what paper is and what its properties are.
Experiment 1 “Paper transparency”.
Tasks:
- arouse children’s interest in their surroundings: the desire to experiment and learn new things;
- find out with the children what type of paper is transparent;
- develop logical thinking, memory, attention, observation.
Equipment: different types of paper: napkins, writing paper, cardboard, newspaper, corrugated paper, tracing paper; image of a maple leaf.
Description of the experience.
The guys determined the property of paper - its transparency. They chose one of the paper options and told us: what it is called, what this type of paper is intended for, and how it is used by people. The selected type of paper was superimposed on the image of a maple leaf to determine whether this type of paper was transparent or not.
Conclusion. Newspaper, paper napkins, cardboard, and writing paper are not transparent. The children could not see the image of a maple leaf through them.
Tracing paper, corrugated paper, is transparent - through them you can very easily see the image of a maple leaf.
Experiment 2 “Paper strength”.
Objectives: - develop the ability to examine an object, establish cause-and-effect relationships and draw conclusions based on an experiment; - develop the ability to answer questions with complete answers; — expand children’s knowledge about the various properties of paper; - Find out with the children which paper is durable.
Equipment: different types of paper: cardboard, paper napkins, writing paper, wallpaper, corrugated paper, newspaper; scissors.
Description of the experience. The guys in pairs chose the same type of paper. One child cut his sheet of paper with scissors, the second tore his sheet of paper with his hands. During the experiment, they exchanged impressions about whether it was easy or difficult for them to carry out the experiment.
Conclusion.
Paper tears easily in all directions; the thicker the paper, the more effort it takes to tear it. Any paper can be easily cut with scissors.
Experiment 3 “Strength of wet paper.”
Tasks:
— to promote the further development of children’s cognitive interests in the world around them;
— to form speech and cognitive activity in the process of conducting experiments; - Find out with the children what type of wet paper is more durable.
Equipment: different types of paper: napkins, writing paper, cardboard, newspaper, corrugated paper, tracing paper; container with water.
Description of the experience.
Each of the students took the type of paper that arouses their greatest interest. We wet a sheet of corrugated paper and began to observe what would happen to it.
It turned out that corrugated paper is very afraid of water and, once wet, immediately begins to tear, and it is very difficult to pull it out of the water.
We then tested the strength of a regular piece of paper by placing it in a cup of water. After the paper is completely immersed in water, we take it out and observe that the paper tears without our efforts when wet, the same thing happened with the newspaper. Next came cardboard; it turned out to be more durable and did not get wet as quickly as writing paper and newspaper.
Cardboard turned out to be more durable than other types of paper.
Conclusion.
Paper gets wet and falls apart, thick paper will take longer, so cardboard is stronger.
RESULT: The thinner the paper, the easier it is to crumple, tear, cut, and wet it.
We crumpled all kinds of papers, wet them, tore them, and cut them, and the children were very delighted with such an interesting and educational experiment. They were surprised and amazed by many things!