• Continue to get acquainted with Gorodets painting, its color, and features.
• Be able to identify the main elements of a pattern.
Tasks:
• Educational: practice drawing Gorodets flowers - baths, roses, observing the sequence of stages of the image; in applying the resin using the tip of a brush.
• Developmental: Develop a sense of composition, the ability to beautifully arrange a pattern in a given shape. • Educational: develop artistic taste and cultivate love and interest in folk art.
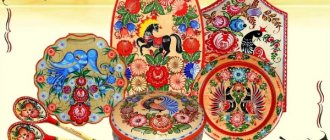
Gorodets painting: how to draw a horse?
- To do this you need to use black or brown paint. But for the horse to stand out, the background of the work must be light.
- The horse's body is drawn with a medium brush. First you can draw an outline for it, and then paint it. The limbs, tail and neck are drawn with a thinner brush. The animal's hooves are drawn separately.
- The horse's mane can be painted red.
- A beautiful ornament will decorate and complement the composition. You can make a picture frame for it. You can also draw a horse running towards the sun.
Step-by-step decorative drawing based on Gorodets painting for children
- The beginning of the drawing is a life-size sketch of the diagram on wood. The size of the future work and its main elements should be outlined.
- To simplify the task, you can draw the size of the composition on paper, and only then transfer the image to a wooden surface.
- When the size of the ornament is applied to the wooden surface, you need to highlight the main center of the composition. After this, you can think about the color scheme.
- When the question of the composition and color scheme of the composition has been decided, you can begin to draw the ornament in detail.
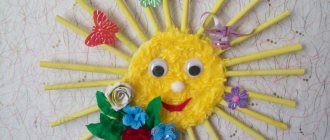
- For children, it is recommended to choose simple drawings. For example, you can depict the sun. A red circle is drawn in the center, and rays next to it. The radial stitches should be the same size.
- At the end of the work, the wooden surface is varnished. A cutting board is perfect for this type of work.
It will be easier for your child to draw simple elements
Gorodets painting patterns for the older group
In the middle and senior groups in kindergarten, there is no need to choose too complex elements of painting, because if the child cannot cope with it, then he will be bored. To begin with, you can get acquainted with this drawing technique and write down a summary. The presentation will not take much time, but the child will know all the basics. You can opt for a simple ornament and draw a beautiful flower. Thanks to this little town painting you can create a bookmark for a book. This is a fascinating activity; appliqué always quickly interested children.
Drawing method:
- The work will use white, red, brown and green paints. Children should draw either on wooden boards or on shallow wooden plates.
- Use a pencil to mark the center of the composition and its size.
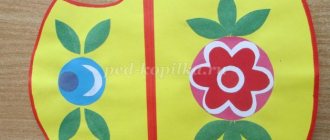
- Then you can start drawing the flower. A small red circle is drawn in the center. Red paint is then mixed with white to create pink. Another circle is drawn in pink, larger than the first. After that, the circle is red again and pink again. Thus, the flower has a multi-colored middle.
- The petals are made with green and brown paints. It’s better to alternate them, so the work will be more beautiful.
- You can combine green paint with white to get a lighter greenish color. They can be used to draw the petals from the inside. This drawing is done with a thin brush.
In the middle and senior groups in kindergarten there is no need to choose too complex elements of painting
The work is completed by varnishing the surface.
Gorodets painting: how to draw flowers?
Master Class:
- To begin with, select the surface and material with which the work will be performed. The more colorful it is, the better.
- The centers of the colors are marked on the surface with a pencil. A bright circle is drawn. Then petals are drawn in each circle. To do this, use a color darker than the core of the flower.
- Every flower must have a petal. Light green petals can be painted on the inside with a thin brush. You can also draw the outlines of petals and flowers with darker paint, but not black.
- The composition will be complemented by blue berries drawn next to the flowers.
a flower can be either complex or easy - it’s up to the master to choose
Options for tasks on Gorodets painting in the senior group: topics and implementation
“Acquaintance with Gorodets painting”
The practical part of the introductory lesson on Gorodets painting includes a mandatory repetition of color mixing and bleaching.
Instructions for mixing the primary colors of Gorodets painting
Scheme of dismounting flowers of Gorodets painting
“Painting a cutting board with a Gorodets pattern”
It is assumed that the children have experience in drawing the elements “rosan” and “kupavka”. The purpose of the lesson is to teach how to create a Gorodets pattern on a workpiece using a new technique - “daisy”.
Step-by-step drawing of a “daisy”:
- Applying the main stain.
- Outlining with a different shade, drawing on the brackets.
- Reviving a flower with “pearls”.
The design of the composition on the board will be individual, but with the obligatory inclusion of “daisies” in the drawn bouquet or flower garland.
“Pattern for Gorodets panel”
Goal: creating panels on paper. Objectives: learn to draw a flower garland with new elements - “rosan” and “kupavka”; decorate the drawing with “animations” - dots and strokes; independently select elements for the pattern.
Step-by-step drawing of “rosan” and “kupavka”:
- Creating round spots by painting: for the “rozan” of a larger diameter than for the “kupavka”.
- Outlining circles with bleached paint.
- Indications of the center of the flower: it is drawn with paint without adding white, for “rosan” it is in the middle, for “kupavka” the center is shifted to the left or right.
- Reviving flowers with white (strokes).
"Bouquet for Mom"
Final lesson. Pupils are given the task of drawing a vase of flowers based on Gorodets painting as a gift for their mothers on March 8th. The children must choose elements, colors, and think through the composition on their own.
Examples of works based on Gorodets painting in the senior group
Painting a paper blank based on Gorodets painting
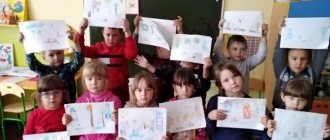
Work in the Gorodets technique for pupils of the senior group Drawing patterns in the Gorodets technique Drawing patterns in the Gorodets technique Drawing patterns in the Gorodets technique
Painting a paper blank based on Gorodets painting. The ability to independently think through the composition
Painting a paper blank based on Gorodets painting. Individual task - independent selection of workpiece
Painting paper blanks based on Gorodets painting
Painting a paper blank based on Gorodets painting
Painting a paper blank based on Gorodets painting
Painting a paper blank based on Gorodets painting Painting a paper blank based on Gorodets painting
Master class in Gorodets painting
Elements of Gorodets painting in stages - you definitely need to learn this, because the sequence of execution is very important in traditional creativity. Copyright inclusions should be minimal.
Underpainting
To put it simply, underpainting is the rough basis of the future image. These are the main elements that will become the center of the picture. If you decide to paint, for example, a wooden cutting board, then the first spot of color on it will be the underpainting. Unless, of course, you are planning to make a colored background on the board. Then you work on the background first, let it dry thoroughly, and then you start painting the underpainting.
We start by drawing the background
Let's say that the main elements of the first work will be flowers - flowers that are often found in Gorodets painting. Below the center, maintaining compositional balance, you draw three circles. Two are deep blue, one (central) is pink. Next, you take blue and red colors, and draw smaller circles on the tops of these circles, which will slightly overlap the main circle.
This completes the first stage. Even a child can handle underpainting (sometimes they say underpainting, this is also correct), but it is not always very easy. The point is precisely that the circles should be even, that you need to learn how to draw them immediately using paint on the background and that, most importantly, they should become the compositional center of the work. If balance does not happen, any subsequent decoration will be in vain.
Tenevka
At this stage of Gorodets painting, the artist draws the petals. By the time the petals are drawn, the circles made at the underpainting stage should be dry. When the paint has dried, paint the petals with bright contrasting paint.
Draw them without haste - although they should not be mathematically accurate and even, strong deviations in the drawing of the petals violate the compositional harmony of the image. The petals can match the color of the small circle on the underpainting. This is not necessary, but usually this combination is well perceived against the general background.
It's time to make the leaves and twigs. And here, too, you need to remember about symmetry: it makes the work beautiful, it is characteristic of the Gorodets craft, therefore any other experiments would not be appropriate here. Beginners should not take on complex greenery decorations: start small, with a couple of leaves on the sides of blue flowers, and with small stems strewn with leaves at the top of these flowers.
When you become more confident in your writing, you can make the patterns more complex. But first you should learn to draw accurately, symmetrically, with good control of color and shape. There are no double strokes in this painting, therefore, even in children’s hands, the basic techniques of the craft come to life and are mastered by novice artists.
