Leaves fell, fell, fell...
Autumn leaves are perhaps the most popular material for crafts. A child can make an applique of leaves with his own hands. You only need to prepare the outline. Choose a story based on your child’s interest and age.
Maple leaves make wonderful roses. To do this, take a maple leaf with a stalk, fold it in half towards the stalk, then roll it into a tight tube. This is the core.
Next, we wrap our core with other leaves folded in half in a circle. When the bud is formed, we secure the leaves at the base with thread. To make roses last a long time, they can be coated with acrylic varnish or painted with spray paint.
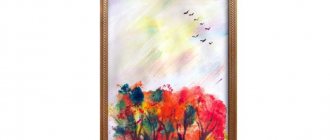
But then I’ll show you our craft, which we did with our daughter for the autumn competition.
Autumn is the season of vegetables
Another popular material for autumn crafts are vegetables and fruits. The simplest vegetable craft is a hedgehog. Take a large potato, make needles from toothpicks, decorate the back of the resulting hedgehog with apples, beautiful leaves, and a mushroom.
Popular heroes Smeshariki can be made from small round apples, lemons, oranges.
Model legs, arms, hats of the characters from plasticine, eyes and mouths can be cut out of paper and glued. For Nyusha, make a snout from red plasticine.
Your favorite cartoon characters are ready.
Pumpkin is the queen of fall crafts. You can make a classic Halloween candle holder with your own hands. Use as a head for almost any hero. If you have patience, you can cut out a house or even a carriage.
Check out more inspiring photos to create some crafts with your child.
Autumn crafts for children 4 - 5 years old
From the simplest natural materials you can create an interesting and very funny composition.
We will need:
- Acorns
- Cones
- Leaves
- Paints
- Cardboard
- Glue
- Plasticine
Use paints to draw faces for your new heroes. To ensure that the watercolor adheres well, first coat the acorns with glue with a pencil. You can make ears from the seeds of cones. Place all your characters on thick cardboard and add leaves and other accessories.
Spider web: craft for children
To do this job we need:
- Three branches
- Leg-split
- Chestnut
- Leaves
- Wire
- Paints
You need to find three branches of equal length. Cross them together and fasten them in the center. Use twine to create a web by wrapping it around branches.
Cut the chestnut in half and color it black with a marker.
Make holes on the side and attach to the wire. Make spider legs from small branches.
You can additionally decorate the web with leaves.
Autumn foliage applications
Colorful autumn leaves are so beautiful! And, besides, this is such a fertile material for creativity! Therefore, when starting autumn creativity, you cannot do without autumn foliage. In particular, it produces amazing animals, fish and other living creatures. For creativity you will need a little:
- a sheet of thick cardboard;
- pencil;
- glue;
- multi-colored markers;
- various decorative elements - for example, colored ribbons, sparkles, etc. But this is optional;
- and, of course, colorful autumn leaves of different trees.
This is how animals are made from leaves.
- Draw some animal on a sheet of cardboard. It’s better, of course, if the child does it himself. But if he doesn’t know how to draw yet, let mom, dad, older brother, grandma or some other adult draw.
- Together with the child, we glue the leaves to the drawing. Whatever you like, it will still be beautiful.
- Together we draw the animal’s face with felt-tip pens.
- If desired, decorate the craft with sparkles or ribbons.
The result will be such a cute animal made from autumn leaves.
Or - this is such an amazing butterfly.
Birds made from autumn leaves
They are easy to make, but the end result is such beauty that children’s delight will know no bounds. And adults will definitely like “autumn birds”. Beauty - everyone likes it.
Here, for example, is how to make an owl out of autumn leaves. For this you will need:
- autumn leaves of different colors, shapes and sizes;
- a branch on which the owl will sit;
- colored paper;
- a sheet of thick cardboard;
- glue;
- pencil;
- scissors.
Let's start making the owl.
- Dry the leaves so that they do not crumble under your hands during the creative process.
- Draw an owl on a sheet of cardboard. If this is difficult, we find an owl stencil on the Internet and download it onto paper.
- Cut out the owl with scissors.
- Glue it onto a cardboard sheet. Cardboard is much better than plain paper: this way the owl will last longer.
- Next, glue tree leaves onto the owl’s wings. These will be feathers.
- Then we cover the entire body of the owl with leaves.
- As an option, the body can be cut out of colored paper of any color and glued to cardboard. As a result, the owl's body will be made of paper, and only its wings will be made of autumn leaves. In general, as your creative imagination dictates.
- Cut out the beak and eyes of an owl from colored paper.
- We glue them to the owl in the appropriate places.
- Cut out colored paper or make legs for an owl from autumn leaves. Glue them where needed.
- If you don’t want the cute owl to be glued to a cardboard sheet, then use glue to plant it on a previously stored twig.
- That's it, it's done. The masterpiece is ready!
The result is such a cute owl. Or – several cute owls at once.
By analogy with making an owl, you can make any other bird. Such a work of art can be hung on the wall - it will decorate any room. Including in kindergarten.
Crafts master class “Bird Autumn”
This craft can be made not only for kindergarten, but also for elementary school.
You will need:
- maple, birch, linden, oak leaves (anything will come in handy);
- thin birch branches knocked down by a strong wind;
- artificial fruits (apples, pears or pumpkins)
- as well as alder cones and acorns.
We take all the “treasures” that we find on the street.
You need to twist a wreath from the branches, additionally securing it with twine to make it stronger.
I made maple leaves from crepe paper. See how to cut them in the short video below.
I also found a small amount of artificial maple leaves in my pantry. My daughter and I also used them and decorated our wreath like this. We glued everything with hot glue using a glue gun.
Then we arranged all the fruits, cones and acorns so that they looked beautiful and harmonious, and also glued them on.
My daughter and I came up with the idea of making an unusual autumn Firebird.
A ball for the head and a blank for the body were rolled out of foil. Then they were covered with a napkin and glued to each other with hot glue.
We made wings out of cardboard. This is what happened.
Now all that remains is to decorate this bird. And for this we cut out “feathers” from our leaves.
They covered the bird with them. And they added beauty and shine with rhinestones.
“The bird must have babies,” my daughter said, and then we decided to build a nest out of dried grass and put the eggs there.
My daughter happily made them out of plasticine and decorated them.
Like this. And they attached the bird.
Our wreath was additionally decorated with a bright bow made of satin ribbon.
How do you like it?
DIY attributes for the holiday “Golden Autumn”
Elena Eroshenko
DIY attributes for the holiday “Golden Autumn”
The autumn festival in kindergarten is one of the favorites, because it is during the festive matinees that children can have fun, look at others, and show themselves. But there is also a “second side of the coin”
- a headache for educators - how and from what to make
attributes for the holiday .
The easiest option, of course, is to buy. But, considering that it costs money and a lot of time spent searching for what you need, and the Autumn Festival - one of the most popular holidays in kindergartens is just around the corner and it must be held in such a way that both the children will remember it and the teachers will be happy.
I decided to show you one of the simple ideas on how you can use recycled material, which had only one way left - in the trash, to use for the benefit of kindergarten children.
Each kindergarten has a kitchen where food is delivered. I asked the cook for plastic transparent cottage cheese buckets. On the Internet I found a picture of “ autumn leaves ”
different in color and shape.
I printed them out on a color printer, cut them out and glued three leaves (red, yellow, green)
.
I covered the handles with colored tape, also yellow, red and green (to match the autumn palette )
.
I bring to your attention one of the outdoor games in which you can use these attributes .
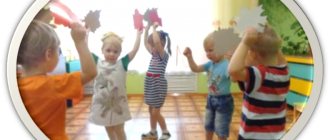
Outdoor game: “In the clearing”
Goal: Increase physical activity and health of children. Learn to perform imitative movements of animals, develop attention, coordination of movements, and the ability to navigate in space.
Young children at the autumn festival wearing masks of forest inhabitants (bears, bunnies, squirrels, birds, foxes)
Educator: Guys, tell me: Where did we end up?
Children: Into the forest.
Educator: Who lives in the forest?
Children: Bears, bunnies, birds, foxes, squirrels.
Educator: That's right, well done.
Educator: How can our forest dwellers have fun in their forest?
What do they like to eat?
Guys, let's show everyone how our little animals can play in the clearing.
(Each child has a bucket in his hand, instead of a basket it contains what the forest dweller in whom the child is dressed likes to eat)
The music director plays cheerful music where all the animals jump, play and have fun. But then the music stops and different music begins to play for the bear, for the rabbits, for the squirrel, for the bird and the fox.
Of all the animals, the cubs heard their own music and begin to imitate the movements of the bear. And then 3-4 bear cubs came out and went to collect pine cones their Here the music changes again and the little bunnies jump out, frolic and collect , which they love very much, their baskets
The music director changes the music again, to music from the fairy tale “The Adventures of Pinocchio”
The fox comes out and picks berries in
the autumn meadow , because she is kind, loves bunnies and does not try to catch them.
The next squirrels come out into the autumn meadow to the music and collect mushrooms scattered by the teacher to make it easier for them to survive the winter.
And then the last ones, to the sound of ringing, cheerful music, are the birds flying into the clearing to peck the grains. Guys - birds fly one after another, sit on the ground and collect corn kernels
their When the birds have eaten everything, all the little animals come out again and run away from the clearing, with baskets full of treats for the forest dwellers.
Topiary made of pine cones
Don’t know what craft on the “Autumn” theme to create with your own hands? A popular blog on Instagram offers a creative option - a topiary (an original tree with a geometric crown) made from pine cones.
To make a decorative figure you will need the following materials:
- cones - 40–50 pcs.;
- wooden stick - 1 pc.;
- flower pot - 1 pc.;
- rowan or viburnum berries;
- dry leaves, branches, reeds, moss;
- Styrofoam;
- silver or golden paint;
- knife;
- scissors;
- glue gun
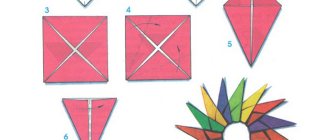
Making a decorative tree is simple:
- Prepare the base for the figure: cut out a foam ball and cylinder that will fit snugly into the tree pot.
- Insert the foam cylinder into the pot and insert the stick. Attach a foam ball to it. The base for the craft is ready.
- Paint each pine cone and tree trunk with paint and wait until dry.
- Hot glue the pine cones one by one onto the foam ball. At the same time, attach rowan branches to glue between the cones.
- Decorate the base of the pot: attach dry leaves, moss, pine cones, berries, reed branches.
To make the tree beautiful, choose the right material. The author of the book “Crafts for Boys,” Svetlana Rashchupkina, recommends collecting the main material for crafts (cones) in the rainy season or on damp soil before they dry out, so they will retain their shape longer.
Beautiful autumn compositions will become worthy exhibits of a thematic exhibition. They can be given as a gift to relatives or teachers.