Summary of a lesson on the application “The sun is shining brightly” in the second junior group
Lyubimova Olga
Summary of a lesson on the application “The sun is shining brightly” in the second junior group
Lesson summary for the application “
The sun is shining brightly ” (
junior group ) Objectives: continue to teach children to lay out, compose and paste images of objects consisting of several parts of various shapes. Strengthen the ability to carefully pick up paste onto a brush, spread ready-made forms on oilcloth, and use a napkin. Cultivate interest in the application , the desire to complete the task.
Preliminary work: observing the sun while walking ; viewing illustrations; conversations, reading poems about the sun .
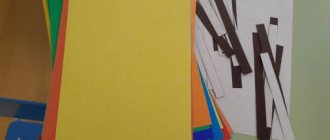
Equipment: brushes, stands for brushes, napkins, paste, oilcloths, ready-made forms from colored paper, leaves with images of animals.
Progress:
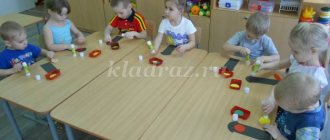
Children sit on chairs arranged in a semicircle in front of a magnetic board. Figures of animals and the sun .
Educator: Guys, look at the cheerful animals dancing in the clearing, they are having fun because the sun is shining and warming the animals. They are warm, happy, and the animals sing songs about the sun and read poetry. Listen:
The cloud hid behind the forest
looks from the sky
And so pure, kind, radiant.
This is how good the animals are in the sun .
I display other animals on the board, without the sun .
Educator: Guys, look, here are the animals from another forest and they are sad, they don’t dance, they don’t sing. You don't know why?
Children: because there is no sun .
Educator: That’s right, they don’t have any sun . Let’s help the animals, let’s put a sun .
I ask one child to place the sun .
Educator: Guys, look at the shape of the sun ?
Children: round.
Educator: that's right, round. What else does the sun ?
Children: rays.
Educator: That's right, rays.
Let's look at how the rays are located with the children.
Educator: look, our animals are cheerful, they are dancing, they are happy that they now have the sun . Guys, the same animals on your leaves are not funny, they don’t have a sun , now you will go to your places, and each of you will stick a sun , but first we’ll play a little:
One, two, we stood up together and walked in place.
We'll put our hands straight. Hands on the belt.
Three, four - let's separate, Hands to the sides.
We'll start studying. Bend forward with hands touching the toes of the foot (left hand - right leg; right hand - left leg)
.) .
Let's stand from heel to toe, rise on tiptoes, hands on belt.
They looked to the right, to the left, Turning their heads left and right.
We squatted on our tiptoes.
And how the birds flew. We ran around the group .
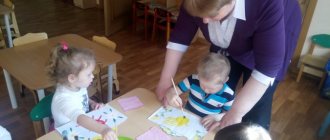
Children sit down in their places and get to work, I remind you that we hold the brush with three fingers, spread the mold from the middle to the edges, remove the remaining paste with a napkin, while working I help those who have difficulty.
At the end of the work, the children lay out their applications on a pre-prepared table. I analyze the work.
Educator: guys, look how happy all your animals are, because now they have the sun . you got beautiful sunny
Using origami technique
Crafting a sun using the origami technique will be an original entertainment at a picnic, in the park or at a festive table in the summer. The modular origami method is best suited for this. The craft can be created from paper of the same or different colors.
The procedure for creating an origami sun:
- Create the first module. To do this, fold the square diagonally twice and unfold it.
- Then bend the corners of the square to make a pancake-package.
- Fold adjacent sides towards the center to form a kite shape.
- Turn the piece over and fold the corner. Fold the piece in half.
- Make 15-17 modules in this way.
- Insert the modules into each other in a circle.
You will get a sun that can be used as a decoration on the table or as a wreath.
From felt
The sun is easy to make from felt. This material can be used to create a real theater that will illustrate how the sun moves over the Earth throughout the year. Children will be able to clearly understand and even explain to their younger brothers and sisters why the seasons change.
To create a theater you will need cardboard, felt, scissors, thread and a needle and felt-tip pens.
The procedure for creating the Theater of the Sun:
- Stretch a piece of felt onto a cardboard base.
- Using felt blanks, cut out: different types of sun according to the seasons, grass, flowers, fruits, berries, autumn leaves and snowdrifts.
- Sew eyes and tongues on the suns, finish drawing the faces.
After this, you can create scenes with the sun and seasons.
From plastic bottles
A sun made from plastic bottles, plastic containers and other waste materials will look interesting in a garden plot or school yard. To do this you will need a lot of plastic bottles, oil paints, cardboard, glue and scissors.
The procedure for creating a sun step by step:
- The bottles must be completely painted yellow. To do this, they can be lowered into a bucket of paint. The bottles must be completely dried.
- Cut a strip of cardboard 70-100 cm long and 7 cm wide, form a circle from it. Paint it completely yellow. Paint the strip yellow.
- From a sheet of whatman paper, make a drawing of a circle with a diameter the size of a cardboard ring, and draw stripes around the perimeter. Cut out the circle, color it yellow and draw a face based on the sketch. Glue the circle to the ring using strips.
- Glue the bottles with corks to the cardboard along the perimeter of the ring.
The volumetric garden sun is ready.
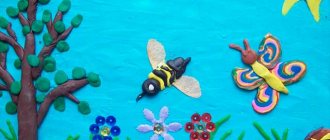
Made from plasticine
Plasticine crafts will allow children to dream up their imaginations and make original, sculptural products. For this you will need materials: cardboard for the base, multi-colored plasticine, a plasticine knife, beads and paper.
The procedure for creating crafts:
- First make a yellow ball. Form a pancake out of it - this will be the base and the face of the sun.
- Make sausages from orange and red plasticine and flatten them. These will be long rays. The red rays should be shorter than the orange ones.
- Create oblong, voluminous ovals from yellow plasticine. Flatten them and form them into petals. These will be wide rays.
- Place rays of different shapes on the base around the face of the sun.
- Check the composition of the rays and fix them on the base. Use a knife to form veins on the rays.
- Use beads and paper to make eyes on the disk, and use a plasticine knife to cut out small details and a smile.
Theme of the week: “Berries”
Lesson 4. Strawberries (Colored paper. Application from prepared silhouettes of objects)
Program content. Continue teaching children to stick parts on the sheet in the right place. Continue to introduce the color red, learn to correlate the color with its name. Cultivate compassion and kindness.
Demonstration material. Doll, object picture, which depicts a strawberry bush with berries.
Handout. Half of an album sheet on which strawberry bushes without berries are drawn and red strawberries cut out of colored paper; glue, glue brush, rag, oilcloth lining.
Progress of the lesson
Show the children the doll and say: “This is the girl Zhenya. She wanted to pick strawberries in the garden, but did not find a single berry. Zhenya is very upset.”
Invite the kids to plant berries on the strawberry bushes and treat Zhenya.
Place in front of each child half of a landscape sheet on which strawberry bushes without berries are drawn and red strawberries cut out of colored paper. Examine strawberry bushes with your kids, determine the shape and color of the berries.
Remind the children to apply glue to each berry and stick it to the tip of the branch.
At the end of the lesson, invite the children to give Zhenya a treat: give her strawberry bushes and berries.
Theme of the week: “Mushrooms”
Lesson 5. Mushroom (Colored paper. Application from prepared parts of the object)
Program content. Improve children's ability to make appliques and apply glue to parts. Learn to accompany the words of the poem with movements corresponding to the text. Develop precision and coordination of movements.
Handout. Landscape or tinted sheet of paper; blanks cut out of colored paper: grass, mushroom details; glue, glue brush, rag, oilcloth lining.
Progress of the lesson
Talk to the guys about mushrooms, tell them where mushrooms grow, what time of year they appear. Tell the children: “Today I invite you to go for a walk in the forest. I will read a poem, and you repeat the appropriate movements after me:
In the morning the children went to the forest (Steps with high knees.)
And they found mushrooms in the forest. (Measured squats.)
Bent over, collected, (Bent forward.)
We got lost along the way.” (Rhythmic spreading of arms to the sides.)
Invite the children to depict a mushroom in the applique.
First, they must place the blanks - the details of the mushroom and the grass on the sheet, then apply glue to the stem of the mushroom and stick it on, then apply glue and stick on the cap. The grass is glued last.
Tell the kids a riddle about a mushroom:
Worth Antoshka
On one leg.
Ask the guys: “Can we say that the mushroom has one leg? (You can.) What else does a mushroom have?” (Hat.)
From threads
A sun made from threads will lift everyone's spirits and become a cheerful decoration for any occasion. This craft can be used as a heating pad for a teapot or as a hot stand. To work you will need yellow and red yarn, cardboard, scissors, glue, and beads for the eyes.
Instructions for creating a sun from threads:
- Create a base from cardboard. This is a rectangle, slightly wider than the radius of the sun.
- Wrap the threads around the rectangle in a fairly dense layer.
- On one side, thread one thread under the threads. This can be done in advance. Pull the thread and tie.
- Cut the threads from the other end of the cardboard. Remove the cardboard and arrange the threads in a circle. Tie the ponytails in a circle.
- With the second tier, tie the ponytails of the sun from the adjacent ponytails of the first tier.
- Use red yarn to make a smile and a nose. Form eyes from beads.
Advice. You can weave wire into the sun - then you can hang it. You can also starch the threads after shaping the toy.
Theme of the week: “In the forest”
Lesson 8. Leaves from the forest (Applique from dried leaves)
Program content. Show children that the applique can be made from dried leaves. Learn to relate an object to its shape. Continue to teach how to accompany the words of the poem with movements corresponding to the text. Cultivate compassion and kindness.
Handout. A landscape sheet on which colored outlines of two leaves of different shape and color are drawn; dried leaves of appropriate shapes and colors; leaves cut out of colored paper; glue, glue brush, rag, oilcloth lining.
Progress of the lesson
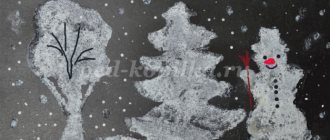
Give the kids leaves cut out of colored paper and invite them to play with these leaves while listening to the poem:
The leaf flew up, (Flash the leaf).
The leaf is spinning
The leaf is spinning, (Twist the leaf.)
It falls under your feet. (Lower the leaf to your feet.)
The leaf is torn, torn, torn. (Tear the leaf.)
The leaf crumples, crumples, crumples. (Crumple up the leaves.)
Play out the situation that two Leafs came to visit the children from the forest: everyone in the forest tramples them, the Leafs want to find their home.
Place in front of each child a landscape sheet with colored outlines of two leaves of different shapes and colors drawn on it, and ask them to find a house for each leaf.
Tell the children: “In order to prevent the leaves from losing their houses again, they need to be glued: apply glue to the back of the leaf with a brush and press it to the paper with a cloth. So we hid the leaves in the houses.”