Card index of didactic games “Shape, size, color”
Let's study the figures:
1. "Domino"
Task: to teach children to find a specific figure among many in order to name it, to consolidate their knowledge of geometric shapes
Equipment: 28 cards, each half of which depicts one or another geometric figure (circle, square, triangle, rectangle, oval, polygon). "Double" cards depict two identical figures, the seventh "double" consists of two empty halves.
The cards are laid out on the table, numbers down. After explaining the rules to the child, the game begins by placing a "double blank" card. As in ordinary dominoes, in one move the child takes and places the desired card at both ends of the “track” and names the figure. If the player does not have the required figure on the card, look for an image with this figure from the total number of cards. If the child does not name the piece, he does not have the right to the next move. The one who gets rid of the cards before the rest wins.
2. “Solve the confusion” Task: to teach children to freely use topics for their intended purpose.
Equipment: toys of different designs that can be grouped (dolls, animals, cars, pyramids, balls, etc.).
All toys are placed on the table in a certain order. The child leaves and the leader changes the position of the toys. The child must notice the confusion, remember how it was before, and restore the previous order.
First, for example, change the blue cube to a red one. So make the task more difficult: put the doll to sleep under the bed, cover the ball with a blanket. Having tried the taste, the child can confuse himself, inventing the most incredible situations.
3. “Help Fedora”
Objective: to develop children’s understanding of color, to teach them to correlate the colors of dissimilar objects.
Equipment: postcards with pictures of cups and handles of different colors.
“Guys, in poor grandmother Fedora’s house all the cups are broken. Their handles are broken, and now he won’t be able to drink his favorite tea with raspberry jam from them. Let's help Grandma Fedora glue the cups. But to do this, you have to look closely at those cup cards and find the pens that match them in color.” If your child has difficulty completing this task, show him how to look for matching cards. The task is then carried out in this way.
4. “Find objects of similar color”
Objective: teach the child to compare objects by color and generalize them by color.
Equipment:: various vehicles, toys of five shades of each color (cup, saucer, threads; doll clothes: dress, shoes, skirt; toys: flag, bear, ball, etc.).
The toys are placed on two tables next to each other. The child is given an object or toy. He must independently select all the shades of this color to the color of his toy, compare them and try to name the color.
5. “Find an object of the same shape”
Task: to teach the child to distinguish certain objects from the environment by shape, using geometric patterns.
Equipment: geometric shapes (circle, square, oval, triangle, rectangle), round-shaped objects (balls, balls, buttons), square (cubes, scarf, cards), triangular (building material, flag, book), oval-shaped ( egg, cucumber).
Separate geometric shapes and objects into two piles. The child is encouraged to examine objects carefully. Then we show the child a picture (it's okay if the child names it) and ask him to find an object of the same shape. If you make a mistake, ask your child to first trace the figure with his finger, and then the object.
6. "Magic Circles"
Task: teach the child to identify certain objects by shape.
Equipment: a sheet of paper with circles of the same size drawn on it (ten circles in total).
“Let's take a closer look at this leaf. What do you see there? What shape do you draw on a piece of paper? Now close your eyes and imagine a circle.”
Next, the child is asked to draw an object from a circle drawn on paper. Ask one child from each circle to draw something based on the circle.
7. “Arrange the ornament”
Task: to teach the child to identify the spatial arrangement of geometric shapes, and to reproduce exactly the same arrangement when arranging the ornament.
Equipment: 5 geometric shapes cut out of colored paper, 5 pieces each (25 pieces in total), crafts.
“Look at the decorations in front of him. Think and name the numbers you see here. Now try to design the same pattern with cut out geometric shapes.”
Then the next card is offered. The task remains the same. The game ends when the child places all the decorations shown on the card.
8. "Game of circles"
Task: to teach children to denote in words the relationships between objects by size (“more”, “smaller”, “greater”).
Equipment: three circles (drawn and cut out on paper) of different sizes.
It is suggested that you look carefully at the circles, place them in front of you, and trace them on paper along the contour. Then the child is asked to compare 2 circles, and then 2 more circles. Ask your child to name the size of all three circles.
9. "Balls"
Objective: to develop and consolidate the ability to establish relationships between dimensional elements (larger - smaller, thicker, longer, shorter).
Equipment: a series of five sticks that decrease evenly in length and width, a series of five circles that also decrease evenly depending on the sticks.
“Let's see what happened. On the street, kind grandfather Fedot was selling balls. How beautiful they are! Everyone liked it. But suddenly, out of nowhere, such a strong wind rose that all of Ded Fedot’s eggs broke off the sticks and scattered in all directions. For a whole week, kind neighbors brought the found balls. But here's the problem! Grandfather Fedot cannot understand which club was attached to which ball. Let's help him! "
First, together with the child, the sticks are laid out on the table according to size from the longest and thickest to the shortest and thinnest. Then, using the same method, the "balls" are arranged from largest to smallest.
What else to read: Summer camp games. Ecological game "Chamomile"
Next, sticks and circles are compared. You can mix all the shapes and ask the child to independently determine the ratio of the elements in size and length.
10. “Help Santa Claus”
Task: to teach the child to use an intermediate means - a measure - to determine the height of objects.
Equipment: a series of five strips, the length of which systematically changes, four pyramids, the height of which also decreases.
“Santa Claus came to the children for the holiday and brought them toys: pyramids as a gift. They are all different sizes: the smallest pyramid is for the youngest, and the largest for the oldest. Find just such a pyramid (one of the stripes is shown).”
After finding all the pyramids, ask your child to point to the largest pyramid, then the smallest. Then have your child repair the “pyramids” as they get smaller. Then have him test himself using measuring strips.
11. "Smart Host"
Objective: to develop the ability to study the shape of objects, give and understand their complex description.
Equipment: plastic children's dishes, bag.
The toys are inspected by the participants and then placed in a bag. The child sits with his back to the players. They take turns coming up to him, patting him on the shoulder and saying: “Anya needs something like that, but I won’t say her name, but I’ll explain what it is... an object, for example a cup: “round, with convex sides, low , narrow at the bottom, wide at the top, handle on the side").
When the child finds the desired item by touch, he takes it out of the bag; it then evaluates whether the task was completed successfully.
12. "Merry Man"
Task: to develop in children the ability to dissect a certain figure into elements (geometric figures) and, conversely, to create objects of a certain shape from individual elements corresponding to geometric patterns.
Equipment: geometric shapes (1 triangle, 1 semicircle, 1 rectangle, 2 ovals, 4 narrow rectangles, image of a “Jolly Man”).
“Today a cheerful man came to us. Look how funny it is! Let’s try to make geometric shapes that represent the same person on the table.”
13. "Sticks"
Task:
Teach children the sequential arrangement of elements of different sizes.
Equipment:
10 sticks (wooden or cardboard) of different lengths (from 2 to 20 cm). Each subsequent stick differs from the previous one by 2 cm in size. To complete this task correctly, each time you need to take the longest strip of those that you see in front of you. Let's use this rule and arrange the sticks in a row. But if you make even one mistake, whether it's rearranging pieces or testing clubs, it's game over.
14. "Find a Home"
Task: to form a visual perception of the form.
Equipment: two series of geometric figures, six figures each. Three of these figures (square, circle, triangle) are basic, and the other three (trapezoid, oval, rhombus) are additional. Additional digits are necessary to correctly distinguish and select the main digits. It is also necessary to outline images of each figure on separate cards (you can cut out the outlines and make “windows”). Each stimulus set contains six to eight cards with an outline of each shape. Cards can be painted in different colors.
Children are shown three basic shapes (circle, square, triangle). Then a card with one shape (for example, a triangle) is shown. “What do you guys think, what kind of figure lives in this house? Let's think together and “put” the required amount here. Now, guys, let's play together. You see, there are different figures on the two tables (they are called two children). Here are the cards. What figures live in these houses? “After completing the task, two more identical cards are dealt. If the child finds it difficult to complete the task, he is asked to trace the “frame” of the shape with his finger, and then draw a few contour figures in the air, which will make it easier to reproduce the shape.
15. “Show me the same”
Task: teach a child to build an image of an object of a certain size.
Equipment: geometric shapes (square, circle, triangle, oval, hexagon) of different sizes. The serial number of geometric shapes depends on the number of children. The set requires 3-4 variations of each figure. “I have the same numbers. I show you a figurine and you need to find the same thing in your set. Be very careful!
After the children have found and shown a figure, the presenter “tests” their choice on his figure. If the child is convinced of the mistake, he is allowed to correct it himself by replacing the selected number with another.
16. “What did the doll bring us?”
Task: to teach the child to feel the shape of an object and name it.
Equipment: doll, bag, all kinds of small toys, which should be noticeably different from each other and depict objects familiar to children (cars, cubes, toy plates, animal toys, balls, etc.). It is recommended to put a rubber band in the bag so that the child cannot look at it when looking for a toy.
"Guys! The doll Masha came to us today. She brought us toys. Do you want to know what the doll brought us? Hands, then say what you have chosen, and only then take it out of the bag and show everything.”
After all the toys are taken out of the bag, the game is repeated again. All the toys are returned and the children take turns taking out their toys.
17. "Good balls"
Task: to develop an idea of shape and color.
Equipment: drawing balls (10-12 pieces) oval and round, flag.
“Look at the drawing. How many balls! Color the round balls blue and the oval balls red. Draw ties for the balls so that they do not fly away in the wind and do not “fit the flag.”
18. "Find the shapes"
Task: to develop visual perception of geometric shapes.
What else to read: Pronoun - what is it in simple words, what are the categories of pronouns and what are their permanent and non-permanent features
Equipment: drawings of geometric shapes. “Look at these photos. Find geometric shapes. The winner is the one who finds more pieces and, most importantly, faster.
19. “Where is it?”
Task: to form spatial orientation on a sheet of paper.
Equipment: a white sheet of paper on which geometric shapes (oval, square, rectangle, triangle) of different colors are depicted; it is possible to replace geometric shapes with various images of animals (bear, fox, hare, cow), vehicles (ship), airplane, cars, Kamaz), toys and other figures are located in the corners, with a circle drawn in the middle.
“Look carefully at the drawing and tell me where the circle is drawn? Oval? Square? Triangle? Rectangle?
Show me what is drawn to the right of the circle?, To the left of the circle?
What is shown in the upper right corner?, in the lower left corner?
What is drawn above the circle?, Below the circle?
A chest of useful things (we study colors and shapes)
Not only do you learn colors with your child, but you also develop fine motor skills through counting. Hammers - and color, fine motor skills and coordination of movements, counting, you can play “find a couple”.
Mushrooms on a stand.
Mushrooms are sorted by color (5 colors), by size (3 sizes), and by the pattern on the caps. So, we count, remember the colors, distinguish more or less equal ones, order, insert a stick. Rod cylinders. We study colors, develop fine motor skills, count to 25, and study the concepts of “big-small-medium”.
"What is color?"
This manual will introduce your child to colors such as red, blue, green, yellow, orange. The images are bright, without unnecessary details, one-color and 4 two-color images. There is a main page where advice is given on working with the book, and various games are offered to develop a child’s color perception. All paintings are cut out and laminated (sealed with tape). At first I just laid out a few images in front of my daughter, naming the colors and telling them what color there was, and after a year they were completely engaged in them, choosing all the images of red, etc., arranged in piles of color. The book includes a cardboard insert - a game: a large multi-colored flower on a white background (primary colors) and 8 colored squares depicting a flower and a butterfly, which can be placed on a petal of the same color.
"Square and Circle"
Thanks to the book, the child learns geometric shapes (circle, square, oval, triangle), colors, and also learns to apply them in the right place on the image. I made this instruction reusable and glued the pages and figures together with tape. For the figures, we glued them to the back of the squares with double-sided tape and received a manual with reusable stickers. The main page provides examples of educational game actions with cubes, pyramids, etc. Recommendations are given on what toys to buy for a child in order to develop the perception of color, size and shape.
"Shape, color."
Thanks to the characters in the fairy tale “Ryaba Hen” (the book contains this particular fairy tale from beginning to end), the child will know the geometric shapes (triangle, square, oval, semi-oval) that must be attached to the corresponding element in the photo. We did not consider this book as a work of fiction; we read fairy tales in a worthy collection. The purpose of this manual is to study geometric shapes, colors, and develop logical thinking.
"Color, shape." This manual will introduce your child to geometric shapes (triangle, circle, square), and you will also be able to repeat the colors and concepts of big and small. My daughter loves to complement images with missing geometric shapes.
The cardboard inlay contains a geometric lot with game options presented on the main page:
| 1 | Find all the triangles (squares, ovals, circles) between the shapes). |
| 2 | Show the largest triangle (square, oval, circle). |
| 3 | Show the smallest triangle (etc.). |
| 4 | Arrange the shapes in descending order: place the largest circle first, then the smallest, then the smallest. |
| 5 | Find all the red shapes (blue, yellow. |
| 6 | Build a yellow house with a red roof from the figures. |
| 7 | Build a pyramid of circles (etc.). |
Well, stick it on yourself, how would you do without it)))
"Complete the mosaic."
Learning about color and shape and developing fine motor skills.
"Animals. Geometric figures".
"Color images".
We guess from the silhouette what is depicted, look for the desired sticker and play with color.
GAMES WITH GEOMETRIC SHAPES.
It is important to teach your child to perceive and distinguish the shapes of objects and remember their names. To do this, the child studies the shape of an object with his hands and eyes and applies the acquired knowledge to solve a specific problem (for example, to select suitable geometric shapes for a slot of the appropriate shape). As a result of purposeful games, the child remembers the standards of geometric shapes and their names. Round is not round. Place round shaped objects in a tight bag (wheel, plastic plate, pyramid rings, teething ring, etc.) and other objects (matryoshka doll, cube, book, bar of soap, etc.). The child needs to get only round objects without looking. Or take any object and say whether it is round or not. “Recognize the figure” Prepare paired volumetric geometric figures: cube, ball, parallelepiped, cylinder, cone, etc. One set of figures is folded into a bag, the second is placed on the table. Show any figurine on the table and ask the child to take it out of the bag. Name the resulting figure: “parallelepiped”, “cylinder”.
“What is blue”
The board game “Gnomes and Houses” will introduce your child to flowers. Contains 7 large and 42 small lotteries with colorful images. And instructions, where there are 5 game options (1. Twin gnomes. 2. Collect all the cars / houses / flowers, etc. 3. Help the gnomes collect their pictures 4. Cars on the road (starting with the rules of this game), you can “play” cards with other images) 5. Lotto Plus for older children additional games are offered: “extra quarter” (the game develops observation and thinking) and “Who can collect the images faster” (we will develop attention and motor skills).
What else to read: Interactive environmental game “ECOmarathon” for elementary school
Magic magnets "Funny figures". There are no stickers on each page; the child is asked to find them among the magnets.
"Colors and Shapes"
To conduct a lesson, you need to cut out and invite the child to put the eggs in a chicken nest, dress the girls in dresses, and so on. : Build a tower according to the diagram. We really liked the sorting tasks: by size and shape (arrange watermelons and cones with nuts).
GAMES WITH GEOMETRIC FIGURES.
By the age of three, a child can already group objects according to shape. And now you need to introduce the child more specifically to each geometric figure, teach him to identify and name the shape of objects. Gradually begin to get acquainted with the figures and move on to the next one after the child has already memorized it well. You can study geometric shapes using the proposed games. Just try to make lessons with your child fun and interesting! Play, don't teach!
"Geometric figures"
GEOMETRIC APPLICATION FOR CHILDREN FROM 1.5 – 2 YEARS OLD.
All types of structures are very useful for the multi-vector development of a child’s thinking. When constructing, for example, such types of thinking develop as: combinatorial, spatial, abstract, figurative. The design can be voluminous or flat. Aerial photography includes mosaic and appliqué lessons. Geometric applique is a special type of applique. When practicing geometric applications, the image consists of simple geometric shapes. Imagine how much a child needs to understand, how much he needs to develop his thinking in order to understand, for example, that the image of a house can consist of a square with a triangle, or you can learn to fold a snowman from three circles, or a ladder from rectangles of different lengths. A small child does not yet know how to perform appliqué in the traditional form - cut out parts from colored paper and glue them to the base. Therefore, for practice it is better to use pre-prepared figures. These figures are used in more than one lesson: without attaching them to a base, the child will place various images of them on his children's table or on a large sheet of cardboard.
And we have block albums!
Cuisenaire colored sticks.
And the album!
PLAY WITH QUEENER STICKS!
Belgian primary school teacher George Cuisiner (1891–1976) developed a universal teaching material for developing children's mathematical skills. In 1952 he published the book "Numeri e Colori", dedicated to his textbook. Kusener's sticks are counting sticks, also called "colored numbers", colored sticks, colored numbers, colored rulers. The set contains prismatic sticks in 10 different colors and lengths from 1 to 10 cm. Sticks of the same length are made in one color and represent a certain number. The longer the stick, the greater the value of the number it expresses.
Products vary in quantity, color and material (wood or plastic). To start, you can use a more simplified set of 116 sticks. Contains 25 white, 20 pink, 16 blue, 12 red, 10 yellow, 9 purple, 8 black, 7 burgundy, 5 blue and 4 orange sticks. The Cuisenaire manual is intended primarily for children aged 1 to 7 years.
What you will need to play with cards
For the games in this article, you will need several thematic sets of cards for children with subject pictures (3-5 sets at least). Subject pictures are pictures that depict one object without a plot (for example, a birch tree, a ball, the Sun or a cloud, a cornflower, a dolphin, and so on).
You can make such cards yourself by cutting out subject images from coloring books, magazines, advertising booklets and gluing them onto thick cardboard.
It is desirable that all cards be the same size, but this is not at all necessary.
As mini-cards, you can also use pictures from old board games - lotto and dominoes on different topics (“transport”, “vegetables”, “toys”, etc.)
Educational game “Shape, color, size” for children 2-3 years old
Goal: get to know the basic colors (red, blue, yellow, green), learn the basic shapes (circle, square, triangle), learn to compare and distinguish the sizes of objects. How to play: The game consists of 4 cards and additional parts that can be stored together (for example, in an envelope). In our case, the cards are made of cardboard, but in the process of working with the child it turned out that it is much more convenient to make such instructions from a material that does not slip or wrinkle (for example, felt).
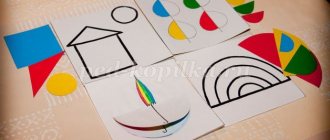
Game progress: all cards can be combined into one fairy tale, similar to mine.
1. Teacher: “Far, far away, in a fairy-tale forest, in a beautiful house lived a curious gnome. Let's see what house he lived in?" Children, together with the teacher, “build” a house from a square and a triangle, naming the shapes. Educator: “One sunny autumn day, our gnome decided to take a walk in the forest.” We place the sun above the house, paying attention to the fact that it has the shape of a circle.
2. Teacher: “In the forest, the gnome saw a lot of leaves under his feet. They all fell from the trees because autumn had come. Let’s help the gnome find the leaf halves.” Children match the halves of the leaves by color, naming the colors.
3. Teacher: “While the dwarf was walking, the weather turned bad: it began to rain. But the gnome had a large multi-colored umbrella with him, let’s open it as soon as possible so that it doesn’t get wet!” Children open an umbrella and name the colors.
4. Teacher: “And when the rain stopped, the gnome saw a colorful rainbow in the sky. Let’s connect our rainbow and name the colors again.” Children collect rainbows by comparing colorful bows by size.
Master class on creating a game “Shape, color, size”
1. Required materials: – colored cardboard (3 white sheets; red, blue, yellow and green sheet); – colored pens; - scissors; – Vinyl glue and brush
2. Cut out templates from white cardstock
3. From the remaining two blank sheets we get four cards. Using templates and colored markers we draw pictures
4. Using templates, cut out parts from colored cardboard
5. Glue half of the leaves and a circle with an umbrella onto the corresponding cards:
6. So, our tutorial is ready:
Play with pleasure and develop!
Requirements for cards for preschool children
- a realistic, clearly recognizable image (or a large photograph of an object), in which all the details are clearly visible,
- an image angle that is understandable to the child,
- thick cardboard, bright, clear picture printing,
- absence of unnecessary distracting details in the picture.
There are many card manufacturers, but in terms of quality (this is my subjective opinion, of course), I really like the “Little Genius” cards because:
1) they are made on excellent quality cardboard and will last a long time,
2) this series of cards has excellent image quality.
At the end of this article I showed examples of them on various topics.
Also very good quality cards called “Smart Cards”.
As handouts for a group of children, mini-cards on various topics are convenient, which are published by the Sfera publishing house and are called “handout cards.”
Examples of flashcard sets for downloading are given at the end of this article.
