Summary of a lesson in the middle group on the application “Spring. Signs of spring."
Lesson summary for the middle group on application
"Spring. Signs of Spring" .
Target:
Strengthen the skills of cutting and making collective appliqué.
Tasks:
consolidate the ability to identify signs of spring;
continue to develop children’s coherent speech, thinking, and memory;
consolidate the ability to cut corners of a square to obtain a rounded shape, cut a sheet of paper along a planned and imaginary line, carefully glue parts, work with different types of paper in different ways;
consolidate the ability to hold scissors correctly and operate safely with them.
cultivate interest in the world around us and the changes occurring in it.
Material:
blanks for collective application, glue, brushes for glue, oilcloths, napkins for glue, prepared background for crafts, object pictures, plot pictures for the game.
Educational areas:
Cognition.
Consolidate knowledge about the season: spring.
Ability to work with paper
ability to navigate on a sheet of paper.
Communication:
Exercise children in forming words by analogy. (diminutives)
Health:
develop basic mental processes: memory, attention;
correctional work: develop fine motor skills of the hands.
Socialization:
cultivate a culture of behavior and the ability to perform the assigned task.
Preliminary work:
Conversations about spring and viewing illustrations on the topic. Cutting out parts from colored paper for a collective applique: butterflies, birds.
PROGRESS OF THE CLASS:
Org. moment
:
Educator: Guys, do you want to know what I brought you today? Yes? I brought you a smile and I want to share it with you. Let's smile at each other.
Conversation:
Guys, what time of year is it now? Why? Name the signs of spring (children, looking out the window, name the signs of spring). Remember the name of the spring months.
(n/game “What did the artist mix up?”)
Now let's play. There are pictures on the table depicting the seasons, but the artist has mixed everything up and needs to find the mistakes.
(Children look at the pictures and name mistakes in a conversation).
Main part:
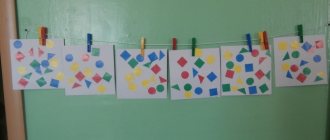
And now I will show you my picture. What time of year does it depict? Notice how sad and cheerless she is. Let's take a look and think about what is missing there?
(children look at the “Spring” background and offer to add the missing spring details).
Let's revive this picture and make it beautiful and colorful together.
I have prepared paper blanks, and we will depict the signs of spring that we have listed on paper using appliqué.
(Children choose what details of the picture they will create).
(repetition orally of ways to create selected parts of the picture)
Spring crafts for kindergarten
How to make spring crafts for kindergarten? It has long been noticed: when the earth is freed from snow cover, not only nature awakens, but also the desire for creativity. Especially - to create small masterpieces reminiscent of the most pleasant spring moments.
Children can make crafts on the theme “Spring” with their own hands in kindergarten, at school, at home, and use a variety of techniques for this: applique, quilling, scrapbooking, modeling and others. At the same time, not only the usual creative accessories, but also household items can be used as a base material.
DIY spring crafts for kindergarten
Crafts “early spring” for kindergarten
The first days of spring are reflected in children's creativity. We will start our spring crafts by driving away the winter - making a Maslenitsa doll.
Paper Maslenitsa doll
Glue an accordion made of colored paper onto the base of the craft - a cardboard circle. Separately glue the head in the scarf and the flowers.
Spring craft “Maslenitsa”
You can make an “Early Spring” applique from colored paper, cardboard and thin real sticks.
“Early spring” applique with real branches
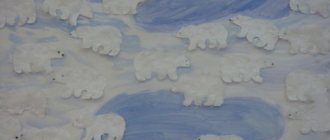
You can make a spring applique “blossoming apple tree” from colored paper and cotton pads.
“Blooming apple tree” made from cotton pads
DIY snowdrops
What would early spring be without the gentle harbingers of warmth - snowdrops? Cotton pads make a very beautiful spring applique “Snowdrops”.
Snowdrops made from cotton pads
From cotton pads you can make flowers themselves and melting winter snowdrifts.
Spring applique “snowdrops”
Watch how to make snowdrops from cotton pads in the video:
DIY:SNOWDROPS from COTTON DISKS.8 March.Crafts with childrencrafts with kids
Very delicate spring snowdrops are made from yarn and fluffy wire.
Snowdrop made of yarn and fluffy wire
DIY spring lilies of the valley
But what a beautiful spring card with lilies of the valley can be made using the quilling technique.
Spring card with lilies of the valley
Spring applique “lilies of the valley” made from pasta
A charming spring birch tree is made from colored paper and a cardboard roll.
Birch from a cardboard roll
Applications on the theme “spring”
You can make a “spring meadow” applique from plain and corrugated paper.
Application “spring meadow”
Look at the video on how to make a beautiful spring craft with birds and birch trees:
DIY bird craft
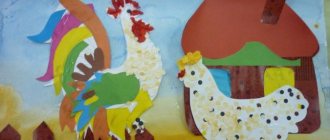
From colored cardboard, napkins and plasticine you get a very impressive “Birds at the Nest” craft.
Application “Birds at the nest”
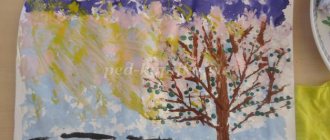
A surprisingly delicate spring applique is obtained from a combination of drawing and appliqué techniques.
Spring drawing and applique
Another option for combining spring applique and pattern. The tree in this applique is made from pieces of crumpled paper.
Application and drawing “Spring”
Here is another spring Easter drawing. Real Easter cake powder gives life and volume to the design.
Spring Easter drawing with Easter cakes
Spring craft “Mimosa”
Mimosa is the very personification of early spring. These delicate fluffy balls fill our homes as the first harbingers of warmth and sunshine. A chic and very simple “mimosa” can be made from ordinary millet.
Application "mimosa" from millet
Children in the preparatory group of kindergarten will be able to make a spring applique on a “mimosa” disc. Mimosa balls can be made from lumps of crumpled paper, colored cotton wool or twisted curls of paper - rolls.
Application "mimosa" from rolls
Watch how to make a beautiful card with mimosas in the video:
DIY: MIMOSA CARD
Source: https://montessoriself.ru/vesennie-podelki-dlya-detskogo-sada/
Spring work with scrap materials
Using the materials at hand, you can create unique works on the theme of spring. It is interesting to make crafts from this type of material not only for young children, but also for older ones and adults. You can use whatever you see fit, as long as you have enough imagination and ideas.
Simple and easily accessible materials for such an activity are:
- disposable tableware (spoons, glasses, boiler tubes);
- sewing materials (buttons, rivets, sequins, pins, threads);
- some hygiene products (cotton pads, cotton swabs for ears, paper napkins)
- light bulbs.
To create a work on a spring theme, you should use your imagination, and you can easily find available materials. With their help, flower arrangements, nests with chicks, houses with birds, rafts, boats, spring panels and much more are created.
Crafts made from natural materials
Nature contains an immense amount of materials for beautiful, bright crafts for kindergartens and schools. For spring-themed robots, children often use:
- pasta, cereals (peas, rice, buckwheat, beans);
- seeds (pumpkin, sunflower);
- twigs with swollen buds, pieces of tree bark;
- bird feathers;
- stones of different shapes.
Some of the simplest and most common crafts are floral arrangements, images of animals and birds. For flower arrangements, you need to draw stems and flower petals with felt-tip pens or cut out flower petals from colored paper, and arrange the inflorescences themselves from the seeds of white and red beans, peas, and pumpkin seeds. To depict animals, you must first draw an outline with a pencil, and then fill the layout with a variety of cereals (buckwheat, millet, rice, peas) everything will depend on the color of the animal and the baby’s imagination. Such works will be interesting for preschoolers and first-graders; they are simple, easy to work with, and at the same time the completed work looks nice and presentable.
An interesting activity is to create a panel of pasta. It is enough to sketch a sketch with a pencil, then fill it with pasta using glue. Decorate this one with your own colors. This type of craft includes several techniques. The finished panel is bright, looks beautiful, well suited for an exhibition in a kindergarten, for a gift for a spring holiday, the image is chosen at your own request.
Spring applications for children:
In spring, nature is reborn. The snow that has become boring during the winter is melting, babbling streams are running everywhere, the first sticky leaves are appearing on the trees, birds returning from warm countries are chirping loudly.
All this creates a special joyful mood. In kindergarten, children are encouraged to dream up a spring theme.
Applications made from colored paper and other available materials allow parents and children to spend time productively and become closer to each other.
Creating with mom
The minutes when the whole family draws, glues or collects crafts from twigs together remain in the children’s memory for a long time. They really enjoy making spring appliqués from paper. Circles, squares and other incomprehensible details suddenly turn into bright flowers, clear streams, and singing birds. At the same time, the child’s creative abilities actively develop.
Children learn to work with scissors and glue, improve fine motor skills, so necessary for learning at school, and quietly repeat geometric shapes.
Children learn to navigate in space (right - left, up - down, far - close, on - under, etc.). The signs of spring are well remembered: melting snow, raindrops, returning birds and primroses.
By creating a beautiful work with their image, the child expands his ideas about this wonderful time of year.
Age characteristics
When creating spring applications with your child, you should take into account his capabilities. A task that is too difficult or, conversely, easy leads to a rapid loss of interest. So, children 2-3 years old cannot yet cut out the parts themselves.
But they can glue a ready-made element onto the base: a butterfly, a bird, a flower. An adult will have to make them.
Also, the baby will be able to independently decorate the finished item with a beautiful pattern from geometric shapes or improvised material.
Children 4-5 years old learn to use scissors. The parts they cut out often turn out crooked, but the child needs such experience. At this time, it is better to give preference to large elements. First, kids learn to cut in a straight line, then in a circle.
After 5 years, a child can create complex plot applications with small details. He is interested in working in different techniques. Children do not always have the patience for painstaking work, but with the help of their parents they are able to create real masterpieces.
Signs of spring
When starting work, choose a plot that your child can understand. Most often, the emphasis is on blossoming nature. Take a light base. Glue dark brown soil onto it. These could be hillocks. Plant trees on them. Winding trunks can be drawn, cut out of paper, or replaced with real twigs collected during walks.
Make melting snow from cotton pads. Usually it lies longer under trees, as well as in the shade of hills. At the same time, the first grass may already sprout on the ground. Decorate the trees with green leaves or delicate flowers made from crumpled napkins. The final touch of the spring application will be the bright sun laughing in the sky.
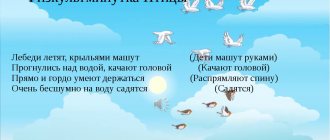
Arrival of birds
The arrival of warmth is heralded by feathered friends returning from distant lands. With children 2-4 years old, make a spring applique “Nest”. For it you need to cut out a large brown semicircle and stick it on the base. This will be the nest in which cheerful inhabitants will soon settle.
It is easier for children to assemble birds from two circles. It is more interesting if the eyes are ready-made, with moving pupils. But they can also be made from paper or drawn with a felt-tip pen. Make wings from feathers. The baby will glue brown pieces of thread or real twigs to the inner surface of the nest.
Older children are able to cut out realistic silhouettes of birds and create complex plot compositions. This could be a picture of a birdhouse or a flowering tree branch on which the nest is located. The use of unusual materials is encouraged: cereals, twigs, feathers, pieces of fabric, beads and rhinestones.
Application “Spring flowers”
As soon as the first thawed patches appear on the ground, delicate snowdrops, lilies of the valley, and mimosas rush towards the sun. Following them, other flowers bloom. Children enjoy creating beautiful applications with their image. Moreover, you can fantasize on this topic endlessly.
The stem is usually cut out of paper. But flowers can be created from cotton wool or cotton pads, from rolled napkins, fabric, buttons and even disposable spoons with cut off handles. Beautiful flowers come out of muffin tins. The core is decorated with bright buttons, sparkles, rhinestones and beads.
Introduce children to various techniques. For kids, trace their hands, cut out blanks from colored paper and glue them onto the stems. The result will be a blooming meadow.
With older children, make voluminous flowers. Two identical blanks are cut out of paper. They are folded in half and glued with the bent side. The other two halves are glued to the base. The result is a flower with a protruding petal. Another way is to cut long strips, glue them into loops and overlap each other. A stem with leaves is glued to the base.
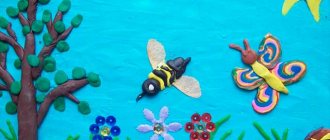
Fluttering butterflies
In spring the sun warms up. And now the first butterflies fly between the blooming flowers. They can decorate any spring applique. Set a simple task for the kids: stick ready-made silhouettes of beauties onto the base. You can also make a large butterfly and invite the baby to decorate its wings with a beautiful pattern of geometric shapes, pompoms, buttons, and beads.
With older children, make a voluminous applique. To do this, you will need multi-colored blanks with silhouettes of butterflies of different sizes. Large parts are glued onto the base first. Above are medium silhouettes. Moreover, their edges are not smeared with glue and are slightly bent upward. We do the same with the smallest pieces. The result is a bright butterfly that seems to flutter across a cardboard sheet.
Spring applications for children can cheer up the whole family. They can decorate the walls of a child's room or be used as a gift for close relatives. Engage in creative work together, because spring is a time of awakening and inspiration.
Source: https://www.syl.ru/article/377970/vesennie-applikatsii-dlya-detey
Applications on the theme of spring
Both children and adults look forward to spring. Therefore, it is not surprising that children very often have the desire to make applications on an interesting and relevant topic of spring.
The subjects of works on this topic can be varied. These are spring landscapes with streams and thawed patches, and the first flowers, and birds and animals. Everything that grows, lives and develops can be safely attributed to the theme “Spring”.
Applications can be made from different materials, using available materials and gifts of nature. However, the master classes described in this article will use familiar and familiar materials. These are paper, cardboard and cotton pads, as an alternative to cotton wool or foam rubber.
Let's start getting acquainted with the works with easy appliqué for the littlest creators.
Making appliques on the theme of spring: making a sun out of napkins
This application is perfect for kindergarten as a group activity. It will charge everyone with positive emotions and spring mood for a long time.
- You will need:
- 1) Whatman paper;
- 2) Gouache paints;
- 3) Yellow napkins;
- 4) Scissors;
- 5) Glue.
- Stages of work:
1) Cut the napkins into squares with a side of 5 cm. Roll each into balls.
2) On whatman paper we draw a circle - this is a template for the sun.
3) Let's start drawing the rays. To do this, we apply paint to the child’s palm and make prints around the circumference of the future sun. You get these kind of rays.
4) Then glue the napkin balls inside the circle.
5) At the end of the work, cut out the sun according to the outlines of the palms.
What can be made from cotton pads? Of course, a craft! This soft material will be an excellent replacement for the usual cotton wool or fluff. Let's look at the example of making a spring panel to see how cotton pads can be used in creative activities.
- You will need:
- 1) Colored paper;
- 2) Cardboard;
- 3) Glue;
- 4) Scissors;
- 5) Cotton pads;
- 6) Pencil.
- Manufacturing process:
1) Cut out blanks from colored paper. A yellow circle and stripes are for the sun, from blue and light blue paper we will make a stream and the sky. We will cut out stems of lilies of the valley from green leaves, and birds from black ones.
2) We begin the design by gluing large parts. This is the sky and the stream. We place them on a silver background.
3) We make the sun. We attach the yellow circle to the upper right corner of the picture, we make rays from strips folded in half, which we glue to the base.
4) From cotton pads we make snowdrifts and blocks of ice on the stream. We place lilies of the valley on the snow, the flowers of which will also be made from disks.
It is recommended to do this work with children in 1st grade. Younger children will have difficulty making voluminous spring flowers.
- You will need:
- 1) Corrugated colored paper;
- 2) Green and blue paper;
- 3) Scissors;
- 4) Glue stick.
- Step-by-step instruction:
1) Make petals. To do this, cut a rectangular strip of yellow paper, twist it in the middle and fold it in half in the same place.
2) We give the tips an oval shape, we get one of the six necessary petals for one flower.
3) Cut out a strip measuring 5 by 15 cm from corrugated white paper, which we then fold in half lengthwise.
4) Wind it onto a pencil and glue it, preventing it from unwinding. This is the future middle of the flower.
5) We arrange the petals in a circle, gluing only at the base. Then we attach the middle without removing it from the pencil.
Where to get ideas and instructions for work
The most important source of any idea is your own imagination. Well, instructions or tips with photos can easily be found on the Internet, in special books, magazines. If you want to study this area in depth, you can attend master classes, watch video lessons on the Internet, purchase specialized literature and get information from there.
Spring is one of the most wonderful periods of the year. In spring, nature comes to life, animals wake up, birds return from warm countries, trees acquire white outfits, rivers melt, the first rays of the sun begin to warm...
At this time of year, you want to admire all the delights of nature and try to remember these moments. Spring crafts are one of the best ways to present, convey, and share the spring mood with others!