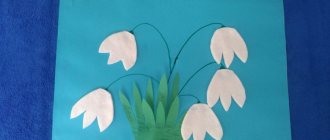
Rowan branch
Here, for example, is a very easy craft for young children - from three to five years old. For it you will need:
- Multi-colored cardboard for the base.
- Green colored paper.
- Napkins of the same shade.
- PVA glue.
- Scissors.
- Pencils.
Operating procedure:
- First of all, the outlines of the future branch are outlined on a piece of cardboard.
- For convenience, you can use ready-made drawings or photos of rowan applications made from napkins. Or you can do it yourself.
- The kids will definitely like the next stage - berries are formed from a napkin. To do this, you need to cut them into squares with a side of about five centimeters.
- Each such instance will form one ball. The work must be done only with dry hands.
- When all the berries are rolled, you need to stick each one onto a branch using PVA. Here you should use a glue brush.
- The final part is cutting out and gluing green leaves onto the branch. After this, the application can be considered complete.
In a similar way, it is possible to create a bunch of different products, which are not at all difficult to come up with.
Affordable and wonderful crafts from napkins
Napkins are an easily accessible and inexpensive material that everyone definitely has in their home.
Using your imagination, it is easy to create quite interesting and attractive products from them, using only scissors and glue.
Crafts made from napkins differ from others in their volume and texture. They are original and unusual, not like classic appliqués made using colored paper using templates.
Children will definitely like these crafts, because this process is a very addictive and delightful pastime.
Common techniques
Working with napkins is varied. During work, it is possible to create crumpled lumps that fill the template, twisting tubes or forming three-dimensional parts.
Experts identify 3 areas;
- lumps;
- tubes;
- volumetric applique.
Lumps
Lump applique is also known as Pape Art. The technique is used to develop fine motor skills in children and adults with finger mobility problems.
The work is carried out in several stages.
- Preparation. Napkins of the required colors are prepared in advance (according to the template);
- A small piece is torn off from a whole sheet and rolled into a ball. It is recommended to prepare a sufficient number of balls of each color in advance.
- The finished balls are glued to the drawing according to the template.
The main task is to glue the balls tightly enough to each other. The finished product should not contain voids.
Twisted tubes
The twisted tube technique involves creating dense tubes from napkins. For work, material of the desired color is prepared in advance.
- The prepared napkins are cut into strips. The width of the strip depends on the type of craft. Sometimes it is enough to divide the sheet into 4 parts.
- The strip is tightly twisted into a tube. It is important that the twist goes smoothly, not obliquely. It is better to do this with dry hands.
- The tubes are lubricated with paste. This will allow them to become stronger and not unwind. After this, the material is dried for 10-15 minutes.
- The finished twists are glued to the template. The completed work is varnished.
The appliqué technique of twisted tubes is suitable for creating crafts of varying complexity. It allows you to create an imitation of jewelry using forging or openwork casting. Appliqué with tubes is actively used for decorating paintings, bottles, and creating panels.
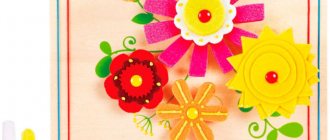
Volume applique
Volumetric application from napkins allows you to get a 3D effect. It is used to make winter compositions with a three-dimensional snowman, or greeting cards with balls and flowers. The variety of colors allows you to most accurately reproduce bunches of lilacs, carnations, and rowan.
A distinctive feature of the technique is that a volumetric element is first created.
- Several napkins are cut into even squares and folded into a stack. The thickness of the stack determines how fluffy the piece will be.
- The layers of napkins in the center are fastened with a stapler.
- The finished part is cut off at the edges, giving it a shape. If the craft is done in the younger group of a kindergarten, then the stack should not be too thick.
- The layers of the napkin are straightened, giving the product volume.
The finished parts are glued to the template along with other applique elements.