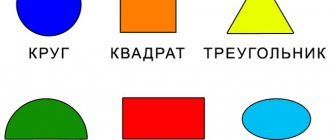
The depiction of objects of different geometric shapes develops a child’s sense of volume. A balloon is a drawing for children that uses different materials - gouache or watercolor, colored and simple pencils, wax crayons.
In the process of drawing, the ability to work with these materials is consolidated. A useful skill for children is practiced - depicting the volume of objects, a sense of composition in a drawing and the correct use of color are developed.
A balloon is a drawing for children that develops a sense of volume and symmetry.
Simple balloon
It is better to start drawing a balloon for children with a simple example. The master class is designed to teach a child how to draw a simple oval-shaped balloon with a string using a pencil. For the model, you can use a real balloon or its image. The child can look at it and compare it with his own drawing.
For the drawing you will need:
- paper;
- a simple pencil;
- eraser.
- First you need to determine the location of the ball on the sheet. This is necessary to develop the child’s sense of composition.
- An oval is drawn with a simple pencil.
- The place where the ball is tied with thread is located below the oval. It needs to be drawn in the shape of a triangle.
- The thread with which the ball is tied is depicted by an arbitrary line extending from this triangle to the end of the sheet.
The balloon can be decorated with paints or colored pencils. There is a highlight on the ball. It is depicted in the form of a speck of arbitrary shape. The entire ball is painted over with any color, but the highlight is not painted over.
Multicolored balloon with basket
To work you will need:
- paper;
- a simple pencil;
- ruler;
- eraser;
- paints (gouache or watercolor); colored pencils or wax crayons.
Stages of creating a drawing:
- On the sheet you need to mark the location of the ball and basket. To do this, mentally or with a light pencil line, divide the sheet into 2 parts in the center with a horizontal line. There will be a ball at the top of the sheet and a basket at the bottom.
- Drawing a ball. At the top of the sheet, mark a square with a simple pencil. A circle is drawn inside the square.
- A basket is marked at the bottom of the sheet. It is much smaller than a ball. Draw a rectangle and connect it with straight lines to the ball on the left and right. These lines are the rafters with which the basket is attached to the ball.
- At the bottom above the basket the ball narrows. Since this balloon is a drawing for children, the balloon can be compared to a lamp to make it easier to draw its shape.
- Next, you should draw 2 lines going from the very top of the ball to the basket. They need to be curved a little as they go through the round shape of the ball and cannot be straight. They seem to lie on the ball, repeating its shape.
- Add horizontal lines encircling the ball. They should also be slightly curved as they pass through a circular surface.
- The square is no longer needed, so it needs to be erased.
- They depict a burner in the basket - an air heater with which the ball flies.
- Next you need to draw the basket.
- To the already drawn vertical lines on the ball, add one more to the left and right. They also draw a line going from top to bottom in the center. It will no longer be curved, since it runs through the center of the ball and visually looks straight.
- Add another horizontal line in the center of the ball, bending it in the shape of the resulting “slices” of the ball.
- Draw basket weaving.
The sketch of the ball, drawn with a simple pencil, is ready. Now you need to paint it with bright colors using paints, wax crayons or colored pencils. To accurately draw fine details, such as the cables of a ball or the weaving of a basket, use a felt-tip pen.
Summary of GCD for drawing in the middle group “Multi-colored balls”
Zakharova Anna
Summary of GCD for drawing in the middle group “Multi-colored balls”
Age group : middle (4-5 years)
.
Topic: " Colorful balls "
Leading educational field: “Artistic creativity”
Goal: To develop children's creative potential using non-traditional visual arts techniques.
Educational: continue to introduce non-traditional drawing ( drawing with cotton swabs print -drawing technique )
, continue to develop in children the ability to carefully fill the outline of an object with color.
Strengthen ideas about the shape of an object (round, oval)
.
Enrich children's ideas about colors (green, blue.)
.
Developmental: develop imagination and color perception.
Educational: Arouse interest in drawing , cultivate friendliness by appreciating the work of other children.
Types of activities: gaming, motor, communicative, visual.
Forms of organization: group , individual.
Forms of implementation of children's activities: conversation, play, looking at illustrations, drawing .
Vocabulary: round, oval, green, blue.
Equipment: White A4 paper with an outline of balls , gouache, water jars, napkin, balls , sponge.
Preliminary work: reading and watching the fairy tale Winnie the Pooh, D/I “Pick it according to the shape”
, D/I
“Colored Rainbow”
, examination of illustrations.
Balloons in the sky
In this master class you are asked to draw a landscape with hot air balloons flying against a blue sky. Using the example of balls in the sky, a child can be introduced in a simple and understandable way to the principle of perspective: the closer an object is to the viewer, the larger it is; the further away from the viewer, the smaller it is.
An example of a balloon drawing for children.
To complete this drawing you will need:
- paper;
- a simple pencil;
- eraser;
- black felt-tip pen;
- colored pencils or wax crayons.
The drawing is performed in stages:
- First, mentally or with light lines with a simple pencil, divide the sheet in half with horizontal and vertical lines. Then these lines will need to be erased. In the meantime, they are needed to determine the center of the composition.
- The balls are placed relative to this center. The balloon in the upper right is closest to the viewer, and therefore the largest. In the upper left part there are two other balls moving away from the viewer. The smallest one is furthest from the viewer.
- Draw the balls. Draw vertical stripes on them, running from the top of the ball to the basket. There can be 5 or 6 of them. These are the cables connecting the basket and the ball. Then add horizontal stripes on the ball. Finish drawing the basket.
- Hills and trees are marked at the bottom of the sheet. Since the balls are flying across the sky, this should be emphasized with a light cloud.
- Erase all unnecessary lines with an eraser. Now carefully outline the drawing with a black thin felt-tip pen.
- The last stage is coloring.
Use colored wax crayons or colored pencils for this. Or paints, of your choice.
Course of the lesson corresponding to the Federal State Educational Standard
| Lesson stages | Content | Auxiliary material |
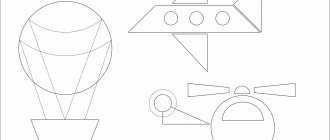
| Organizing time | Guys, today a new toy will come to visit us. But first, solve the riddle. If you answer correctly, you will find out what kind of toy it is. What clues in the riddle helped you solve it? How can you play with a toy airplane? Today we will learn a lot about airplanes and learn how to draw them. And after class you can play with him. In ancient times, people looked at birds and dreamed of flying like them. But a lot of time passed before this happened. First, people learned to rise into the air on... (Show picture). Do you know what this is? People learned to take to the air in a hot air balloon. The ball was filled with smoke from the fire, a gas that is lighter than the surrounding air. But the ball flies where the wind blows. And the man wanted to choose where to fly. Time passed and finally an airplane was invented, which was controlled by a pilot. (Show picture). It flies where the pilot directs it. But in order to get off the ground and into the air, the plane must first fly at high speed along the ground. This requires a lot of space and a specially built road - a runway. And sometimes you need to fly to a place where there is not a lot of space and such a runway. That's when people had to come up with a helicopter. (Show picture). The helicopter is also controlled by a pilot. But to take off and land, a helicopter does not need a lot of space or a runway. The pilot turns on the engine, these blades begin to rotate (shown in the picture), and the helicopter takes off straight from the spot. Guys, what does the plane have? (wings, landing gear, fuselage, cockpit) Let's draw a plane that flies through the clouds. Show the children a finished sample of the drawing. | Riddle: Not a bee, but buzzing, Not a bird, but flying, Not building nests, Carrying people and cargo. (Airplane). |
| Practical part | Invite the children to use wax crayons. First you need to draw the body, and then finish drawing the wings, windows, and cockpit. Color the plane with crayons in a solid color. Use watercolors and a lot of water to paint the sea around. While the watercolor is drying, play outdoor games. Guys, a cloud appeared on the way of the planes. Let's draw it using gouache. Give the children white or blue gouache. Show how to paint oval clouds using a semi-dry hard brush using the poking method. | Outdoor game: Let's fly, fly, (Stand your legs apart.) Spin your arms forward. (Rotate your arms in front of your chest.) Arms to the sides - take flight. Send the plane, (Spread your arms horizontally to the sides.) Right wing forward, (Turn your body to the right with your right arm moving forward.) Left wing forward. (Turn the body to the left with the left arm moving forward.) One, two, three, four - Our plane has flown. A wonderful pilot sent the plane on its way. (Running freely with your arms out to the sides.) |
| Conclusion | After creating a drawing, children are invited to play a game. At the end of the game, ask the children what new did you learn today and what did you learn during the lesson, what did you like most? Praise each child. Be sure to sign all the drawings and arrange a mini-exhibition for parents. | Outdoor game “Airplanes” Children run freely with airplanes in their hands. The teacher gives the commands: “Planes, land,” “Planes, take off,” “Planes, gain altitude,” “Planes, descend.” |
Distracted attention syndrome in children with mental retardation, hearing and vision impairment
Note! Depending on the skill level of the students, you can complicate or simplify the drawing.
Hot air balloon hovering over the city
Drawing a balloon in this master class will reinforce knowledge and skills in drawing for young children. But something new will appear, namely, elements of the urban landscape. The acquisition of skills in working with color continues, and knowledge of the principles of perspective is consolidated.
To work you will need:
- drawing paper;
- a simple pencil;
- eraser;
- round and flat brushes;
- gouache;
- thin markers of different colors.
First you need to determine the center of the sheet. The entire composition will be located relative to this center. To do this, divide the sheet in half with a vertical and horizontal line.
The intersection of these lines is the center of the sheet and the composition of the drawing. Lines are drawn with a simple pencil.
The balloon will be located at the top of the sheet. At the bottom of the sheet is the city.
You need to make a sketch with a simple pencil. Mark the location of the ball in the sky. It can be placed in the center of the composition or closer to the edge of the sheet, as desired. Drawing for children doesn't have to be complicated. Therefore, the city landscape can be made a little fabulous and simple in execution.
Outline the location of the city's houses:
- The houses are depicted close to each other.
- Windows are painted on houses. They can be of different sizes - square, rectangular.
- Roofs are drawn at different heights.
- At the very bottom of the sheet you need to show the surface on which the houses are located. This is a city street. You can draw small figures of people and cars on it.
After the sketch is made, we begin to work with paints:
- Paint the background blue. This is heaven.
- Clouds are painted with white gouache.
- Color the balloon.
- They draw the roofs of the houses.
You can depict a fairy-tale city and use different colors for this. And the houses themselves can also be painted in different colors.
You can paint tiles on some house roofs. And show the brickwork on the walls. But not on all houses.
Next, you need to let the work dry. Then, with a thin felt-tip pen, you need to trace along the contour of the house, roofs, windows, tiles on the roofs. And other small details are drawn in this way. The drawing is ready.
Balloon drawing for children of any age. The master classes show the principle of creating a drawing for children of primary school age.
To make such a drawing, the child will need to master the skills of drawing three-dimensional objects, learn to work with the background, and develop spatial thinking. Drawing a round ball will help your child learn to maintain symmetry when drawing geometric shapes.
