Getting ready to draw with preschoolers using the monotype technique
Monotype is an unconventional drawing technique. Artistic images are created by imprinting part of an image or a full composition. Works created using the monotype technique are symmetrical or have a mirror effect.
We recommend that you read more about non-traditional drawing techniques in the article.
Preschool children develop spatial concepts. They do not yet have the ability to draw with symmetry in mind. Monotype will be an effective technique for introducing children to this concept.
Preparing to get acquainted with monotype begins with choosing materials and a subject for drawing
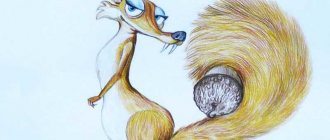
Interesting fact. Monotype connects art and psychology. In 1921, Swiss psychiatrist Hermann Rorschach developed the test. He showed patients 10 monotype pictures and asked them to voice the associations. These monotypes (Rorschach blots) are still used to determine the internal state of people.
Monotype underlies the images of a famous psychological test
Materials for monotype drawing
For monotype drawing classes, prepare the necessary materials.
- Drawing paper. It is not recommended to use office paper and notebook sheets - they will get wet if they come into contact with water and may tear.
- Brushes, sponges. Any brushes of medium thickness will do. Older kids will need thin brushes. Sponges will replace pieces of household sponge.
- Paints: watercolor,
- gouache.
At home or in individual lessons with older preschoolers, you can use acrylic paints. The children and I made cards with their help. Monotypical works are distinguished by image clarity and brightness.
Monotype classes in kindergarten do not require special materials or tools.
Table: drawing techniques taking into account the age of children
| Drawing technique | Application in monotype technique | Age group |
| Drawing spots and lines |
| First and second youngest (1.5–4 years) |
| Pokes |
| Second junior and middle groups (3–5 years old) |
| Background fill |
| Senior and preparatory groups (5–7 years old) |
| Stroke | Drawing the outline of the resulting image: done with a pencil, felt-tip pen or thin brush. | Starting from the middle group |
| Hatching, detailing | Drawing details in the image: blades of grass in a clearing, veins on a leaf, a pattern on the wings of a butterfly, tree branches in a landscape. | Preparatory group |
Each child develops at his own pace and develops his own taste. Personalize tasks! While some children are coping with spots and lines, some are already trying to trace contours.
Consider the age of the children: older preschoolers will be able to create a landscape in monotype
The order of drawings using the monotype technique
So that children do not lose interest, improve their drawing skills and develop their imagination, drawing using the monotype technique is carried out from simple to complex. Children 2–4 years old create images of symmetrical objects, then compositions. In older preschool age, landscapes are mastered.
Step by step drawing of a butterfly
- Initially, children learn to prepare a piece of paper. A square or rectangle is folded in half to indicate the middle of the image. The teacher helps.
The first stage is preparing a sheet of paper
- On one half of the sheet, part of the image is drawn: the upper and lower wings of the butterfly. The torso, head and antennae can be marked (according to the children’s capabilities). It does not matter which half of the sheet the drawing will be on. As a rule, right-handers draw the basis for monotype on the right, left-handers - on the left side of the sheet.
Part of the image is drawn on one half of the sheet
- While the paints have not dried, the paper sheet is folded along the line. You need to press firmly on top with your palm and smooth the sheet. Open it up - it’s a butterfly!
For younger preschoolers, the task is considered completed when the print is completed
- Children 3–4 years old are invited to complement the drawing of a butterfly: draw eyes, a pattern on the wings, try to make an outline.
Detailing and decorating a drawing is fun, but it’s difficult for little ones
Step by step drawing of a tree
- It is necessary to show children that a monotype can be created on a sheet of different shapes (rectangular, square) and with different orientations (horizontal, vertical). To draw elongated objects, the sheet is placed vertically.
Part of a tree is drawn on a rectangular sheet
- Additions of a darker shade are drawn using wet paint.
By drawing using the monotype technique, children develop a sense of color.
- Using several shades of green produces a realistic color of the crown and grass.
Monotype “Tree” can be used for the collective composition “Forest”
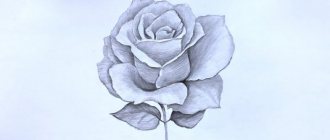
Step by step drawing of flowers
- To draw a flower arrangement using the monotype technique, several plants and half of the object, if any, are depicted on one side of the sheet (vase, pot).
Using the monotype technique, children master drawing a simple flower arrangement
- The image is mirrored and a lush composition is obtained (according to the plan) - a flower bush or bouquet.
The printed image forms a symmetrical composition
- All that remains is to draw the details: the centers of the flowers, the veins of the leaves, and designate the petals. The pot or vase should be circled.
Drawing details brings the flower arrangement to life
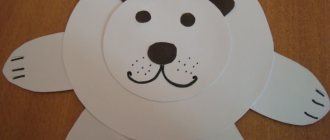
Step by step drawing of a dress
- The “Dress” stencil is applied to the sheet with the marked border. The teacher checks that the middle of the template coincides with the middle of the sheet. Children trace the stencil with a pencil.
Children cannot draw a dress symmetrically; they are asked to trace a template
- One part of the dress is filled with the main color.
The choice of color for the dress can be left up to the guys
- A simple pattern is applied on top of the undried paint: pokes, strokes.
The simplest pattern for a dress is small pokes
- The design is imprinted - the dress is evenly colored with interesting stains and patterns.
Monotype allows you not only to color the template, but to make a symmetrical pattern on it
- When the drawing is dry, the children cut out the dress along the outline.
Children cut out the monotype on their own using safety scissors, or they are helped by a teacher.
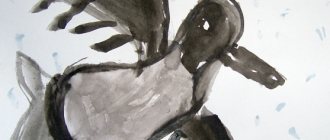
Step by step drawing of a winter landscape
- The background is drawn first: sky and water.
For a winter landscape, cold colors are selected
- We print and open the sheet. Drawing a winter forest: blue, light blue, lilac or gray paint is suitable.
The landscape is created in several stages of imprinting
- Landscape monotype is based on the mirror principle: objects (trees, houses, ships) are reflected in the water.
An imprint in a landscape monotype is a reflection of objects
Step-by-step drawing of a winter tree (on film)
- A special type of monotype is the printing of drawings from glass, plastic or film. Initially, the image is created on a smooth surface, and it can be anything (asymmetrical). It is recommended to paint with gouache; watercolor will form droplets on the film.
A drawing is created on a smooth surface with a thin brush.
- If the gouache has dried while the image was being created, apply a little water on top with a clean brush.
The image on the film must be wet to make a print.
- Place a sheet of paper on the film or glass, press and iron it. The winter tree is done!
Classes on monotype on film are conducted with students of senior groups