Simple origami animal patterns for kids
For the simplest crafts, a sheet of paper needs to be folded only a few times; for more complex ones, it needs to be folded along curved lines, which is completely beyond the power of a child. Therefore, we have selected very simple schemes according to which you can assemble the animal in a few minutes.
To work, you will need paper of the appropriate shade, a marker or ready-made doll eyes (then you will also need glue). We hope you will like our ideas and start creating origami with your child.
Owl using origami technique - diagram for kids
The origami technique can be both complex to make and simple, when even small children can handle the crafts. In this master class we will demonstrate an easy way to create an owl from a simple square of paper.
To make such an owl we need to take:
- square of single-sided brown paper;
- glue;
- orange felt-tip pen;
- a pair of large plastic eyes.
First, we must make diagonal folds on the square piece. To do this, fold the square in half, it takes the form of a triangle.
Then we make an additional fold along the other diagonal, after which we place the square with the white side up.
We pay attention to the vertical fold, or rather, to its upper half. This part needs to be visually divided into 3 parts, after which one third should be folded down. You can immediately use glue and fix this corner.
We bend the opposite bottom corner up so that it touches the top. Here again we take glue and fix this fold.
Now we bend the sides, do it symmetrically, this is how we made the owl’s wings.
We bend a small part of the previously bent corner in the opposite direction, this will be the owl’s beak.
Color it with an orange felt-tip pen.
Glue on large plastic eyes.
All that remains is to mark the plumage of our bird; for this we will use a black felt-tip pen.
Our paper owl is ready.
How to make a paper duck using origami technique
In this master class we will show you step by step how to make a duckling from single-sided yellow paper using the origami technique. Photo 1.
To make the duckling we prepared:
[*]a square of yellow single-sided paper with a side of 10 cm; [*]a rectangle of the same paper measuring 10x5 cm; [*]glue; [*]plastic eyes.
We will use a square to make the body of the duckling, and a rectangle will be needed to create its head. Let's start with the torso. To do this, fold the yellow square in half with the white side inward.
At the place of the fold we mark the middle, and then bend the sides at an angle (they must be symmetrical).
Then we bend these corners down again.
We make the same fold on the other side.
We will now bend the lower corners to the sides. At this stage, you can use glue to fix all the layers.
On the reverse side we see the resulting blank for the duckling's body.
To create the head, take a rectangle and fold it in half, with the white side on the inside.
Fold the bottom edge of the top layer up.
Then we make folds on the sides in the form of small triangles. Secure them with glue.
Then you need to bend these corners again as follows. Let's use glue again.
Fold the top corners to the reverse side. This is the template for the duckling's head.
We connect it to the body.
Add plastic eyes. Our paper duck is ready.
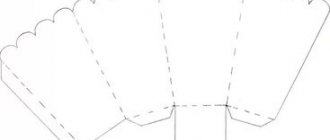
A very simple origami diagram - Mouse
Another simple craft for kids using the origami technique is a paper mouse. To make it, you can take colored paper of any shade, the main thing is that it is double-sided. You will need a square measuring 10x10 (you can take a different size, a larger one, to make folding easier). We do it according to the diagram:
At the end, glue on the doll’s eyes (you can draw them with a marker), and fix the folds with glue.
Please note: for babies it is better to use lighter paper to make it easier to fold. Thick paper holds its shape better, however, it can be difficult for a child to fold it in several layers.
Origami frog
This origami jumping frog is great fun for little ones. Preschoolers (especially boys) love such entertainment very much. Especially if the craft is made of bright paper.
Just like for many other crafts, for this you will need a square with a side of 10x10 cm (you can take a larger one).
The diagram shows each step, so the craft should not cause you any misunderstanding. The arrows show how and where to fold the paper, and the dotted line shows the fold.
This frog has a small “tail”, by pressing the edge of which you can make the frog move forward - jump.
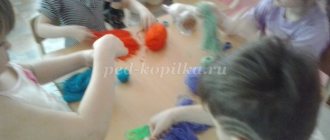
Abstract of the OOD for children “Wild animals and their young” on construction from improvised means
Oksana Kuzina
Abstract of the OOD for children “Wild animals and their young” on construction from improvised means
MUNICIPAL BUDGETARY PRESCHOOL EDUCATIONAL CENTER
INSTITUTION KINDERGARTEN No. 62 COMBINED TYPE
Summary of OOD for children on designing from improvised means
Goal: To develop the ability to design from waste material, adding characteristic features to images.
— Introduce children to construction techniques from waste material (cotton wool and a barrel from Kinder Surprise)
;
— Expand generalized ideas about wild animals and their young ;
— Develop attention, memory, thinking, creative image;
— To develop children's interest in design ;
— Develop gross motor skills and fine motor skills of the fingers;
- Develop the ability and desire to complete the task;
Origami bunny - diagram for kids
By folding a few square pieces of paper we can make the bunny shown in this master class.
To make the craft we will prepare:
- 2 squares of orange single-sided paper;
- glue stick;
- scissors;
- decorative eyes;
- black felt-tip pen.
From one square we will make a head with ears, and the second orange square will be needed to create the bunny’s body. Let's start by folding the square diagonally.
Then we cut it along the fold line. We get 2 triangles. From one we will make a head, and the second triangle will be needed to create the bunny ears.
Let's start with the head. To do this, bend the top of one triangle so that the white side is on top.
Then we will bend another small corner on the muzzle.
Let's form the sides; to do this, bend the edges of the workpiece at a slight angle.
Additionally, we will make folds at the bottom.
We take the second triangle and start making ears from it. To do this, bend the top as follows.
Then you need to bend the right corner up.
Fold the left corner symmetrically. The completed folds can be glued. These are the ears for a bunny.
Glue them on the back side of the muzzle.
Let's start creating the body. To do this, bend the remaining square diagonally.
We bend the side corners of the resulting triangle upward.
Then fold back the small corners. These will be the paws of the future bunny.
To finally form them, you will need to carefully unfold the entire square, and then turn the small corners to the other side. Our bunny got these white paws.
We connect the head and torso together.
All that remains is to design the face. We do this with a black felt-tip pen and also glue on the eyes. We made such a paper bunny.