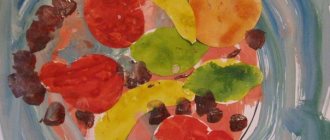
Autumn mushrooms
Autumn is a time of beautiful landscapes. If classes fall at this time of year, you can perform a mushroom composition with the guys. You can also make fruit using this technique.
This will be an application made from cereals, so for it you will need:
- Semolina and buckwheat;
- Sheets of green colored paper;
- Cardboard;
- Scissors;
- PVA glue;
- Grass and mushrooms patterns.
To complete the application, children will need:
- Trace the patterns of mushrooms on the background;
- Cut the grass;
- Apply glue to the cap;
- Fill it with buckwheat;
- Shake off loose residues;
- Also coat the leg with glue;
- Cover with semolina;
- Glue the grass.
The application is ready!
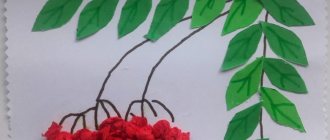
Master class: flowers on a stem
This beginner's tutorial will help you make cute flowers on a stem, which are prepared according to a simple pattern.
The following materials need to be prepared:
- Thick paper of any color;
- Green corrugated paper;
- Wire;
- Scissors;
- Glue;
Work progress:
- You need to cut a circle out of paper and fold it three times. The wide part of the resulting triangle is rounded off with scissors.
- The circle unfolds and the workpiece is glued together.
- The wire must be bent so that on one side it resembles a hook. It needs to be covered with green corrugated paper.
- The stem is inserted into the center of the flower, with the hook inward, it should also be wrapped in green paper.
This is an incredibly simple and accessible scheme that even a child can handle.
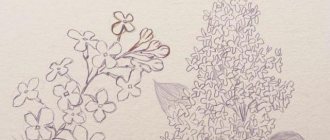
Snowdrop made of colored paper and other materials
Hi all! Tatyana Sukhikh is with you. Continuing the topic: Application. Snowdrops are obligatory “guests” in creative activities in kindergarten. But this is not surprising, because we observe nature all year round, note all the changes and cannot help but notice the appearance of primroses, which symbolize the arrival of spring.
I personally just love these delicate buds, they are wonderful, especially considering their amazing durability and strength. How do they break through the snow?
My preschoolers and I depict blueprints in different ways: we draw, make compositions from plasticine and other materials, and, of course, cut them out of paper.
What will the Internet tell you?
It’s not for nothing that we in kindergarten offer children certain subjects to depict. Take, for example, our topic. Having decided to make a paper composition, we tell educational stories about flowers, nature, listen to beautiful music, read poetry, that is, along the way we develop artistic taste, expand our vocabulary, and develop a love for all living things.
Master class: flower garlands
You can make stunning flower garlands from ordinary paper that can decorate any occasion.
The following materials should be used:
- Corrugated paper in different colors
- Scissors
- fishing line
- Glue
Work progress:
- Rectangles are cut out of corrugated paper and folded into a stack five times.
- The size of the rectangles determines what size the flowers will be.
- Each stack needs to be collected into an accordion in the middle, secured with a paper ring, and the edges of the petals should be folded up; they must first be rounded.
- The finished flowers are strung on a fishing line, the garland is ready.
Useful tips
Appliquéing is very interesting, and useful tips can help you achieve perfection and make working with paper easier.
Before you start a handicraft lesson for children, you need to know some nuances.
- Scissors should be used with rounded blunt ends, they should be light.
- To make the product more neat, it is recommended to use adhesive pencils. They are very convenient to use, but they are intended for children aged three years and older.
- You can use anything as a base for the applique, it can even be cardboard cereal boxes.
- Paper comes in different densities; for more durable crafts, the thickest paper is used.
- To make the applique appear airy and voluminous, use corrugated paper.
The applique can be flat or three-dimensional; the chosen technique will give the desired result and help you create a unique work of art with your own hands.
Features of the application
Applique is real magic for any child, allowing you to create magnificent crafts and show your imagination. Children perceive this as an exciting game, the benefits of which are obvious.
As early as two years old, you can begin to teach your child how to create simple applications. This type of art helps develop imagination, learn colors and their combinations, develop fine motor skills and learn to recognize shapes.
There are many different types of applique, and the main material for it is paper. Children's appliques are created from paper of different colors; they look very bright and original.
Flowers are a great theme for any craft; they look very impressive and can serve as a great gift for loved ones.
Teddy bear
Using yarn, you can make an applique of a wonderful bear in the senior group of kindergarten.
For this you will need:
- Bear stencil;
- Cardboard;
- Pencil;
- Scissors;
- Brown and gray paper;
- Glue;
- Brushes;
- Gouache.
The children must independently choose a suitable background, draw or trace a stencil of a bear on it, fill in the areas with parts made of colored paper, and draw the missing elements.
Golden spikelet
On the theme of bread, you can invite the children to make a modular application using the origami technique. Lesson notes on this topic will greatly help the teacher in the learning process. This way you can make an autumn carpet. For the application the children will need:
- Sheets of paper;
- Scissors;
- Adhesive paper.
Progress:
- Take a sheet of yellow paper, which will later become a spikelet, cut it into 20 squares with sides of 5. Cut the remaining piece into long pieces. This is the future stem.
- Place one of the squares in the shape of a diamond and bend it to form a triangle. After that, bend it again, open it and return to its previous shape. Thus, we only marked the fold lines.
- Fold the corners of the triangle as shown in the photo.
- Fold the lower ends of the figure. You should get a shape similar to a heart.
Each spikelet consists of three such modules. The upper module is obtained by folding the original one in half. The lower one is done by simply bending the tip. Attach the stem to the base of the spikelet.
Collect the remaining spikelets. They can be either part of the composition or an independent fake.