Basic methods and techniques in teaching preschoolers to draw
Basic methods and techniques in teaching preschoolers to draw
1st junior group (2-3yrs)
The foundation of drawing is laid.
The main tasks of the teacher:
Instill in children an interest in drawing. Teach to be attentive in class. Familiarize yourself with materials and supplies for drawing. Teach how to hold a pencil correctly, not put it in your mouth, and draw only on paper. Teach how to hold a brush correctly and move the brush over the paper without pressing. Learn to apply paint only to the bristles of the brush, squeeze out excess paint on the edge of a dish, and rinse the brush in water. Teach to recognize and remember colors (red, blue, yellow, green). Recognize and name images of an object by color. Recognize and name drawn objects. Talk about what you drew yourself. Learn to draw objects as shown by the teacher and independently.
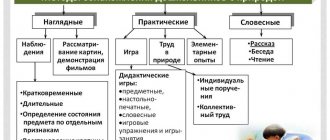
Basic techniques for learning to draw:
Step-by-step explanation and demonstration of what is depicted Explanation as a whole Demonstration of the image - partial or complete Verbal instructions Completing the drawing of the object (the teacher begins, and the children finish drawing, for example, adding strings to balloons) Working together (so that the child does not aimlessly manipulate the pencil, you need to take the child’s hand in yours and work together)
Paint with soft brushes No. 5-6 and paints - gouache.
Learn drawing skills.
Straight lines - horizontal, vertical, oblique.
Topics: “Grass for bunnies”, “Rain-rain, drip-drip-drip”, “Paths”, “Strings for balls”, “Handkerchief”, “Ladder”, “Railroad”
Wavy and curved lines
Topics: “Stream”, “Short and long ribbons”, “Balls for kittens”
Dipping technique (press the brush bristles onto the paper and immediately tear them off)
Topics: “Leaf fall”, “It’s snowing”, “Dog footprints on the path”, “Our feet are walking along the path”
Rounded lines (learning to close a circle line)
Topics: “Rings”, “Sunshine”, “Balls on Strings”, “Big and Small Balls”, “Berry on a Branch”, “Soap Bubbles”
2nd junior group (3-4y)
Has a lot in common with 1st younger group
The main tasks of the teacher:
Cultivate attention and observation in fine arts classes. Learn to sit correctly at the table, hold your body and arms correctly. Learn to use a pencil and brush. Carefully scoop up the paint, squeezing out any excess paint on the edge of the dish. Guide the brush only behind the bristles, rinse it and dry it with a napkin. Familiarize yourself with the properties of paints, use 2-3 colors of paints in your work (using different brushes) Learn to distinguish and name primary colors and know their shades (pink, blue, gray) Learn to independently embody your own ideas in a drawing. Distinguish and name the shape of objects (round, triangular, square), their sizes (large, small, high, low, wide, narrow) Learn compositionally correctly place a drawing on a sheet of paper (in the center) Familiarize yourself with the constructive structure of simple objects
(demonstrate that some objects consist of several parts of the same shape but different sizes, for example, a tumbler or a snowman)
Basic techniques for learning to draw
Consistent demonstration of image methods Partial demonstration of image methods Verbal teaching techniques - explanations, instructions, encouragement Examination of the shape of an object
Drawing skills
Straight, vertical, horizontal, oblique lines and objects consisting of them.
Topics: “Window”, “Short and long ribbons”, “Tree”, “Christmas tree”, “House with a window”
We give a rounded shape and objects based on it.
Topics: “Big red ball, small blue ball”, “Beads and dryers”, “Beads for mom”, “Snowman”. Based on the snowman, we draw objects consisting of round shapes: “Tumbler”, “Bunny”, “Bear”
We learn to paint with a brush flat all the time in one direction. We give a rectangular shape: the teacher draws a base line to help the child draw an angle (separate drawing technique)
We learn to draw a rectangular shape continuously: we draw a line, we stopped, now a corner, and the line went down, we stopped, a corner, a line to the left, we stopped, a corner, a line up.
Topics: “Handkerchiefs are drying”, “The cubes are falling apart.”
5. We draw trees: the trunk is without thickening, the branches stretch upward towards the sun.
We draw a Christmas tree: the trunk is without thickening, the branches are down without bending.
6. Draw a house: draw a line of land at the bottom of the sheet. The child draws the walls according to the principle of a rectangle, connecting the walls, draws the ceiling, from the middle of the ceiling we make a line upward and from it inclined lines extend to the corners of the house - a triangular roof is obtained. In the middle of the house we draw a square - a window. Paint the roof and window.
7. Draw transport: a rectangular cart with two wheels and a handle.
Themes for drawing according to the plan: “Tree and snowman”, “Snowy woman at the Christmas tree”, “Christmas tree in winter”, “Roll-y-dolls went for a walk”, “The cart is carrying cubes”, “Dandelions in the meadow”.
Middle group(4-5l)
The main tasks of the teacher
Introduce children to types of fine art (illustrations in books, reproductions of paintings by artists, folk toys - whistles, nesting dolls). To develop children's powers of observation, attention, memory, sense of color and shape. Teach children to depict simple-shaped objects in drawings, highlighting their main parts. Teach children to draw drawing lines smoothly, change the direction of the lines, turning their hand accordingly. Learn to distinguish, name and apply different colors and shades, learn to draw with 3-4 colors in one drawing. Learn to draw from memory. Learn to place an image on a piece of paper. Improve the ability to draw objects using straight, oblique, arched and wavy lines. Improve the ability to draw objects of round, rectangular, triangular and oval shapes. Teach to convey the proportional relationship of two objects in size (large - small, tall - short) Teach children to carefully paint over a drawing (the pencil does not come off the sheet of paper, the brush follows the pile all the time in one direction)
Basic techniques for learning to draw:
Verbal technique - questions, explanations, instructions. Familiarization with the object, its shape, tracing the contour with a finger. Partial or full display
Drawing Skills:
1. We give a new shape - an oval (we call it - it looks like a cucumber)
Topics for drawing: “Cucumber”, “Lemon”, “Zucchini”
2. We give the concept of distinguishing between round and oval shapes
Topics for drawing: “Tomato and cucumber”, “Orange and lemon”, “Cucumber and zucchini”
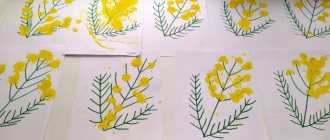
We give shading when painting objects. We draw flowers using the dabbing technique. For drawing it is better to take
four-petalled flowers, simple in shape and structure. Please note:
stem - straight or curved. In the future, the number of petals can be
increase.
We draw trees: the trunk is thickened downward, the branches are large, and small branches come from them. Topics: “Garden in autumn”, “Trees in the park” Drawing a Christmas tree: branches with a deflection, a trunk thickened at the bottom
Topics: “Christmas tree and tree”, “A Christmas tree was born in the forest”
Draw a house: the roof is flat, there is a door in the center, windows at the top of the door,
located on the same level. We paint only the roof, windows,
door.
We draw a person: head + frame without detailing the legs and torso; draw with paints, paint over it flat with a brush. When dry, use pencils or felt-tip pens to draw the eyes, mouth and nose.
Topics: “Doll in a long dress”, “Girl in a sundress”, “Girlfriends in a round dance”
Draw birds and animals using familiar shapes - circle, oval, triangle
Topics: “The little white bunny is sitting”, “The bunny met the bun”, “The duck is swimming”,
“Chickens in the meadow”, “Birds peck the grains”, “Beautiful fish”.
We draw transport, using a truck as an example, using familiar shapes - square, rectangle, circle
Topics: “A truck is driving along the road”, “A car is carrying bricks (or sand) to a construction site”
Topics for plot drawing: “Flowers in the meadow”, “Autumn in the park”, “Garden in winter”, “Garden in spring”, “Apple trees in bloom”, “Fish in the aquarium”, “A car carrying bricks to a construction site”, “Girlfriends in round dance”, “Kolobok met a bunny”, etc.
Senior and preparatory school group (5-7 years old)
The main tasks of the teacher:
Develop an aesthetic attitude towards the environment. Develop observation, imagination, attention, independence in performing work. Learn to identify the essential features and shape of objects, their similarities and differences. Teach expressive solutions to the composition of a drawing. We introduce you to arts and crafts and folk crafts. We learn to distinguish, name and select colors and shades, creating shades by gradually adding colored gouache to white (and not vice versa!). We teach the proportional relationship of two or three objects in the picture. We learn to draw according to plan, from memory and from nature. We learn how to use watercolor paints correctly, dilute them with water, carefully pick up paint on the bristles of the brush, holding it obliquely, turning it on a plane. We learn to depict humans, birds and animals statically and in motion. Improved drawing and shading skills.
Basic techniques for learning to draw:
Full display (if a new topic, for example, “a person in motion” or “portrait” or “animal”, etc.) Partial display Examination of an object with hands Detailed examination and analysis of an object (for example, when drawing from life) Explanation, instructions, questions Observation (especially important when drawing nature)
Drawing Skills:
1. We introduce the use of a simple pencil sketch for a more accurate representation of objects. A sketch is made and then painted.
2. We learn to draw the horizon line when:
- a narrow strip of sky, wide of earth. Topic: "Garden in autumn"
- a narrow strip of land, a wide strip of sky. Topic: “Birds fly to warmer lands”
- the entire leaf is earth. Theme: “Blooming meadow”
- the whole leaf is the sky. Topic: “Planes are flying”
3. We introduce drawing from life - one of the most difficult types of drawing, where there is no demonstration of work by the teacher.
We draw fruits, vegetables, flowers, branches, leaves. The composition is compiled by the teacher. It is advisable to place the nature at eye level in front of each row of tables where children sit.
Behind the nature there is a background of the same color as the children’s sheet (white, blue, greenish, pink). Explain the location of objects on a sheet of paper without showing them. At the end of the lesson, we compare the drawing with nature - “similar or not similar.”
We learn to draw flowers in a vase. We divide the vertical sheet into 3 equal parts (vase, stem, flowers), the lower one part is a vase, the 2 upper parts are flowers or branches. Vases are drawn in simple shapes.
We learn to draw objects on the table. We give the concept of “still life”
| Senior group | Preparatory group |
| 1st quarter Round and oval shaped objects (“Tomato and cucumber”, “Apple and plum”) on the table line | 1st quarter Round and oval-shaped items (“Tomato and cucumber”, “Apple, plum and pear”) on a platter or plate |
| 2nd quarter Houseplant with simple-shaped leaves in a pot (“Tradescantia”, “Sansevieria”) | 2nd quarter Indoor plant with leaves of complex shape in a pot (“Croton”, “Ficus”, “Violet”) Combined still life (“Branch with leaves and apple”) on the table line We introduce the blocking technique using the example of drawing a watermelon and a watermelon slice. |
| 3rd quarter We draw flowering branches of fruit trees in one color (cherry plum, pear, peach). We draw bouquets of uniform flowers of simple shape (only daffodils or only tulips) Don't forget about the background! | 3rd quarter Drawing blossoming branches of fruit trees with color overlay (apple tree, apricot, quince). We draw mixed bouquets of homogeneous flowers of simple shape (daffodils and tulips together) Don't forget about the background! |
4. Learn to draw a person. Be sure to provide a simple pencil for sketching. We explain why this is needed.
| Senior group | Preparatory group |
| Drawing a man in full height Divide the vertical sheet into 5 parts. 1 part (the head) is taken as the basis. Next - part 1 - the neck and torso to the waist (we draw the so-called “T-shirt”). Next - 1 part from the waist to the middle of the thigh (draw a trapezoidal “skirt”). Next - 2 parts - legs. On the side of the shoulder and to the end of the “skirt” are the arms (2 straight parallel lines). The hand ends in the form of a “circle”. Legs in the shape of a triangle. If it’s a boy, then the “pants” go down from the waist. | Drawing a man in full height All the same. The hand ends in the form of a “mitten” |
| Drawing a portrait of a person Draw an oval covering the entire vertical sheet. This face Divide into 2 parts and draw bangs (hair) in the upper part. Under the bangs there are eyes and eyebrows in the form of dots and arched lines. Next, we divide the lower part of the oval into 2 parts again. This is the level of the nose (put 2 dots). Next, we divide the lower part into 2 parts again. This is the level of the lips; we draw them in the form of an arcuate line and semicircles. | Drawing a portrait of a person All the same. Eyelashes are drawn and ears are drawn in the form of semicircles. |
| Drawing a person in profile The principle is the same as in full height We show this using the example of a child. | |
| Drawing a person in motion using the example of “stick men” The principle is the same, we just show changes in the position of the arms and legs. We explain that the arms and legs bend at the joints. Topics: “Athletes”, “We do exercises” | Drawing a person in motion using the example of “stick men” We learn to draw a person in clothes and at work, correctly conveying proportions and movements. |
5. We learn to draw birds and animals based on an oval and a circle. Plastic and wooden toys are used as a sample. A sketch is made with a simple pencil.
6. We learn to draw transport based on rectangular and square shapes. A sketch is made with a simple pencil.
7. We learn to draw buildings: in the senior group - two-story ones, in the preparatory group - multi-story ones. We pay special attention to the correct and symmetrical arrangement of the windows (one above the other!), and that the upper and lower parts of the windows are at the same level (we make auxiliary thin lines with a simple pencil). You can paint multi-storey buildings like a “cage” with a wide brush. The roof is flat, like in the middle group. In the preparatory group we draw fairy-tale houses, shops, theaters, schools.
Drawing a night city. If the background of the picture is black, the houses and silhouettes are gray. If the background is blue, the houses and silhouettes are black. The light in the windows is yellow.
8. Draw trees. We give the concept - the crown of a tree. Please note that each tree has its own crown, foliage color and trunk shape; we observe trees on the street. We use painting methods - “poke”, chaotic lines, so that the gap is visible.
On spruce trees we add needles using different drawing techniques.
9. Subject drawing becomes more complicated as you acquire skills. We learn to arrange the composition proportionally: cars are smaller than houses, people are smaller than trees and houses, distant objects are smaller, nearby ones are larger. We learn to arrange objects in the space of a sheet in accordance with how they are located in life: closer, further, or partially blocking each other.
Lesson topics are selected in accordance with the theme of the week, the season and taking into account the children’s sufficient skills in the image.
Methodological recommendations for conducting classes in visual arts (drawing)
- All material is prepared in advance.
In accordance with the type of drawing, the topic of the lesson, prepare paper of different formats, backgrounds (you can use colored half-cardboard or tint the paper with watercolors, gouache paints, ink, etc.).
- Gouache paints are diluted with water until the thickness of liquid sour cream; to prevent the paints from crumbling after drying, they can be diluted with milk.
For activities with children of the younger group, gouache paints are poured into small jars so that the water does not evaporate; you can cover them with paper or newspaper moistened with water.
- Water for washing brushes is poured into transparent cups or unbreakable jars.
In younger groups, if children paint with paint of the same color, the water is not prepared. There can be more than one jar per table, so that children can change the jar of water as the water gets dirty. It is advisable to do this in older groups so that children are not distracted and do not disrupt the creative process.
- The drawing paper must be signed: in the lower right corner, write the child’s name and the initial letter of the surname with a pencil.
Paint brushes are placed in stands; in the younger group, children paint with one thick round or medium-sized flute brush, and in the older and preparatory groups for school, children paint with two brushes: thick and thin. There should be more of them than children in the group.
- Pencils must be sharpened well; in the younger group they can be placed in cups, stands, and later offered in an open box for pencils; In the middle group, pencils are given in a box. For drawing with pencils in older groups, it is necessary to use 18 - 24-color boxes of pencils. In the same box or separately, older preschoolers should have a simple pencil.
- All drawing materials (art materials, jars of water, napkins for drying brushes, supplies for brushes) are placed on a separate table, from where children take it before starting to paint. Clean jars, brushes, and napkins are also placed there. It should be remembered that some of the visual materials are stored in children’s tables, so before class it is necessary to check with the children the condition of these materials.
- Particular attention must be paid to the placement of visual didactic material for the lesson, prepare a stand for the nature, think about the placement of the nature or several natures.
- At the end of the lesson, viewing and analysis of children's drawings will be organized, so you should think about where the drawings will be placed (on a special table, on easels, on a board, etc.).
- Modern requirements for conducting visual arts classes provide for the connection of visual activities with other types of children’s activities: gaming, music, speech, theater, so the teacher does not say that the lesson is over, he creates the conditions for the transition to another type of activity.
Drawing fir trees
Junior group
We draw on tinted paper, on the entire sheet or strip, with green paint and a wide brush.
Explanation:
We indicate where the spruce grows - I draw an even, straight line from left to right with green paint. Then I draw a straight and beautiful trunk - I draw a vertical line from top to bottom, start painting with the tip of the brush, and then with the whole brush. Now I'm drawing branches. At the top of the head the branches are short and point upward towards the sun. I draw the rest of the branches, starting from the top - I draw a line from the trunk down on one side and on the other, at the top they are short, and then they grow, grow (we draw the line of the branch), and this branch is even longer (grows, grows, grows).
Middle group
We draw on tinted paper, on the entire sheet or strip, with brown and green paint. We give 3 brushes: wide for the trunk, medium thickness for the branches and thin for the needles.
Explanation:
I take a wide brush and use brown paint to mark where the spruce grows, drawing an even straight line from left to right. Then I draw a straight, beautiful trunk - I draw a vertical line from top to bottom, start painting with the tip of the brush, and then with the whole brush. I take a medium-thick brush, with which I will paint brown twigs. The spruce tree has a crown. I draw 2 small branches that look up at the sun. Now I draw the rest of the branches, starting from the top. The branches at the top are small and look down on one side and the other, below the branches are longer, even longer and the longest. Now I paint needles on the Christmas tree with a thin brush and green paint. They grow on branches on one side and the other.
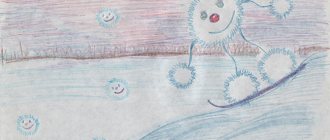
In winter, you can draw a spruce covered with snow and decorated with lights for the New Year holiday.
Senior group
We draw on two-stripe tinted paper with brown and green paint. We give 3 brushes: wide for the trunk, medium thickness for the branches and thin for the needles.
Explanation:
We don’t indicate where the spruce grows, we immediately draw the trunk. I take a wide brush and use brown paint to draw an even straight line at the end with pressure, from the top point I draw another similar line next to it and so on several times to get a beautiful, straight trunk. Now I paint the branches with a medium brush. The technique is the same as in the middle group. At the top 2 are small up, the rest are long to the sides. The spruce branches have “legs” - small branches, I’ll draw them under the big ones (show). Now we paint the pine needles with green paint and a thin brush.
We decorate the New Year tree with a garland and draw a stand under it. In this group we give images of fir trees near and far. Please note that here the branches are not painted separately with brown paint, but the spreading paws are painted immediately with green paint.
Preparatory group
We draw on tinted paper, gouache, palette - on it we will create different shades of green. We give 3 brushes: wide for the trunk, medium thickness for the branches, thin for the needles.
Explanation:
The drawing technique does not change. Only when depicting needles do we pay attention to the fact that the upper branches are young, elastic and the greenery on them is bright, the needles on the branches below are old and dark in color
Drawing trees
Junior group
We draw on tinted paper, on the entire sheet or strip, with black paint and a wide brush.
Explanation:
We indicate where the tree grows - I draw an even, straight line from left to right with black paint. Then I draw a straight, beautiful trunk - I draw a vertical line from top to bottom, start painting with the tip of the brush, and then with the whole brush. Now I'm drawing branches. The tree has a crown - I draw 2 small branches up. The spruce branches grow downward, and the tree branches grow upward towards the sun. Raise your hands up, in the same way we will draw twigs on a tree, the brush will show where the twig grows - it grows from the trunk upward (I draw a line), now I draw a twig on the other side - it grows, grows.
Middle group
We draw on tinted paper, on the entire sheet or strip, with brown paint. We give 2 brushes: wide for the trunk, medium thickness for the branches.
Explanation:
I take a wide brush and use brown paint to mark where the tree grows, draw an even, straight line from left to right. The tree has a straight, beautiful, even trunk - I draw a vertical line from top to bottom, start painting with the tip of the brush, and then with the whole brush. I take a medium-thick brush, with which I will paint brown branches. With the tip of the brush I paint 2 small branches on the tops of the heads, which look up at the sun. The tree has thick branches, and they all grow upward - towards the sun, I paint them with the whole brush on one side and the other of the trunk. And on thick branches there are thin ones, they also reach out to the sun, I paint them with the tip of a brush on one and the other side of the branch.
Encourage children to watch their friend’s work and exchange opinions.
In the middle group, you can draw a tree at different times of the year: in winter, covered with snow, in spring, summer, autumn - with leaves, we draw them by dipping them.
Senior group
We will draw varieties of trees. Pay special attention to the fact that if children in the older group, even after repeated observations, draw poorly, then this work should be transferred to the preparatory group, since this material is very difficult for children.
Pine
If children have mastered the technique of drawing fir trees well, they can be taught to draw pine trees.
We draw on two-stripe tinted paper, gouache, palette. We give 3 brushes: wide for the trunk, medium thickness for the branches, thin for the needles.
Explanation:
The pine has a beautiful, even trunk of light brown, golden color, because pine really loves light and sun. Create this color on the palette. The technique for drawing a trunk is the same as for spruce. Pay attention to the branches, they grow to the sides of the trunk, alternately on one side and the other, the branches are short at the top, longer at the bottom. There were also branches below, but they all lacked light and sun, and they broke off, leaving only small twigs. Pine needles are emerald, long and fluffy. Using a thin brush, make long strokes from the branch in different directions.
Birch
We draw on two-stripe tinted paper with white and black paint. We give 2 brushes: wide and medium thickness.
Explanation:
The birch has a beautiful trunk - I paint the trunk with a wide brush of white paint, just as we painted the trunk of other trees. The birch tree has black specks on its trunk, we will paint them later when the white paint has dried. Birch is called curly birch. Its branches are beautiful, elastic, and bent down. I take a medium brush and use black paint to paint thick branches from the trunk on one side and the other, starting from the top. And from the thick branches come thin ones, like garlands, descending down. The birch trunk has dried up, now let’s decorate it with black dots. Remember, when we looked at it, we noted that the trunk was very black at the bottom and there were fewer dots at the top.
We draw a birch tree at different times of the year: snow-covered in winter and green in spring (we draw the outline of the crown and the leaves with dots in a raw way).
Apple tree
We draw on two-stripe tinted paper, gouache, palette. We give 2 brushes: wide and medium thickness.
Explanation:
I paint the trunk with a wide brush and dark brown paint. The drawing technique is the same. Now I will paint the crown with a medium-thick brush. The crown of the apple tree is like a bowl. Large branches grow from the bowl towards the sun, and small ones on them. Because the apple tree has such a crown it is called spreading. I paint the leaves of the apple tree by dabbing, with the end of the brush pointing upward.
You can also give the theme “Apple tree in bloom” - with pink paint we paint the flowers with curls, but we don’t paint the leaves.
Drawing varieties of trees in the older group can only be taught if the children have high technical skills. In case of difficulties in the senior group, it is better to leave drawing a tree according to the method of the middle group and teach drawing a birch; the rest should be taught in the preparatory group.
Preparatory group
We continue to draw varieties of trees.
Oak
We draw on tinted paper in two stripes, gouache, palette. We give 3 brushes: wide for the trunk, medium thickness and hard.
Explanation:
The oak is called a giant, its trunk is very thick, I will paint it with a wide brush with brown paint like this - I will draw a central line and “build up” the trunk on one side and the other. The trunk is thick, the oak is mighty, it stands firmly on the ground - the roots are visible. Using a medium brush, I paint the branches with brown paint. The branches have bent from time to time, they are old and thick. The oak tree does not have a crown like other trees. At the top the branches are curved and thick curved branches extend from the trunk. Small curved branches come off from the thick branches; I paint them with the tip of a brush. The greenery of the oak is transparent, carved, I will paint it with a hard glue brush “poke”.
Pine
In this group you can teach drawing pine trees with colored pencils, but for children it is very difficult. Children also learn to draw a young pine tree.
We draw on two-stripe tinted paper, palette. We give 2 brushes: wide for the trunk and medium thickness for the needles.
Explanation:
Using a wide brush with light brown paint, I paint a short trunk. The technique is the same as when drawing fir trees. We pay special attention to the branches. I draw 2 small ones at the top, and then from the trunk I draw 2 branches up to the sun and from here 2 down. Now, with the middle brush, I paint the needles, the upper branches are young - the needles on them are light, bright, the lower branches are older - the needles are dark.
In this group you can show how to draw a crown without branches - with an outline.
Also at this age, children enjoy drawing various fairy-tale trees.
Get text
Article “Methodology for teaching visual arts in the middle group”
By the age of four, a child has come a long way in development, all his mental processes are improving. Attention becomes more stable, visual, auditory, and tactile perception is refined. Children learn to distinguish rather complex shapes of objects and more varied colors.
New program tasks are added in art activity training:
Drawing:
- learn to mix paints and get the desired colors and shades;
— carefully paint in one direction, using different materials;
- decorate the silhouettes of toys with elements of Dymkovo and Filimonov painting.
Modeling:
- teach pinching with a slight pull on all the edges of a flattened ball, pulling out individual parts from a whole piece, pinching small parts (ears on a kitten, beak on a bird).
— teach techniques for pressing the middle of a ball or cylinder to obtain a hollow shape. Introduce using stacks.
Application:
- develop the ability to hold and use scissors correctly.
All classes are divided into three parts:
1. Explanation of the task.
2. The process of completing the task.
3. Joint analysis of the work performed.
The first and third parts are the shortest in time - 2-5 minutes, depending on the task. The explanation takes longer for a new programming task and less time when consolidating knowledge and skills.
In the first part
during classes, the teacher tells the children what and how they will do. The explanation should be emotional in nature in order to arouse children’s interest in the activity and create a creative atmosphere.
In the second part
During the lesson, the teacher makes sure that everyone immediately starts completing the task. If some children are hesitant to start working, showing what their peers are doing usually has a positive impact.
During the lesson, the teacher makes sure that there are no pauses, so that, having completed one stage, the child immediately moves on to the next. Pauses disrupt the rhythm - the lesson lengthens, many do not have time to complete the task.
Starting from the middle group, children turn to the teacher by raising their hand, but the teacher also needs to monitor which of the children is experiencing some difficulty.
Gradually, children need to be taught to overcome difficulties, to look for solutions on their own, and not to constantly raise their hand and ask about something.
In about 5 minutes
Until the end of the lesson, children are warned that they should finish their work. If someone did not have time to complete it, the teacher must provide the child with the opportunity to do this, but in the afternoon. However, it is necessary to teach children to fit into the time allotted for the lesson, to teach them to act quickly, without pauses, without being distracted by extraneous things. For those who don’t have time, at first you can give them a smaller piece of paper.
In the middle group, the analysis of drawings at the end of the lesson can be structured in different ways. Four-year-old children will not be able to give a detailed, well-founded analysis of drawings, but they are already able to independently choose a drawing that they like, say whether it is similar or not to the depicted object or sample, and whether the drawing is neatly executed. The teacher will help to justify why it is beautiful, similar or not. In the middle group, you can arrange an exhibition of all the drawings after the lesson and then analyze the individual works that the children choose. Bad work, just like in the younger group, should not be shown so as not to reduce the child’s interest and mood. But the teacher can work with the authors of weak works individually in his free time when the child wants to draw. Children of the middle group can notice the advantages and disadvantages in the works of their peers, but it can be even more difficult to evaluate their own work, since the process of drawing itself gives them great joy and more often they are satisfied with the result of their work. A self-critical approach to work is developed later.
The main principle of teaching art activities to children of any age is clarity.
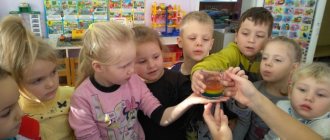
In the middle group, the use of nature begins to occupy a greater place. The natural object can be a simple-shaped object that is well known to children, with clearly visible parts, for example, a mushroom (2 parts), a tumbler doll (4 parts). When examining an object, the teacher draws the children’s attention to the shape and arrangement of parts, their sizes, colors, and various details in order to make it easier for children to correctly convey the structure. The listing of all these characteristics of an object should be in the order in which they are given in the image. As in the younger group, when examining an object, the teacher uses an outlining gesture and verbal explanation. For children who have acquired drawing skills, this gesture is often enough to understand where to start drawing and in what sequence to complete it. During the lesson, the teacher reminds the children about nature, invites them to look at it and draw it. At this age, children cannot yet convey an image from a certain point of view, so the nature must be installed so that they see it from the most characteristic side and clearly distinguish the main parts.
When drawing, the teacher should pay the children’s attention only to the visible parts of the object. Nature is also used after finishing the work to compare drawings with it, although the analysis in this group cannot be very detailed and corresponds only to program requirements. Taking into account the characteristics of four-year-old children, playful aspects should be included in various teaching methods. For example, a tumbler doll asks to draw her portrait; when analyzing the work, she looks at and evaluates the drawings. Play always brings excitement and joy to children’s work, which increases their activity.
Demonstration of drawing techniques in the middle group continues to occupy a significant place in teaching in those classes where new program material is given: the sequence of depicting parts of an object, the concept of rhythm, pattern, etc. For example, the topic of drawing is a snowman. For the first time, the teacher invites the children to convey the correct proportional relationships and sequence of the image. He shows the children how to draw all three balls, starting with the big bottom one, and at the same time asks the children questions: which ball should they draw now? Where? There is no need to draw small details (eyes, mouth, nose, hat) so as not to delay the explanation and leave the opportunity for the children to take the initiative and finish the drawing. For all subsequent classes with similar program material, but on other topics (tumbler, matryoshka, doll), a demonstration is not needed; it can be replaced by looking at an object or a picture.
In decorative drawing, demonstration is especially necessary, since children first become acquainted with the composition of the pattern. A child can only gain an understanding of what rhythm in a pattern means and how to create it in a drawing by visually seeing how rhythmically the teacher’s hand moves, applying strokes to a strip of paper. Then the child repeats exactly what the teacher did. To consolidate this skill, children are given the task of drawing the same pattern on colored strips of paper, but with different colors. In such repeated classes, the teacher helps those children who could not cope with the task.
Modeling in the middle group
In the fifth year
Throughout life, children learn to more accurately convey the shape and structure of objects. In addition, they become familiar with the image of a person and an animal. The teacher can sculpt a Snow Maiden, a snowman, a girl in a fur coat, a bird, a rabbit, a hedgehog, a fish, a pig. All these objects require compliance with form and proportions, but can still be depicted in a simplified manner. For example, in order to make a girl in a fur coat, children make a column, give it a conical shape, then roll out a small ball for the head and an elongated cylindrical shape for the arms, which is divided in half. As a result of the tight connection of the parts, a figurine with a simple design is obtained. When depicting a bird, the children are introduced to a new technical technique - pulling plasticine away from the general shape to obtain such details as a beak and legs, but at first they are not yet required to master this technique.
The teacher should teach children to pinch the edges of the shape with their fingertips, sharpen and round the end of the column. As exercise, children make carrots and treats for dolls (pies, cookies, cheesecakes).
Children from the middle group get acquainted with new visual and technical skills. For example, they learn to pull small details from the shape when depicting chickens and birds, press a round shape with their fingers to get a hollow one, and bend the edges of a flattened shape. The topics offered by the program help consolidate acquired skills. Children can make dishes for dolls: bowls, plates, cups and saucers. When depicting birds, they learn to tightly fasten the parts, pressing them one against the other and covering the places of fastening with their fingers.
Application in the middle group
The main complication of the tasks lies in the development of compositional skills (pasting forms in various combinations) and mastering the skill of using scissors.
The arrangement of elements depends on the content of the task. Thus, Christmas tree beads or flags are depicted on a curved thread, and parts of a snowman or pyramid gradually decrease in size. In decorative works, the arrangement of elements depends on the shape of the sheet being decorated with a pattern.
The composition of the pattern remains quite elementary in this group - filling the corners and edges, which are highlighted by the form itself. A new, more complex task also appears - decorating the center of the form.
Compositional tasks also become more complicated when gluing objects consisting of separate parts. More details are introduced into the image, since children of this age are able to identify the main parts from the general shape, for example, a house has windows and a door, a snowman is standing in the snow, he has a hat or bucket on his head, etc.
A new task facing the middle group is mastering the skill of cutting with scissors. It requires fairly developed coordination of hand movements, since in order to obtain a clear shape one must be able to act rhythmically with scissors, which requires a certain position of the fingers. Children learn to cut straight strips 3-4 cm wide so that the result is achieved after 1-2 movements of the blades. Children use cut pieces of paper first in games as tickets, flags, and then for gluing (for example, windows for the house, etc.).
Having mastered the skill of cutting in a straight line, preschoolers learn to cut round shapes. The teacher shows a technique for rounding the corners of a square or rectangle, which makes it possible to maintain the desired dimensions and correct shape.
Cutting round shapes is more difficult because, in addition to the ability to use scissors with one hand, you need to smoothly turn the paper with the other. The resulting rounded shapes are used to create objects - a mushroom, an airplane, a turret, a snowman.
When planning GCD for types of
fine arts
, you should remember: all types of visual activities are interconnected, since they reflect the surrounding reality in all its diversity. It should be borne in mind that each type of activity has its own specifics: modeling allows you to reflect objects and phenomena of the surrounding reality in volume; drawing - planarly, in color, in space; applique - in color, silhouette. Each type of activity has its own imaging technique.
When planning, it is advisable to adhere to cyclicality: to combine for some time activities related to program tasks and themes (for example, the image of a person, animals in drawing, modeling, appliqué).
GBDOU kindergarten No. 7 Kirovsky district of St. Petersburg
Methods of teaching visual arts
in the middle group
Prepared by: teacher Zemerova T.P.
2019
MAGAZINE Preschooler.RF
“The use of algorithmic schemes in teaching drawing to preschool children”Drawing is a type of visual activity, the main purpose of which is a figurative reflection of reality.
In modern society, the all-round development of the new person and the further increase in his creative activity are of paramount importance. Therefore, it is necessary to develop the correct technical and drawing skills, a sense of beauty, to form high aesthetic tastes, the ability to understand and appreciate works of art, the beauty and richness of our native nature. The technical side of visual activity is subordinated to the task of creating an expressive image in a drawing.
This is what determines the choice of one material or another for drawing. When thinking through the lesson, a material is selected in which the image of the object can be particularly expressive, interesting, beautiful, and will give children aesthetic pleasure. But this will be possible only if preschoolers have a good grasp of technical and drawing skills.
In practice, some children do not show much desire to draw in free activity; they draw only at the request of an adult and reluctantly. The reason for this is not so much a lack of interest in drawing as difficulty in depicting objects and a lack of drawing skills.
You can teach children to draw and depict only by developing targeted visual perception - observation. In order to draw or sculpt any object, you must first become familiar with it, remember its design, shape, color, size, and arrangement of parts.
In the process of learning to draw, the teacher should pay special attention to developing in children the ability to depict in a drawing the main features and properties of an object: structure, shape, conveying the correct color. Children's attention should be focused on the fact that these signs are inherent not to a specific object, but to all objects of the surrounding reality.
One of the techniques that allows you to comprehensively analyze an object, see its properties and characteristics, is learning to draw based on the algorithmic sequence of depicting the object.
When teaching preschoolers subject drawing, the teacher first offers to analyze the subject by showing a toy or drawing. It suggests mentally dividing an object into parts, its components - torso, neck, head - comparing them with geometric figures and drawing in a certain sequence, observing proportions. This kind of work is called algorithmic drawing schemes.
For example, when drawing an animal, children name the shape of the body and head, then the teacher shows the drawing algorithm (sequence), naming the parts of the body and their shape (head - round, body - oval, beak, tail, etc.).
Subsequently, children can use these skills by drawing according to their own ideas on a specific topic.
Such diagrams consist of geometric shapes familiar to children (rectangle, circle, triangle, oval, square). When a child is shown an algorithm, he recognizes familiar figures that he can already draw. At the initial stage, the teacher and the children consider what geometric shapes the object consists of, and the child traces them with his finger.
The image of an object according to an algorithmic scheme begins with a geometric figure, the basis of the object (the body of an animal, a person), to which the remaining parts (head, legs, etc.) are sequentially drawn.
For example, the image of a cat begins with drawing a geometric figure - a circle. Inside the circle, at the bottom of it, a smaller circle is drawn - this is the head. Ears are drawn on the head using small triangles. A muzzle is drawn - two parallel dots - the eyes, one bold dot lower - the nose. A mustache is depicted using horizontal lines. The arcuate line is the mouth. Using small ovals we draw two legs and a tail. The extra lines need to be erased, the drawing should be colored according to the child’s wishes.
This sequence is intended for children 3-4 years old. As children grow older, they are presented with increasingly complex patterns.
In older preschool age, children depict a large number of objects of reality. In order to draw skillfully, it is not at all necessary to have algorithmic diagrams of all these objects. It is enough to study the basic forms; on their basis, children can easily build other objects and objects of reality. For example, knowing the sequence of drawing a truck provides the key to drawing all types of cargo transport (van, dump truck, tractor, etc.).
Gradually, children cease to feel a sense of uncertainty and fear of drawing; they take up pencils with interest and draw, first together with the teacher, and later, having mastered the experience of drawing according to diagrams, on their own.
At first glance, it may seem that mastering algorithmic schemes is characterized by monotony of execution techniques and hinders the development of a child’s artistic creativity, but this is not the case, since children are given as many options as possible for depicting the same object, and are offered variability in color solutions and details. As a result, the child remembers the sequence, the essence of drawing, retains the technique, but brings creativity and individuality to the image.
In our opinion, the use of drawing sequence diagrams contributes to the formation of creative abilities in children and activates the potential of their abilities in learning to draw. Having mastered the skills of subject drawing, it is much easier for preschoolers to move on to a more complex type of image - plot.
Literature:
- Baishanova V.A. “How to teach how to draw flowers, berries, insects . -Moscow, 2008
- Lykova I.A. “Colored palms” . - LLC "Karapuz-didactics" , 2007.
- Tyufanova I.V. “Workshop of young artists. . " -St. Petersburg “Childhood-Press” , 2002.
- Shaifurova N.V. “Teaching preschool children how to draw animals using algorithmic schemes. Literary manual for educators. DOW " . -SPB, “Childhood-Press” 2009
- Komarova T.S. Visual activities in kindergartens. — Moscow, 2011
| Next > |
Organization and methodology of drawing classes
Organization and methodology of drawing classes
All material is prepared in advance.
1. In accordance with the type of drawing, the topic of the lesson, prepare paper of different formats, backgrounds (you can use colored half-cardboard or tint the paper with watercolors, gouache paints, ink, etc.).
2. Gouache paints are diluted with water until the thickness of liquid sour cream; To prevent paints from crumbling after drying, they can be diluted with milk.
For activities with children of the younger group, gouache paints are poured into small jars; To prevent the water from evaporating, you can cover them with paper or newspaper moistened with water.
3. Water for washing brushes is poured into 0.5 liter glass jars; you can pour it in the morning and place the jars on a tray.
In younger groups, if children paint with paint of the same color, the water is not prepared. There can be more than one jar per table, so that children can change the jar of water as the water gets dirty. It is advisable to do this in older groups so that children are not distracted and do not disrupt the creative process.
4. The drawing paper must be signed: in the lower right corner, write the child’s name and the initial letter of the surname with a pencil.
5. Paint brushes are placed in stands; in the younger group, children paint with one thick round or medium-sized flute brush, and in the older and preparatory groups for school, children paint with two brushes: thick and thin. There should be more of them than children in the group.
6. Pencils must be sharpened well; in the younger group they can be placed in cups, stands, and later offered in an open box for pencils; In the middle group, pencils are given in a box.
7. All materials for drawing (graphic materials, jars of water, napkins for drying brushes, stands for brushes) are placed on a separate table, from where children take it before starting to draw. Clean jars, brushes, and napkins are also placed there. It should be remembered that some of the visual materials are stored in children’s tables, so before class you need to check with the children the condition of these materials.
8. Particular attention must be paid to the placement of visual didactic material for the lesson, prepare a stand for the nature, think about the placement of the nature or several natures.
9. At the end of the lesson, viewing and analysis of children’s drawings will be organized, so you should think about where the drawings will be placed (on a special table, on easels, on a board, etc.).
10. Modern requirements for conducting visual arts classes provide for the connection of visual activities with other types of children’s activities: gaming, music, speech, theatrical performances - therefore, the teacher does not say that the lesson is over, he creates the conditions for the transition to another type of activity [3] .
In order for each lesson to be not only interesting for the child, but also to solve the problems of his mental development, the teacher must carefully prepare for it. Important points when preparing for the lesson are the following:
• Choosing an activity name that promotes the creation of expressive
image (“Merry and sad bear”, “Funny snowman”, “Brave hare”).
• Determination of the type of occupation (single-type, integrated,
complex).
• Selecting paper for drawing (landscape, tinted, wallpaper,
illustrative, tracing paper of different sizes), although you can draw not only on
paper, but also on asphalt, sand, snow.
• Selection of visual materials (paints: gouache, watercolor;
felt-tip pens, markers, pencils, sanguine, charcoal).
• Selection of material for modeling (clay, plasticine, flour mixture with salt).
• Preparation of various parts, paper templates for decoration
work (apron, handkerchief, umbrella, dress, etc.); slotted silhouettes (birds,
flower, bunny, etc.) for painting in younger groups.
• Choosing the motivation for the activity (we make baked goods for a game of shop, we draw flowers for mom or as a gift to a friend, etc.) [2].
To develop visual skills and aesthetic perception in visual arts classes, a variety of techniques and methods are used:
• Examination of objects of art in each lesson (book graphics, painting, architecture, folk and applied arts).
• Reading fiction, singing songs, listening to music.
• Demonstration of ways to depict an object drawing, step-by-step demonstration by the teacher.
• Full and partial demonstration of ways of representation by individual children.
• Games and dancing in class.
• Encouragement, demonstration of successfully started work, advice, explanations, individual demonstration.
• Analysis of children's works (works are displayed on a stand, on a table, on book stands) [1].
Children love to engage in visual arts not only in specially organized classes, but also in their free time. In independent artistic activity, the teacher also provides guidance, but not direct, but indirect. For example, he draws a forest on a large sheet of paper for the decoration of a theater; the children watch with interest. The teacher invites them to draw mushrooms, berries, flowers in the forest, leaves on the trees. Children can draw this picture for several days to carefully draw and color all the images.
In independent activities, the teacher involves children in playing with folk toys, looking at illustrations in books, and laying out mosaic patterns; interests children with entertaining graphics (draw funny blots, circle the picture, print flowers with carrots, potatoes).
Topics for free drawing, sculpting, applique can be very different: “What I can draw”, “Fun drawing”, “What I want... and what I want...” (drawing, sculpting, applique), “Picture from a mosaic” (applique) , “We make products for the store”, “My favorite holiday”, “Decorate what you want” (napkin, dress, skirt, rug, scarf), “Who flies?” (drawing, modeling), “Draw your favorite fairy tale,” “Let’s sculpt something delicious.” Special classes should be held monthly according to the plan [4].
Such a diverse inclusion of visual activities in a child’s life will help develop hand motor skills, creative abilities, and aesthetic perception.
Bibliography:
1. Grigorieva, G. G. Unity of teaching and development of creativity in visual arts classes // Preschool education. – 1989. – No. 2. – P.24-33.
2. Kazakova, T. G. Visual activities of younger preschoolers / T. G. Kazakova. - M.: Education, 1980.
3. Komarova, T. S. Visual activities in kindergarten / T. S. Komarova. – M.: Mosaika-Sintez, 2008.
4. Tikhonova O. Drawing of children of the third year of life // Preschool education. – 1994. – No. 12. – P.10-14.
Algorithmic schemes in drawing animals by preschool children
Relevance
“
Visual and didactic aid” has a developmental, educational and educational value. It can be used in almost any type of educational activities and children's play activities. The meaning of visual activity lies in the ability to convey the surrounding reality with the help of visual materials and means. Children have difficulty drawing animals and conveying their movement.
Methodological apparatus
Object of study:
teaching preschoolers to draw animals.
Subject of research:
development of a visual didactic aid for teaching preschool children how to draw animals.
Purpose of the study:
to develop a visual didactic guide for teaching preschool children to draw animals.
Objectives of the study:
- to determine the types of visual aids used in teaching preschool children to draw animals;
— develop a long-term work plan for teaching preschool children how to draw animals;
- create step-by-step diagrams for drawing animals with children in preschool age;
— develop tasks for individual work with preschool children on learning to draw animals.
Research methods:
theoretical analysis of scientific literature.
Main part
Researcher B.G. Meshcheryakov defined the concept of children's productive activity as the process of obtaining a product that has certain specified qualities.
S.V. Pogodina points out that productive activity has a number of structural components:
Productive activity
motive
goals
actions
Main part
According to T.S. Komarova, mastery of visual skills, including technical ones, is closely related to the development of the action of perception and presentation of objects.
Sakulina N.P. shows that to create a drawing, it is necessary to have, on the one hand, clear ideas about those objects and their qualities that should be drawn, on the other hand, the ability to express these ideas in graphic form on the plane of a sheet of paper, to subordinate the movement of the hand to the task of imagination.
- Ability to use pencil and brush fluently
- ability to regulate movements in terms of strength and tempo
- the ability to depict in a drawing the main features and properties of an object
According to Yu.M. Kirtser, the depiction of animals requires a close study of their external appearance, the nature of their plasticity and the structural structure of their body shape.
Main part
According to Leonova N.N. , Shaidurova N.V. One of the most effective ways to develop visual skills in drawing animals of preschool children is algorithmic schemes.
Main part
When working with children, you can use a set of visual technological maps. The set includes cardboard cards depicting certain objects and images. The card clearly shows the visual technique - the method of creating an image using the “step by step” method, variants of images or plot compositions.
Stage 1
- Studying methodological literature on the problem of teaching children to draw an animal
- Studying methodological literature on the problem of teaching children to draw an animal
Stage 2
- Development of a long-term work plan for teaching preschool children how to draw an animal
- Development of a long-term work plan for teaching preschool children how to draw an animal
Stage 3
- Development of a visual didactic aid for teaching preschool children how to draw an animal
- Development of a visual didactic aid for teaching preschool children how to draw an animal
Stage 4
- Selection of animal drawing exercises for individual work with children
- Selection of animal drawing exercises for individual work with children
Practical part
.
Practical part
Ways to use samples of algorithmic schemes in drawing an animal:
- Extensive use of animal body structure samples, showing a toy or drawing.
- Suggests mentally dividing an object into components - body, neck, head, tail - comparing them with geometric figures and drawing in a certain sequence, observing proportions.
— Using an algorithmic approach to drawing means that each drawing must be done multiple times - up to 38 times each in order to bring drawing skills to automatism.
.
Practical part
Middle group
These algorithmic schemes can be used for frontal drawing lessons with children.
.
Senior group
Preparatory group
Practical part
Assignments for individual work with children.
In each task it is necessary to complete either the missing details
Practical part
Tasks for individual work with children
Drawing from live life is the main way to study the features of an animal image.
Practical part
Pets
Wild animals
Animals of hot countries
Conclusion
An integrated approach to the selection of methods and ways of using algorithmic schemes when teaching children to draw will allow teachers to help their students correctly depict objects and develop their artistic and creative abilities.