Cards “Numbers from 1 to 10” - print each number on a separate sheet.
The sixth archive contains cards similar to the previous ones with numbers and mathematical symbols, but without names. In order to use cards for a long time, it is better to print them on thicker paper or laminate them.
It is quite difficult for a child to remember numbers, so the learning process needs to be given special attention, and most importantly, to make it fun and interesting. You need to study constantly, in a playful way, using visual materials and objects. Practice at home, on the street, in transport, in a store; such training, as a rule, brings the most unexpected results and is most effective.
If you are interested in a complete set of cards with mathematical signs and symbols for creating various examples and problems during lessons with your child, follow this link.
How to write numbers from 1 to 10 correctly.
This manual will be useful to you after your child has learned and memorized 10 printed numbers well. In order for a child to learn to write capital numbers correctly, it is first necessary to demonstrate to the child the sequence of writing them using arrows using a clear example. Place the form on the table in front of the child, take a pen or pencil, and start circling the first number from the indicated point in the direction of the arrows, then invite the child to do the same. Then the second, third and so on, depending on how quickly the child remembers the writing sequence.
The form must be in sight of the child at all times so that he can check himself at any time. After the child has memorized these rules, you can proceed to the seventh point of this page, where the child needs to circle the numbers by dots, guided by this manual.
Download numbers from 1 to 10 “Blue”. Numbers and their names.
The fifth archive contains 11 cards with blue numbers from 1 to 10, starting from zero, each of which is located on a separate page. Under each number on the sheet there is also a name for the number. Additionally, we also included the mathematical signs “plus”, “minus” and “equals” in the set of cards.
When studying numbers with your child, it is necessary to direct all efforts to teach the child to compare the visual image of the number shown on the card with its quantitative value.
To print cards, use A-4 paper size. Even if you don't have a color printer, don't worry, when you print numbers on a black and white printer, the numbers will turn black.
Cards with numbers from 1 to 10 and mathematical plus and minus signs.
By downloading the fourth archive, you will receive 2 forms with numbers and mathematical plus and minus signs, which are located on sheets in frames, 6 pieces on each. Cut out the frames along the lines and you will have a wonderful set of cards for introducing your child to printed numbers and teaching your child how to count to 10.
Your main task is to convey to the child that real objects are “hidden” behind the numbers and how interesting it is to learn how to count them yourself.
During classes, give your child as many visual examples as possible from the environment in counting, unobtrusively practice with him on a walk, while eating, playing - make learning fun and interesting.
Download numbers - coloring pages from 1 to 10 with tasks.
These cards are good because during classes the child can combine learning with drawing. If you notice that your baby is tired and has stopped perceiving information carefully, take a break and invite your child to color pictures with a number that he has already learned. This way, the child will have a rest and will be happy to start learning the next number.
On the fourth form you will find two counting tasks for kids to reinforce the material covered. In addition, in the second task the child is asked to complete the patterns on the mittens in a mirror image. You can easily create such examples yourself using numbers, pictures and mathematical symbols that you print on the page.
“Numbers from 1 to 10” for printing in pictures.
You can print these bright and colorful picture cards with numbers from 1 to 10 on a color printer (A-4 paper). Cut each form into four parts along the indicated lines - and start teaching your child. Using these cards, you can independently come up with various tasks for kids, for example, similar to those that we have placed on the fourth form of the manual.
Mathematics lesson in the middle group “Number 1”
Summary of an integrated lesson in mathematics in the middle group, topic of the lesson: “Number 1”
Author of the lesson: Svetlana Alekseevna Davydova, teacher-methodologist of the highest qualification category.
Program content:
Introduce children to the number 1, teach them to relate the number to the number of objects. Strengthen the ability to determine spatial location and copy it. Strengthen counting skills and comparing objects by size. Learn to understand a learning task and complete it independently. Will reinforce sculpting techniques: rolling, pressing, pulling. Develop thinking and fine motor skills
Equipment:
Demonstration material: number “1”, subject pictures, typesetting canvas or magnetic board. Handouts: notebooks or sheets of paper, pens, number boxes or number fans, three bricks for each child from a set of building materials, colored pencils, sheets of cardboard, plasticine.
Progress of the lesson:
This number is one. See how proud she is. Do you know why? Starts counting everything. (I. Blyumkin)
The unit or number one is always ahead, it starts the counting. Find number one and show it (children use number boxes or number fans.)
Didactic exercise “Trace and color the number”
Children trace the number with a pen and color it in with a colored pencil.
Didactic exercise “Show one object”
On the ground: Show one finger. Show me one pencil. Show me one brick. At the board or easel: Show one cube, one book, one doll, one ball (pictures).
Didactic exercise “Connect with a line”
Children are asked to connect a circle with the number one and circles with a line. In which one object is drawn. Children are asked questions: “Why didn’t you connect this picture with the number one? How many objects are shown in this picture?
Dynamic pause "Soldiers"
Stand on one leg, as if you were a persistent soldier. Put your left foot to your chest, Look, don’t fall... Now stand on your right, If you are a brave soldier. Now stand on the left, If you are a brave soldier. Once - get up, stretch. Two – bend over, straighten up. Three - three claps of hands, three nods of the head. By four – your arms are wider. Five - wave your arms. Six - sit down quietly.
Didactic game "Repetition"
The teacher places three bars on the table in different positions; after the command “repeat,” the children lay out their bars exactly according to the pattern. The teacher complicates the tasks and reduces the time allotted for completing the task.
Didactic exercise “Geometric shapes”
Here are the fidgety figures who love to play hide and seek. So let's look for them, guys, with our eyes.
Look left, look right, look? Where is the circle? And we found you. Here he is, beloved friend.
Let's all look to the left together. What's there? Where is the square? You prankster cannot escape, from the inquisitive eyes of the guys.
Let's look down and find the triangle there. This is a triangle. Where is the rectangle?
Look in your notebooks and find these figures in them. How many figures are there in total? Which figure is first? Color the square yellow. What figure is next? What is it like? Second. Color the circle red. What figure is next? What is it like? Third. Color the triangle blue. What figure is next? What is it like? Fourth. Color the rectangle with any color you like.
Warm-up for fingers “Baby fingers”
(L. Mukhomorina)
Mom let the kids go for a walk (open your palm, straighten all your fingers). Mom has a lot of them. There are five of these kids! Have you been out for a walk, kids? Now go home! Come quickly, you’re a big finger (the children bend all their fingers one by one), And now you’re attentive, your index finger, And now your middle finger. This is not the last. Ring finger, run to the house
Program content
Introduce numbers 1 and 2 and learn to denote numbers with numbers.
Practice counting skills forward and backward within 10.
Strengthen the ability to navigate on a sheet of paper, determine the sides and corners of the sheet.
Improve your understanding of triangles and quadrilaterals.
Didactic visual material
Demonstration material. Cards with numbers 1 and 2, dummies of mushrooms (1 porcini mushroom and 2 aspen mushrooms), 10 triangles of the same color, sample pattern.
Handout. Cards with numbers 1 and 2, rectangles of the same color (10 pieces for each child), sheets of paper, colored pencils.
Guidelines
Part I. Game exercise “Count the mushrooms.”
There are dummies of mushrooms on the teacher’s table: 1 porcini mushroom and 2 aspen mushrooms.
The teacher asks the children the names of the mushrooms and finds out whether they are edible or not. Then he asks: “How many porcini mushrooms?” Who knows what number can be used to represent the number one?”
The teacher shows a card with a picture of the number 1, places it next to the porcini mushroom and asks: “What does the number one look like? Find a card with the number one and circle it with your finger.”
Clarifies: “The number one means the number one.”
Similarly, the teacher introduces children to the number 2.
Part II. Didactic game “Find the same amount.”
The teacher shows the number. Children find the appropriate number of objects in the group and justify their choice. (One watch, two vases, two paintings...)
The teacher clarifies: “The number one (two) shows the number one (two).”
The teacher names the number of objects, the children show the corresponding number.
Part III. Game exercise “Count the figures.”
There are 10 triangles of the same color on the flannelgraph. Children determine their number. Then the teacher asks: “How many triangles will remain if we remove one triangle each time?”
Children, together with the teacher, count the triangles in reverse order (from 10 to 1). The teacher clarifies: “What did we do when we counted from ten to one?”
Part IV. Working with handouts.
Children have ten rectangles. The teacher offers to complete a similar task. Children count the rectangles, remove one at a time and determine how many are left. Together with the teacher, they call the numbers in reverse order. (Ten, nine, eight...one.)
Part V Didactic game “Remember and complete” (auditory dictation).
Children have sheets of paper and colored pencils. The teacher clarifies the name of the sides and corners of the sheet.
Then he gives the children tasks:
1) draw a straight line along the top side of the sheet with a red pencil (along the bottom side with a green pencil, along the left side with a blue pencil, along the right side with a yellow pencil);
2) draw a circle in the upper left corner with a red pencil (in the lower left corner with a blue pencil, in the upper right corner with a yellow pencil, in the lower right corner with a green pencil);
3) put a dot in the middle of the sheet with a red pencil.
Children check the correctness of the task using the teacher’s model.
The teacher clarifies: “What and where did you draw?”
Children name the details, their color and location.
Numbers for children
Mathematics for children always begins with learning numbers. This is the basis of everything. Children will associate each number with a quantity. The child needs to see the number itself and the number of objects next to the number being studied. Visualization helps you quickly and efficiently study all the numbers.
How to easily learn numbers with your child?
Place numbers, dots and objects in front of your child. Place the required number of dots and objects next to each number. You can also highlight points and numbers in the same color.
You can also use combined cards. Show the child the card, first count the dots with him, then the elements that are drawn on the card and show him the numbers.
Counting sticks are a great way to introduce a child to numbers. After showing the child the number, ask him to lay out the corresponding number of sticks.
There are many ways to learn numbers in a fun and playful way:
- Make numbers and dots from plasticine.
- Build figures from Lego.
- Draw numbers and objects on each separate sheet.
- Place toys in a row and count them.
- Count pencils or markers.
- Lay out counting sticks.
- Make applications from numbers.
- Play hopscotch and jump by numbers.
- Cut out the numbers and the corresponding number of items for them.
- Draw numbers and dots for them on the asphalt in different colors.
- Draw numbers on sand and snow.
- Lay out numbers from pasta and dots from peas.
As you can see, learning numbers with children is quite an interesting process for both children and parents. The form of the game will allow you to captivate your child in learning numbers for a long time.
Lacing for studying numbers will help you remember and circle the entire number. It also develops fine motor skills of the hands, which has a beneficial effect on the child’s speech development. Below are stencils for playing and learning numbers. Print out the materials, make holes for each number according to the template and show your child how to thread the lace while studying the number.
Below are numbers that you can color with your fingers. Having dipped the boy into the paint, the child will happily run his finger over the dots. In this way, it will be fun and interesting for the child to learn each number. To study numbers, match each number with a different color.
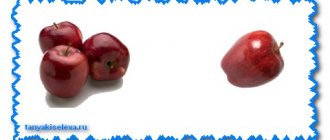
Counting items. How many objects are there in the picture?
Find all the objects and count their number. Write the resulting numbers in the squares.
Let's count how many butterflies there are in the picture.
How many gryas do you see in the picture?
Count all the squirrels in the picture.
Find the swans in the picture and count how many there are.
How many balloons are launched into the sky?
The pictures show numbers and objects. Connect the objects with the corresponding number with a line.
The picture shows objects. Count them and write down how many objects you see.
Find all the hidden numbers in the picture and say them.
Lego math. Lego figures. study the numbers
Number and figure 1
Additionally
Digit 1
Number and figure 1
The number 1 is a unit of counting and refers to the number of objects, i.e. one cat, one boy, one sunshine.
The number 1 is a symbol that represents a number and is written as ONE.
The number 1 stands between the number zero (digit 0) and the number two (digit 2).
Let's show the child a number of toys equal to the number 1 and ask: how many objects are in front of you? One doll, one duck, one locomotive, one giraffe, one bucket.
the number one from the counting sticks , and then next to it we will put one stick, which will indicate the corresponding quantity, i.e. number 1 .
Now we have figured out what is the difference between the number 1 and the number 1.
Let's study the number and number 1 together with animals. Let's talk with your child about animals and that each animal has one?
Answer the questions about the number 1 and the number 1 :
- How many tails does a tiger have? Answer: One tail is a number, and let’s denote it as 1.
- How many beaks does a sparrow have? Answer: One beak - we will call the number 1, and write the number 1.
- How many noses does a cat have? Answer: the cat has one nose (we say the number 1), and we also write the answer - the number 1.
Write down the number of apples growing on the tree and voice this number.
Answer: There is one apple growing on the tree (number 1), and write down next to the picture 1 apple (number 1).
With the help of the game, the child will develop a representation of the number 1 and the number 1. In a playful form, classes with children are interesting, enjoyable and memorable.
Let's prepare handouts and repeat the following concepts: large, smaller, small with the number 1 and the number 1.
Let's draw one large Christmas tree on the first white sheet of paper and place a large mushroom under this Christmas tree. Let's say that we see one big Christmas tree (we voice the number 1) and write the number 1 next to it.
Then we take out a second sheet of paper and draw a smaller Christmas tree and tell the child that we have drawn 1 smaller Christmas tree (number 1) and sign the number 1 next to it. Also, a smaller mushroom will grow under the smaller Christmas tree. Voice the number 1 and write the number 1 next to the smaller mushroom.
Now we need a third sheet and on it we draw a small Christmas tree and a small mushroom. We ask the child to voice the quantity himself and what number needs to be written down, i.e. small Christmas tree, small mushroom, number 1 and number 1.
This activity reinforces the concepts of big and small and the need to use the number 1 and the number 1.
In the lesson about number and number 1, the child learns to understand and reinforces the following concepts:
- How is the number 1 different from the number 1?
- What number does the counting start from?
Open a picture book and ask your child to list all the objects whose number corresponds to the number 1.
Let's talk to the child again:
Number 1 - say out loud the number of objects corresponding to this number.
The number 1 is a number representing the number 1, we write the number.
Thus, we have examined the concepts of number 1 and number 1 .
Presentation topic number 1 and number 1.
Invite the child to circle the large drawn number 1. Then you can offer to circle the number 1 by dots; copybooks with the number 1 will help with this. And then, after practicing writing the number 1 by dots, the child tries to reproduce the spelling of the number 1 himself.
Lesson notes on number and number 1 will help in conducting classes and diversify activities with preschoolers and 1st grade students.
This material can be used as a summary for a lesson about the number 1 and the number 1 .
A child’s first acquaintance with numbers and numbers begins with the number 1 and the number 1 .
After learning how to count to 10, you can start writing numbers from 1 to 10.
When writing each number, you need to approach it correctly, show how to write the number and how to connect each element of the number with each other. For clarity, you can show your child how to spell the number 1 correctly:
When you write the number 1 with your child, say the name of the number “one”.
To begin with, we put a point from which the writing of digit one will begin, and then we place subsequent points to connect with the rest. We will begin our introduction to writing the number one by writing the large version of this number. That is, on a white sheet of paper we will write the number one in a large size, gradually reducing it in size, and then we will practice writing the number 1 in a school notebook.
It is better to speak and tell all lessons in a playful way with a cheerful, cheerful mood. The child will immediately become interested in learning numbers and numbers. After all, if a fun game helps develop mathematical skills, the child will be happy to join such a game and gain new knowledge.
Plasticine will help to reinforce the study of number one. Using plasticine, we make the number 1 and make one circle of the same color. So we immediately used both fine motor skills and logical comparison of the number 1 and the number 1 .
After completing classes, we summarize the topic studied and praise the child for his success in learning the number 1 and the number 1 .
Digit 2
Number and figure 2
Additionally,
name the objects in the picture:
- Two (spoons)
- Two (mushrooms)
- Two (balls)
- Two (handles)
- Two (erasers)
- Two (rulers)
- Two (thermometers)
- Two cats)
- Two (dogs)
- Two keys)
Draw two circles and two squares with your child.
Find 2 objects in the room and ask your child to name and describe them.
Ask the child to show 2 fingers on his hand.
In classes on the topic number 2 and number 2, we will look at the following:
- Let's introduce the child to the number and number 2.
- Find out the location of the number 2 in a series of numbers from 1 to 10.
- Let's learn how to compare the number of objects equal to the number 2.
- We will practice writing the number 2.
- Let's teach the child to understand the difference between the number 2 and the number 2.
In the last lesson we got acquainted with the number 1 and the number 1, now we move on to studying the number 2 and the number 2.
There was 1 mushroom in the basket, and 1 more mushroom was put in it. As a result, there were 2 mushrooms in the basket. We talk with the child about the number 2.
Number and figure 3
Additionally
Number and figure 4
Additionally
Number and figure 6
Additionally
Digit 7
Number and figure 7
Additionally
This is what the number seven looks like.
The number seven corresponds to seven objects shown in the figure below.
The numbers seven are greater than the numbers: 0, 1, 2, 3, 4, 5, 6.
Find all the numbers 7 in the picture and circle them.
Draw the number seven in red.
Where is the number seven hidden in the picture?
Draw the same number of objects next to the number 7.
The number 7 is between the numbers 6 and 8 in the middle, that is, 6 7 8.
At school they teach you to write the number seven in a notebook as shown in the picture.
Number and figure 8
Additionally
Number and figure 9
Additionally
Number 10
Additionally
MAGAZINE Preschooler.RF
Integration of educational areas: “Cognition” (formation of elementary mathematical concepts, cognitive and research activities), “Physical education”, “Communication”, “Socialization”. Program content: -introduce children to the number and number 1; - practice counting objects up to 5; - learn to find the number 1 among many other numbers; -remember and consolidate knowledge about geometric shapes; — develop fine motor skills by modeling the number 1 from plasticine. Materials and equipment: Demonstration: fairy-tale hero Zhikharka, picture of a hut, number 1, geometric shapes (circle, square, rectangle, triangle), plasticine, colored cardboard, peas. Handout: numbers up to 5, geometric shapes (circle, square, rectangle, triangle), plasticine, peas, colored cardboard. Contents of the GCD: 1. Organizational moment. Zhikharka comes to visit. 2.Introduction to numbers and numbers 1. The fairy-tale hero shows a picture of a hut. Children are asked to look carefully at the picture and find objects, one at a time. (children find and list). Then the number 1 is set. The teacher introduces the children to the number. Listen to a poem about the number 1. This number is one. See how proud she is. Do you know why? Starts counting everything. I.Blyushkin Children are asked to circle the number 1 in the air (children circle). The teacher explains to the children that there should not be many objects indicating the number 1, but one (one sun, one moon, one nose, etc.). The children find the number 1 on their table and show it to Zhikharka. 3. Physical education Stand on one leg, like you’re a steadfast soldier. Left foot to the chest, but be careful - don’t fall. Now stand on the left, If you are a brave soldier. 4. Consolidation of knowledge about geometric shapes. Display of geometric shapes (square, circle, rectangle, triangle). Children name the shapes they know. It is proposed to build a house for Zhikharka, following the model of the teacher. (the square will be a house, and the triangle will be a roof). Children build on their own. 5. Finger gymnastics “Family”. This finger is grandpa. This finger is grandma. This finger is dad. This finger is mom. This finger is me. That's my whole family. 6. Modeling the number 1 from plasticine. A sample of the number 1 is displayed. The children examine it and, with the help of the teacher, make a number and decorate it with peas. 7. Reflection. Exhibition of finished works.| Next > |
