How to draw a bird
The process of drawing birds will be greatly simplified if you follow the recommendations and practice regularly, improving your hand. Master classes will be useful for children of all ages, helping them cope with the difficult task of mastering artistic skills.
Owl
Let's try to recreate this expressive image step by step:
- Work begins with two circles with cross-shaped lines at the smaller top figure.
- We outline them with smooth lines, continuing the back part, ending with the tail.
- We finish drawing the legs with three toes.
- We depict round eyes with eyebrows and characteristic ears.
- Below we place a beak that looks like a hook.
Now we need to display the plumage, which lies in rows on the wing, tail, and the fluff on the chest, conveyed by shading. The pencil drawing of the bird is ready.
Penguin
Not a flying, but a floating specimen, recognizable from cartoons and movies, also belongs to the family of birds; its appearance is not difficult to reproduce in profile. You will need to outline a vertical egg ending in a small head with a beak. Draw a short tail and legs.
The most important thing is to correctly paint the picture with paints or felt-tip pens - the head area, the back with wings-flippers are black, and the abdomen is white.
Chick
The proposed version of the image of a chick is simple. We draw an arc from bottom to top, ending with an arrow-nose. We draw the eyeball with the pupil side by side. From the arrow we continue the bow to the starting point, ending it with a tail. We draw on the arched wing and thin legs.
Parrot
Many people keep these bright individuals at home; let’s draw a striking bird step by step:
- We sketch out a diagram of 2 ovals, on the left we draw a back line that turns into a falling tail.
- We use a semi-rounded ruler to mark the bottom of the wing.
- Draw the beak-hook, eyes-circles and paws.
We proceed to contrasting coloring, conveying the feeling of feathers. We use red, blue, yellow. Using a black tone we highlight the base of the beak and the edges of the feathers.
If you want to capture a parrot in flight, use a pair of arched rulers to show outstretched wings with an arched lower edge; its face will be half turned towards us, complemented by a beady eye and a hump nose.
Woodpecker
The cautious and beautiful little bird, by knocking on a tree trunk, not only gets food for itself, but also lets other “relatives” know about the boundaries of its territory, attracting females in the spring. Procedure:
- We draw an oval head and a body with extending wings.
- We draw the line of the beak, legs and move on to the hanging tail.
- We detail the wing by tracing the contours and highlighting the feather strokes.
- We remove unnecessary lines and refine the eye.
Decoration will add realism - a red head, a white chest. We emphasize the beak and other body fragments with black coloring.
Stork
This handsome guy has long legs, an ovoid body and a small head with an elongated yellow nose. Having completed the sketch, we clarify the details. Using a series of rulers we draw out the raised wings.
The ankle-shaped, yellowish limbs have a thickening in the middle. The aerial inhabitant has a snow-white color with a gray-blue tint at the tips of the plumage. Using strokes we emphasize the fluff in the chest area.
If you take on a heron, then give its neck a greater bend, and draw a crest on the back of its head, let it keep its balance on one limb, tucking the other, as it is more accustomed to do when hunting for river life.
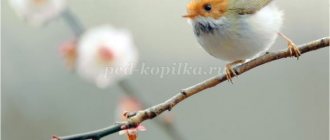
Bullfinch
Let's depict a small bird with a colorful appearance that does not fly away to hot countries for the winter:
- Draw an oval body and a circle head.
- From them we draw a line that turns into a wing.
- We fix the neck and tail segment.
- The paws will tenaciously hold on to the branch.
We paint the figure - a bright red breast, a white spot under the eye, reminiscent of a bead with a dot, highlighted darkened plumage.
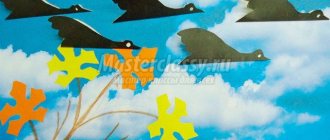
flying seagull
At first, the task seems difficult, however, even a child can do it:
- A round head and an elongated body with a lower convexity are outlined.
- The near wing has a more elongated format compared to the far element.
- The continuation of the figure will be the tail.
- The bird's legs are folded and pressed.
- We display zigzag feathers more accurately.
Hatching shows the fall of the shadow. It is worth noting that the dimensions of the wings of flyers increase in direct proportion to the size of the body.