Lesson 2. Hedgehog in watercolor
This master class will show how easily and simply you can depict a hedgehog with paints.
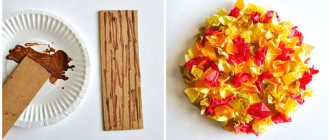
Tools:
- paper (preferably a sketchbook - it has thicker sheets);
- a set of watercolor paints;
- brush of medium and small diameter.
Essential elements
- You need to put white paint on your brush and draw a small circle. Next, you should paint it with the same color.
- Now on the left side we add an elongated triangle muzzle to the resulting circle.
- We wash the brush from white and add a little black. This is necessary in order to indicate the body of the animal. We paint the white part with black, but do not touch the face. The body becomes dark gray in color. Let the workpiece dry a little.
- Now we paint black again and use short strokes in different directions to cover the entire back of the hedgehog with spines.
- Dip the brush into bright brown or dark orange paint and paint the animal’s face with it.
Drawing details
- Using the same color as the muzzle, we draw the short legs of the hedgehog.
- Using black paint we outline the tip of the nose, the round eye and the short line of the mouth. (this needs to be done with a brush of a smaller diameter)
- Using the same brush, he works on the needles again - now they will be a little thinner.
- The drawing can be supplemented with a mushroom, an apple or a leaf on the thorns of an animal. And around it add bushes of short grass.
Ready! A cute hedgehog is looking at you from a piece of paper!
Summary of a lesson on drawing in the non-traditional technique “Hedgehog” in the middle group
Anna Vericheva
Summary of a lesson on drawing in the non-traditional technique “Hedgehog” in the middle group
Summary of the art activity (
drawing ) “
Hedgehog ” in
the middle group .
Learn to draw animals in an unconventional way .
Continue to teach how to convey the structure of an object consisting of several parts.
Strengthen the ability to hold the hand and arms in the correct position, achieving a continuous, continuous movement.
Systematize and deepen children’s understanding of seasonal changes in nature, the habitat of animals and their habits.
Lesson 3. Drawing a hedgehog from “Smeshariki” step by step
The topic of drawing animals in cartoons is very interesting. Each artist approaches this issue in his own way. We invite you to depict the hedgehog as the creators of the animated series “Smeshariki” see it. The heroes of this good and educational cartoon have been delighting children of several generations for years.
The step-by-step plan for drawing such a hedgehog requires a little more time. But this does not mean that such a drawing is more complicated. Drawing a Smesharik is as easy as drawing any other hedgehog.
Tools:
- paper;
- a simple pencil;
- eraser;
- You may need a compass.
Step-by-step instruction:
- Draw a circle in the center of the sheet.
- We draw horizontal and vertical lines so that they intersect in the center of our circle and divide it into four equal parts.
- Draw two smaller circles in the two upper sectors. These will be the eyes of a hedgehog. It is necessary that they are shifted to the center of the large circle.
- Next, we draw another circle around the eyes and combine them according to the principle of an inverted number “8” - these are the character’s glasses.
- A little higher above the glasses we draw two eyebrows - two small rectangles at a slight angle. This will give the expression of the muzzle a slightly surprised and good-natured look.
- We finish the eyes by drawing the pupils.
- Now we draw a small triangular nose, almost directly below it is a triangle-mouth.
- Thorns. These will be five triangles combined into one “crown”. To do this, first draw the two side triangles and the top triangle. Then between them - another triangle.
- At the bottom of the silhouette we draw two “pear-shaped” legs.
- To complete the drawing, trace the outline with a black felt-tip pen and remove all unnecessary lines with an eraser. You can color the hedgehog, or you can leave the picture in black and white.
As you can see from the lessons, drawing a hedgehog is very simple. Let the minutes spent drawing be a joy and benefit you and your child!
Hedgehog for preschool children
The figure of a hedgehog is always drawn in two parts: the head and the body. Their location is marked on a piece of paper using two ovals.
The body template is a large oval drawn horizontally. A smaller oval is depicted vertically, which will become the base for the hedgehog’s head.
There is no point in worrying that the outline of oval shapes is uneven. At the end of the job, the lines will be covered with needles or simply wiped off.
Step by step:
- A sharp muzzle is added to the small oval, and inside it there is a small circle instead of an eye. The pointed part ends in a round spout. Four legs are added at the bottom along the entire body.
- A general outline of the animal’s figure is created. Two ears are completed. The hedgehog's legs resemble curved branches with two processes of different lengths directed in one direction.
- The conditional lines of the sketch are erased. Small antennae are drawn next to the demolition. The eye area is more clearly defined. A trace of glare is left on the pupil.
- Three fingers are formed on the hedgehog's paws.
- The upper contour line of the abdomen is drawn.
- The needles are applied with small teeth tightly adjacent to each other with a slight inclination to the right. If you draw them like stroke sticks, you will get the image of a porcupine.
- The conventional lines are erased from the drawing.
- Shadows add volume to the hedgehog, and the leaves under his feet will make the picture complete.
Cartoon hedgehog
The funny hedgehog has become the main character of children's cartoons more than once.
Hedgehog from Smeshariki
It’s understandable that children want to figure out how to draw their cartoon idol—the smart and funny hedgehog from Smeshariki.
- The body of the funny hedgehog from Smeshariki is drawn as a circle.
- A block letter “A” is written inside the circle with a slight slant. Its lines will determine the location of the arms and legs and will make it easier to draw the hero’s face.
It is planned to draw a hedgehog in motion, which means one leg should be drawn raised.
- The position of the hands is noted first.
- The outline of the eyes is drawn.
- The image of the right sole located below differs from the high raised sole of the left foot.
- The contour line of the hedgehog's needles is applied using a herringbone pattern. The upper cone with a downward expansion is a needle on the top of the head. From there the rest of the hedgehog's spines begin to appear.
- The nose is drawn in a triangular shape, two circles represent two eyes. A small ear is drawn on the side.
- A small triangle is drawn on the top of the head under the line of needles. It serves as a guide for where the eyebrows will be located.
- The contours of the arms and legs of the cartoon prickly character are drawn more accurately. In this case, a realistic image is not required, but special attention is paid to drawing the sole of the left foot.
- The work on the design of the nose and mouth is being completed. The teacher's drawing is used as a guide.
- Working on the eyes will complete the image of the hedgehog from Smeshariki. Circles with a large radius are drawn around the eyes. This is how the hero gets points. One scent is added to them to make the accessory look believable. Pupils and highlights appear in the circles of the eyes. Eyebrows are applied in short, wide strips.
- The hedgehog image is ready for coloring.
The first coloring option is to apply shading to the drawing to highlight the shadows. The drawing will be more fun if you use light-colored pencils.
Character from the cartoon "Hedgehog in the Fog"
Not only children, but also adults love the hedgehog from the cartoon “Hedgehog in the Fog.” He remains a favorite of more than one generation. Getting closer to your childhood friend is easy. Just follow the step-by-step lesson on how to draw a hedgehog in the fog.
- A conditional inclined line drawn in the center of the sheet is chosen as a guide when creating the image of a cartoon hedgehog.
- The general contour lines of the character are built around the line.
- Small details are added to the sketch to form the image.
- The eraser removes conditional auxiliary lines.
- The sketch is completed by adding spines and designing a pouch in the hedgehog’s paws.
- The hero of your favorite cartoon is colored with dark pencils.
Option number 5 – paints!
You can depict many animals - for example, a cat, a pony, a tiger and a hedgehog - using paints. At the same time, if the child is more than 2 years old, he will be interested in drawing such a thing with you.
There is no need to make the picture complicated. You can simply mark an oval with light gray or blue paint, and then paint part of it with dark gray. Blue or light gray - here will indicate the muzzle, and black color - the needles.
Then you should draw the needles on the hedgehog’s body using black strokes. The muzzle needs to be “clarified” using, for example, beige paint. Then use dark colors to designate the character’s nose, eyes, and mouth.
You can “plant” a red apple on the needles, which is drawn in red. You can draw green grass under the hedgehog’s legs with strokes.
Whatever method is chosen in drawing the Hedgehog, you need to understand that the main thing is sometimes not the result itself, but the process of execution.