Hedgehog made from autumn leaves
It is difficult for preschoolers of the younger group to sit still for a long time, so they have to use technically simple but exciting activities. One of these crafts is a funny hedgehog. This animal, associated with autumn and mushroom season, is easy to make from fallen leaves. First, you and your children need to collect leaves from the yard; they must be clean and fresh. They must be dried under a press so that the ornamental material turns out smooth and neat.
To create an application, prepare:
- dried leaves;
- landscape or thick colored paper;
- office glue;
- black or dark brown half bead;
- toy eye.
Instructions for creating an application:
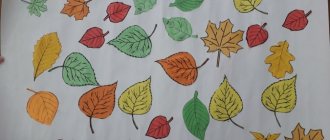
- Prepare natural material, select leaves suitable for making the animal. One leaf should have a pointed tip - this will be the face of the hedgehog. A linden or birch leaf will do. For a back with thorns, maple specimens are optimal, but you can choose others at your discretion. Handle dried material carefully, as it is fragile.
- Glue a sharp piece of paper – a muzzle – onto a horizontal piece of paper, slightly moving it to the side from the center of the composition.
- On the back side of the tip of the nose, glue maple leaves to the muzzle. The number of copies can be any, depending on the size of the application. The main thing is that the leaves should be directed with their carved ends up and to the sides; they should not cover the hedgehog’s nose, but can overlap each other.
- Glue a black bead onto the tip of the muzzle to create a nose. Also glue on a toy eye. If you can't find it, cut out an eye from colored paper.
Crafts workshops for February 23rd in kindergarten
Step-by-step lessons on creating crafts for Defender of the Fatherland Day in kindergarten will help educators convey this or that idea to their students and bring it to life.
Applications
For grandfather or father, children of the junior and middle groups can make an award medal. This is a simple, easy craft.
To create it you will need materials and tools:
- colored paper;
- cardboard;
- glue;
- ruler;
- compass;
- scissors.
Teachers need to draw a blank for the medal on a sheet of yellow cardboard using a ruler. The lower rounded part of the figure is decorated with a compass. Children are allowed to cut the blank along the contour.
During work, it is important to observe safety precautions: children work with special scissors with rounded ends
Using templates prepared by teachers, children cut out the numbers “2” and “3” and an asterisk. The decor is glued to the medal in this way:
At the top of the medal you can write the word “congratulations” and place small stars or flowers around the edges
An interesting and simple craft for kindergarten on the theme of February 23 is ready.
Airplane
You can offer crafts in the shape of an airplane to children in the junior and middle groups by February 23 at the preschool educational institution. To make this gift you will need colored paper, cardboard, scissors, and a glue stick.
Work process:
- A strip approximately 15 cm long and 3-4 cm wide is cut out of a sheet of dark green paper.
The color of the paper for the airplane can be chosen in any way: yellow, orange or gray, it should differ from the blue cardboard that serves as the general background and the color of the Russian flag - The third part of the cut is bent upward, as shown in the photo.
In the future, this will be the tail of the plane. From the same paper, cut out a rectangle 2 times smaller than the base of the aircraft. The piece is folded in half and cut at an angle into 2 parts. The strips are attached to the base of the aircraft to form wings - Rectangles are cut out of white, blue and red paper, symbolizing the stripes of the Russian flag. A small circle is cut out of white - this is a window on an airplane, as well as white clouds.
- The composition is assembled on a blue sheet of cardboard, all its parts are secured with glue.
Adults can only write congratulations on February 23 on the finished card
Rocket
Children of the younger group in kindergarten will enjoy mastering the skill of making crafts in the shape of a rocket for February 23rd. Children 3-4 years old will need adult help to prepare the templates.
Rocket wings can also be made in the form of upward triangles
Work algorithm:
- From yellow, gray or black paper, cut out the base of the rocket into a rectangle.
- The rocket wings are cut out of paper of a different, contrasting color.
- The portholes are made white, and the stars around are red.
- The applique is assembled on a sheet of blue or light blue cardboard.
Stars are placed around the rocket or on the top, sharp part of it
At the bottom of the application, using a felt-tip pen, make the inscription: “Happy February 23!”
Tank
Crafts for the garden on a military theme for February 23 can be made in various ways. Some of them are quite original.
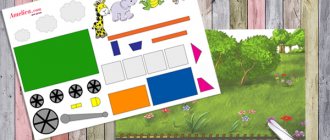
Even the youngest kindergarten students can handle the work on such a gift. The guys just need to help cut out the sprocket and wheels of the combat vehicle.
Assembling the product is simple: all parts are connected without the use of glue
For work you will need materials:
- 2 sponges for washing dishes – large and smaller;
- colored cardboard in black and red;
- a stick from a famous lollipop in the shape of a ball;
- double sided tape.
Black circles are pre-cut out of cardboard. Their diameter should not exceed the side of a large sponge.
Tank manufacturing process:
- The smaller sponge is attached to the larger one using double-sided tape.
- Black circles are glued to the sides of the large sponge to form wheels.
- A red star is attached to the surface of a small sponge.
- A lollipop stick is placed in the front of the tank turret, in the center, and the porous material is pierced with it.
A simple and original craft is ready. In the future, it may become an interesting toy for the children themselves.
You can also make a postcard with an applique in the shape of a tank.
The product requires blanks. Adults draw them and put them on colored paper.
For the tank, green paper is chosen, for the wheels - black, the star is made of red material
The applique itself is glued to dark blue or black cardboard.
Algorithm of actions:
- Cut out all the necessary parts for the tank.
- Combine them to get the picture.
- Glue a red star to the side of the combat vehicle turret.
- Cut out 3 rectangles from red, white and blue paper so that by connecting them you get the Russian tricolor.
It’s easy to give a gift to kids of any age group on February 23rd. Teachers will help the younger children cut out the blanks.
If you make the background of the application lighter, you can beautifully write congratulations on February 23 to your beloved defenders
Postcards
The combination of paper and plasticine in crafts looks beautiful and original. Children from the senior and preparatory groups of preschool educational institutions can give such a gift.
Materials you will need for the postcard:
- cardboard;
- simple pencil, felt-tip pen;
- plasticine.
To begin with, a design in the form of flowers is applied to a sheet of white or pale blue cardboard. Children are asked to roll small balls from colored plasticine and fill the buds with them.
The work is painstaking, requires perseverance, develops fine motor skills
Using a green felt-tip pen, children from the preparatory group can decorate the corners of the postcard, drawing patterns on them. You can write congratulations on February 23 with a red felt-tip pen.
Another version of the postcard is made only from paper or cardboard. Children who are good with scissors can make this craft for February 23rd.
Some decorative elements are made voluminous according to special patterns
Necessary materials:
- colored paper and cardboard;
- a simple pencil;
- ruler;
- glue stick;
- markers;
- scissors.
In the process of making stars and numbers, you will need the help of adults. Children from the preparatory group will be able to give such a gift on February 23rd.
Stages of work:
- Bend a sheet of cardboard in half crosswise.
It is important that the fold is even, all lines coincide with each other - A landscape sheet is glued to the inner (colorless) part of the cardboard.
The dimensions of both sheets must be the same, the excess is cut off - At the top of the front side of the colored cardboard, draw a star and cut it out along the contour.
For this manipulation you will need scissors with sharp ends; it is better for the teacher or parents to cut out the star - To make a star you will need cardboard or red paper.
The star is cut out according to this pattern, so the decor will be voluminous - The resulting figure is folded strictly along the dotted lines under the ruler.
The gray areas of the pattern are folded inward. everything should be smooth and voluminous - The decor is glued to the inside of the cardboard opposite the cut window.
When the card is folded, the star should appear to protrude through the cut-out window. - Then cut out 3 black and 2 orange thin stripes and glue them under each other at the bottom of the card.
This will be the St. George ribbon. Congratulations on February 23 are written in the space between the star and the ribbon.
Soldiers
Even kids in the younger group will be able to glue together the soldier figures.
This gift to dad on February 23 will be a wonderful finger toy for the baby too.
The teacher cuts out green circles and invites the children to roll them into a cone. This will be the body of a soldier. The face is cut out of white paper in the form of a semicircle; children draw all the details themselves. The helmet is also shaped like a semicircle and an asterisk is glued onto it.
Soldiers made using the origami technique are another option for creating a holiday symbol.
Children from the middle and senior groups of pre-school educational institutions will easily cope with the craft by February 23. Small details are drawn with felt-tip pens.
Helicopter
The figurine in the shape of a helicopter is not difficult to make. Children 6-7 years old can handle it.
For work you will need materials:
- colored cardboard;
- scissors;
- glue;
- small photo of a child;
- thin magnet.
Adults need to make preparations for a gift. Children from 4 years old will be able to cut out the parts themselves.
The template is drawn on a thick sheet of cardboard
All the details of the composition are placed so that it turns out to be a helicopter with a window, and they are glued together. A magnet is attached to the back of the cardboard using glue.
Every dad is pleased to receive a craft for February 23rd with a photo of his beloved child
The gift can be attached to a metal surface at home, the magnet will hold the helicopter in weight.
Mug
All kindergarten students will be able to complete this craft by February 23rd. To create it you will need colored and white cardboard, colored paper, scissors, glue, a tag with a thread from tea bags.
How to do:
- Cut a rectangle with sides 10 and 15 cm from thick white cardboard, and 15 cm and 21 cm from colored cardboard.
You also need to cut a handle in the shape of a horseshoe - On a large colored rectangle, indent 3 cm from the sides and draw fold lines.
Lines are drawn with a simple pencil - Then the drawn sides are folded inward.
It is important that all the folds are the same and even, so the craft will turn out neat - Strips and circles are cut out of sheets of colored paper to decorate the mug.
The decor is attached to the workpiece using PVA glue - A handle is glued to the white rectangle made of thick cardboard on the left.
The ends of the workpiece in the form of a horseshoe are launched 1 cm deep into the craft - Then 2 sheets of cardboard are glued together.
The gluing lines must be straight so that the craft does not tilt to the side - The entire structure is connected from the reverse side.
The top of the product should be convex and the back should be flat. - A tea tag is taped inside the mug.
A small detail adds more realism to a cardboard craft. - From the inside of the cardboard craft they write warm words to their beloved father, grandfather, brother.
A teacher will help you make a beautiful inscription
Application “Autumn” in the younger group
The tool for creating an applique can be the hands of children. For the lesson, prepare a set of colored paper, stationery glue, scissors and decorative cardboard for the base.
Instructions:
- Select brown, red, orange and yellow paper from the paper set.
- Cut out the trunk and branches of an autumn tree from brown paper and glue it to the cardboard.
- Let the children place their hands on the other colors of paper and trace with a pencil.
- Cut out the pencil sketches.
- Invite students to glue paper blanks to tree branches.
DIY craft ideas for February 23rd in kindergarten
At home with his mother, a kindergarten student can make his own crafts for February 23rd and surprise his friends with them. Products do not necessarily have to be complex and labor-intensive.
The postcard for February 23rd, made using the quilling technique, is bright and unusual. The volumetric applique looks impressive. To create it you will need white cardboard, colored paper cut into strips, and glue.
All inscriptions are attached edgewise to the paper.
Colored fireworks can be made from thin colored strips of paper rolled along their entire length.
The next craft for February 23rd is made from CDs, covered with colored paper and painted with felt-tip pens.
Drawings for decoration can be found in old children's magazines and coloring books.
Autumn tree
Preschoolers of the younger group are interested in the use of various creative techniques. One of these involves the use of cotton pads.
Making a bright autumn tree is quite simple:
- Prepare your watercolors. Draw the trunk and branches of a tree on watercolor paper with brown paint.
- Provide children with cotton pads and pipettes. If necessary, teach how to use this medical device.
- Dilute the watercolor paint with water so that it becomes convenient for drawing into the pipette. Each color requires a separate glass. It is important that kids choose colors typical for autumn: red, yellow, orange, burgundy, light green.
- Show the students the image technique: they should dip a pipette into glasses with watercolor solutions, then pour it onto a cotton pad. One disc can be pigmented with different colors, resulting in beautiful color transitions.
- When the painted discs are dry, children glue them to the trunk and form the crown of the tree.
Application in the middle group on the theme “Autumn”
Preschoolers of the middle age group begin to get acquainted with geometric shapes, they form the idea that the outlines of natural objects can be similar to figures. For the lesson, prepare a set of colored paper, PVA and scissors. The cardboard base can be of any color.
Application technology "Autumn":
- Cut a strip of green paper and glue it to the bottom edge of a thick base - this will be grass-covered ground.
- Choose from a selection of paper in fall colors: red, purple, yellow, light brown, burgundy, orange.
- Encourage children to cut out different geometric shapes. Emphasize that the shapes must correspond to the actual shapes of the trees. Let the pupils look out the window and say what shape the crowns have: triangular, oval, round. Moreover, it is not the same, but in some trees it is more elongated or wider.
- Once the shapes are cut out, have the children glue them onto the cardboard along the center axis, parallel to the previously glued “ground”. Some figures should be slightly higher - these will be tall trees, others lower. They can be partially overlapped.
- When all the figures are glued, all that remains is to draw on the trunk and branches with a felt-tip pen.
Curly hole punchers to help
If you haven’t yet appreciated the convenience of using shaped hole punches in applique, then it’s time to buy a couple. Perfect little snowflakes that come out with just one click are simply miraculous!
Children will “spank” them with delight, and any applique decorated with such snowflakes will look much more interesting.
Pumpkin
Autumn is associated with the harvest and Halloween. You can make a bright applique on this topic for the middle group of kindergarten.
For work, prepare:
- template – outline image of a pumpkin with leaves;
- pumpkin seeds;
- gouache paints;
- office glue.
Instructions for creating the “Pumpkin” applique:
- Glue the pumpkin template onto the cardboard base.
- Place the seeds on the table, after covering it with film or newspapers.
- Color most of the seeds orange, the smaller part green. Leave to dry.
- Carefully glue the dried seeds to the template image: orange ones to the pumpkin itself, green ones to its leaves.
Drawing + applique
The applique can be combined with a pattern. On the Internet there are a lot of pictures for appliqué depicting houses, penguins, snowmen, etc. This template just needs to be printed, cut out and glued to a base of colored cardboard
The best color for a winter background is blue or blue. The drawing is painted with paints or felt-tip pens, and everything that is snowy or white in color is filled in with appliqué.
Cheerful lion
In the middle age group, preschoolers learn about the world around them, get acquainted with different types of animals and their characteristics. An applique using maple leaves can help with this.
For the lesson, prepare:
- press-dried maple leaves of yellow and red shades;
- cardboard for the base;
- yellow or light orange colored paper;
- office glue;
- pink and black markers;
- plastic toy eyes.
Step-by-step instructions:
- Glue the leaves onto the cardboard radially so that their sharp ends stick out in different directions. It is advisable to glue them in 2-3 layers to make the applique voluminous. The glued leaves will become the lion's mane. Explain to the children that these African animals have thick manes.
- Draw the kennels of a lion's face on yellow paper. Use a black felt-tip pen to draw on the nose, mustache, and mouth. Color the inside of the mouth with a pink felt-tip pen. Cut out the outline.
- Separately cut out the ears, and paint their central part pink too.
- Glue a lion's face into the center of the foliage ring. Glue the ears a little higher between the leaves.
- To finish the job, glue on the toy eyes. If there are none, you can cut out eyes from white paper and draw on the irises and pupils.
Velvet applications
Among the various photos of winter appliqué, there are many interesting options using multi-colored velvet and woolen threads. You can cut a mitten or a hat from velvet. The top of the hat can be decorated with a real pom-pom made of thread or a cotton ball; the bottom of the mitten can be covered with scraps of cotton wool, which will depict a fur edge.
You can embroider a snowflake on a mitten with woolen thread or depict a knitted pattern with pieces of multi-colored velvet. And the hat can be striped from different colors of velvet.
Autumn landscape
This leaf applique on the theme “Autumn” is intended for older preschoolers. The task greatly develops imagination; autumn leaves in the composition turn into bushes and trees: the leaf plate is the crown, the petiole is the trunk.
For work take:
- press-dried leaves of different types of trees;
- white cardboard for the base;
- PVA;
- watercolor.
Step-by-step work:
- Using watercolor paints, depict the main composition on cardboard, for example, the sky, a lake, and a strip of shore between them. Wait for the painting to dry.
- Select leaves in pairs. That is, the leaves in a pair should be as similar as possible.
- Create a forest on the shore. Glue the leaves one at a time from a pair. Glue at random, with one leaf partially overlapping another. The effect will be as if the trees are standing close to each other, the forest approaches the water itself.
- Don't forget about the reflection in the water. Glue the second pair of leaves upside down onto the image of the lake. Straight and inverted paired leaves should be joined by petioles.
Applications from “palms”
Children's favorite hand appliques are also popular in winter themes. Green “palms” make a wonderful Christmas tree, which children can decorate to their taste with ready-made stars, bows (such shaped hole punches also exist), sparkles, buttons, sequins, and anything else.
Do you remember the poem “It was in January.”? Tell it to your child while you glue on ten bunny faces peeking out from under the Christmas tree paws.
Application “Autumn” in the senior group made of colored paper
One of the associations with autumn is drizzling rains and bright umbrellas. Older preschoolers will certainly enjoy the beautiful “Autumn” applique made from colored paper. Take a set of paper, stationery glue and scissors for the lesson.
Make the application like this:
- Draw a circle of any size on colored paper, which determines the size of the composition. Divide the circle into 4 equal parts and cut them out.
- Twist the blanks into cones and secure with glue. Their color can be any, the same or different. In the second case, you will either have to cut out parts of the circles from different papers, or use white paper, then color it.
- Glue the finished cones onto a cardboard base so that they meet at their sharp ends. You will get a half-opened umbrella.
- Cut out a handle with a curved knob. Glue to the base of the umbrella.
- Cut out colorful autumn leaves using templates. Insert them into the cones and secure.
Subjects of winter applications
The main subjects for winter applications are, of course, winter. It's snow, snow and snow again. Snow on the roofs of village houses, snow on bare tree branches, snow on Christmas trees, and, of course, a snowman. In addition to Santa Claus, deer, polar bears, and penguins are frequent guests of the applications.
Attributes of New Year's fun: skates and skis or winter accessories: warm mittens, hats and scarves are also popular in winter scenes. And, of course, a decorated Christmas tree.
Mushroom time
A wonderful three-dimensional applique on the theme “Autumn” in kindergarten makes you want to go to the autumn forest to pick mushrooms.
For work, prepare:
- set of colored paper;
- templates - contour images of mushrooms and leaves;
- decorative cardboard for the base;
- office glue;
- scissors.
Instructions:
- Take light brown and dark brown paper. Cut out strips 7x1.5 cm. Ask the students to glue each one into a ring. This is a fun activity that develops perseverance.
- Make a basket from the finished paper rings. Glue the rings to the cardboard, alternating dark and light copies: it will turn out more interesting. First, make a semicircle - this is the bottom and sides of the basket. Then fill the middle tightly with rings. Finally, make a semi-circular handle for the basket.
Cut out mushrooms and leaves of the corresponding colors according to the templates. Butt glue to the top edge of the basket.
Volumetric applique of autumn forest
This method requires some skills and is accessible to children of primary school age.
Take white birch paper and draw black marks. For a voluminous central trunk, cut a strip of 9x17 centimeters and screw it into a tube onto a marker, gluing the edge so that the tube retains its shape.
Attach strips of 10x4 centimeters in the same way, using a pencil, to get thinner tubes. Roll the paper along the long edge, so you will get a thick tube 17 centimeters long and several thin ones 10 centimeters long.
Glue them in the form of a central trunk with branches on the sides. Using a template or a hole punch, cut out leaves from paper in autumn shades and attach them evenly along the branches.
For originality, you can add autumn fruits, such as apples.
Application “Autumn” in the preparatory group of kindergarten
Preschoolers 6-7 years old can be taught to work with salt dough. It is more interesting for children to sculpt figures from it than from plasticine. The work is painstaking, teaches patience and perseverance, and develops imagination.
Step by step execution:
- Prepare a dough from white flour, fine salt and water. It should be dense enough for modeling.
- Place the finished dough in a cool place for 1.5-2 hours.
- Make out of it any two-dimensional, that is, flattened figures associated with autumn: fallen leaves, mushrooms, ripe fruits. Make a beautiful composition out of them. You can, for example, make a vase with leaves, you will get a wonderful still life.
- Place the composition in the oven. Heat for 30 minutes at 130°.
- Paint the frozen dough with gouache paint.
- Glue the finished autumn composition to decorative cardboard using a hot glue gun.
Applique autumn forest from other materials
You can use many materials to create a beautiful and unusual applique. It all depends on the desire and capabilities of the master.
Application from plasticine
Since plasticine is quite heavy, applique requires a solid base, such as cardboard or fiberboard. You can use a disposable plate. You need the softest plasticine so that it spreads easily.
For the background, roll out two green sausages and one light brown one, then assemble them into one sausage without kneading. Tear off pieces and spread where the soil should be.
There is no need to mix the colors into one; let the effect of chaotic spots remain, as if part of the grass has already dried out. Smear blue across the sky, occasionally adding white.
Sculpt or paint with gouache. Roll many 5mm balls in the color of autumn foliage. Each ball must be attached to the base and squeezed to form a flat cake.
Use these flatbreads to fill the space of the tree crown. You can make mushrooms from white and brown plasticine and place them between the trees.
Cereal application
For the “Autumn Forest” applique you need buckwheat, millet, wheat and other cereals. The paper should be thick enough, since you will have to use a lot of PVA glue, and the thin paper will get wet.
It is better to paint the background and contours of the trunks. Apply glue to the tree crowns and sprinkle with cereal. You can use a separate type of grain for each tree or mix all grains together. The work should lie until the glue dries completely.
A craft with seeds is made in a similar way. Pumpkin seeds are painted with gouache in the colors of the autumn palette, and then glued to the base.
To develop children's imagination, invite your child to choose his own materials for crafts. For example, paper can be replaced with fabric or felt. Let your child get acquainted with different textures and materials.
It is in early childhood that the child’s imagination develops most actively. Don't miss this moment and grow a creative person.
Origami “Maple Leaf”
Preschoolers in the preparatory group will be interested in learning about the Japanese art of origami. Making an applique is not difficult, the main thing is accuracy. The work requires 3 paper squares of autumn colors and stationery glue. The preferred size of the squares is 8x8 cm.
Instructions:
- Take a square. Fold diagonally. Expand.
- Place the square so that the fold is directed vertically. From its top point, fold the “wings” towards the fold. The result will be a rhombus with a more elongated upper part.
- Turn the workpiece over with the extended end down.
- Fold the protruding upper triangle under the “wings”.
- Fold the top corners towards the center line. You will get a rhombus with two small triangles.
- Return the triangles to their original state. Then remove them along the folds inside the diamond.
- Fold the top corners of the diamond down. The result was a third of a maple leaf.
- Perform similar actions with 2 other squares. Then connect them with the side edges.
The carved maple leaf is ready. All that remains is to glue it to the decorative cardboard and paint on the petiole. You can decorate walls and windows in a kindergarten with ready-made origami maple leaves.
